
32 Dreamy Rustic Christmas Tree Ideas You Absolutely Need to Try This Season
You know the feeling: it’s the third week of November, you’ve saved 84 rustic Christmas tree photos, and not one of them tells you which ornaments actually go together. We get it — so we did the digging for you. After scrolling through hundreds of options at Walmart, Terrain, and Adirondack Country Store, plus photos from real homes and small makers, we narrowed it down to 32 ideas that hold up when you’re standing in the aisle with a cart. Prices run from about $8 for a single wood-slice ornament to $340 for a full flocked tree setup, covering the farmhouse, woodland, coastal, and vintage-industrial looks defining 2026 — a year where patina over polish is the entire point. And stay until the end — we break down the most common mistakes that can ruin these looks.
📌 Save this to Pinterest for later — you’ll want to revisit these ideas.
1. Coastal Nautical Tree in a Blue-and-Beige Room
What keeps a nautical tree from looking like it wandered in from a Cape Cod rental is the room doing half the work. The blue-and-beige patterned wallpaper and the blue and white checkered rug set the palette first, so the lobster, shrimp, and sailboat ornaments read as a deliberate theme instead of a novelty pile. The woven green tree collar replaces a fabric skirt and reads like a basket you’d already own. And that single red throw on the checkered armchair is the only warm note in a sea of blue, white, and evergreen — proof you need one accent, not three.
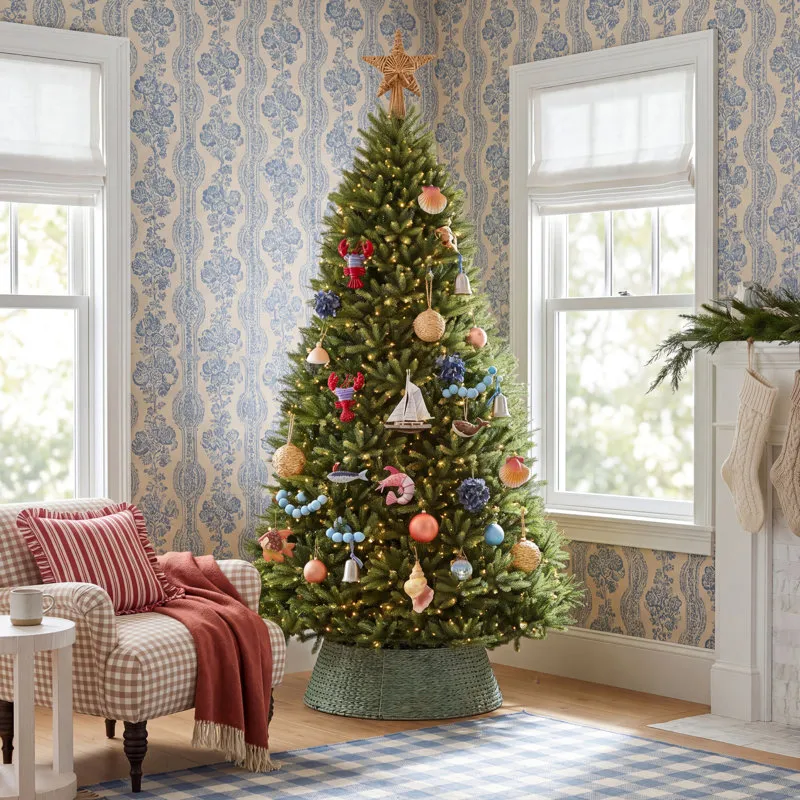
- Pre-lit tree, 7.5 ft with warm white lights: $180–$450
- Woven green tree collar: $45–$120
- 20–30 coastal ornaments (shells, boats, sea life): $60–$200
- Blue and white checkered rug, 5×8: $80–$250
- Striped pillow and red throw: $50–$130
Budget route: a $45 Walmart tree and a $22 strand of warm white LEDs, shells from your own beach trips, and a $30 thrift-store checkered rug land you near $200 — and honestly, nobody can tell.
2. Galvanized Metal Trees Against a Corrugated Wall
Strip away the corrugated metal wall behind these two galvanized trees and the whole vignette goes flat. That backdrop is the one thing doing the heavy lifting: it turns silver metal warm, gives the star topper something to silhouette against, and makes a pair of modest decorations look collected rather than bought. Notice the toppers aren’t matched either — one star, one pointed finial. Without the wall you’d still have a nice tabletop arrangement, but you’d lose the reason to photograph it.
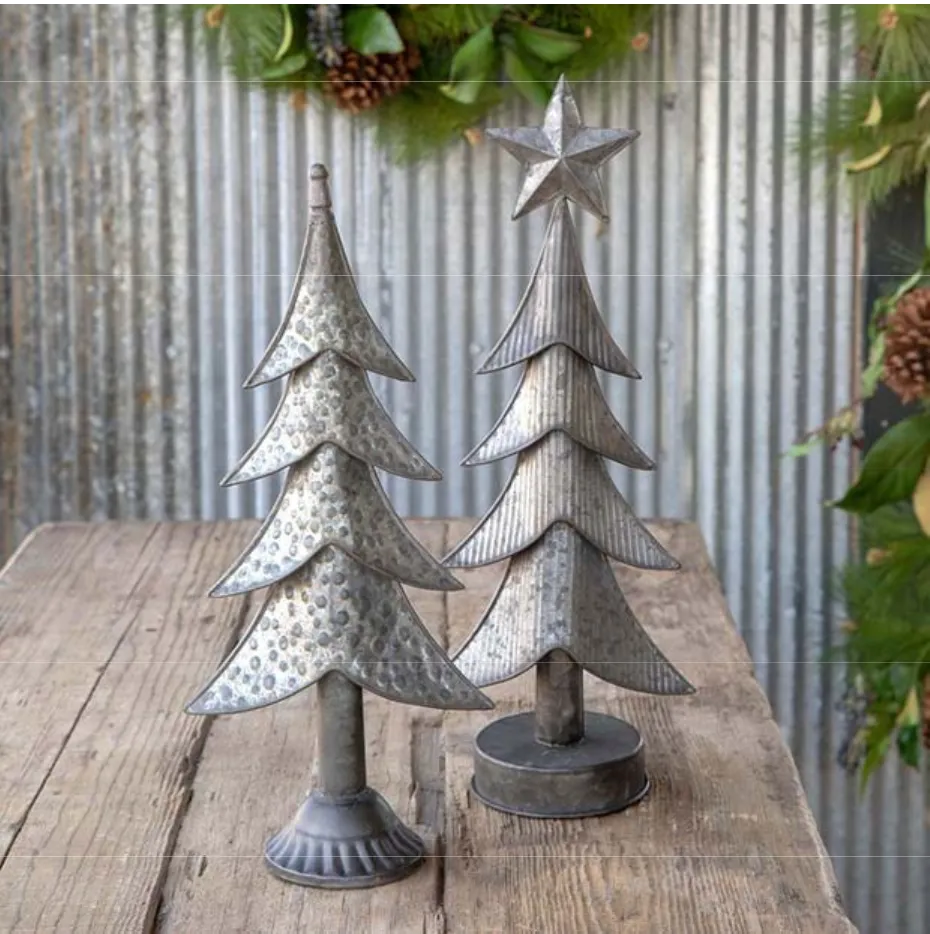
Styling a metal tree pair takes about 20 minutes and costs nothing if you already own the pieces.
- Pick two trees in different heights — 18 inches and 24 inches is the sweet spot.
- Top one with a star and leave the other as a plain finial. Matching toppers kill the charm.
- Set them on a weathered surface at least 36 inches wide so there’s breathing room on both sides.
- Drape a pinecone-and-greenery garland behind, letting it fall past the table edge by 8 inches or so.
- Leave 4 to 6 inches of bare wood visible between objects. Empty space is part of the design.
3. Wooden Star Topper with a Plaid Blanket Tree Skirt
A 50×60-inch throw blanket is the correct size for a tree skirt on anything up to 7.5 feet — and it beats a store-bought skirt on cost every time. Here’s the fold: lay the throw flat, fold it corner to corner into a triangle, then wrap the two long ends around the stand and tuck the point toward the front so a corner of fringe lands in view. Black and white plaid does double duty because it’s neutral enough to survive whatever ornaments you swap in next year, and the geometric wooden star up top gives the plaid a sharp, non-fussy counterpart.
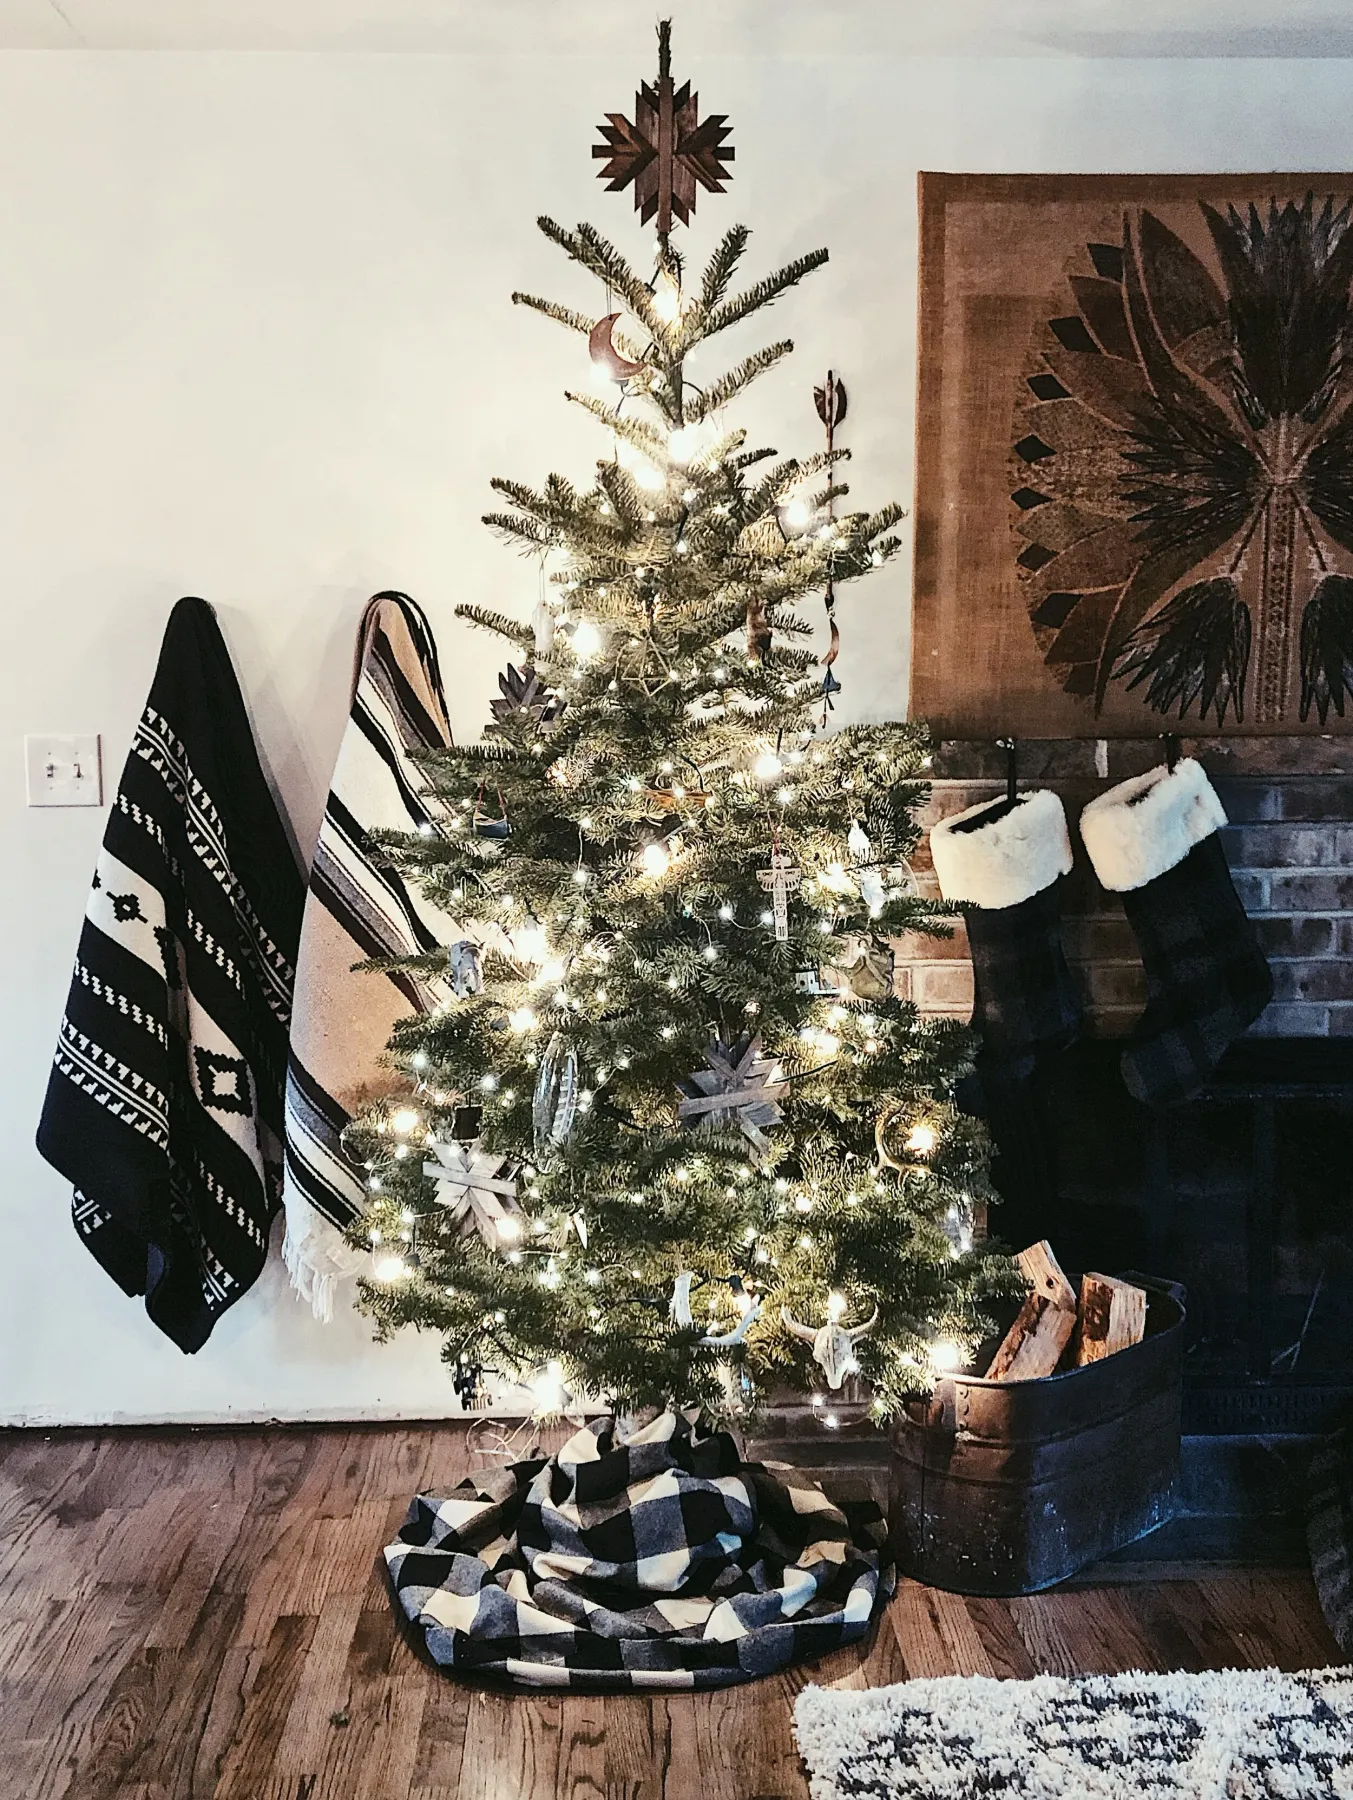
You don’t need a $90 tree skirt. Thrift stores and Facebook Marketplace are full of plaid wool blankets for $8 to $15 between October and December, and a slightly nibbled corner doesn’t matter once it’s wrapped around a stand. For the topper, a $6 unfinished wooden star from a craft store plus a coat of dark wax reads exactly like the one here. Target’s $15 flannel throws work too — just look for a large-scale check, not a tiny gingham, so it still registers from across the room. Total spend: under $25.
4. Multitone Wooden Slat Tree with Copper Wire Lights
The formula here is roughly 70% wood, 20% white, 10% glow. That 70% isn’t one wood tone — it’s light, medium, and dark slats mixed deliberately, because a single tone reads like a fence panel. The 20% white comes from the star topper with its metallic bead detail, the only crisp thing in the composition. The final 10% is the copper wire string lights, and it’s the smallest slice on purpose. Swap the palette and the formula holds: pale grey-washed slats plus a black star plus warm Edison bulbs gives you the same tree in a moodier key.
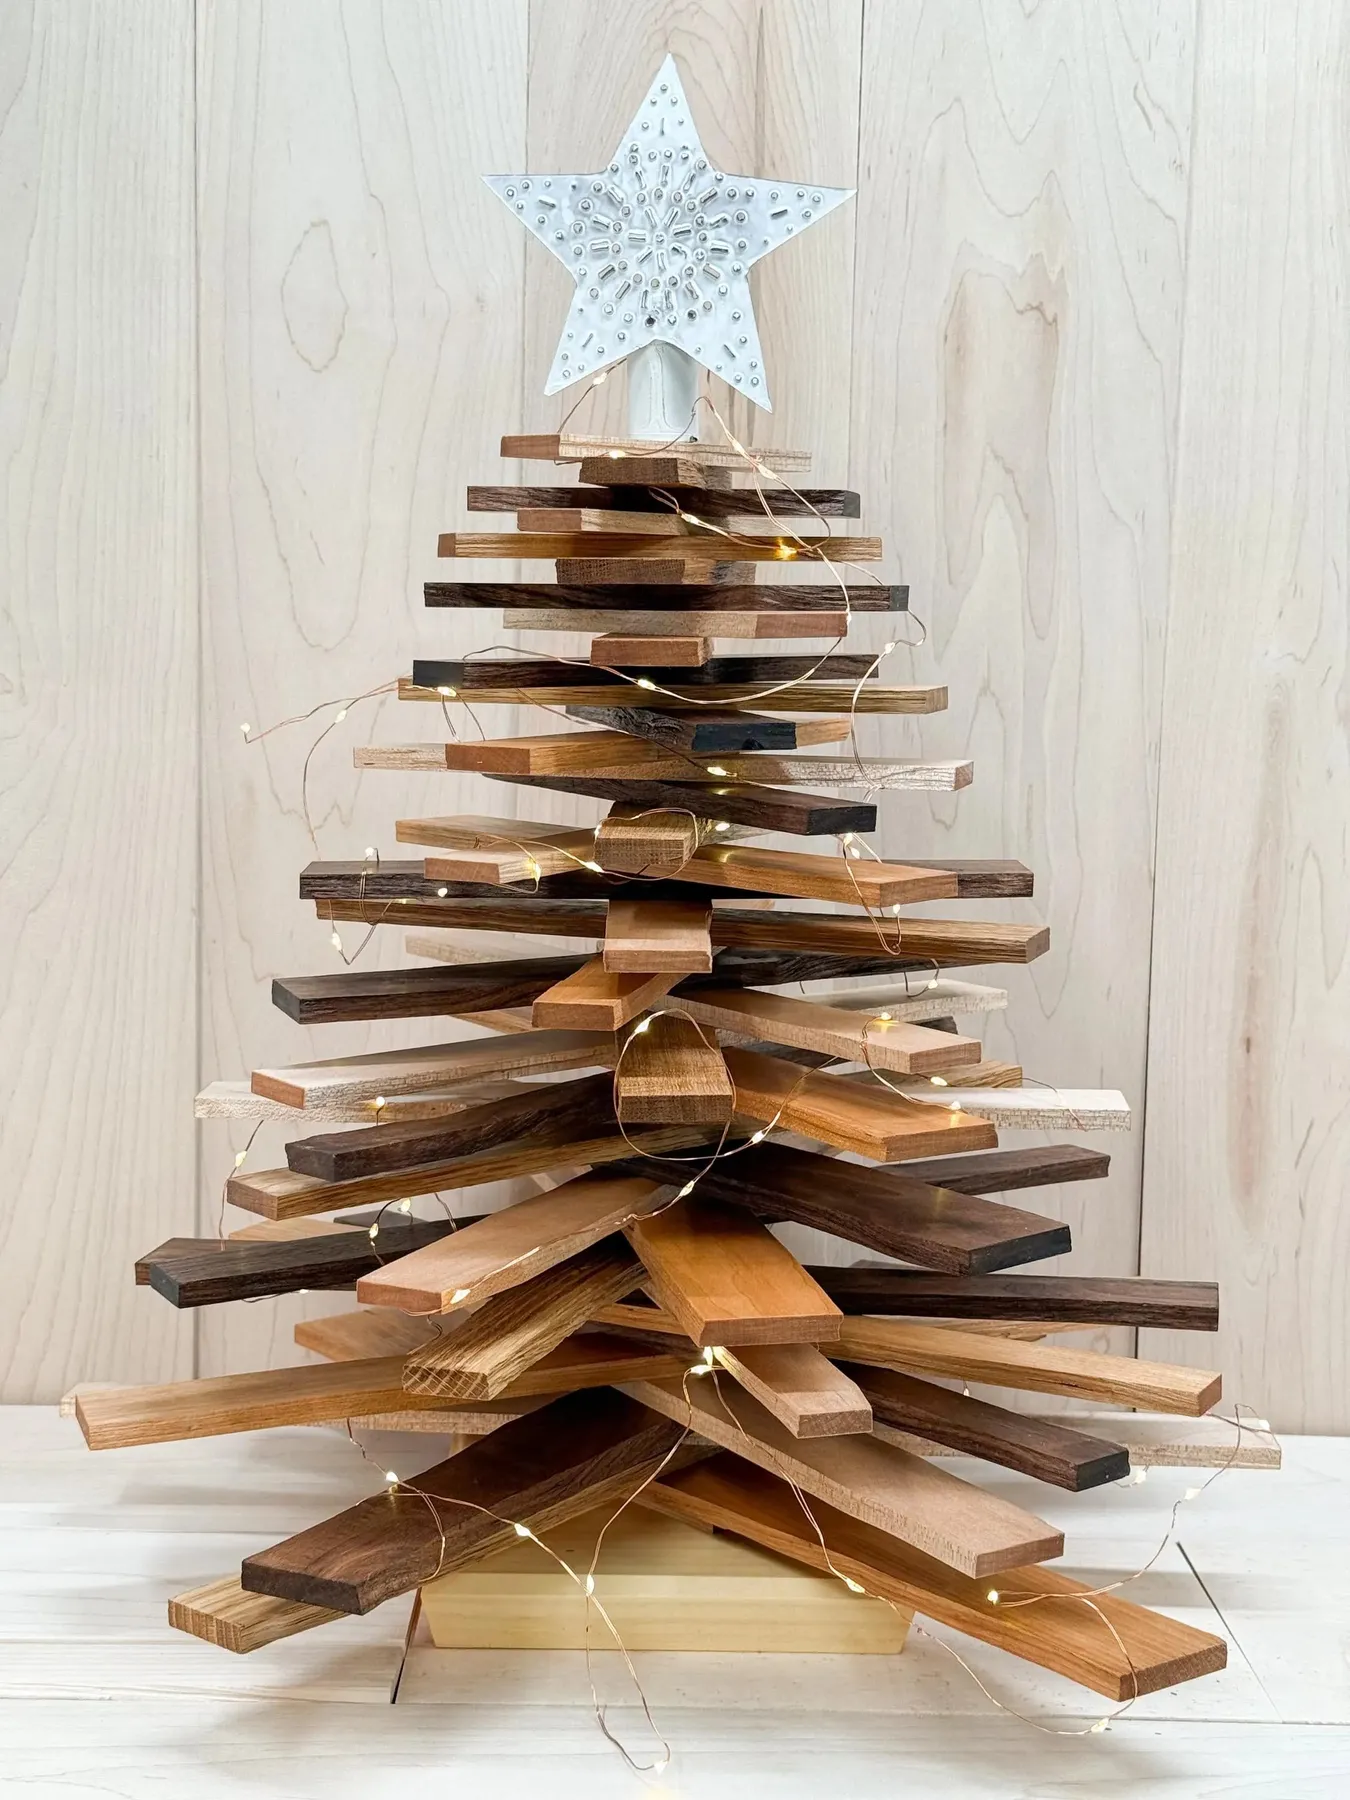
Two things to know before you commit. First, if your walls are light wood paneling — like the backdrop here — a multitone slat tree can disappear into them. You need at least two steps of contrast between the tree and the wall behind it. Second, slat trees are front-facing by nature; they look wonderful flat against a wall and awkward floating in the middle of a room. If you have a toddler, a climbing cat, or a dog with a tail like a metronome, this is actually your safest tree of the whole bunch.
5. Red and White Ribbon Tree by a Stone Fireplace
Two colors, repeated to the point of rhythm. Red and white striped ribbon, red berries, white snowflakes, white faux fur skirt, and pinecones doing the neutral work in between — that discipline is why this tree feels traditional instead of busy. The other move is vertical continuity: the berry garland on the dark mantel picks up the same red at a different height, so your eye travels from skirt to mantel without a gap. Underneath it all, a light stone fireplace keeps the whites from turning cold, and the black stockings add one graphic interruption.
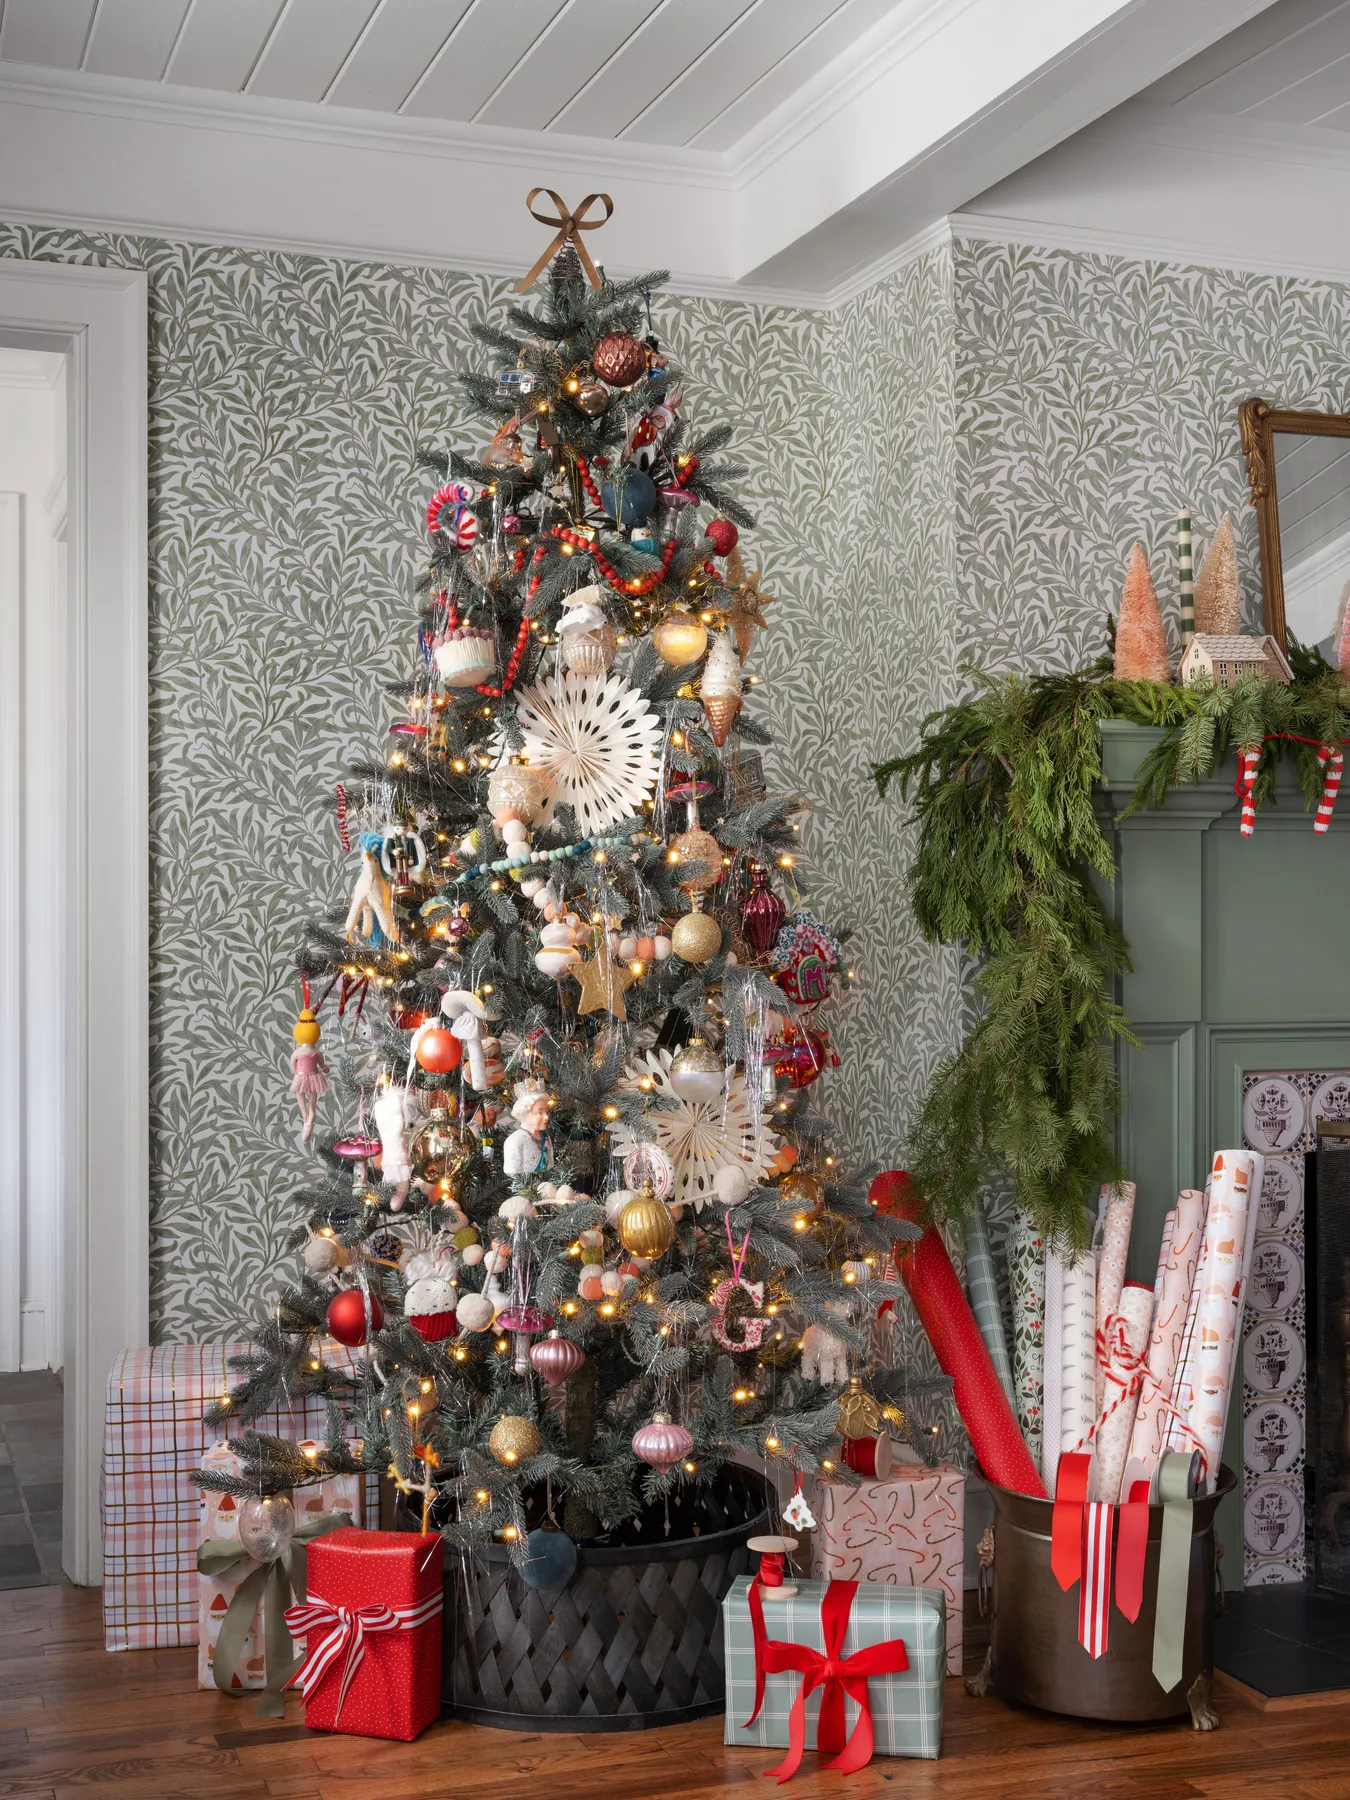
This is a fireplace-wall tree, and it needs the room to match. Plan on a wall at least 12 feet wide with a 9-foot ceiling so a 7.5- to 9-foot tree has clearance above the topper and about 3 feet of floor on each side. The full look needs roughly 200 square feet of living room to breathe. Working with something smaller? Compare with Idea #17, where a 4-foot tree on a church pew does the same job in a 3×6 entryway.
6. Wooden Tree Silhouette Framing a Metallic Deer
The star cutout at the top gets the attention, but the deer is the point. Someone designed this tree so there’s a hole in the middle, then placed a metallic deer inside it — so the ornament is framed by negative space rather than hung on a branch. Take the deer away and you’re left with a wood tree shape you’ve seen a hundred times. Put it back and the piece has a story: the tree is the frame, the deer is the picture. The visible grain and flat wooden base keep it from feeling manufactured.
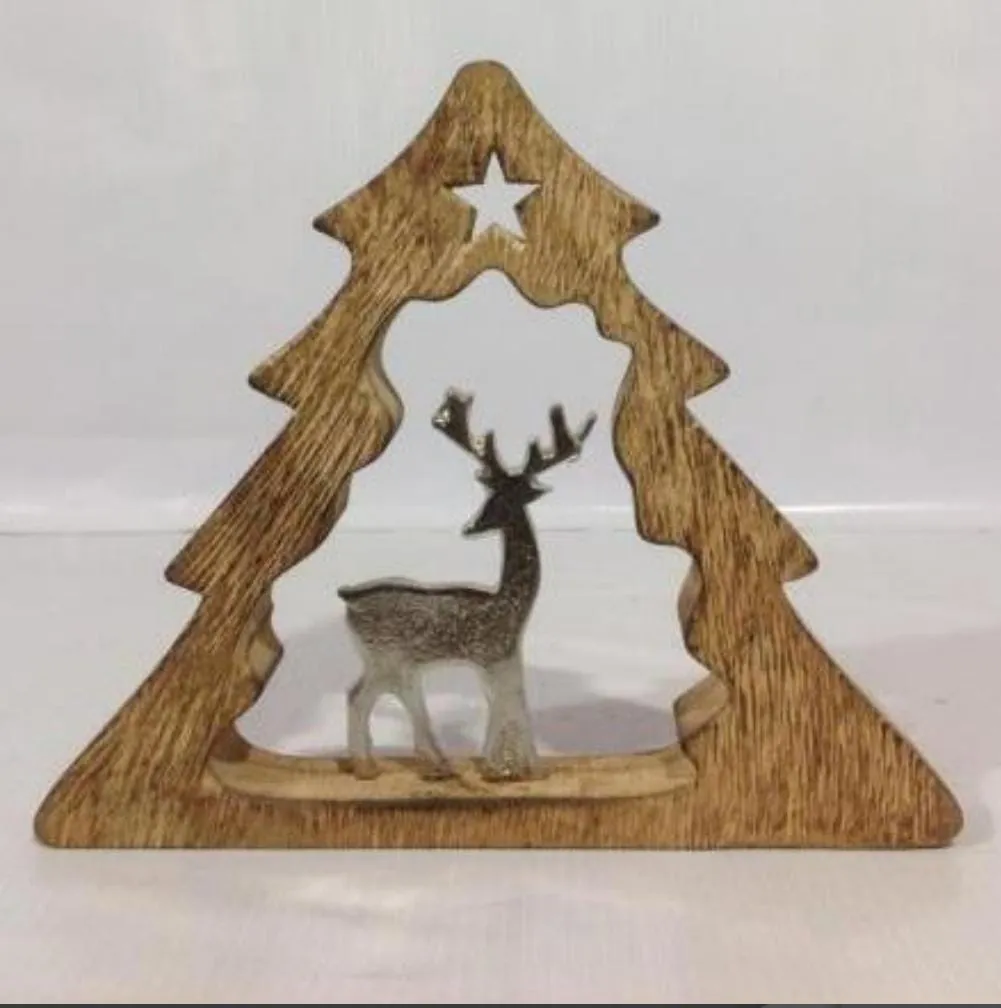
A wood blank, a jigsaw, and a Saturday morning will get you close for about $14 — a pine board from a home center, a printed silhouette taped on as a template, sanded edges, and a wipe of dark wax. If power tools aren’t your thing, laser-cut versions run $18 to $35 on Etsy, and small metal deer figures are a few dollars in craft store miniature aisles. What matters is scale: the deer should fill about 60% of the opening. Too small and it looks lost; too big and it looks stuffed in there.
7. Rusted Metal Pine Trees on Unfinished Wood
Weathered, patina-covered metal is the quiet story of 2026 Christmas decorating. After years of glitter and high-gloss baubles, people are gravitating toward pieces that look like they’ve already lived a few seasons — rust, pitting, uneven edges and all. It’s part of the same slow-made shift pushing shoppers toward small metalworkers and farmhouse salvage instead of big-box sets. The upside: this trend has real staying power because it’s built on texture, not a color of the moment. Leave a rusted metal pine tree out every December for a decade and it’ll only look better.
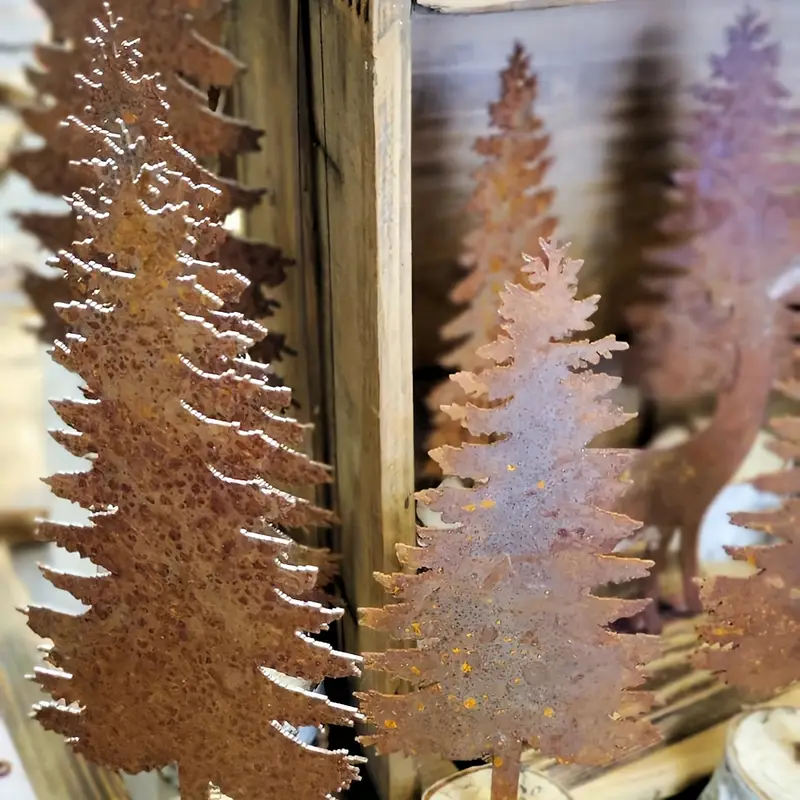
Real rust keeps shedding, so give any piece a matte clear-coat before it goes near a rug, table runner, or gift wrap. Two light coats, 20 minutes apart, and it stays put. For arranging, group flat metal trees in odd numbers — three or five, never four — and stagger the heights so no two tops line up. Keep a 1-inch gap between silhouettes so each one casts its own shadow against the unfinished wood; that shadow is what makes them look dimensional.
8. Distressed Plank Tree Topped with a Five-Point Star
This is a weekend build, roughly 6 to 8 hours including dry time, for about $35 in materials.
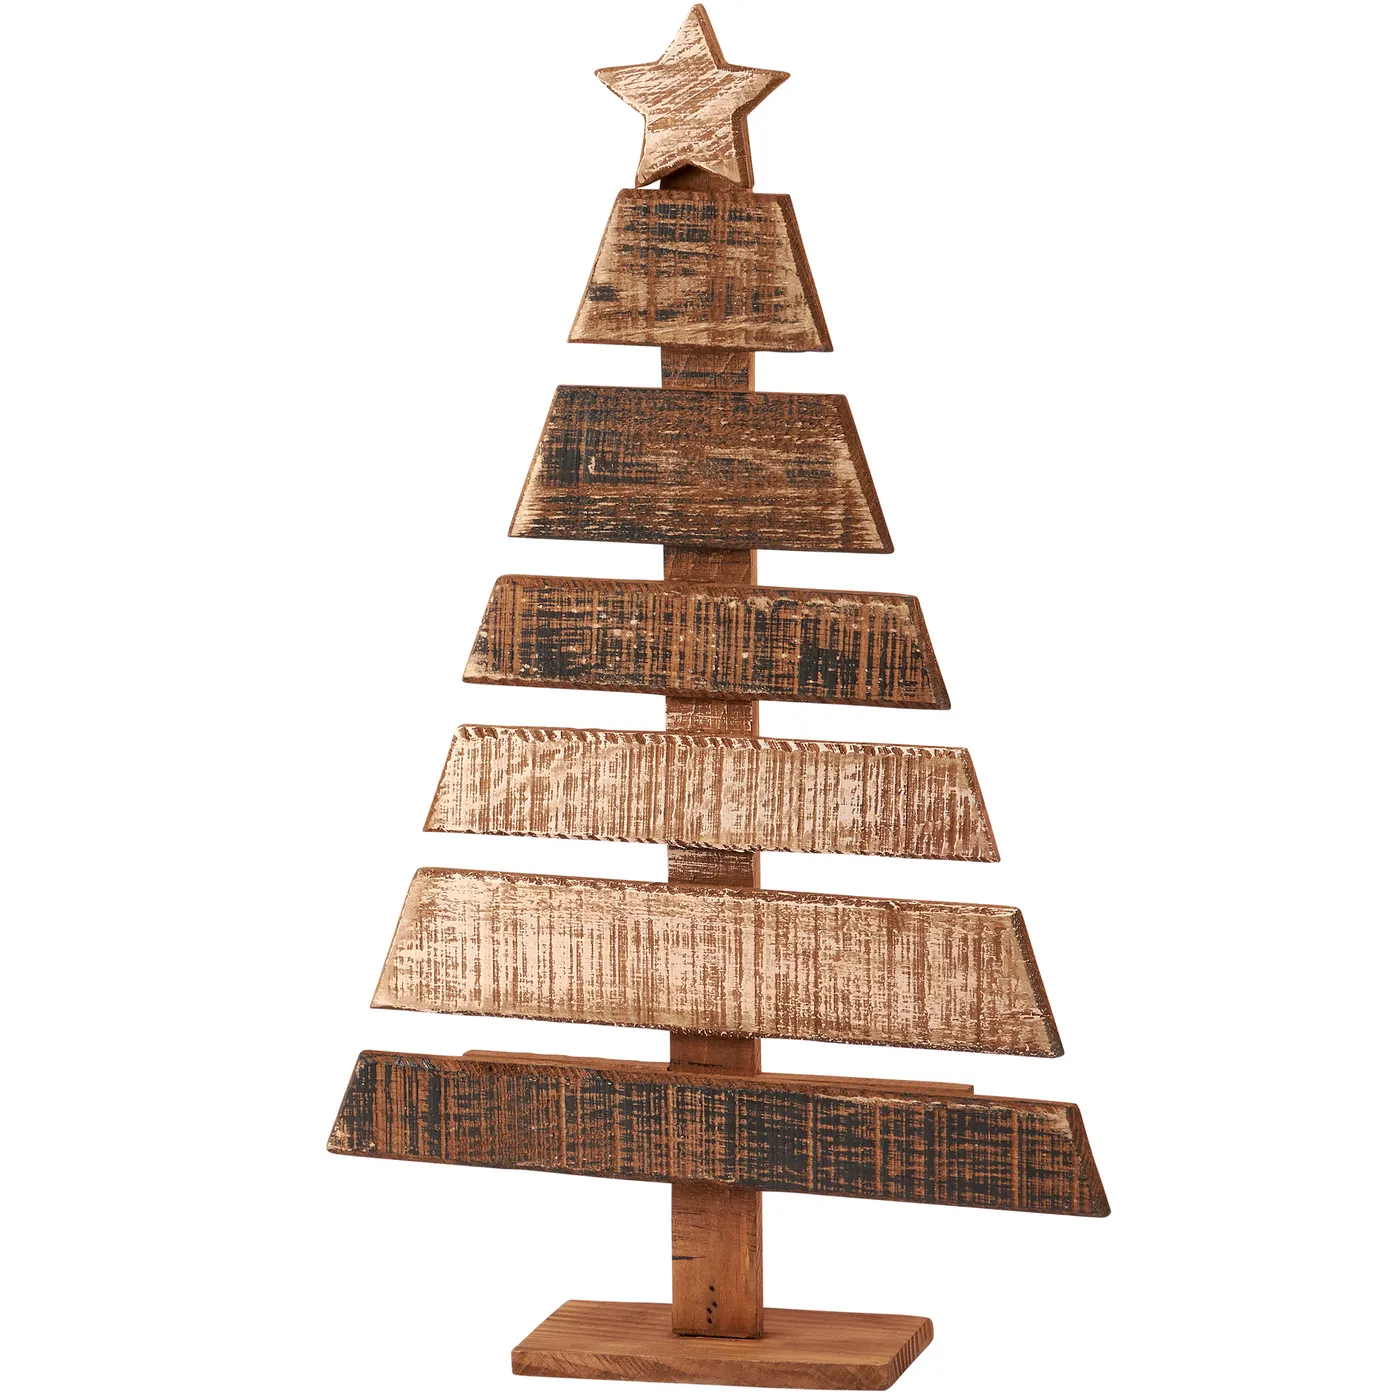
- Cut seven trapezoids from 1×4 pine, starting at 22 inches wide and dropping 3 inches per tier.
- Sand the edges, then dry-brush dark brown over a light base and wipe most of it off — that’s where the distressed finish comes from.
- Attach each plank to a central vertical support with 1¼-inch screws from the back so no hardware shows.
- Cut a five-point star, paint it to match, and screw it into the top of the support.
- Set the whole thing on a flat wooden base wide enough to clear the bottom tier by 2 inches.
Wood this distressed is high-maintenance in one specific way: the grain and dark crevices collect dust, and it’s visible from across the room. A soft brush attachment every two weeks keeps it sharp — a damp cloth just pushes dust deeper. Store it wrapped in an old sheet, never a sealed plastic bag, because trapped moisture lifts the dry-brushed finish. Skip the radiator and the heat vent; planks cup within a season.
9. Heavily Flocked Tree in a Stenciled FARM Crate
- Flocked 7.5-ft tree: $120–$400
- Wooden crate tree collar, stenciled: $50–$140 (or DIY from scrap for $20)
- Burlap fabric for the base: $8–$20
- Ornament set — red glitter, striped, gold, twine balls: $70–$180
- Buffalo check snowflake accents, set of 6: $18–$45
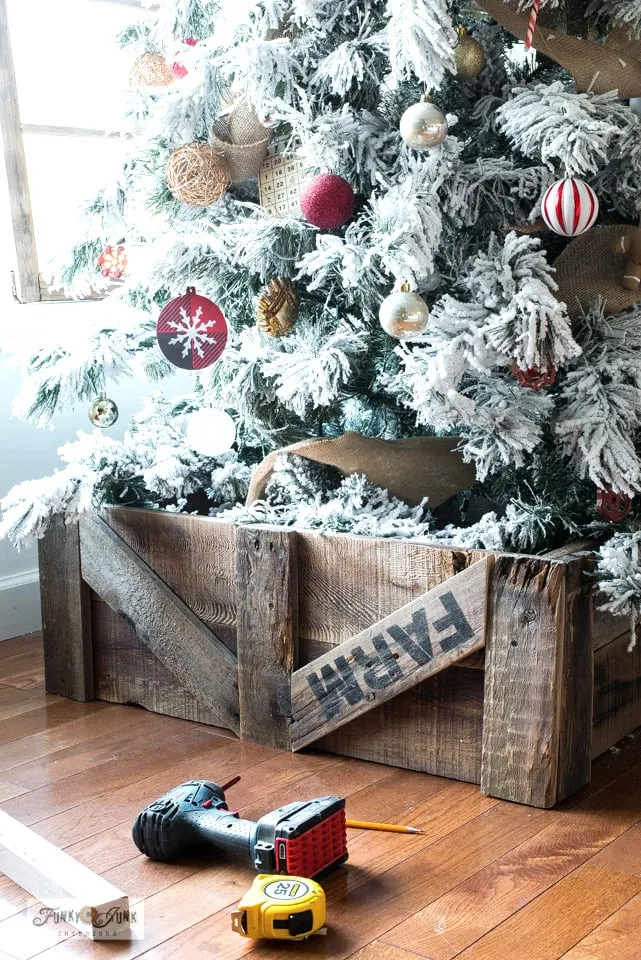
Before you commit to the crate, run through this:
- Measure your stand’s footprint — the collar needs at least 2 inches of clearance on all sides.
- Check whether your tree is factory-flocked or DIY-flocked; DIY versions shed for two seasons.
- Lock your palette first: red, gold, burlap tan, and white only.
- Decide if the crate gets stenciled before or after assembly — lettering is far easier on a flat panel.
- Budget a plastic liner if a live tree is going inside that box.
10. Polka-Dot Wooden Deer on a Weathered Tray
The proportions here are worth copying: about 60% weathered wood, 25% greenery, 10% white and cream, and 5% natural jute. The wood is doing the boring, beautiful work — the tray, the deer, and the light wood bead strand all sit in the same warm brown family, which is why the whole arrangement feels calm. The faux pine branches bleed off the edges so the composition doesn’t look staged in the middle, and the antler in the background adds a shape nothing else provides. Swap the cream stack for matte black and the deer for a small brass bird, and you’ve got the same vignette with a sharper edge.
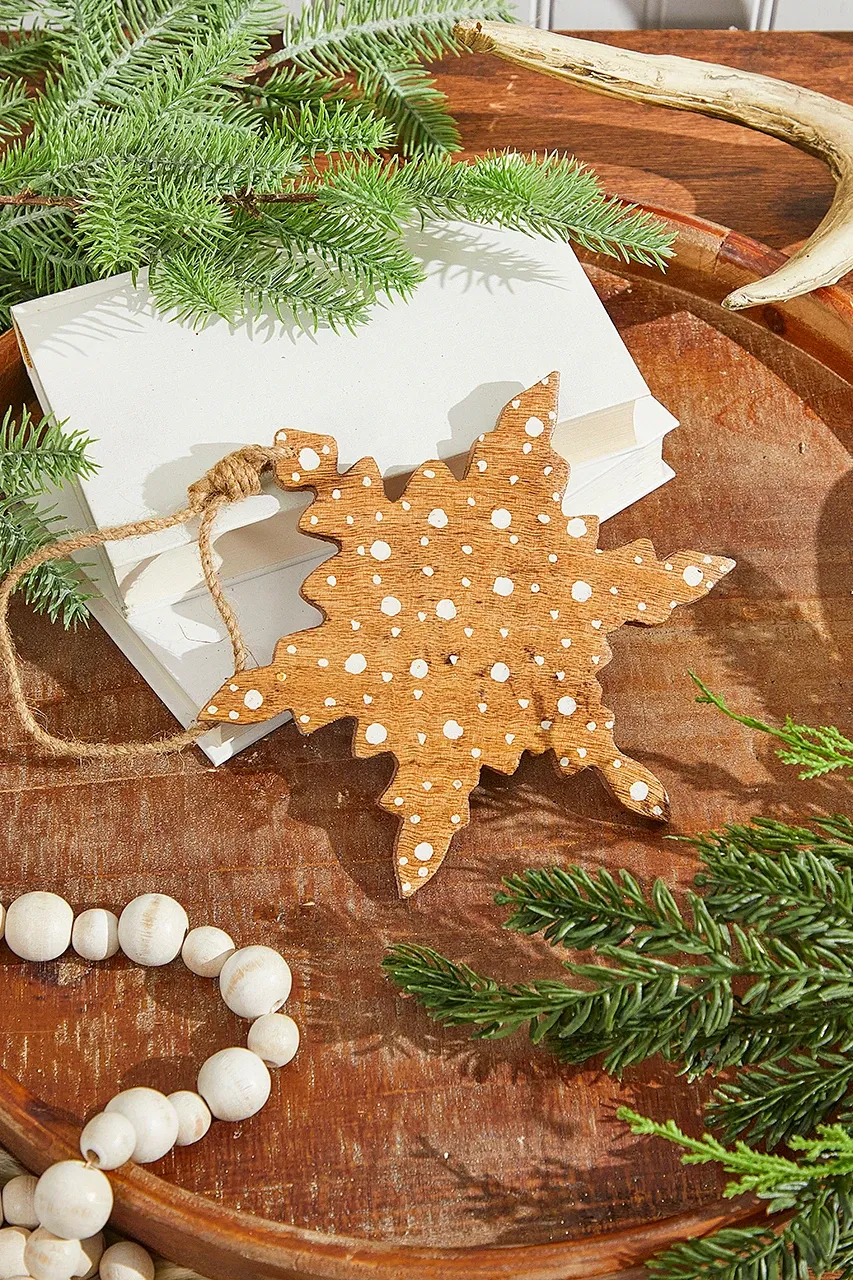
It’s the polka dots. A plain wooden deer on a weathered tray would be perfectly nice and completely forgettable — you’d walk right past it. Those little white dots are what make you stop and pick the ornament up, and they’re doing something technically useful too: white on warm brown creates the contrast the eye needs at this small scale. Without them, the deer blends into the tray and the pine needles behind it. Roughly 30 seconds with a paint pen — possibly the best return on effort in this entire article.
11. Wood Slice Ornaments with Illustrated Woodland Animals
Wood slices are heavier than glass, so hang them differently. Tie twine around the branch itself rather than hooking a wire over a needle — a wire hook will slip and drop a slice through the lower branches. Space them in clusters of three with at least 6 inches of clear branch between clusters; evenly scattered ornaments read as a chore, clustered ones read as a design. And because each slice carries a different animal, hang them at eye level and below on the front third of the tree where people actually look.
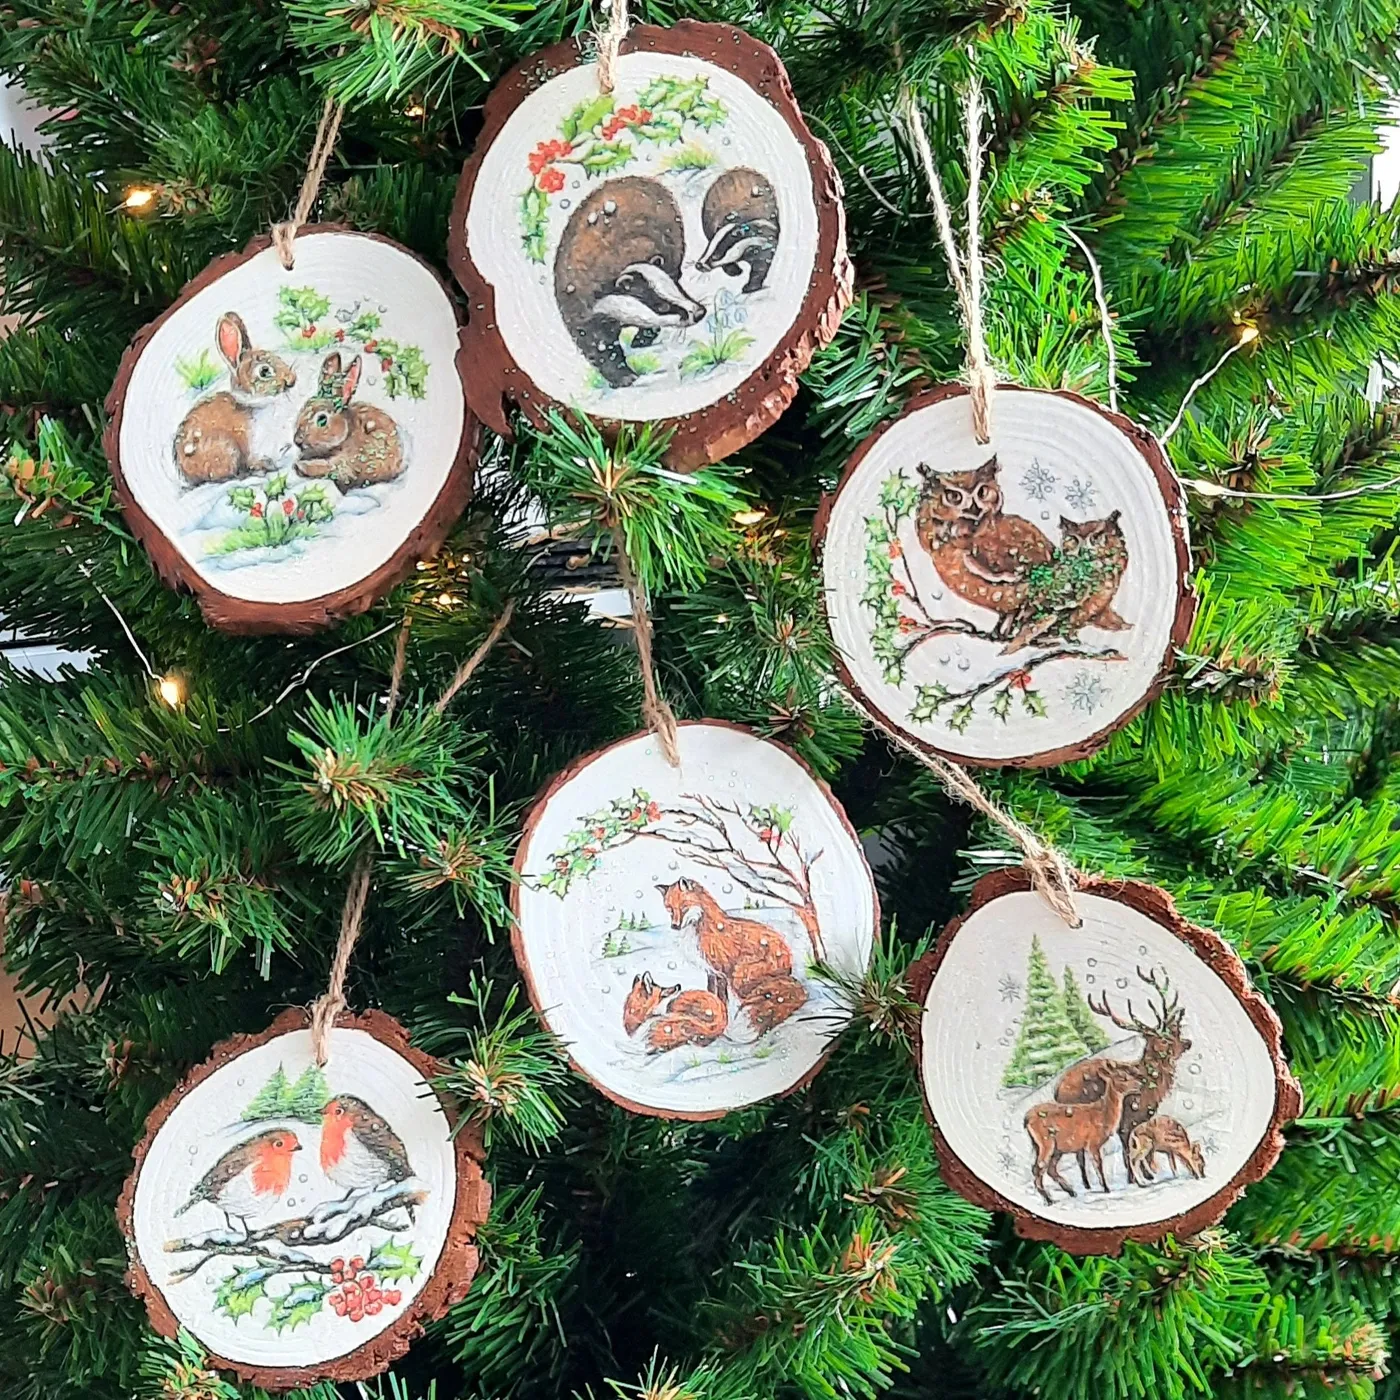
Blank wood slices run about $12 for a hundred online, and a set of printed woodland napkins or a downloadable animal illustration set costs under $10. Mod Podge the paper onto the slice, trim the edge with a craft knife, and you’ve got the identical look for roughly $1 an ornament instead of $8. Alternatively, craft fairs in November are full of these for $3 to $5 each — buy six of the same animal rather than six different ones if you want the tree to look edited. See Idea #29 for the raw-slice version with no illustration at all.
12. Layered Evergreen Garland with Pinecones and Red Berries
Three foliage types, not one. The garland mixes a long-needle green, a short dense green, and a lighter, greyer sprig so the thing has actual depth instead of reading as a flat rope. The weathered wood plank wall behind it does the rest — horizontal lines against a vertical garland creates a grid the eye likes. Red berries are clustered in threes and fours rather than dotted evenly, and brown pinecones sit between them as the neutral. It’s a formula you can build yourself with three inexpensive garlands layered together.
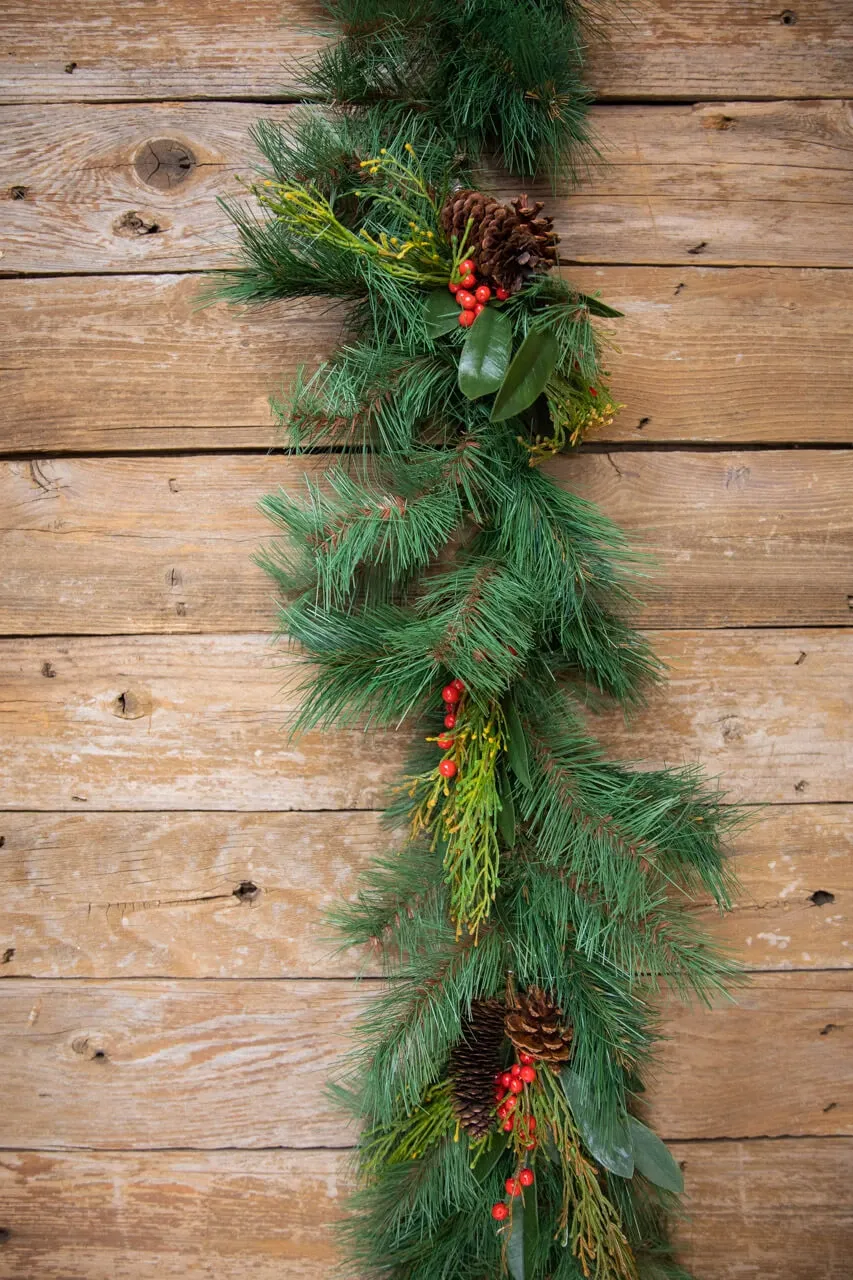
Building this garland takes about 45 minutes and roughly $35 to $60 in supplies.
- Lay a plain 6-foot evergreen garland flat on the floor as your base.
- Lay a second garland of a different needle texture on top, offsetting it 8 to 10 inches so the two don’t line up.
- Wire pinecones on with 22-gauge floral wire, spacing them every 10 to 12 inches.
- Add berry clusters in odd numbers between the pinecones — three or five berries per cluster.
- Hang it, then fluff every branch outward with both hands so nothing stays flat against the wall.
13. Black Bauble and Gold Details on a Warm Wood Base
Black-and-gold reads best at small scale, which is why it usually lives on a 4- to 6-foot tree or a tabletop arrangement rather than a nine-footer. Give it a wall about 4 feet wide and a ceiling of at least 8 feet so the dark ornaments have somewhere to sit visually. This is the idea for a narrow entry (3×5 feet), a console in a hallway, or the corner of a dining room — anywhere you’d otherwise skip a tree entirely. Working with a bigger room? See Idea #22, where a flocked tree in a planter box fills the same role at double the footprint.
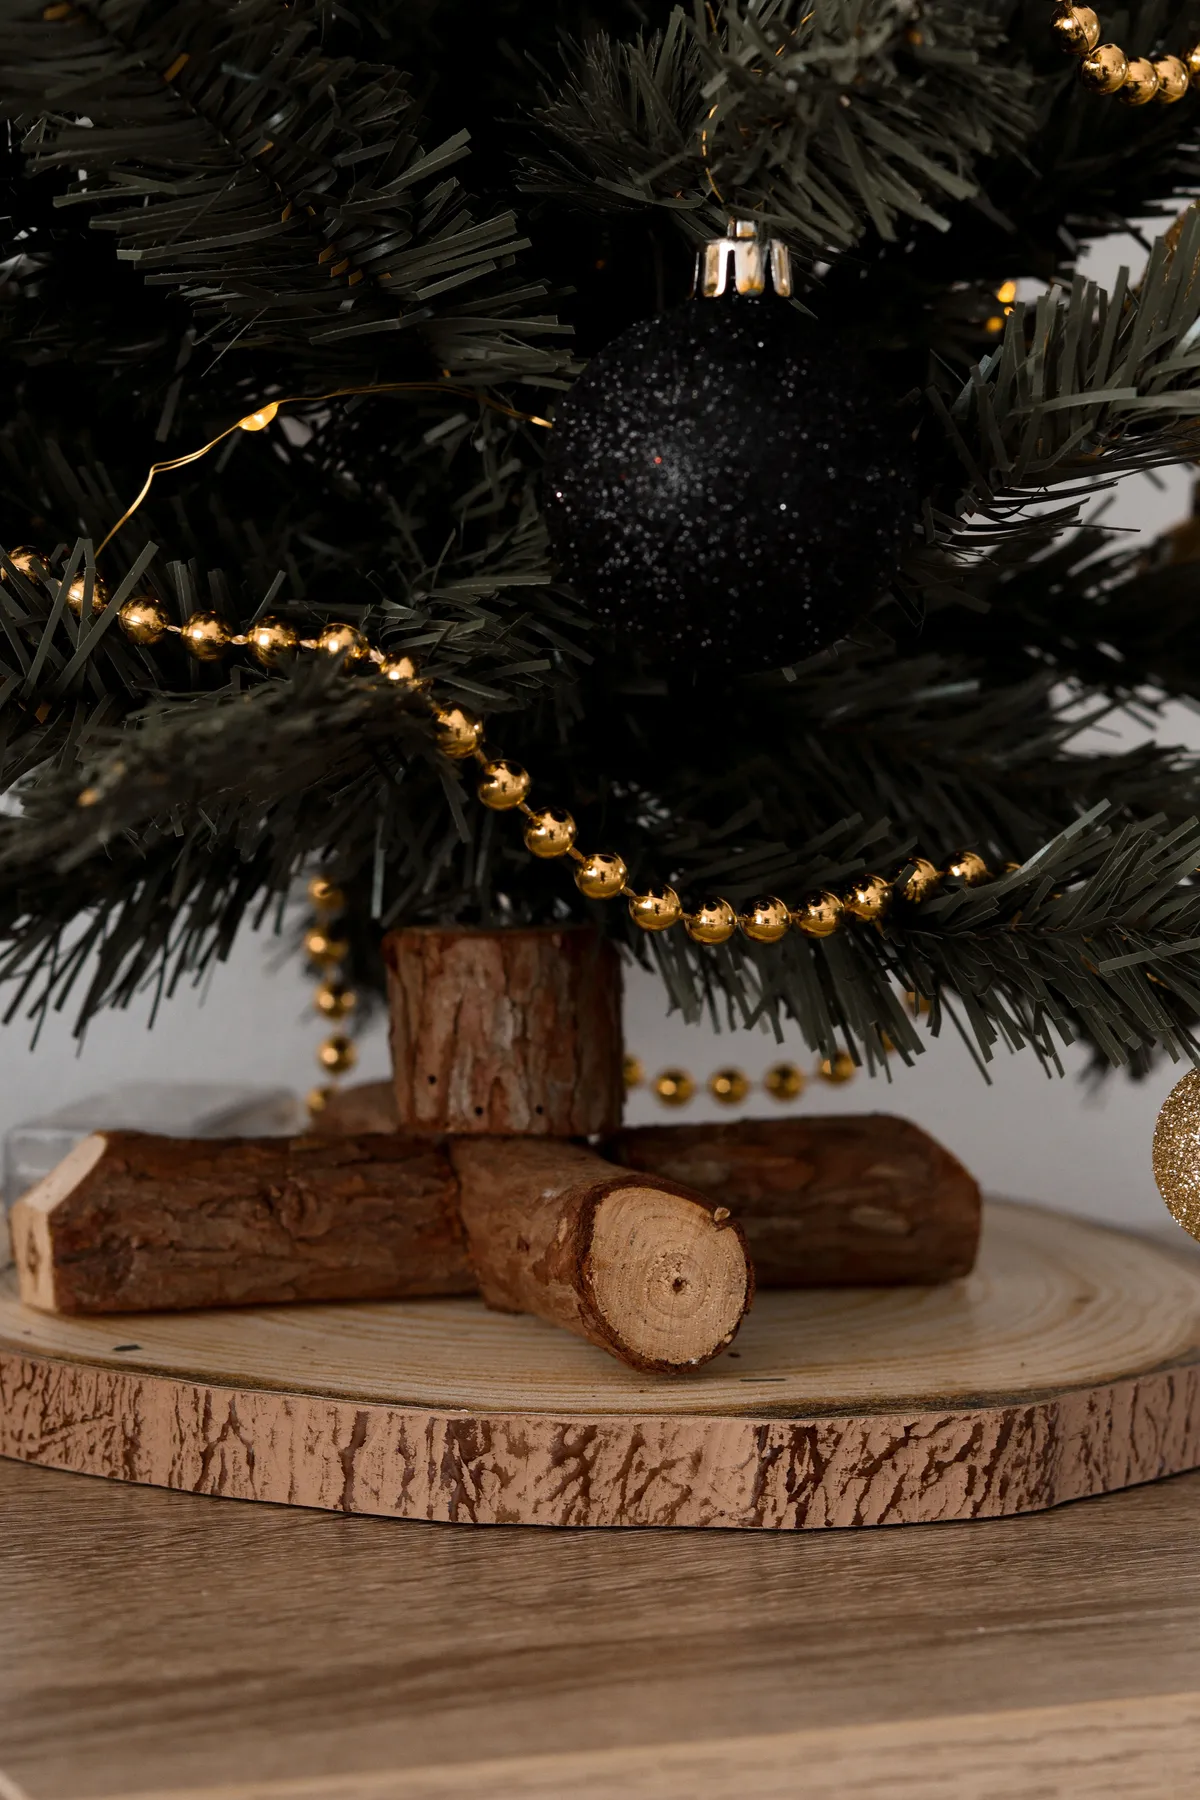
Black ornaments vanish against dark green needles in low light — and December afternoons are nothing but low light. The fix is ratio: aim for two or three gold pieces for every black one, and lean toward warm golds rather than bright brass so they read at dusk. Also check before you buy whether your “gold” is brass, antique gold, or champagne — mixing three gold finishes on one small tree looks like an accident, not a collection. If the tree sits against dark walls, skip black ornaments entirely.
14. Pinecone and Warm LED Bulbs Tucked into Dark Fir
Think of this as 80% dark green, 12% light, 8% brown. The dark fir is the field, the warm LEDs are the accents, and the single natural pinecone is the one organic interruption. That’s the whole recipe, and its restraint is the reason it works — add a second pinecone type and you lose the effect. Light temperature matters more than count here: 2700K LEDs read warm and slightly golden, while 4000K reads office building. Swap the pinecone for dried orange slices, or the clear bulbs for frosted ones, and the math holds at the same ratios.
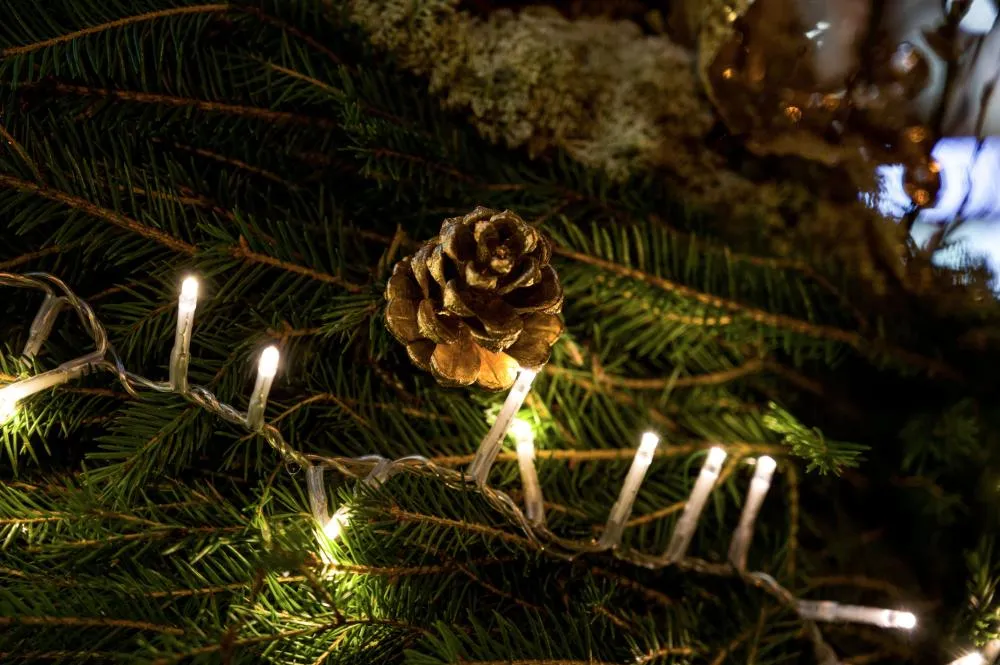
Aim for roughly 100 lights per foot of tree height — a 7-foot tree wants about 700 bulbs — and count your strands before you start wrapping. Space them in a loose zigzag about 6 to 8 inches apart with no visible wire between runs; the eye should never be able to trace a line. Clear casings like these glow warmer and more distinctly than frosted ones, which blur into a soft haze. Lights on first, then ornaments, then the pinecone last so it sits on the surface and doesn’t get buried.
15. Handpainted Wooden Snowshoe Ornaments
- Individual handpainted wood ornaments: $8–$22 each
- Set of six matched handmade ornaments: $35–$70
- Unfinished wood ornament blanks, 12-pack: $10–$18
- Acrylic craft paint and fine brushes: $12–$20
- Jute or linen hanger string: $4–$8
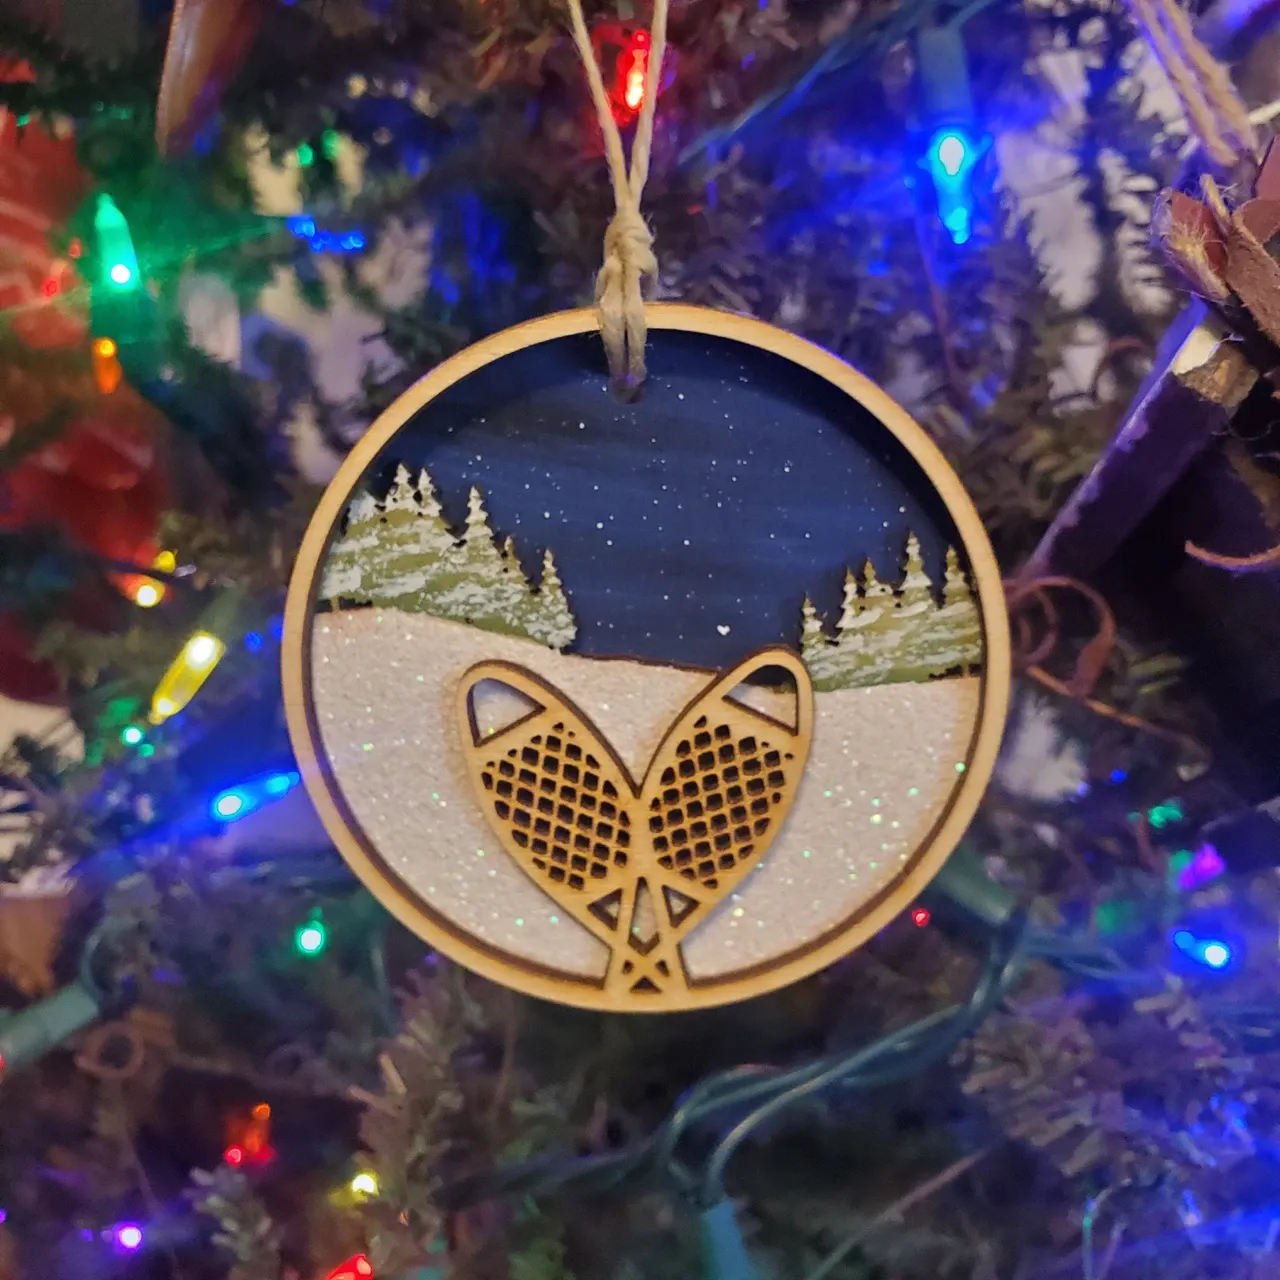
Handpainted wood is tough until it isn’t. The paint will chip at the corners where the hanger rubs, and one drop onto a hard floor can take an entire design with it. Store painted ornaments in individual tissue wraps, not a loose box, and never in a damp basement — humidity lifts acrylic within a couple of seasons. Expect to touch up edges every year or two with the same color, so keep the paint bottles. On the plus side, they’re far harder to break than glass.
16. A Stack of Mixed Knits Beside a Lit Tree
Look at how many different knits are in that stack: ribbed, fluffy, smooth, patterned. That’s the whole trick. A pile of five identical beige throws looks like laundry; a pile of five different textures in the same warm family looks like a styling decision. The warm white lights just above the stack do something specific too — they graze the top of the ribbed knit and make the texture legible from across the room, which is exactly why knits and tree lights are such a reliable pairing. The red-and-white patterned piece anchors the bottom so the earth tones don’t drift away.

Thrift stores are the move here. Wool and cotton throws run $3 to $8 apiece at Goodwill, and it takes about five to build a stack this deep — figure $25 total. IKEA’s $12 throws in oatmeal and grey fill in the plain-textured slots, and a $6 Target fleece handles the fluffy layer. Skip anything with a logo or a novelty print; the stack only works if every piece reads as neutral. Hand-wash the wool ones in cold water and lay them flat to dry.
17. Small Lit Tree in a Vintage Milk Crate by a Church Pew
The milk crate is doing something a store-bought tree collar can’t: it brings a whole story with it. “Country Fresh Milk Co.” stenciled on the side turns a base into an object, and the vintage crate also solves a practical problem — it’s tall enough to hide the stand without swallowing the bottom branches. The dark stained church pew beside it matters just as much, because a small tree on an entryway floor can look like an afterthought. Give it a substantial piece of furniture to sit against and it reads as a designed corner.
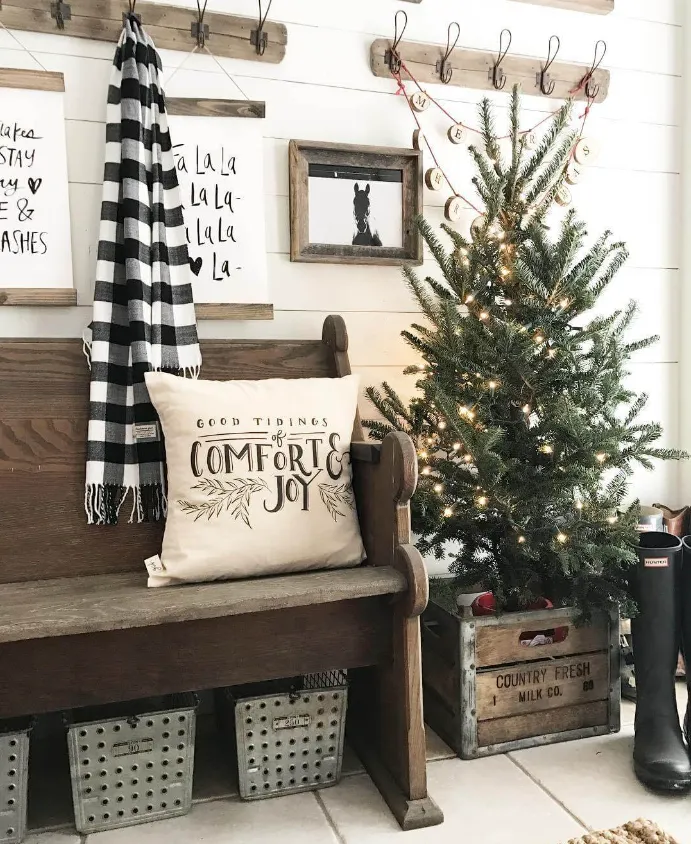
This setup fits an entry or hallway of roughly 3×6 feet with an 8-foot ceiling — genuinely small-space territory. The tree here is under 4 feet, which means it can sit on the floor in a crate and still leave the wall above free for wooden hooks and framed art. Keep 18 inches of walking clearance past the pew. If your entry is wider than 6 feet, bump the tree to 5 or 6 feet and give the crate a partner — a basket of blankets on the other side.
18. A Handmade-Only Tree Where Every Ornament Has a Maker
This is the slow-Christmas shift in its purest form: a tree with nothing mass-produced on it. It’s driven by a real cultural appetite for craft — holiday fairs are up, small-batch makers sell out in October, and shoppers are increasingly willing to buy six good things instead of thirty cheap ones. The look has staying power precisely because it can’t be duplicated at scale; every year you add one or two pieces and the tree gets better while everyone else’s gets replaced. The trade-off is time. Start collecting in September if you want a full tree by December.

Handmade costs more per piece and there’s no way around it — plan on $15 to $40 for a well-made ornament, which makes a full tree a multi-year project rather than a single shopping trip. Read lead times before you fall in love with a maker’s shop; October orders often ship in December. Think about durability too: unfired clay, delicate paper, and anything with dried botanicals won’t survive a toddler or a determined cat, so keep fragile pieces in the upper third.
19. Folk Art Floral Star Ornaments with a Frayed Pink Ribbon
Repeat a single accent color three times or it looks accidental. That light pink shows up in the ribbon, inside the floral patterns on the stars, and once more somewhere small — a single pink bauble tucked deep in the branches. Three is the minimum for the eye to register it as intentional. Notice the ribbon is frayed at the edge, which is deliberate and worth copying: cut your ribbon with pinking shears or pull a thread to fray it so it reads handmade rather than purchased. And keep the gold hangers thin — thick wire kills the delicacy of a folk-art star.
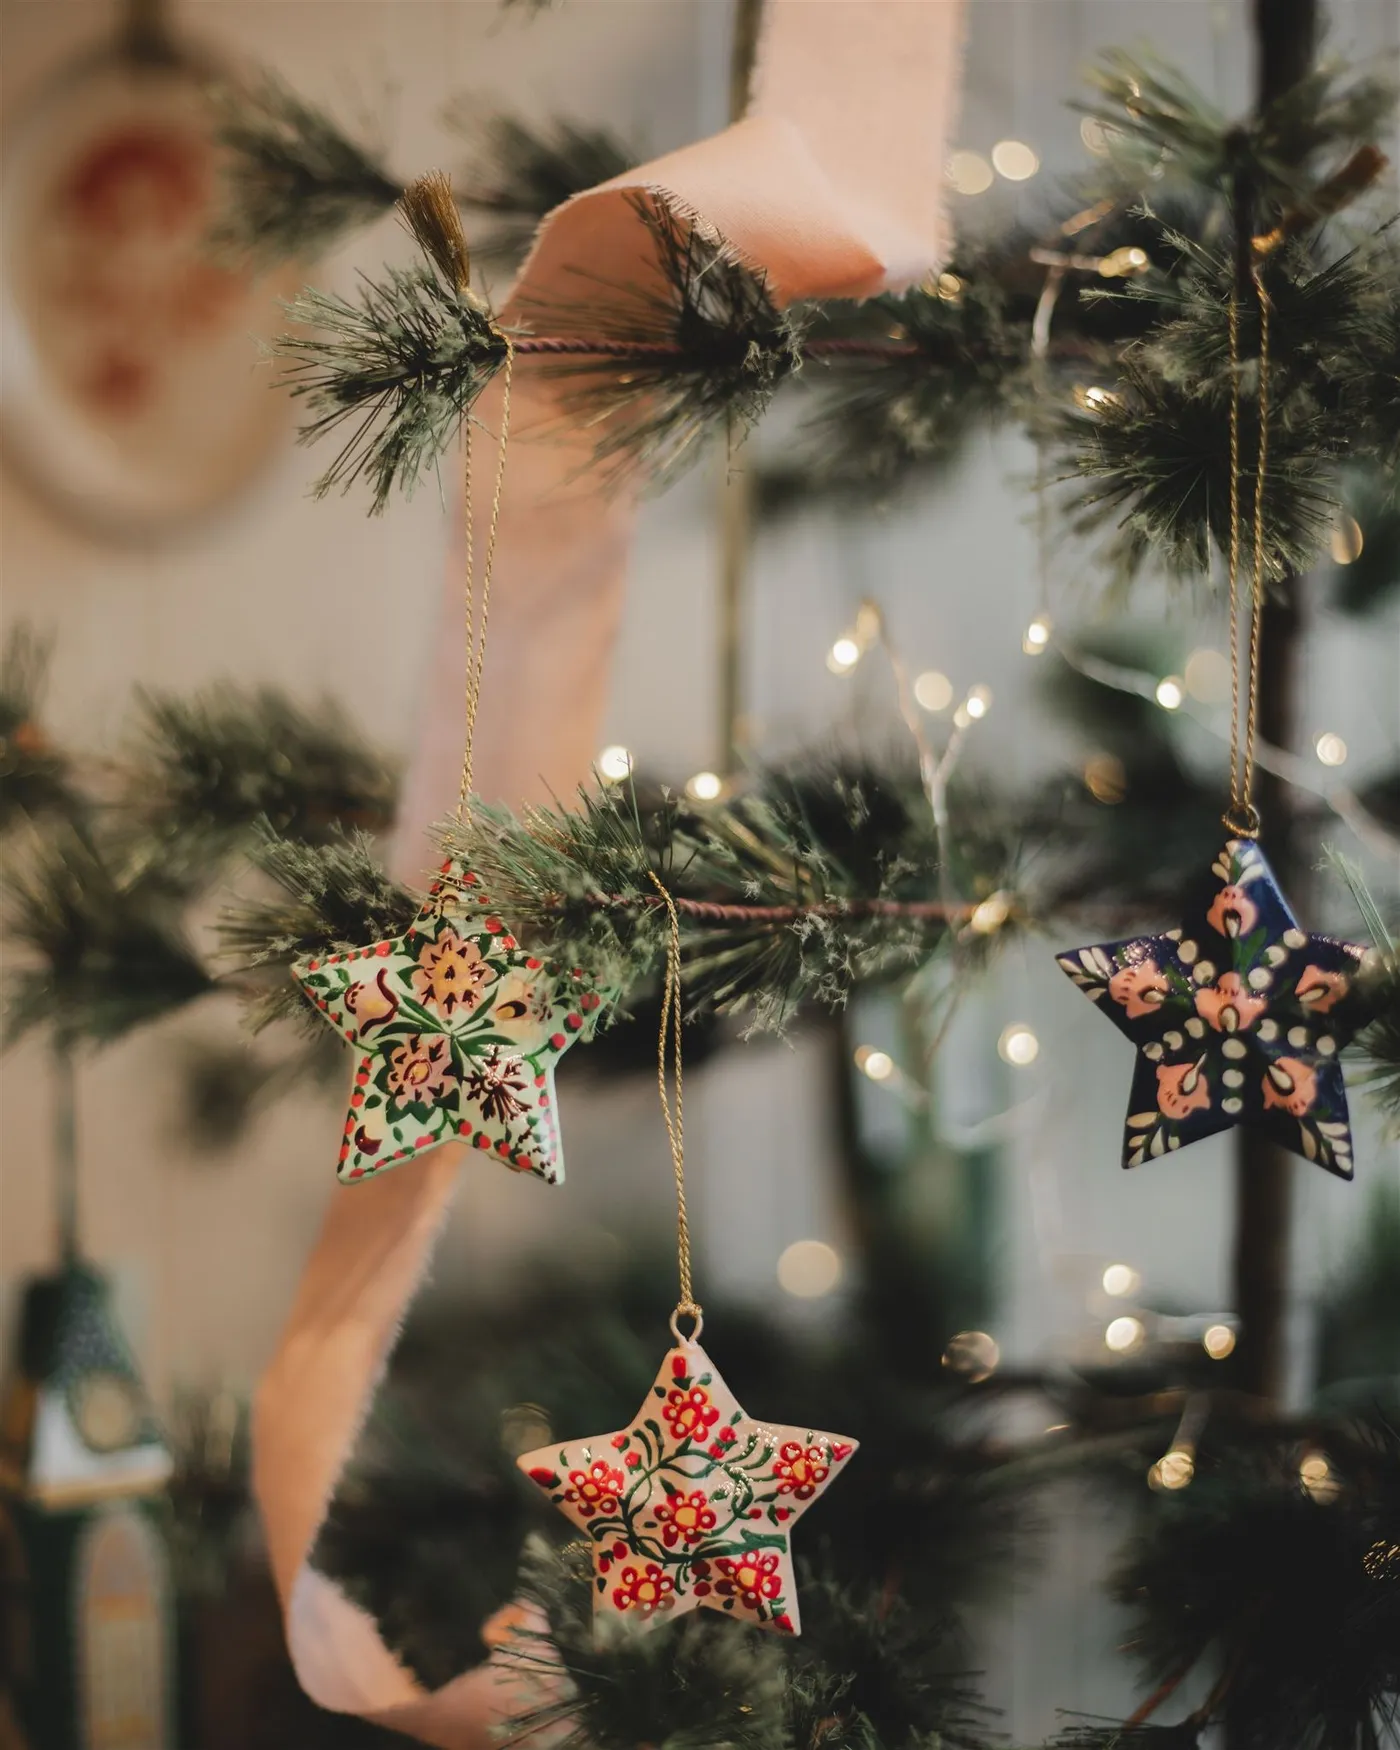
- Folk art star ornaments, set of 12: $40–$90
- Light pink fabric ribbon, 3 yards: $8–$18
- Filler ornaments, cream and navy: $25–$60
- Warm white string lights, 300 count: $18–$35
- Gold hanging string or thin ribbon: $6–$12
20. Red and Natural Wood Star Ornament with a Painted Center
These alternating-segment stars take about 40 minutes each and roughly $4 in materials.
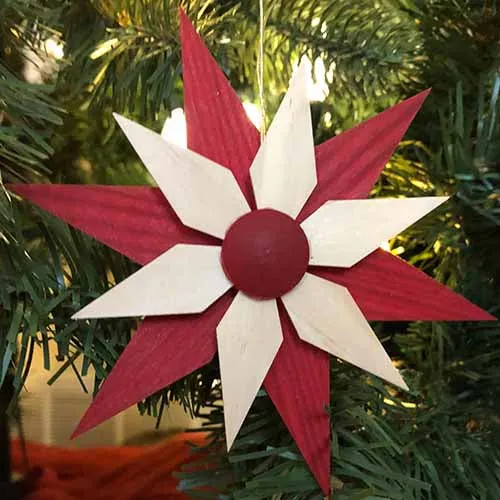
- Cut ten identical diamond shapes from ⅛-inch basswood.
- Paint five of them with two thin coats of dark red, letting each coat dry fully.
- Arrange all ten in a ring, alternating red and natural, and glue the overlapping tabs with wood glue.
- Cut a small circle from the same wood, paint it dark red, and glue it dead center to hide the seams.
- Thread a white string through the top point and knot it — no metal hook, which would fight the handmade look.
The formula is a straight 50/50 — five red segments, five natural, alternating around the circle. That’s unusual, because most decorative stars skew to one dominant color; the even split is what makes this one feel graphic rather than sweet. The solid red disc at the center anchors the pattern so it doesn’t spin visually. Change the pairing and the math holds: forest green and natural for a woodland tree, or black and natural if you’re leaning into Idea #13‘s palette. Keep it two colors, never three.
21. Illuminated Multi-Point Star with Layered Red and Yellow
The layering is the whole idea. A single illuminated star is a nice thing you can buy anywhere. This one stacks a deep red wooden layer behind a warm yellow one, so the light reads as two colors at once — amber in the middle, red at the edges — and it shifts depending on where you’re standing in the room. Take away the red layer and it’s a plain yellow star from a big-box store. That single decision is the difference between a craft-store find and something that looks like it came from a boutique. Layer two flat stars of different sizes and you get the same effect.
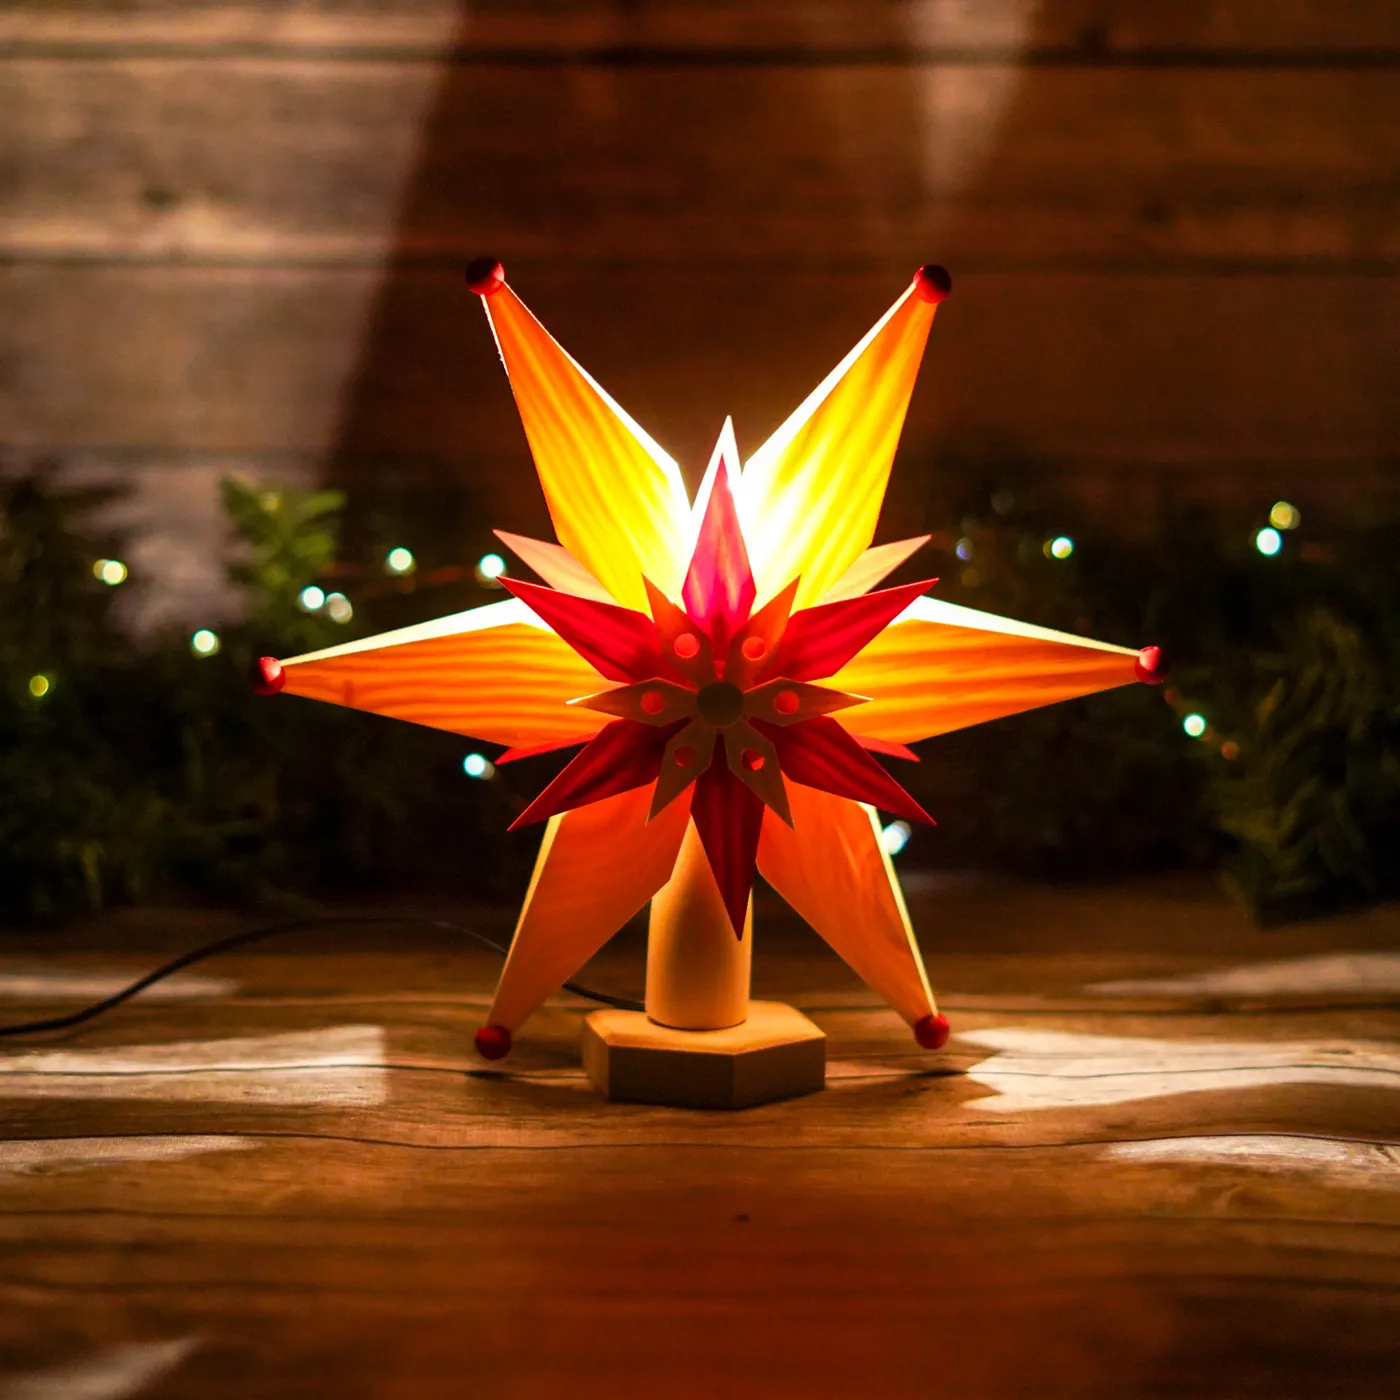
Two flat wooden stars from a craft store — a 10-inch and a 12-inch — run about $12 total. Paint the large one deep red, the small one golden yellow, glue them centered with the red behind, and run a short strand of warm fairy lights behind both. That’s the whole build: 20 minutes, no tools beyond a glue gun. Boutique versions of this exact concept sell for $70 to $95, so you’re saving roughly 85% for a difference nobody will spot from four feet away.
22. Flocked Tree in a Distressed X-Brace Planter Box
Flocking sheds, and it sheds more against a box than a skirt because the excess falls straight onto the wood. A quick shake outdoors before setup removes most of the loose bits, and a soft brush along the branches mid-season keeps it tidy. The blue wall matters too: flocking is a cool white, and next to a saturated blue it can tip grey and slightly cold in daylight. Warm white lights are non-negotiable here — cool white LEDs against a blue wall make the whole corner feel like a waiting room. Always put a liner in the box before the stand goes in.
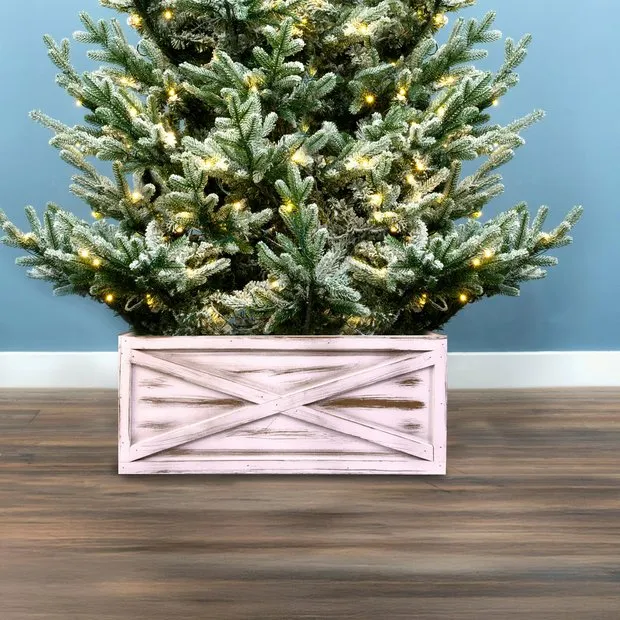
Plan on a floor footprint of at least 4×4 feet. The planter box adds roughly 14 inches of height, so a 7.5-foot tree ends up around 8 feet 8 inches — which means you need a true 9- or 10-foot ceiling for the topper to have any air above it. Measure before you buy the box, not after. This setup wants a wall at least 6 feet wide so the box doesn’t crowd a doorway. Smaller rooms should look at Idea #26 instead.
23. Lighted Wood Sign Tree with a Candy Cane Goblet
Building the lighted wood sign takes an evening and about $35 to $50.
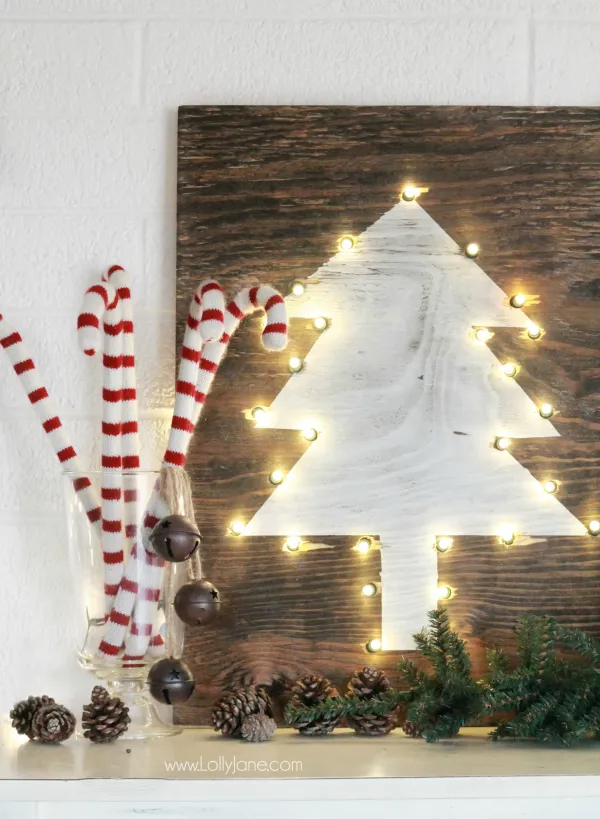
- Cut or buy a rectangular wood panel — roughly 12×18 inches is the sweet spot for a console.
- Sketch a simple tree silhouette in pencil, keeping the shape broad and simplified.
- Drill 3/16-inch holes along the outline and through the interior, about 1½ inches apart.
- Paint the panel dark brown, let it dry, then dry-brush white over the tree shape only.
- Push warm white fairy lights through from the back, taping the battery pack to the rear.
Keep a few holes empty near the trunk so the tree still reads when the lights are off.
- Wood panel or pre-cut sign blank: $12–$35
- Warm white battery fairy lights, 20–30 count: $8–$15
- Dark brown and white craft paint: $10–$16
- Glass goblet for candy canes: $6–$18
- Pinecones and faux pine sprigs: $10–$25
24. Buffalo Plaid Poinsettia with Rusty Bells and Burlap
Roughly 45% red, 30% green, 15% black, 10% natural jute and burlap. The black comes in almost entirely through the plaid, which is smart — it keeps the black from becoming its own statement and instead reads as a texture inside the red. The rusty bells and jute twine are that last 10%, and they’re what stop this from looking like a big-box display. Swap the plaid for a cream-and-charcoal check and the same ratios give you a much quieter, more modern version of the same flower. Keep the burlap ribbon either way; it’s the matte finish that grounds everything.
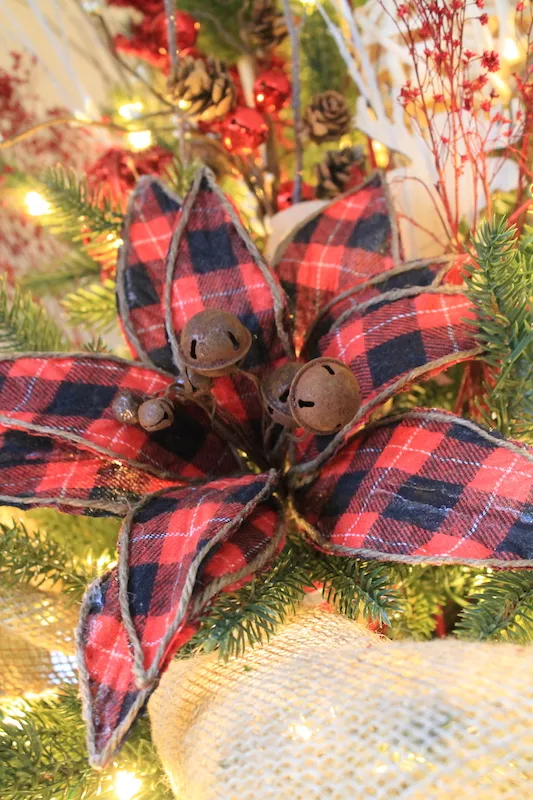
- Check the flower’s actual diameter — 8 to 12 inches reads as a statement; under 6 looks like a filler ornament.
- Count how many you need before ordering; two to four per tree is the useful range.
- Sniff it. Burlap and jute can carry a musty smell straight out of the package.
- Confirm the bells are wired on, not glued — glued bells drop off by January.
- Verify your lights are warm white; this palette turns garish under cool LEDs.
25. Mini Tree on a Step Stool Wearing a Santa Hat
The Santa hat instead of a star. That’s it — that’s the whole reason this little setup makes people smile. A 2- to 3-foot tree on a wooden step stool is a completely ordinary thing; you’ve seen a hundred of them on entryway tables. The hat flops to one side, which is exactly what you want, because a perfectly centered hat would look like a decoration and an off-kilter one looks like it landed there on purpose. It also gives you height without a star, which matters on a mini tree where a proper topper can overwhelm the whole thing.
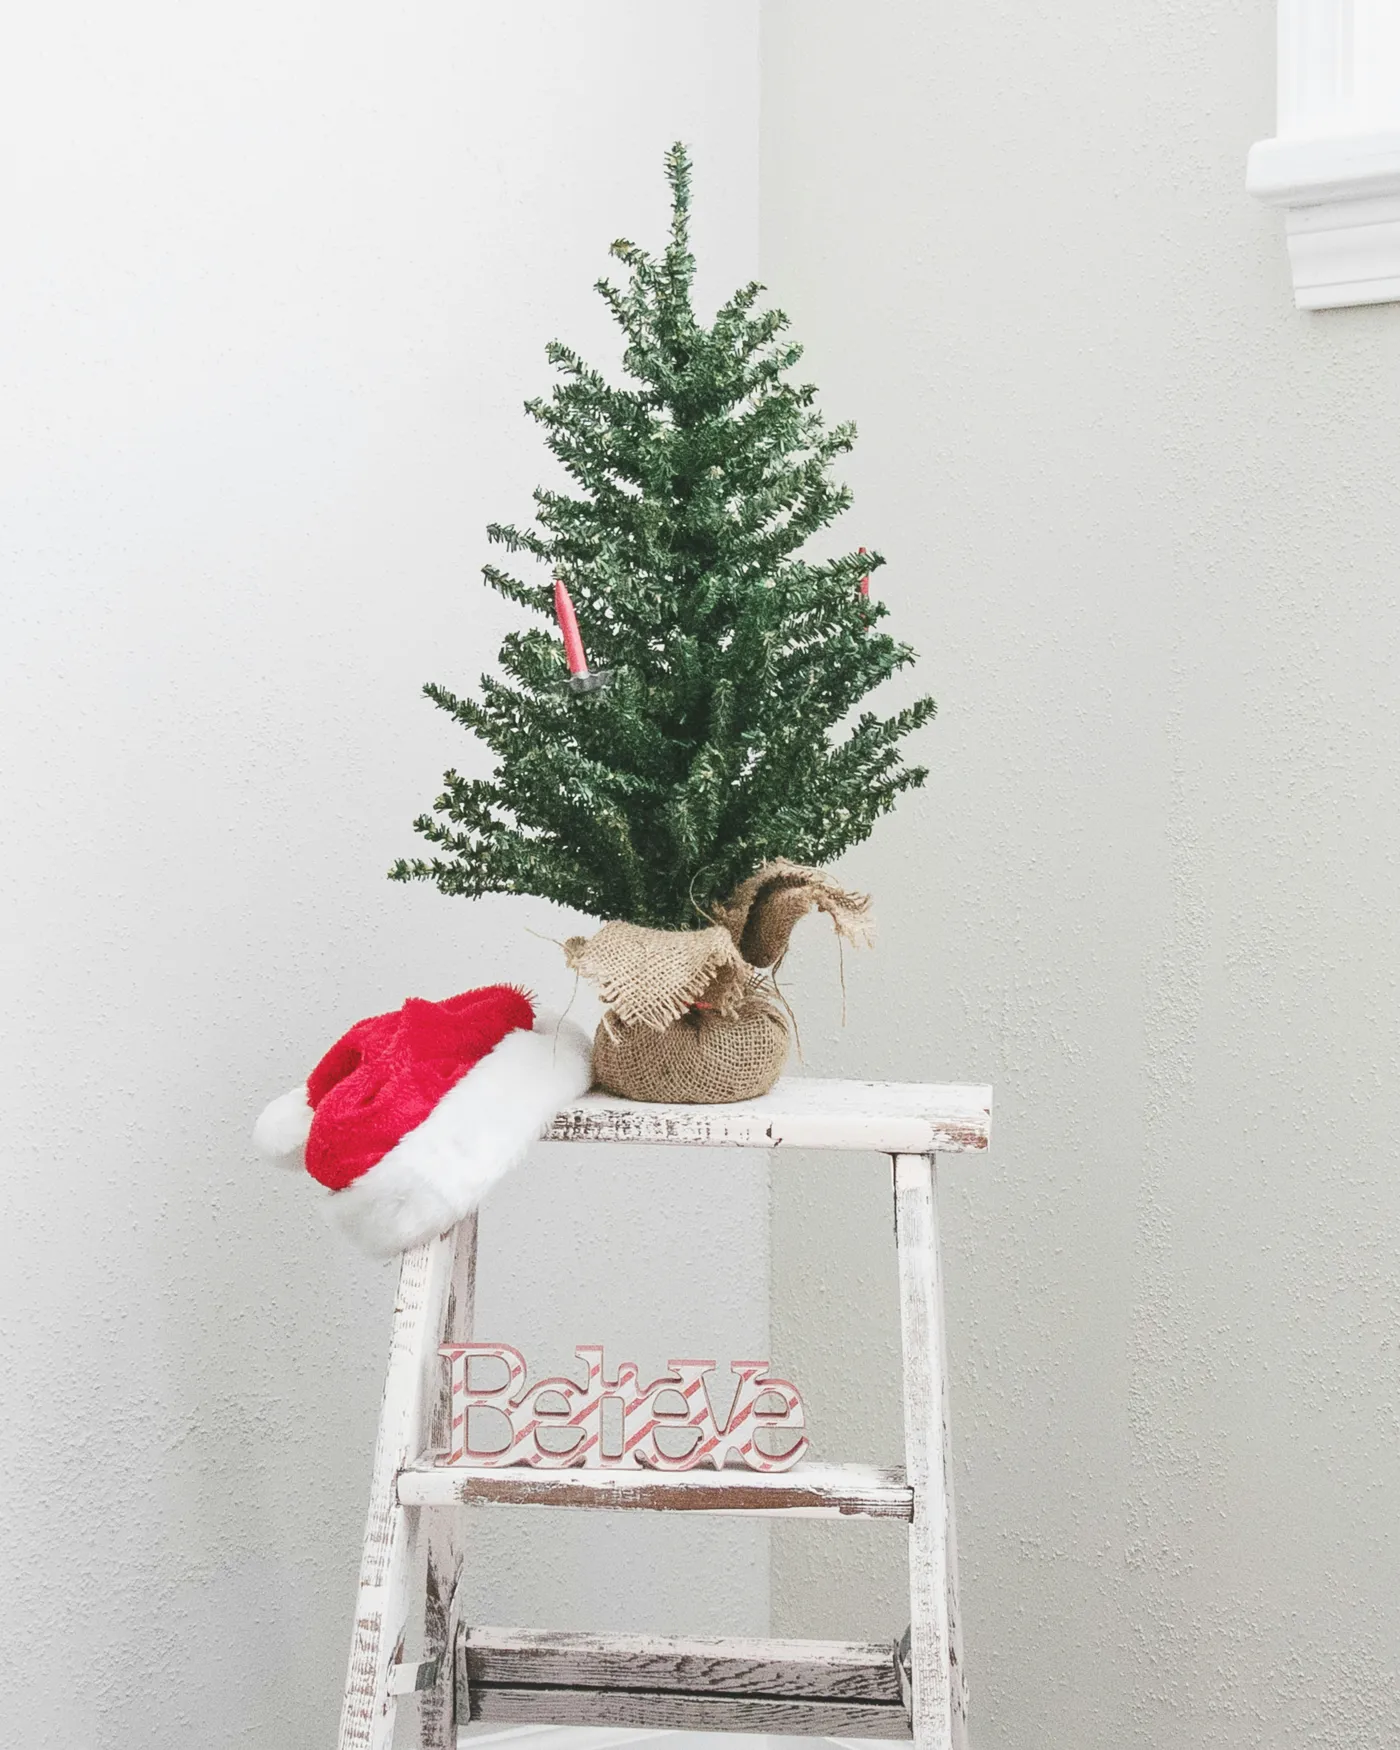
A Santa hat is about $2 at a dollar store, and honestly the cheaper the better — the stiff, structured ones don’t flop right. Step stools come free from your own garage, or $6 to $12 at a thrift store if you want a wood one with visible wear. The tree itself doesn’t need to be anything special: a $15 tabletop tree with warm white lights is enough, since the hat is what people notice. Total under $25. If the stool is painted, sand one edge so it doesn’t look brand new.
26. Wooden Crate Tree Collar in a 26-Inch Square
Wood and water are enemies, so this is a liner situation, not a maybe. Use a plastic liner bucket or a heavy-duty bag inside the box, and never water the tree past the liner’s edge. Wipe the collar with a dry cloth only — a damp rag raises the grain on unfinished wood and leaves water stains that won’t come out. Store it flat and wrapped, not stacked under anything heavy, because 26-inch square panels warp easily under pressure. Re-oil or re-wax every other year if it lives somewhere dry, and check the base joints each November for loosening screws.
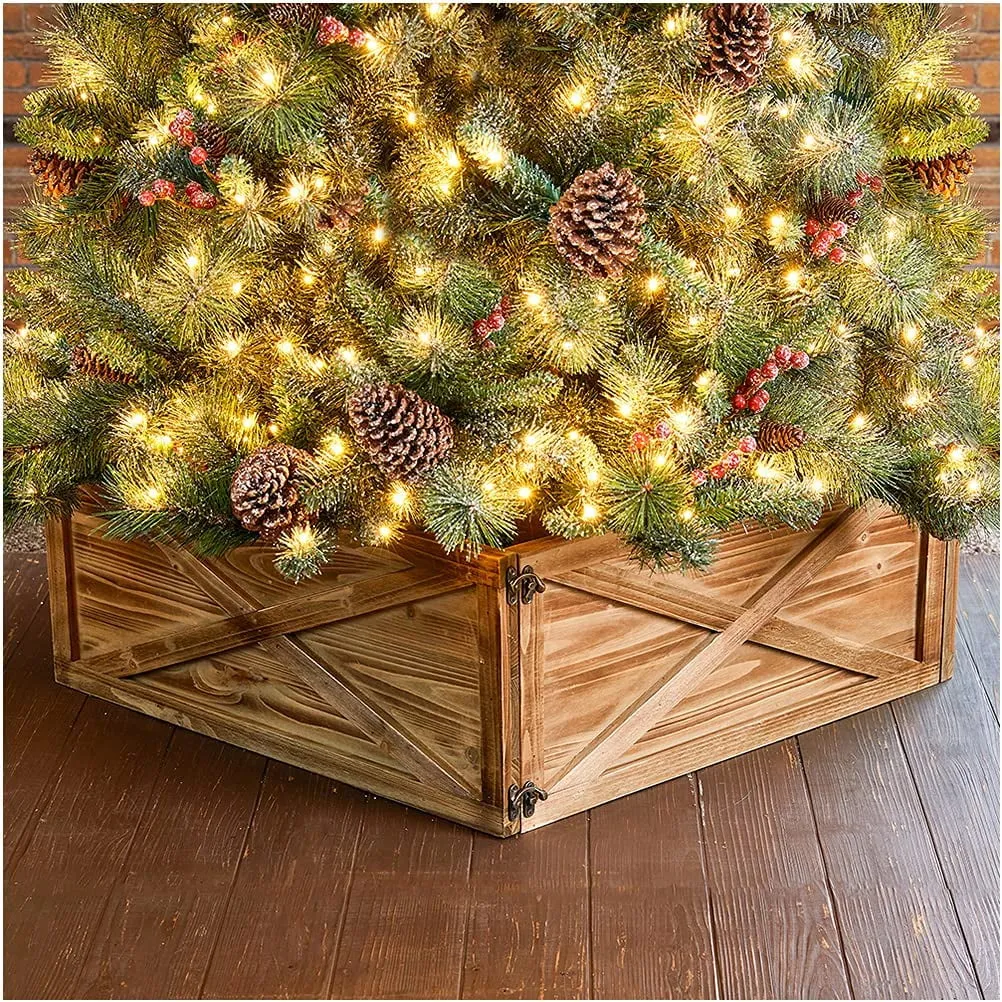
A 26-inch square collar fits trees up to about 7.5 feet and works with most standard stands, which usually measure 20 to 24 inches across. You’ll need at least 30 inches of clearance behind and beside it so you can actually get a hand in to water. It reads best on a floor with contrast — dark wood planks under a light collar, or the reverse — and it needs roughly 5 feet of wall width so it doesn’t look squeezed. Taller than 8 feet, step up to a 30-inch collar or the proportions go top-heavy.
27. DIY Christmas Tree Apron Box with Hinged Panels
The apron-box build takes an afternoon and roughly $40 in cedar or pine.
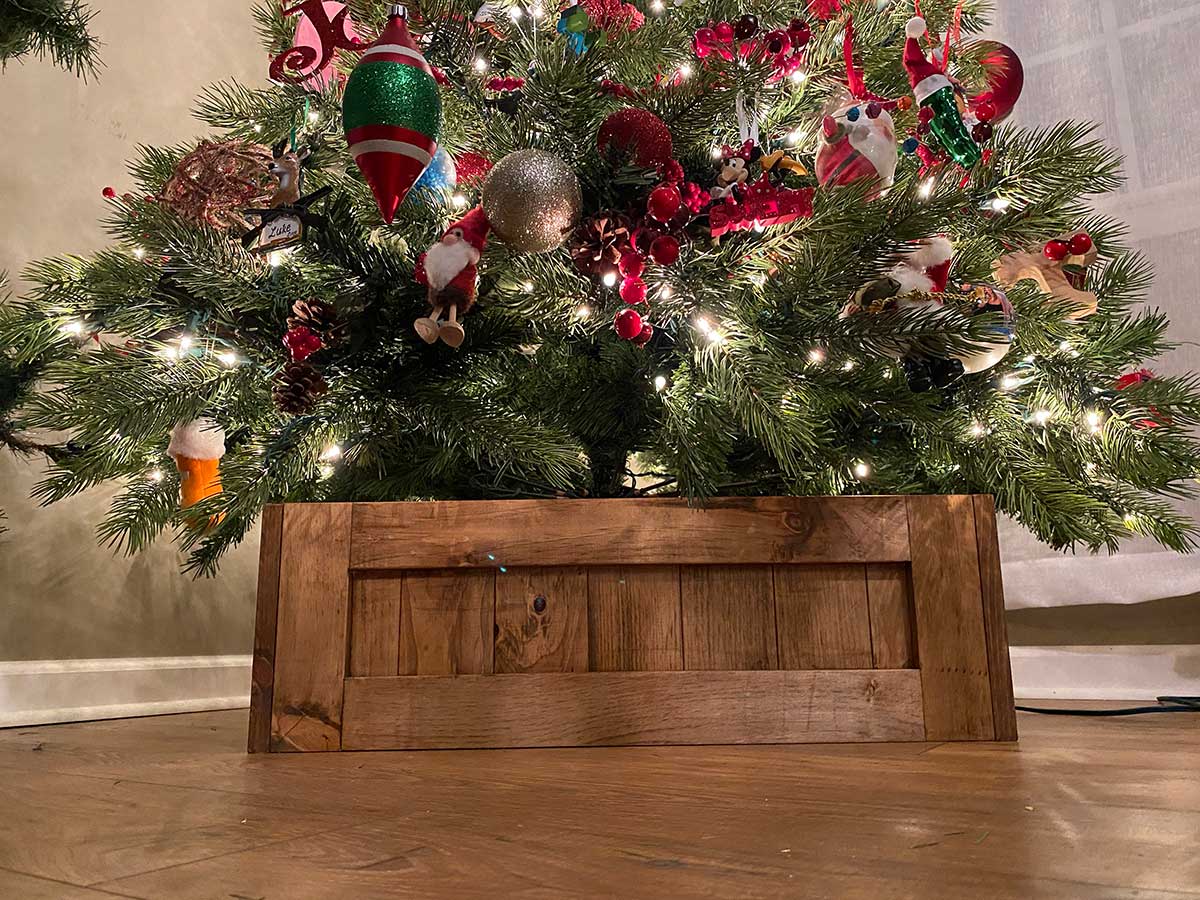
- Cut four side panels to 22 inches tall and wide enough to leave 3 inches around your stand.
- Attach them to a square base with hinges on two sides so the front panels swing open.
- Drill a 1-inch ventilation hole in each remaining panel so the tree isn’t sealed in.
- Keep the front two panels latched shut with a simple hook during the season.
- Finish with a matte sealer, inside and out, so watering splashes don’t stain the wood.
Two practical warnings. First, these boxes get heavy fast once a stand, water, and a full tree are sitting inside, so build it where the tree will live rather than assembling it in a garage and hauling it. Second, hinged panels need clearance to swing, which means you can’t push the back flush against a wall unless you’re only opening the front. And don’t skip the liner — cedar stains from standing water within a single season.
28. Oversized Sugar Pinecones Draped as Garland
Giant pinecones need different hardware than the small ones. Use 14-gauge wire or doubled jute twine, and anchor each cone to a woody branch near the trunk — not to a needle, which snaps the moment the cone gets heavy in humid air. Space them 8 to 10 inches apart and use six to eight oversized cones on a 6-foot garland; any more and it turns lumpy. Angle them slightly downward and outward so the flat base faces the room rather than the wall. One more thing: shake them out over a trash can before they go anywhere near a rug.
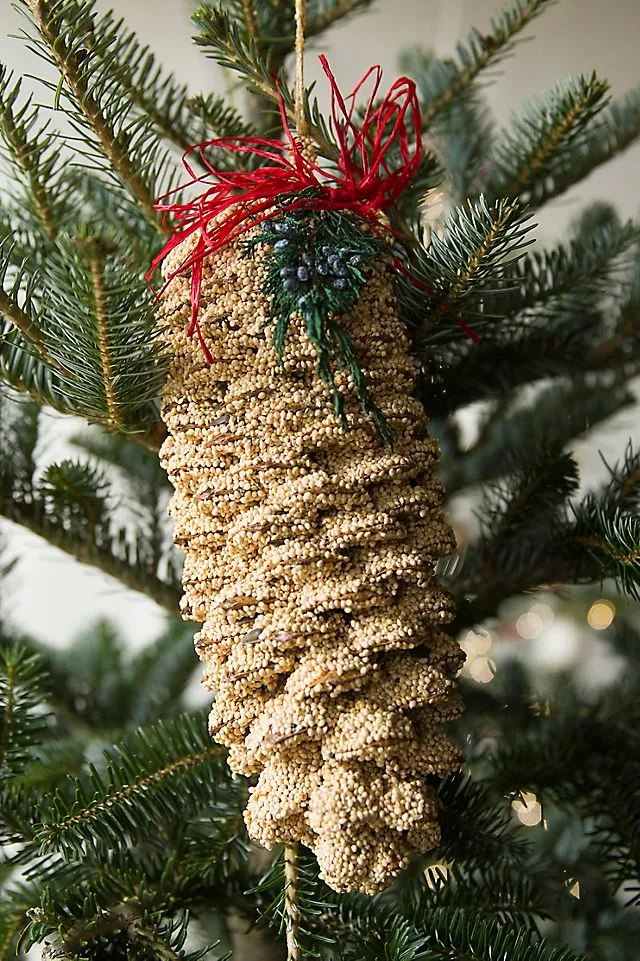
Oversized naturals are having a genuinely big moment, and it’s not just a Pinterest thing — big resin seasonal decor has lost ground to pieces that look gathered rather than manufactured. Sugar pinecones in particular have become a status object in natural-decor circles because their size is real, not scaled up with foam. The trend should hold for years since it’s built on material honesty rather than a color. You can also swap in magnolia pods, dried citrus, or seed pods.
29. A Full Tree Dressed Entirely in Wood Slice Ornaments
- Wood slice ornament set, 12 pieces: $18–$45
- Extra slices, 100-count bulk: $12–$20
- Twine or jute hangers: $4–$8
- Beeswax or matte sealer: $8–$14
- Wood burning tool, optional: $15–$30
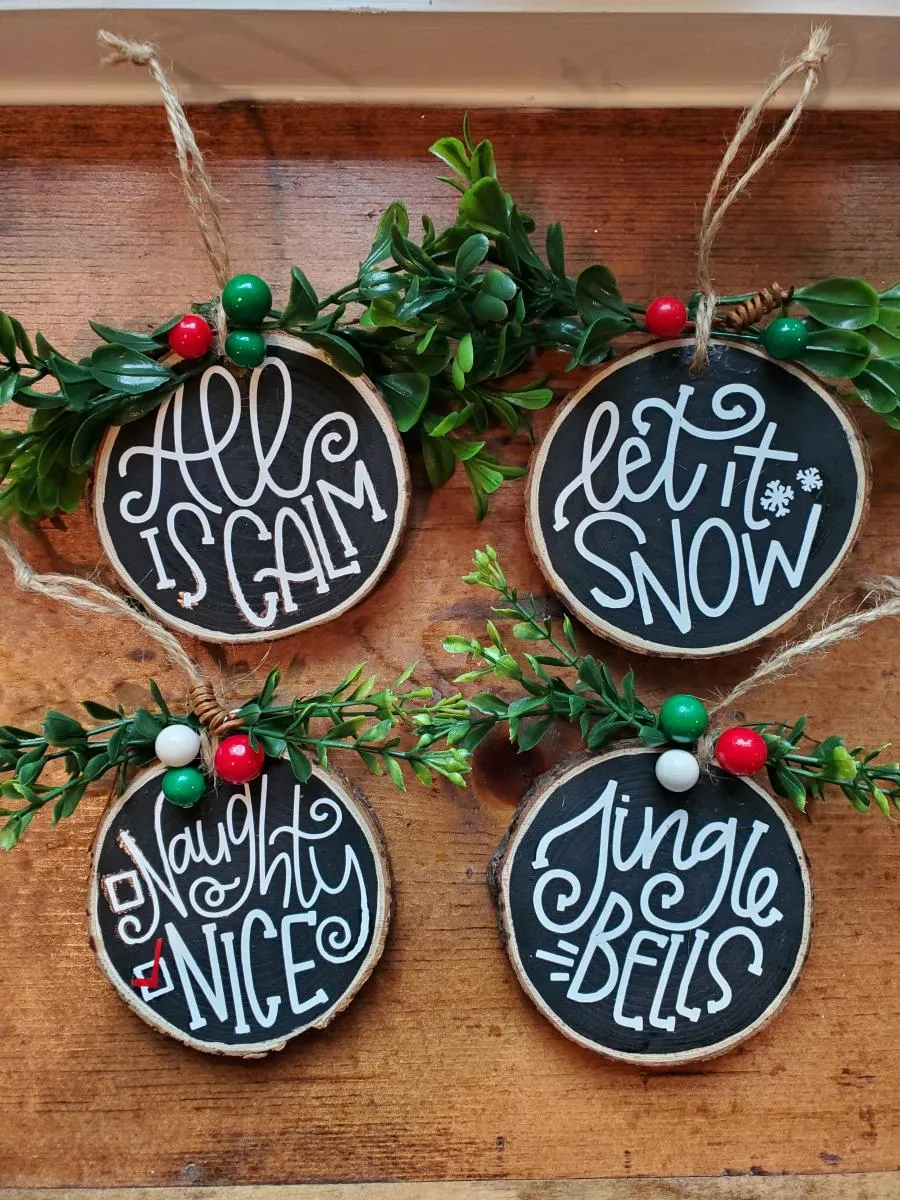
Buying bulk slices and stringing them yourself cuts the per-ornament cost to about $0.40, which means you can fill a whole tree for under $30.
The reason a wood slice tree holds together is repetition with variation. Every ornament is the same shape, the same material, and the same warm brown — that’s the repetition that makes it feel curated rather than random. The variation comes from the bark edges, the grain, and the slight differences in thickness. Add one small, consistent detail — a single twine loop on every piece — and the whole thing reads as intentional from across the room, which is where most people actually see your tree.
30. A Highland Cow Ornament That Steals the Show
Novelty character ornaments from small shops run $15 to $24 each, which adds up fast if you want a whole farmyard. Buy the printed illustration as a digital file for $3 to $6, print it on sticker paper, and mount it to a 3-inch wood slice you already bought in bulk — under $2 an ornament. Or skip the print entirely: a hand-drawn highland cow in paint pen on a slice has more charm than a printed one and costs nothing but 10 minutes. Either way, keep the hanger twine neutral so the character, not the ribbon, gets the attention.
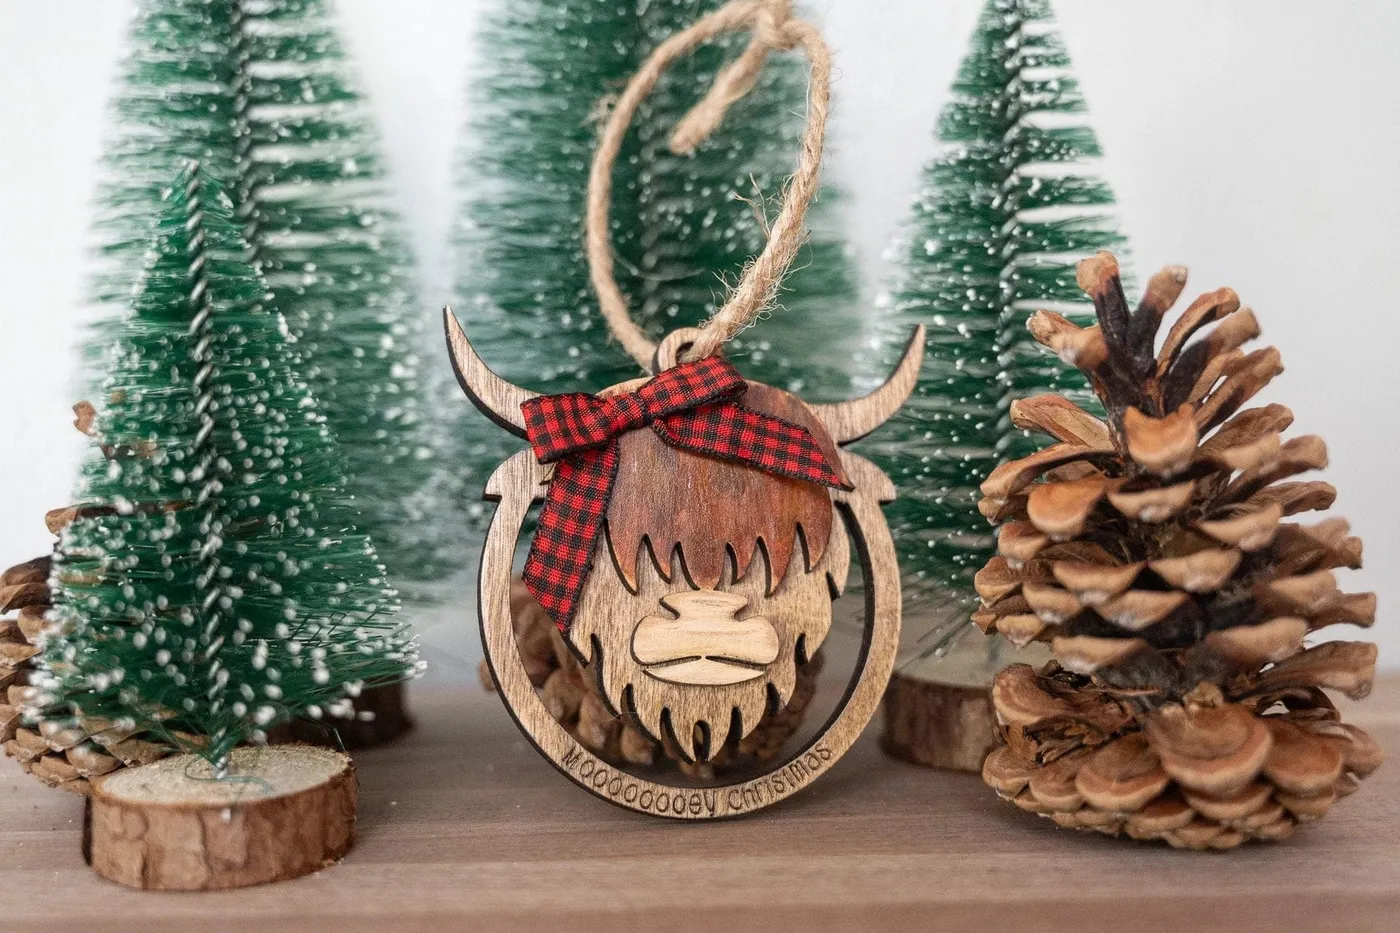
Novelty ornaments are wonderful in small doses and overwhelming in large ones. Five or six across a tree reads as personality; twenty reads as a theme park, and every guest will ask about each one individually. Spread them out — one per major branch section — and give them space so a highland cow isn’t hanging shoulder to shoulder with anything else. Also check the finish before hanging on a live tree: fresh varnish can react badly to moisture and stick to needles. Personalize the back in paint pen if you’re gifting one.
31. Flat Rusty Metal Pine Tree Silhouettes
Their flatness. These are 2D cutouts with no depth whatsoever, and that’s the entire design decision — leaned straight against a wall or hung flush, they read as graphic shapes rather than objects, which means they hold a wall without filling it. A three-dimensional metal tree in the same spot would look like clutter. Because they’re flat, they also photograph beautifully, which is part of why they keep showing up in stylized rustic interiors. A grouping of five at graduated heights, spaced 4 to 6 inches apart, gives you a tree-shaped arrangement with no tree at all.
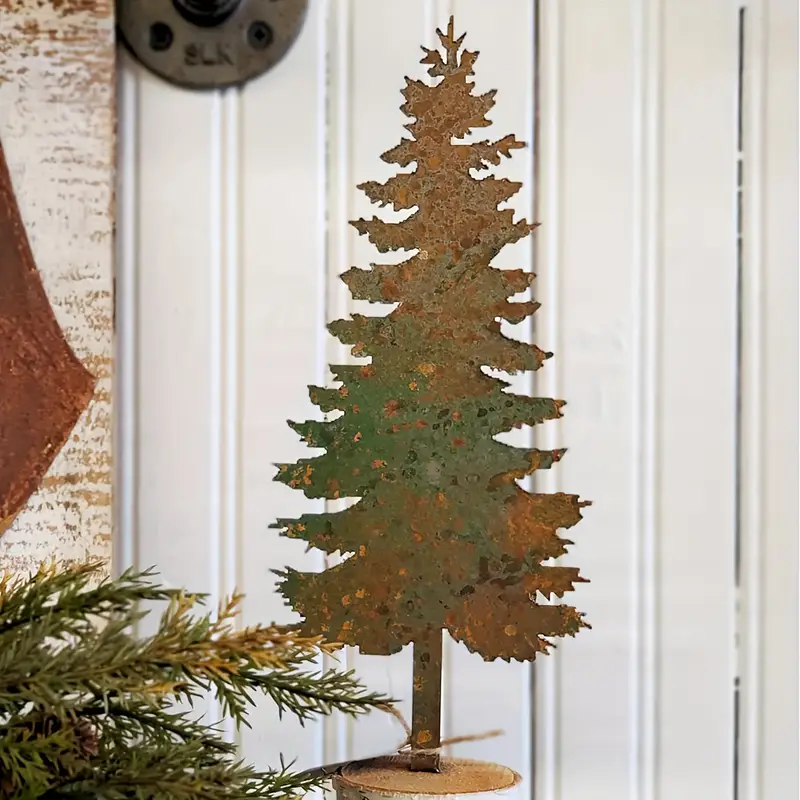
Rust never stops. A heavily rusted cutout will drop fine orange dust onto whatever sits below it, including a mantel, a shelf, or a white table runner. Two coats of matte clear sealer fix it permanently and don’t change the look. If you skip the sealer, keep them away from textiles and don’t handle them while wearing light colors — rust transfers to fingers fast. Store them flat, between sheets of cardboard, because these thin silhouettes bend at the base. The patina deepens slightly each year, which is a feature, not a problem.
32. Reindeer Silhouette Ornament Hung Low and Forward
- Check the ornament’s size against your tree — a silhouette under 3 inches vanishes on a 9-foot tree.
- Confirm whether the finish is painted, stained, or bare wood; painted versions chip faster.
- Decide placement before you hang it — reindeer belong low and toward the front, not near the topper.
- Match the hanger to your other ornaments so it doesn’t stand out for the wrong reason.
- Buying multiples? Order them together so the tone and finish match.
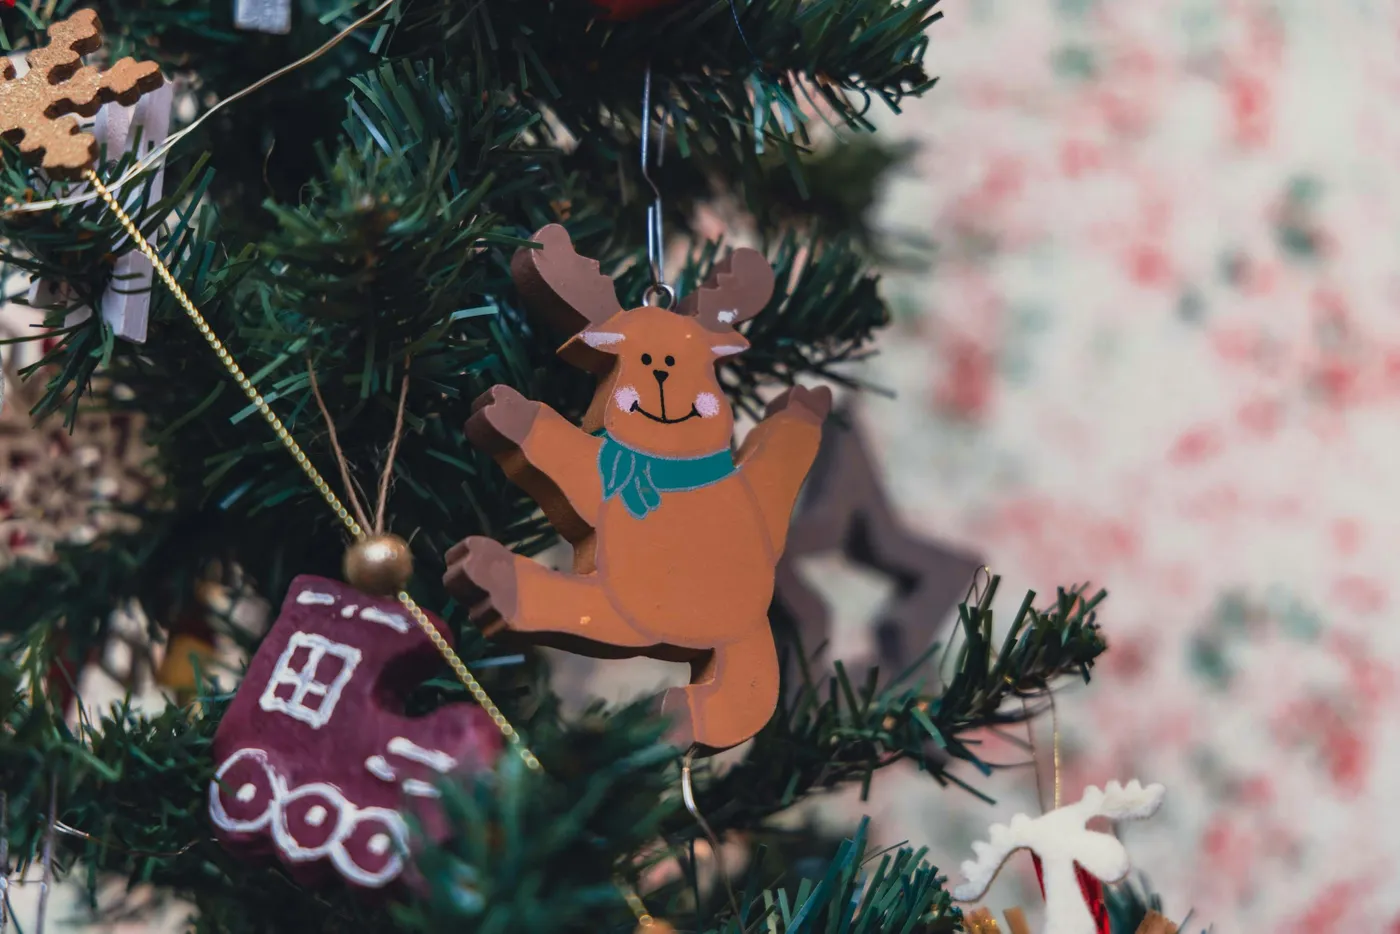
Silhouettes do something round ornaments can’t: they interrupt the rhythm. A tree of nothing but balls looks rhythmic in an almost mechanical way, and a reindeer standing in profile breaks that pattern without adding clutter. The single-figure shape also gives the eye a place to land, which is why one well-placed animal among twenty baubles is more memorable than five of them scattered around. Pair it with a natural hanger — twine, jute, or a thin waxed cord — and the ornament feels gathered rather than purchased.
Your Rustic Tree Doesn’t Need a Theme — It Needs a Point of View
Pick one idea from this list, not five. The trees that look best in real homes are the ones where somebody made one clear decision — a color pair, a material, a base — and then repeated it until it felt inevitable. Start with the base, hang the lights before the ornaments, and give yourself permission to leave some branches empty. Save this guide to your Pinterest holiday board — and when your tree goes up this December, we want to see it.