
34+ Stunning Pallet Christmas Tree Ideas You Absolutely Must Build in 2026
Still scrolling through pallet Christmas tree photos at 11 p.m., saving twenty of them, and still not sure where to start? Same. The save-to-actually-build ratio on this idea is genuinely brutal — which is exactly why we did the weeding for you.
We spent real time digging through Target, Walmart, IKEA, Home Depot, and Dollar Tree, plus a whole lot of free-pallet listings on Facebook Marketplace, and narrowed it down to 34 ideas that hold up in an actual living room. Every single one can be built somewhere between $18 and $400, because a pallet is free and paint is not.
Inside you’ll find minimalist light-wood spirals, whitewashed cutout trios, chevron porch displays, buffalo check statements, and a few builds that are honestly just an excuse to use a miter saw. And stay until the end — we break down the most common mistakes that can ruin these looks.
In 2026 the pallet tree is having a real moment, partly because reclaimed and repurposed decor keeps climbing on Pinterest, and partly because nobody wants to store a six-foot artificial tree in a closet for eleven months.
Go ahead and save this — you’re going to want to reference it when you finally pull that pallet apart. 📌 Save this to Pinterest for later — you’ll want to revisit these ideas.
1. Tapered Olive-Green Slat Tree With a Gold Star
The taper is doing all the work here. Because every horizontal slat gets shorter than the one below it, your eye reads tree instantly — no needles required. Set against a bare white wall on a grey concrete floor, the olive-green wood becomes the only color in the room, which is why this lands as sculpture rather than craft project. The gold star is deliberately undersized. A big topper would fight the clean horizontal rhythm you worked so hard to build.
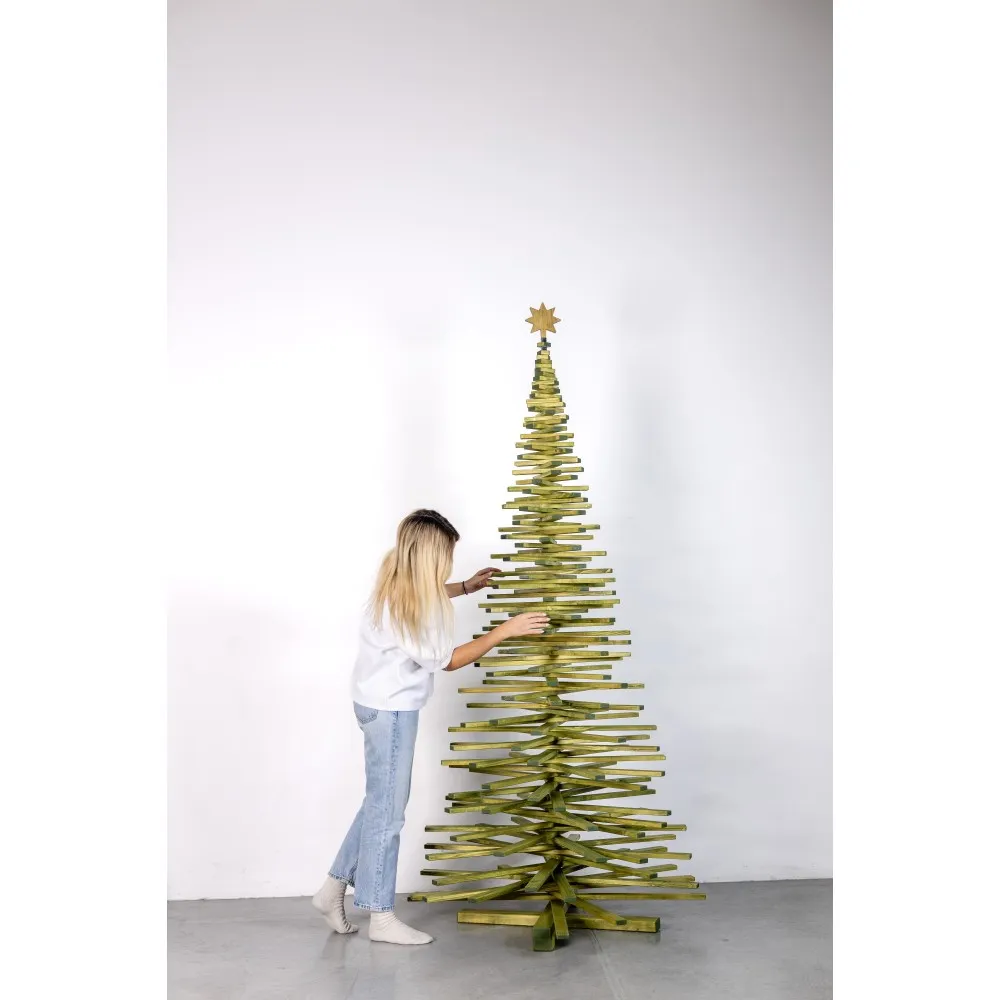
Paint the slats before you assemble anything, and use a matte water-based enamel rather than a glossy latex. Gloss reflects window light and flattens the depth of the stack, especially on a pale floor. Two coats on all six faces — ends included — keep the bare wood from wicking moisture and warping once this sits in a cold garage or on a covered porch. A quart covers a 5-foot tree with room to spare, and let it cure a full 48 hours so the slats don’t stick together when you stack them.
2. Five Patterned Wooden Tree Cutouts on a Wood Slice
The wood slice. Without it, five patterned cutouts sitting on a buffalo check cloth read as a scattered craft-fair display. The chunky raw-edge round gives all five trees a shared stage and adds a natural texture that calms the busy red-and-green patterns above it. It also solves the practical problem of tabletop styling — you arrange the trees once on the slice, then move the whole vignette as a single object when you need the table back for dinner.
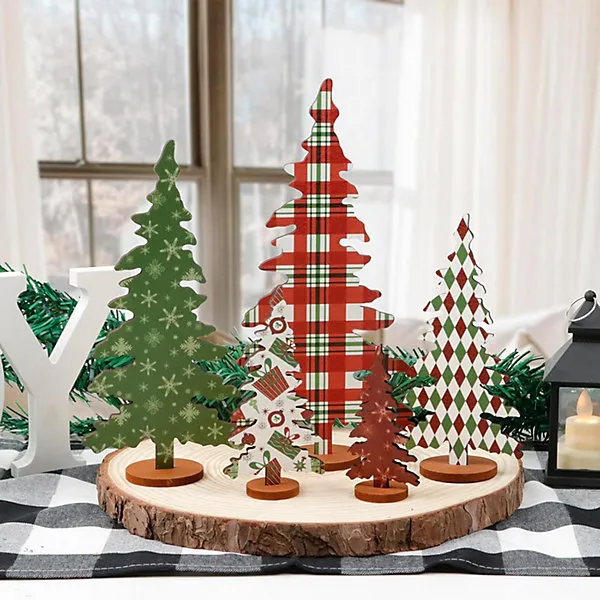
- Rough-cut wood slice, 12–14 in.: $18–$45
- Five unfinished wooden tree blanks: $12–$30
- Acrylic craft paint and brushes: $10–$20
- Buffalo check tablecloth or 1 yd fabric: $12–$28
- Black lantern with LED candle: $15–$40
- Green tinsel garland: $4–$10
Total: roughly $71 to $173 — closer to $35 if you cut your own slice from a firewood log and thrift the lantern.
3. Three Distressed White Plank Trees With Pinecone Bases
- Cut three sets of horizontal planks at 14, 11, 8, 5, and 2 inches — one set per tree.
- Sand the edges lightly, then dry-brush white paint and wipe while wet so the grain still shows.
- Glue and brad-nail each row to a center spine board, leaving a 3/4-inch gap between rows.
- Weave battery fairy lights through the gaps and tape the battery pack behind the spine.
- Hot-glue pinecones and pine sprigs along the bottom edge to hide the base.
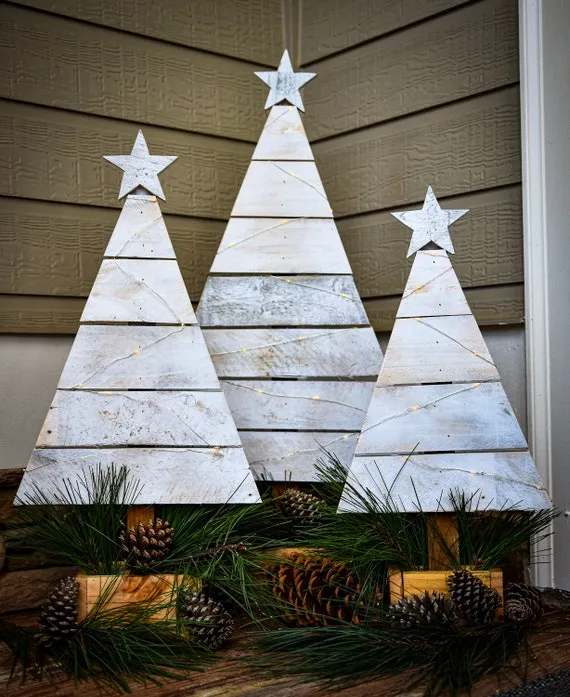
Time: one weekend afternoon. Materials: about $40 for all three if you’re working from reclaimed pallet slats.
Battery fairy lights are the weak link in every one of these. Cheap strands eat three AA batteries in about two weeks of nightly use, and the thin wire corrodes fast if the tree lives on a covered porch in humid weather. If you want these timed all December, buy a strand with a USB or plug-in option and hide the cord behind the spine board. And be honest about sun — distressed white paint on bare wood yellows slightly over time, so keep them off a south-facing sill.
4. Spiral Wooden Tree Lit by Dozens of Real Tealights
If you’re using actual tealights on a wooden structure, keep every flame at least 8 inches from the wood above it, and never leave the room. A safer swap that looks nearly identical: flameless LED tealights with a warm 2200K glow, dropped into small glass votives. The glass catches the light and throws a pool of warmth onto the plank below, and that reflected glow is what makes candlelit wood read cozy instead of dark and sooty.
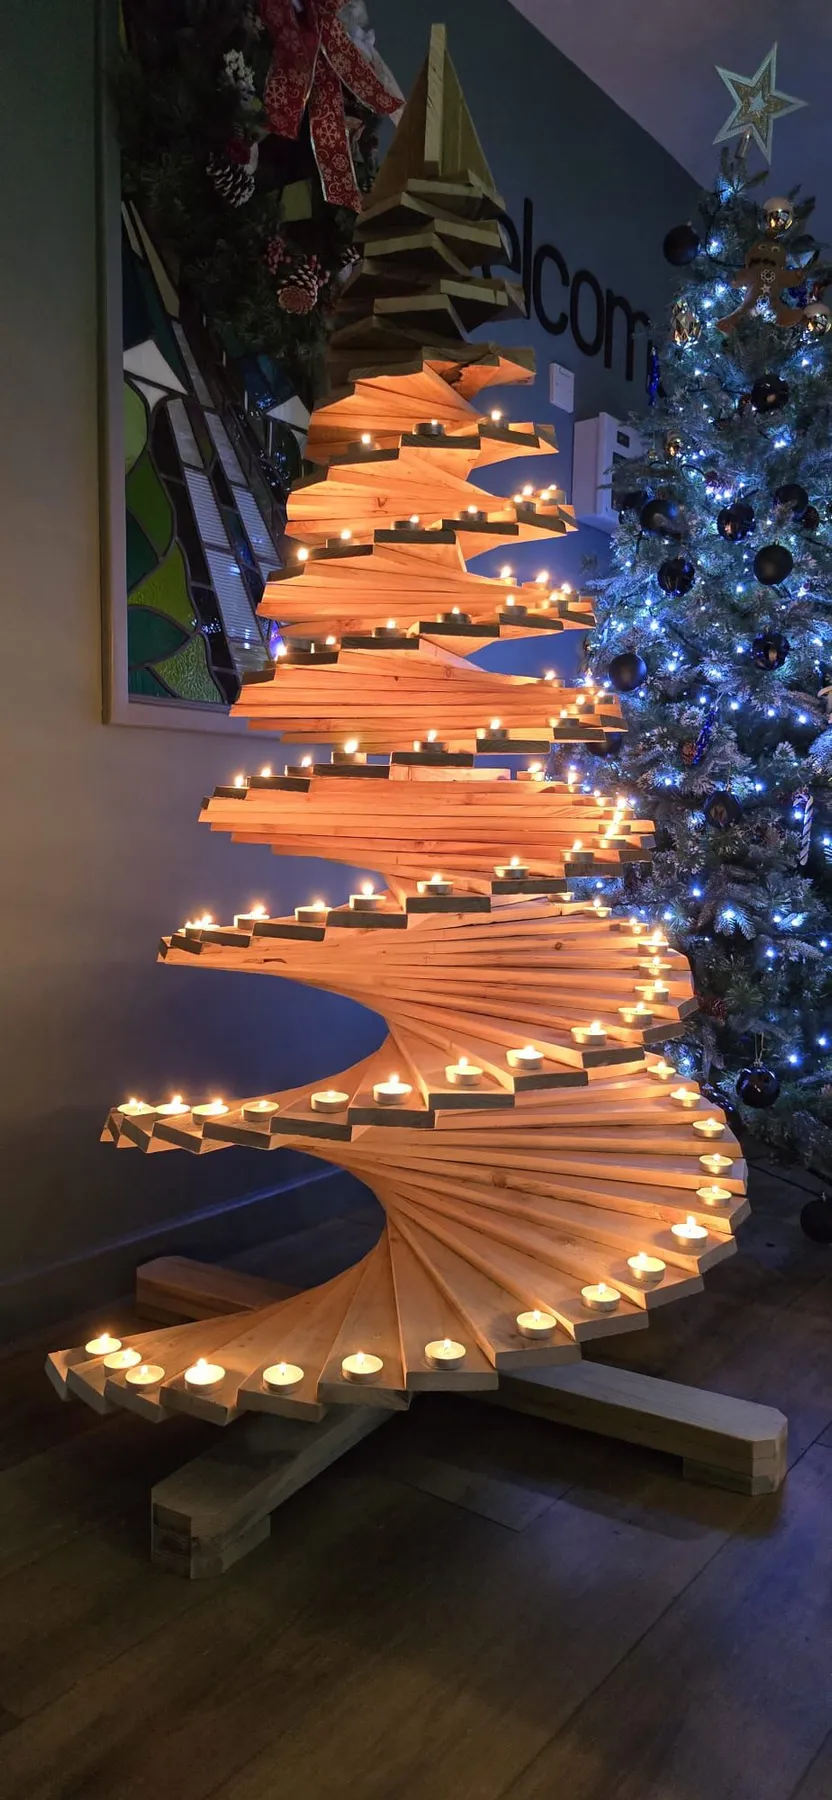
60% light natural wood for the structure and floor, 25% deep blue from the wall and the fir tree’s string lights, 10% warm candle glow, 5% red ribbon as the jump. Blue and amber-orange sit nearly opposite each other on the color wheel, which is exactly why this corner feels alive rather than flat. Swap the blue for charcoal and the amber for cool white and the formula still holds — but you lose every bit of the warmth that makes it work.
5. Spiral Plank Tree With Pinecones and Wood Slices
Natural pinecones are the maintenance item here. They shed scales, they hold dust, and if they were gathered damp they can grow a fine white bloom by February. Bake them at 200°F for 30 minutes on a foil-lined sheet to kill anything living inside, then seal with a light coat of matte polycrylic. Wood slices need less — a dry dusting does it. Budget about 20 minutes of touch-up per season, plus a fresh set of batteries every three weeks.
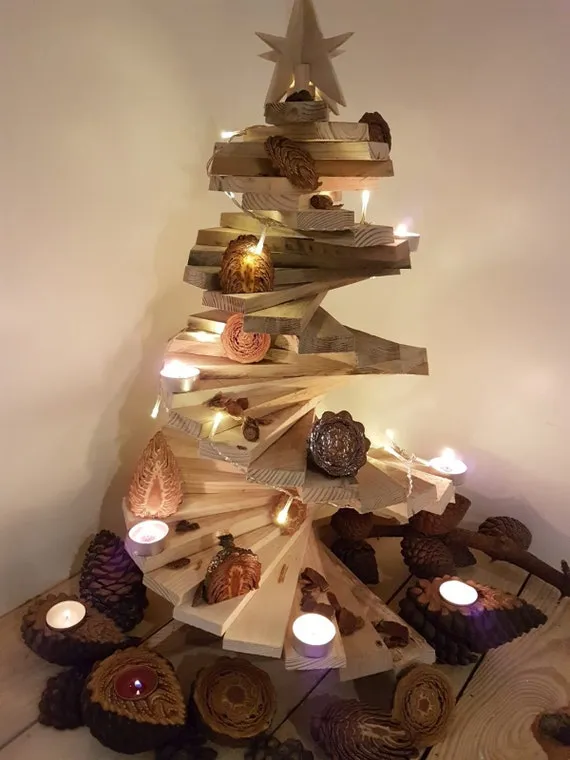
Everything except the lights can come from outside. Pinecones from a park, wood slices cut from a fallen branch, a star traced and cut from scrap plywood. Buy the lights — that’s the one place to spend. A 33-foot strand of warm white copper wire lights runs $8 to $14 at Target or Walmart, and IKEA’s battery version sits around $10. Realistically you’re under $30 for a tabletop version, versus $150 for a store-bought decor tree of the same scale. This is the budget cousin of Idea #8, and it earns its keep.
6. Plank Tree With LED Candles and a Teddy Bear Topper
The teddy bear. Every other decision in this corner — the raw plank spiral, the flickering yellow LED candles, the dark metal stair railings — is tasteful and restrained. The bear is the one thing that isn’t, and that’s precisely why the whole arrangement feels like a home instead of a showroom. It also visually caps the taper. Without a topper, a plank tree this tall reads as unfinished carpentry, and your eye keeps traveling up past the apex looking for something that isn’t there.
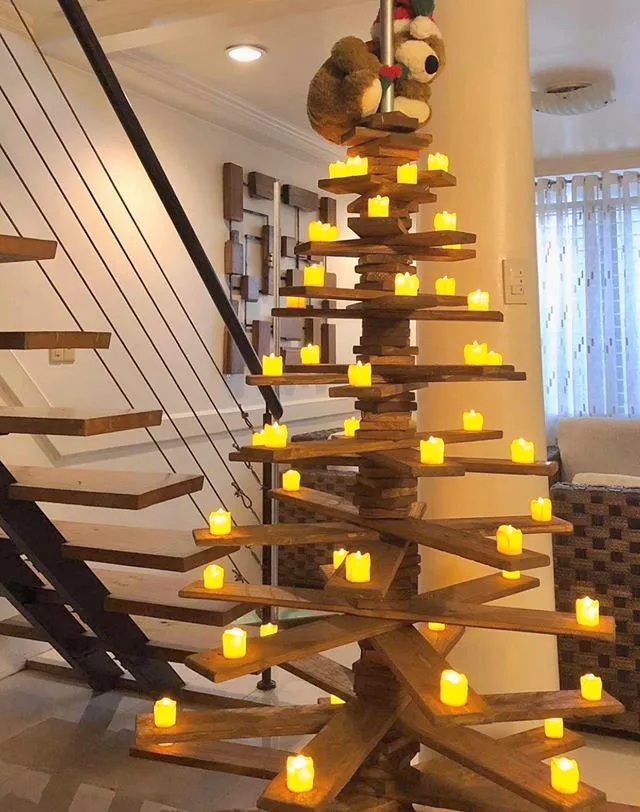
This one needs vertical room to breathe. It reads correctly at 5 to 6 feet in a stairwell opening with 9-foot ceilings — anything under 8 feet and the top plank crowds the handrail. Give it 18 inches of clear floor on at least two sides so you can walk the spiral. If your entry is tighter than 4 by 6 feet, a tabletop version of the same build works, and the smaller plank trees in Idea #8 were made for exactly that footprint.
7. Horizontal Planks With Embedded Lights Against Purple
Colored walls are back, and that’s what makes this feel current rather than dated. After a decade of white-on-white holiday styling, 2026 Pinterest searches for moody holiday walls and jewel-tone Christmas are climbing fast — purple-blue especially, because it flatters warm string lights better than grey or beige ever did. Raw wood suits this shift perfectly. It’s neutral enough to sit against a saturated wall without competing, which is a much harder trick to pull off with a green artificial tree.
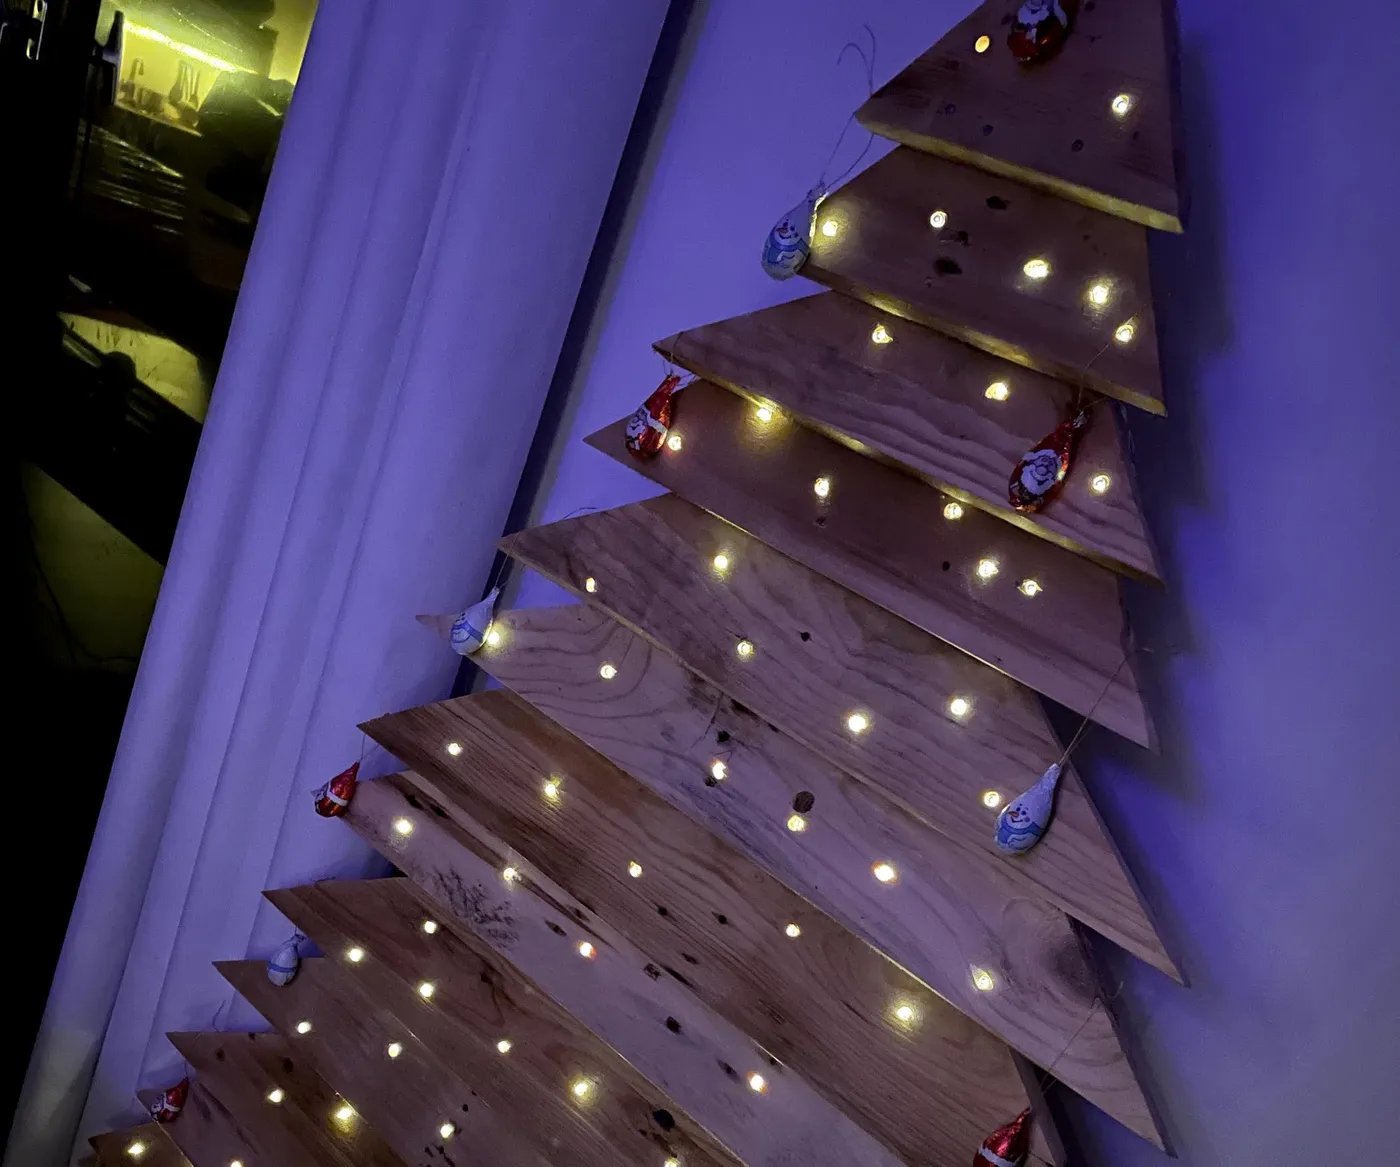
Embed the lights, don’t wrap them. Run the strand along the top edge of each plank and secure it with a small cable staple or a dab of hot glue at the ends only, so the wire sits in a straight line and the bulbs peek over the board. Wrapped lights spiral around the wood and read as a tangle from three feet away. Space bulbs about 4 inches apart — closer than that and you lose the individual pinpoints that make the glow feel handmade.
8. Tabletop Distressed Pallet Tree With Felt Gnomes
- Reclaimed pallet slats (one pallet): free–$15
- Wooden star topper: $5–$14
- Warm white fairy lights, 10 ft: $6–$15
- Felt gnome figures, set of two: $12–$28
- Red ball and silver jingle bell ornaments: $4–$12
- Paint, wood glue, brads: $8–$15
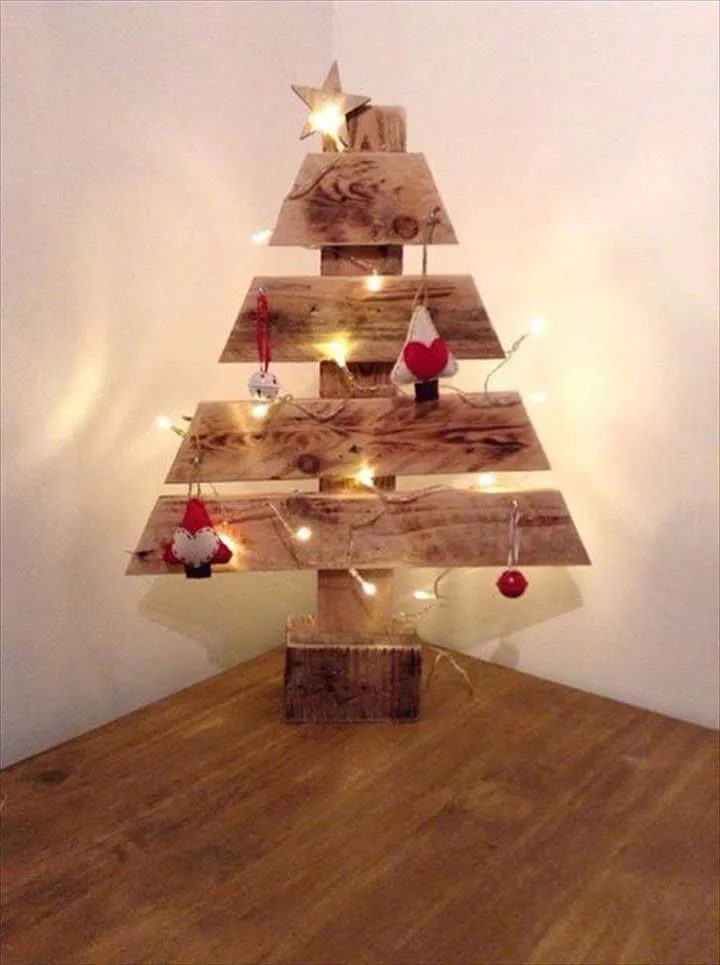
Total: $35 to $89 for a tabletop tree you can build in one afternoon. Skip the gnomes and you’re at $20.
Scale is the whole trick. At roughly 18 inches tall, this is small enough to live on a console or a kitchen counter where a full tree would never fit, yet it keeps the same silhouette — narrowing plank widths, a star up top, light spilling through the gaps. Distressing the paint on the plank edges adds shadow lines that make a genuinely simple object read as far more detailed than it is. Nothing here is precious, which is exactly why it survives a hallway.
9. Weathered Planks With a Gnome and Long Pine Needles
Three finishes on one tree only works if the tones stay in the same family. Natural wood next to crisp white next to blue-grey is fine; add a barn-red board and the whole thing tips into craft-fair territory. Be honest about placement too — this one is styled against siding, which means rain, snow, and fading. Water-based paint on untreated wood will lift within a single season outdoors. Seal it properly, or commit to repainting every fall.
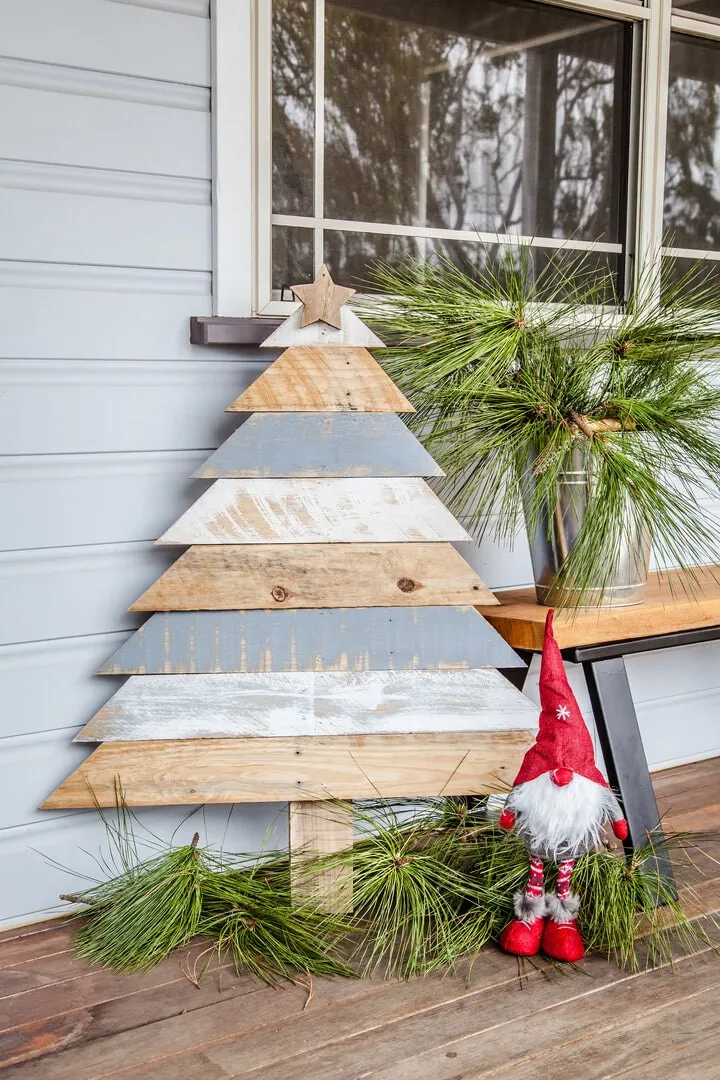
70% weathered neutrals — natural wood, whitewash, and that soft blue-grey — 20% fresh green from the long pine needles, 10% red from the gnome’s hat. The red stays tiny on purpose. One small saturated object against a wall of quiet cool tones reads as charming; three of them read as a theme. Want a warmer version? Swap the blue-grey for oatmeal, change the gnome to cream, and the formula holds without a single other adjustment.
10. Buffalo Check Planks With Wooden Knobs and Polka Dots
The knobs are doing something specific: they’re the only light-value element in a mostly black-and-grey composition, and they repeat at even intervals down the taper. Space them 3 to 4 inches apart on the center line of each plank, and use a 1-inch round wood knob — anything bigger reads as a drawer pull. Paint the knobs a shade lighter than your lightest plank so they stay visible from across the room, which is where this tree actually gets seen.
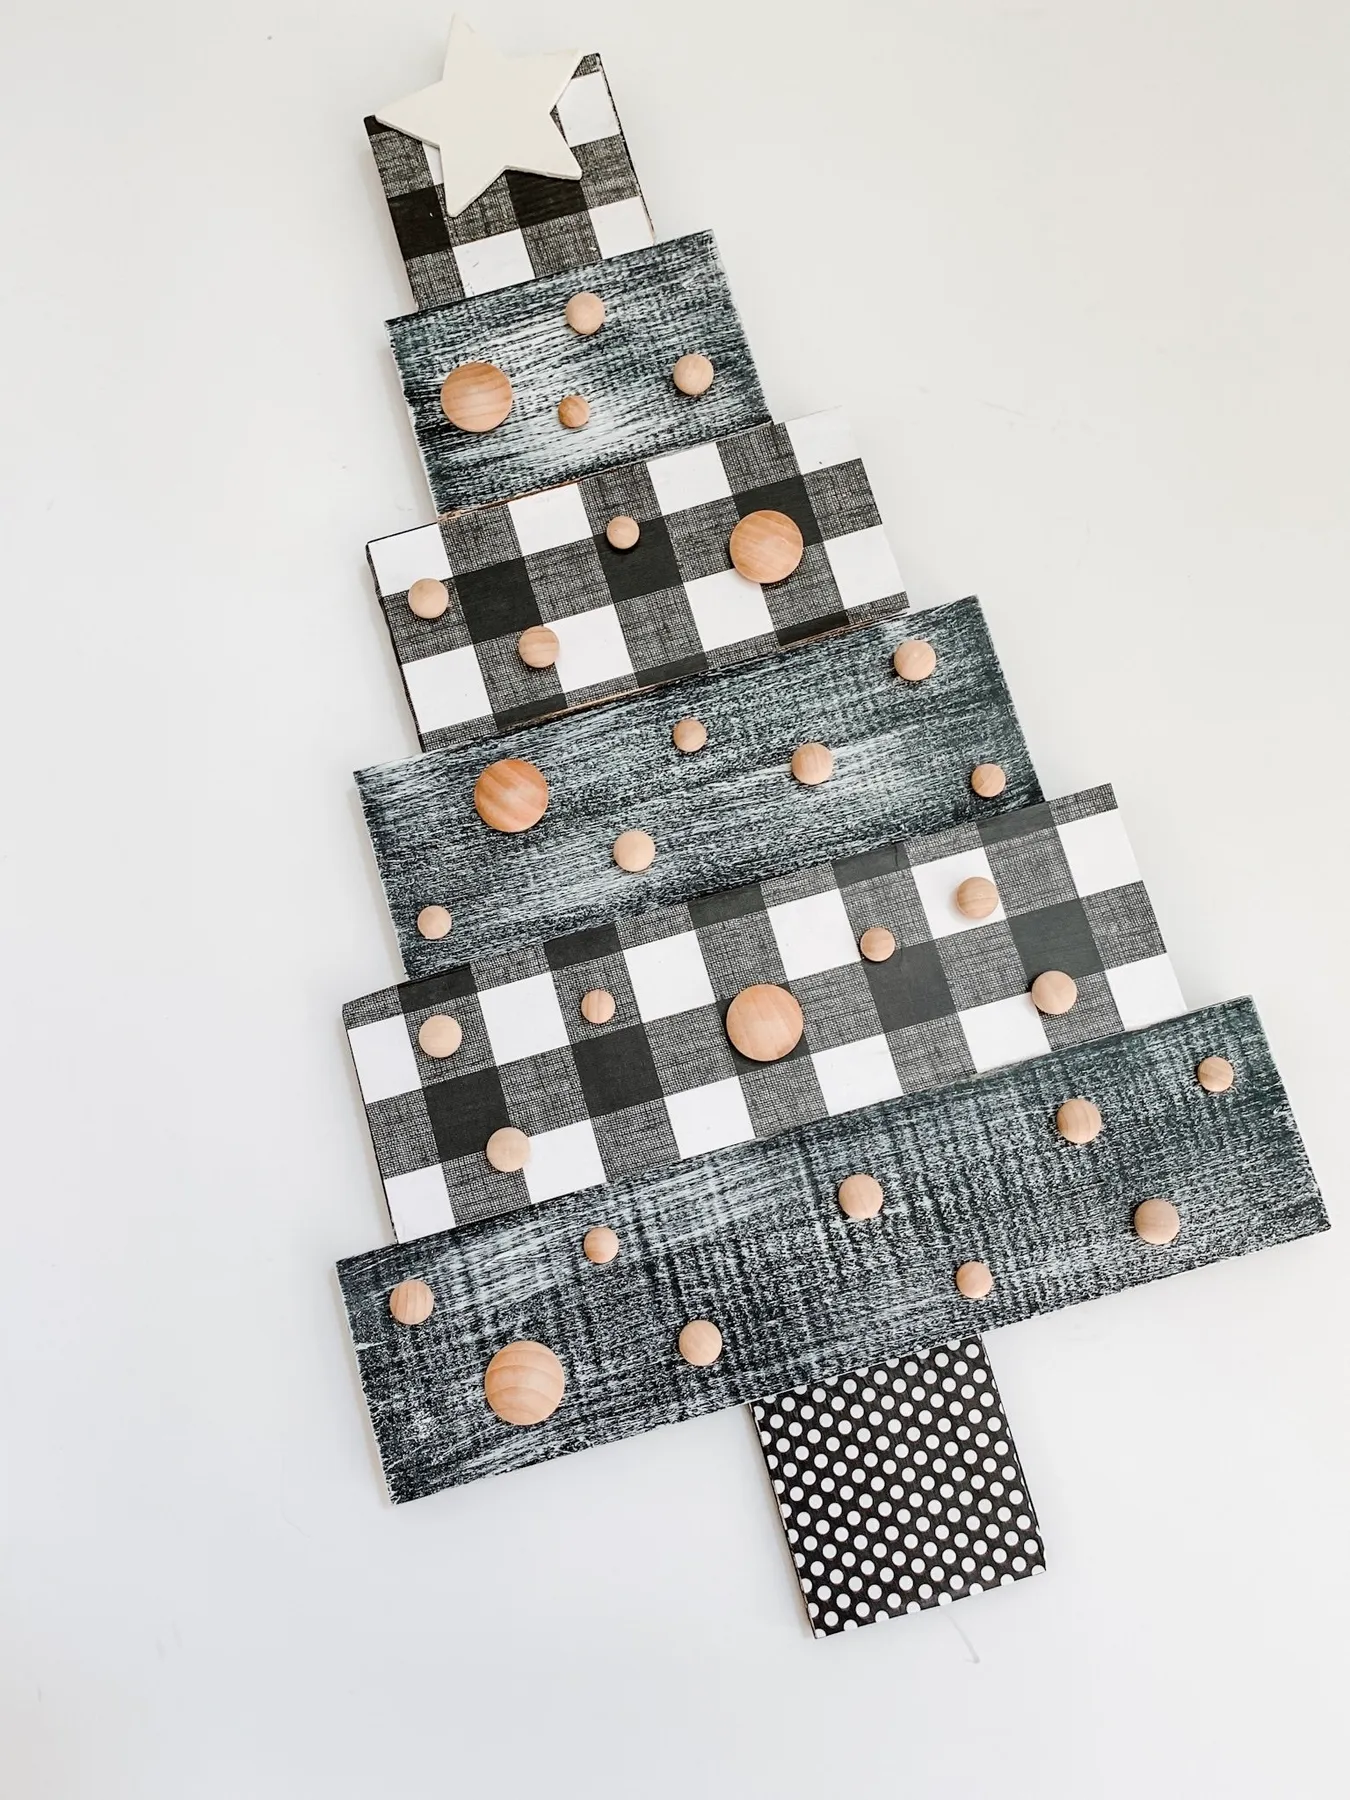
The polka dot trunk. It’s a small, slightly silly detail and it’s the reason this tree has personality instead of just pattern. Buffalo check alone can feel preppy and stiff; a dotted base interrupts it right where your eye lands last. Strip the trunk down to plain wood and you lose the joke that ties everything together — and honestly, the white star up top stops feeling earned without it.
11. Weathered Slats Alternating With Distressed Dark Green
Outdoor pallet trees live or die by proportion to their doorway. A good rule: the tree should be about two-thirds the height of the door or pillar it stands beside. Next to a standard 80-inch door, that’s roughly 50 to 54 inches tall and 30 inches wide at the base. Too small and it disappears into the hardscape; too large and it blocks the entry. On a covered porch, leave 6 inches of clearance behind the slats so air moves through and moisture doesn’t sit.
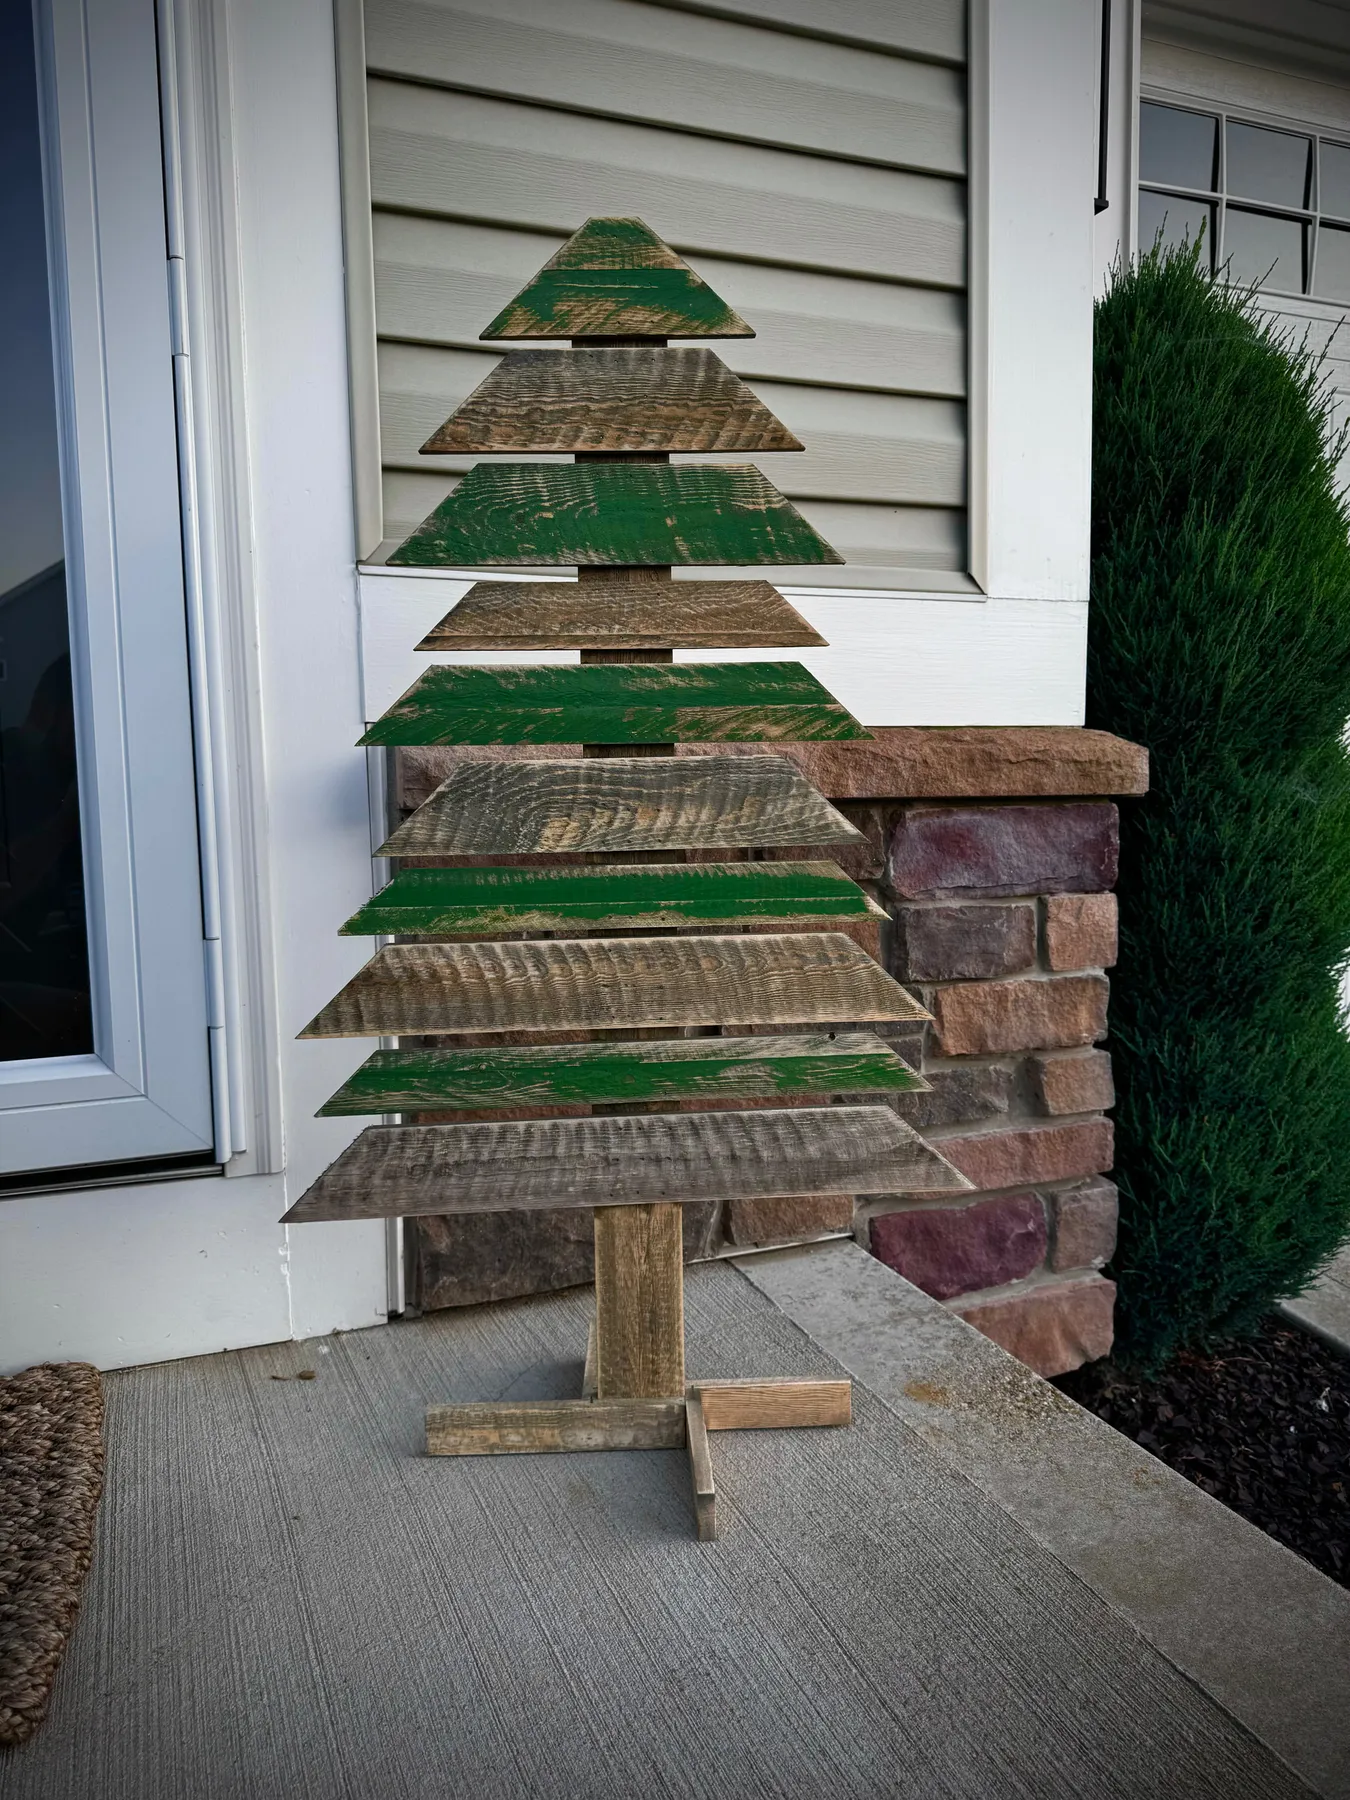
A pallet is free if you ask. Check Facebook Marketplace under free pallets, call a local garden center, or post an ISO in your neighborhood group — most places are glad to hand them over rather than pay disposal fees. Pull the slats with a flat pry bar and hammer the nails out from the back. After that you’re only buying exterior paint ($18–$28 a quart), a star, and lights. Realistically $35 to $60 for a pair, versus $120+ for anything comparable in a store.
12. White Pallet Slats Dressed in Star-Shaped Fairy Lights
- Trim the pallet so the deck boards form a clean triangle — 30 in. at the base, 40 in. tall.
- Scuff-sand the slats, then paint white and wipe the edges back for a worn finish.
- Pry a shallow channel behind each slat to run the light strand so bulbs sit in front.
- Space baubles every 6 inches, mixing sizes so the eye doesn’t row them up.
- Wrap the base with a fabric star and scatter pinecones to hide the cords.
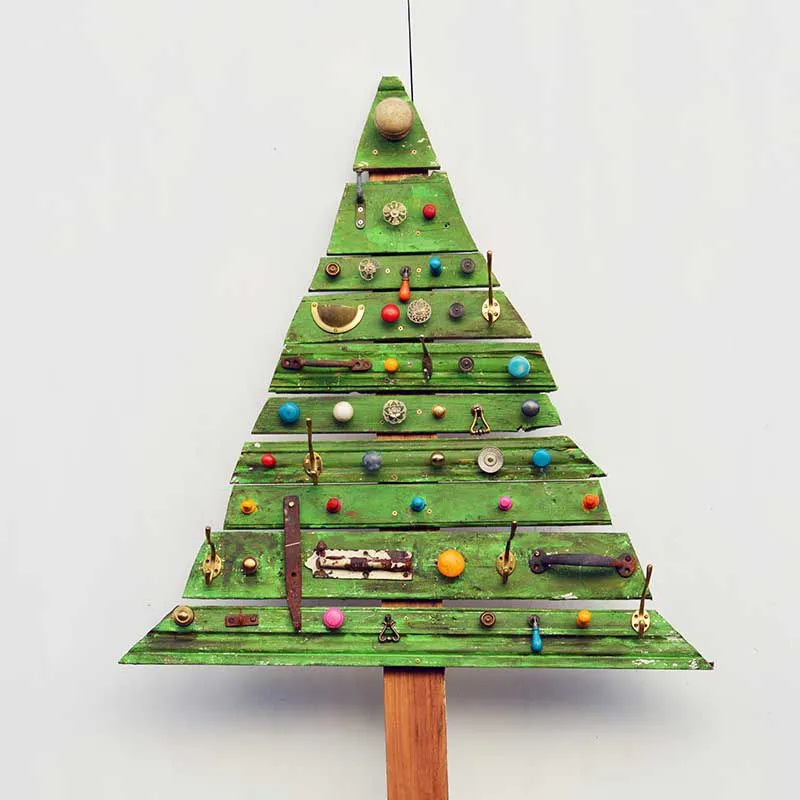
Two hours start to finish, under $30 in materials if the pallet is free.
Multicolored bulbs are back after years of everything-white. The shift started with the vintage C7 nostalgia wave and picked up steam from grandmillennial holiday styling on Pinterest, where warm, mismatched, and slightly imperfect is the entire point. A white pallet tree is the perfect host for it — the neutral base keeps five colors from turning chaotic. Compare with Idea #15, which uses a similar white pallet base and a much tighter color story.
13. DIY Wooden Trees Around a Rustic Outdoor Table
If you’re setting a table outdoors in December, wind will take the glasses and rain will take the wood. Light wood trees left out through a wet winter go grey and, worse, start to check and crack along the end grain. Move them under cover or seal them. And skip the fabric runner unless it’s machine washable — candle wax and red wine don’t come out of linen, and there’s a reason the carafe here sits directly on bare wood.
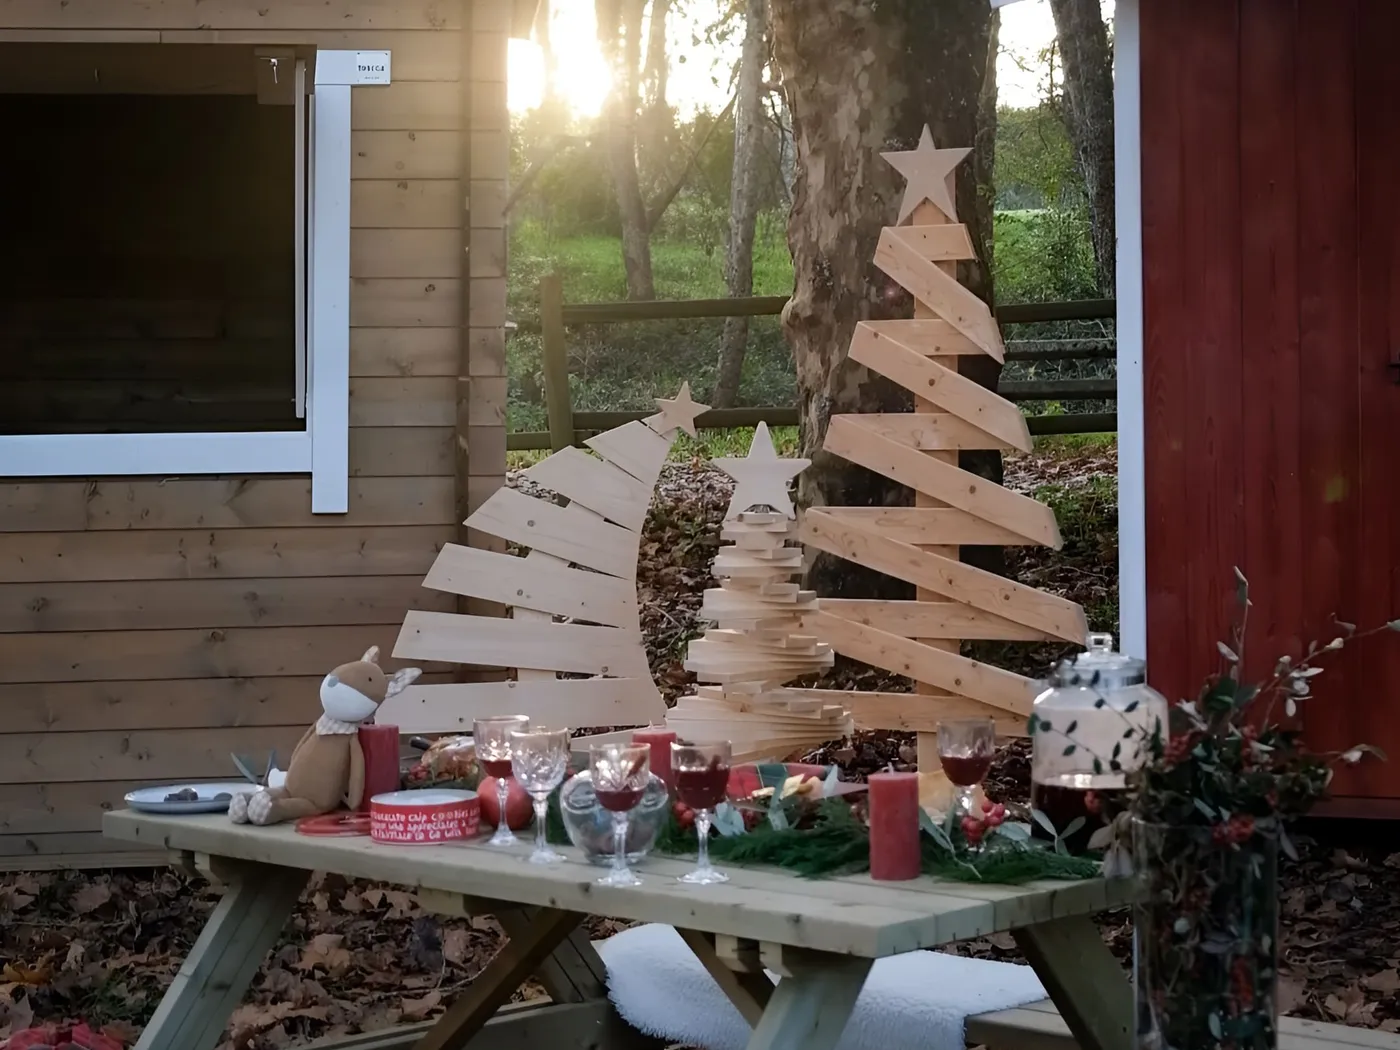
- Three small light wood trees, DIY or bought: $45–$140
- Wooden star toppers: $10–$25
- Red pillar candles, set of three: $12–$30
- Glassware and carafe: $25–$70
- Fresh greenery and eucalyptus: $15–$40
- Plush wooden-animal accent: $12–$30
Total: $119 to $335. Thrift the glassware and you cut a third of that immediately.
14. Rough-Hewn Pallet Tree With Big Multicolor Bulbs
Big C9-size bulbs are heavy, and heavy bulbs pull wire down. On rough plank wood they’ll sag into little U shapes between anchor points unless you secure the strand every 8 to 10 inches. Use outdoor-rated clips, not tape. Check your load too: older incandescent C9s draw real wattage, so don’t daisy-chain more than three or four strings on a single circuit. LEDs cost more up front, run cool, and let you chain as many as you like — which matters a lot on a tree this size.
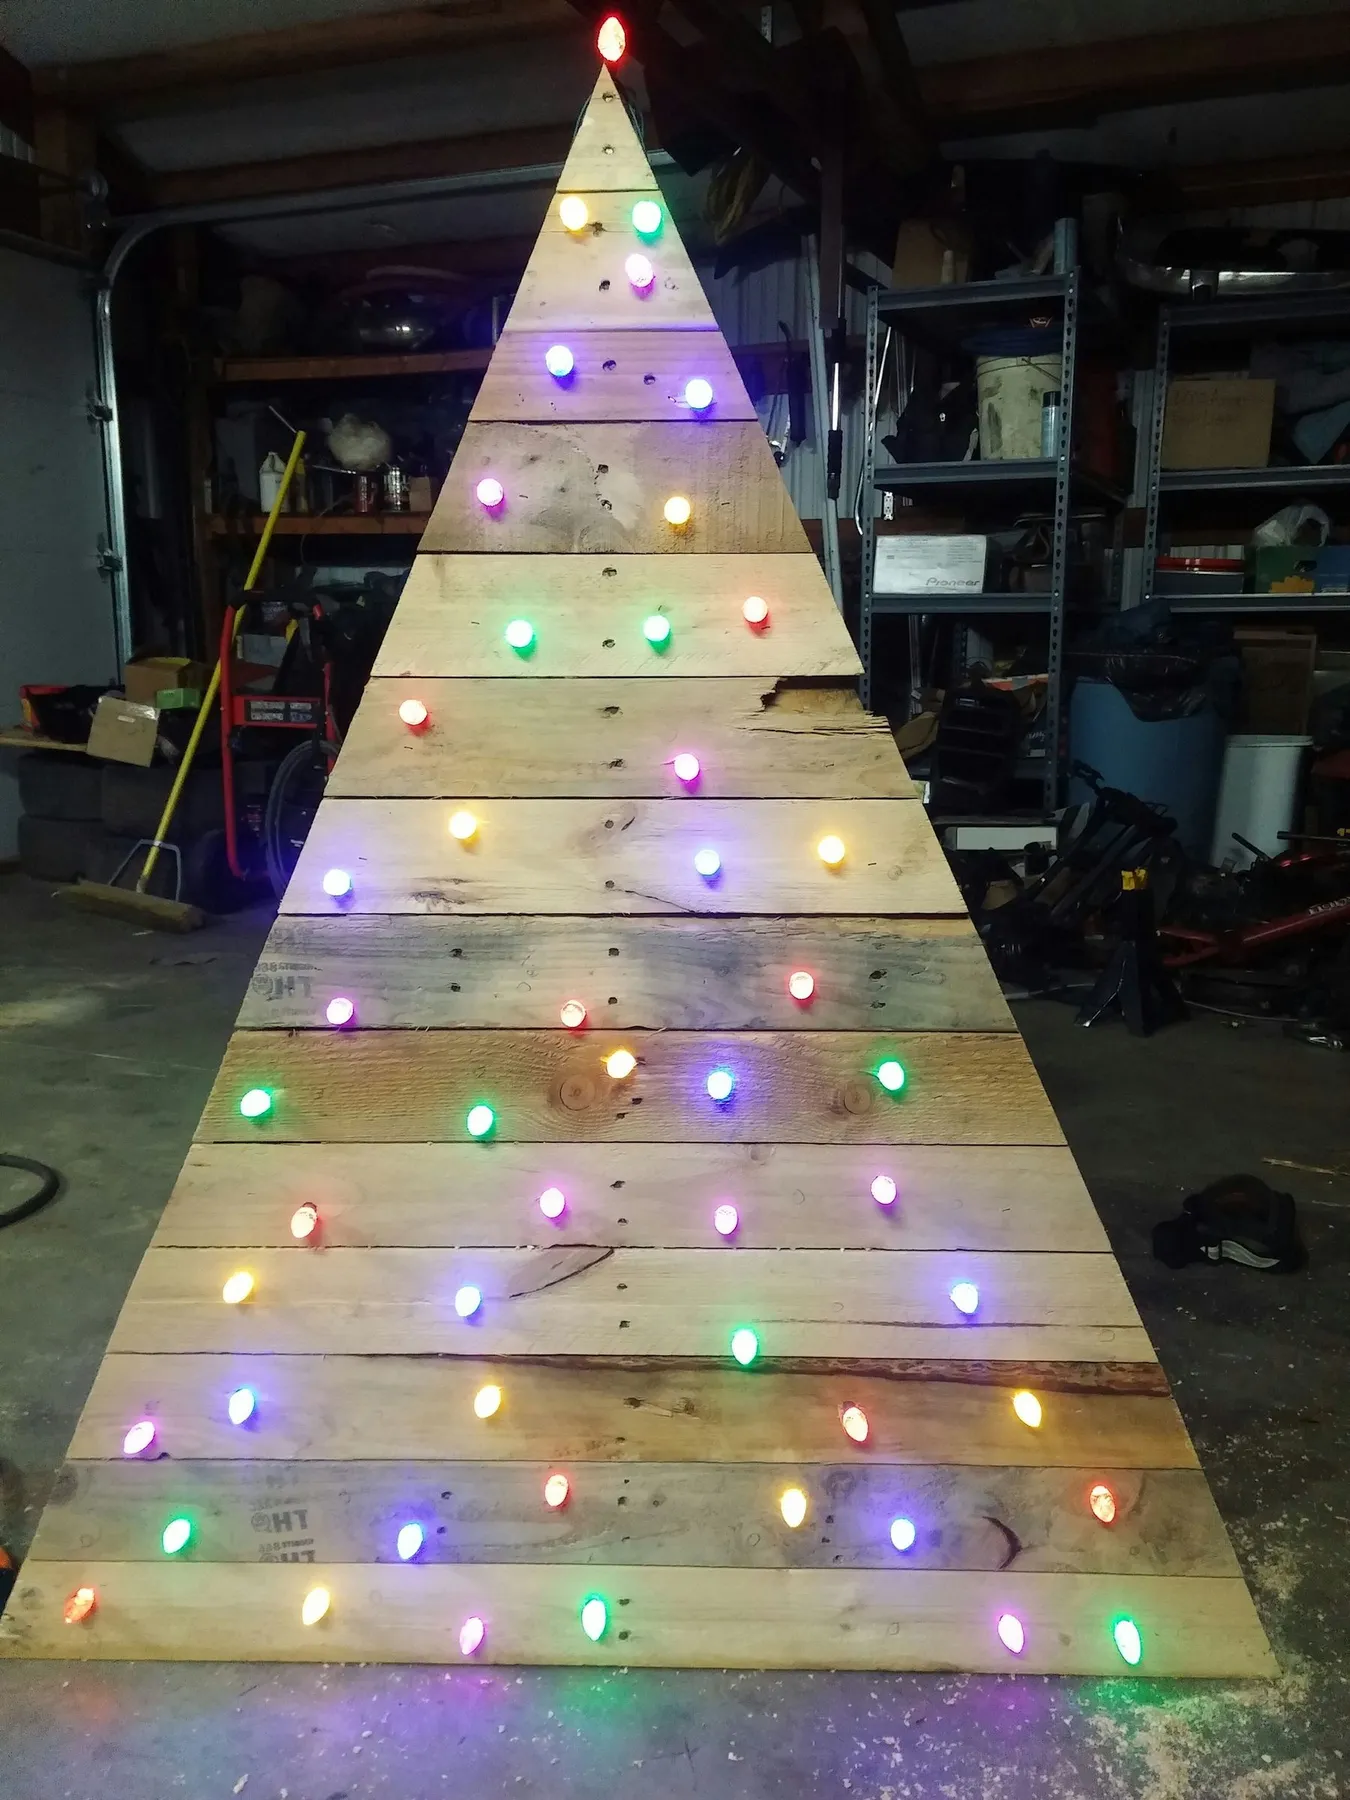
Cut your plank lengths to a real ratio instead of eyeballing them. The classic tree taper is about 1:1.4, base to height. A 4-foot tree wants a 34-inch base plank, then each row steps down roughly 2.5 inches. Even spacing is what separates a homemade tree that looks intentional from one that looks improvised, and it costs nothing but a tape measure and five extra minutes at the saw.
15. Distressed White Pallet With a Gold Glitter Star
80% distressed white, 12% warm white light, 8% color from ornaments and the gold star. That’s an unusually high neutral ratio, and it’s why this reads calm even though there are ornaments all over it. The gold star is the only metallic in the composition, which gives it far more visual weight than its size deserves. Flip to 50% white and 50% color and you have a folk-art tree instead — same shape, completely different mood, same afternoon of work.
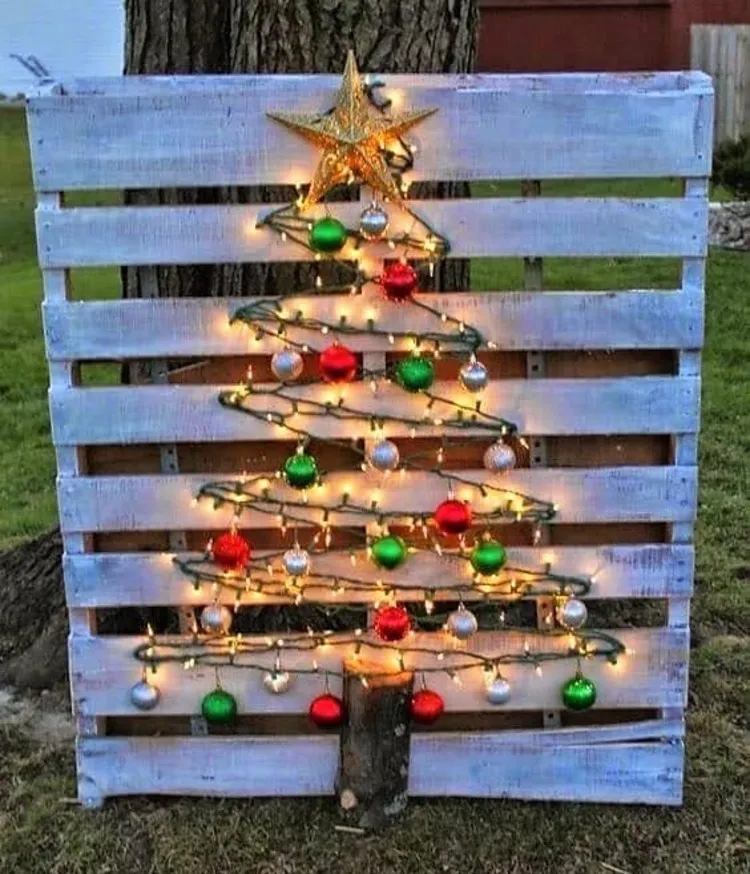
A flat pallet tree leans against a wall, which means the bottom slats collect whatever the floor collects. Vacuum the gaps monthly or you’ll see dust lines bloom in the bare wood by spring. Distressed white paint also yellows in direct sun, so keep it off a west-facing sill. Storage matters more than cleaning: wrap it in a cotton sheet, not plastic, so trapped humidity doesn’t turn into mildew in a hot garage over the summer.
16. Three Raw Pallet Trees With Visible Nail Heads
This is the cheapest project in the whole list, and it should be — raw wood, no paint, no garland. One pallet yields enough slats for two or three trees. Add a $6 can of exterior-grade clear sealer and a $10 star cutout from a craft store, and you’re done. If you don’t want to pry a pallet apart at all, Walmart and Menards both sell pre-cut craft wood packs for under $15. Total for the trio: $20 to $45, depending on what you already own.
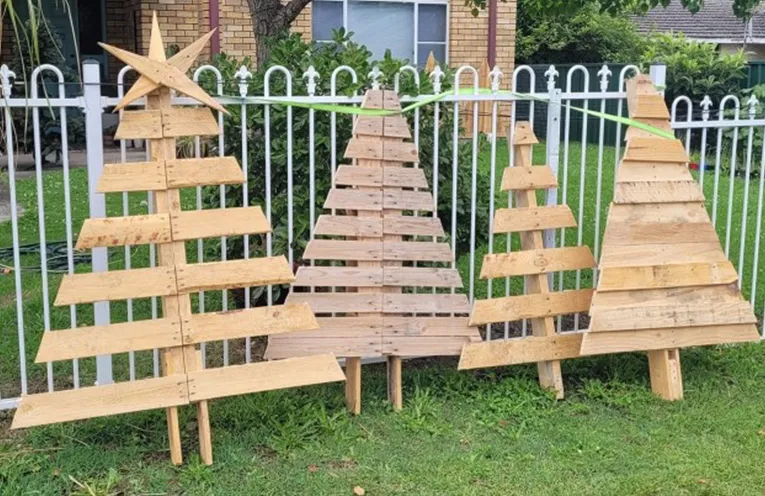
Lawn trees want to be bigger than you think. At 6 feet away, a 3-foot tree looks like a garden ornament. Aim for 4 to 5 feet tall with a base around 32 inches, and cluster three at staggered heights — tallest in front, smallest behind — so they read as a group from the street. If your lawn is small or your porch narrow, the stepped cutout versions in Idea #30 solve the same problem in a much thinner footprint.
17. Snowy Porch Trio in Distressed White Wood
The lit wreath on the door. Three lit trees alone would make a bright cluster with nothing above it, and the porch would feel lit but not decorated. The wreath gives the composition a top and gives your eye somewhere to land before it drops to the trees below. It also ties the trio to the house itself rather than letting them float as standalone objects — the same reason these trees sit close to the door frame instead of out at the steps.
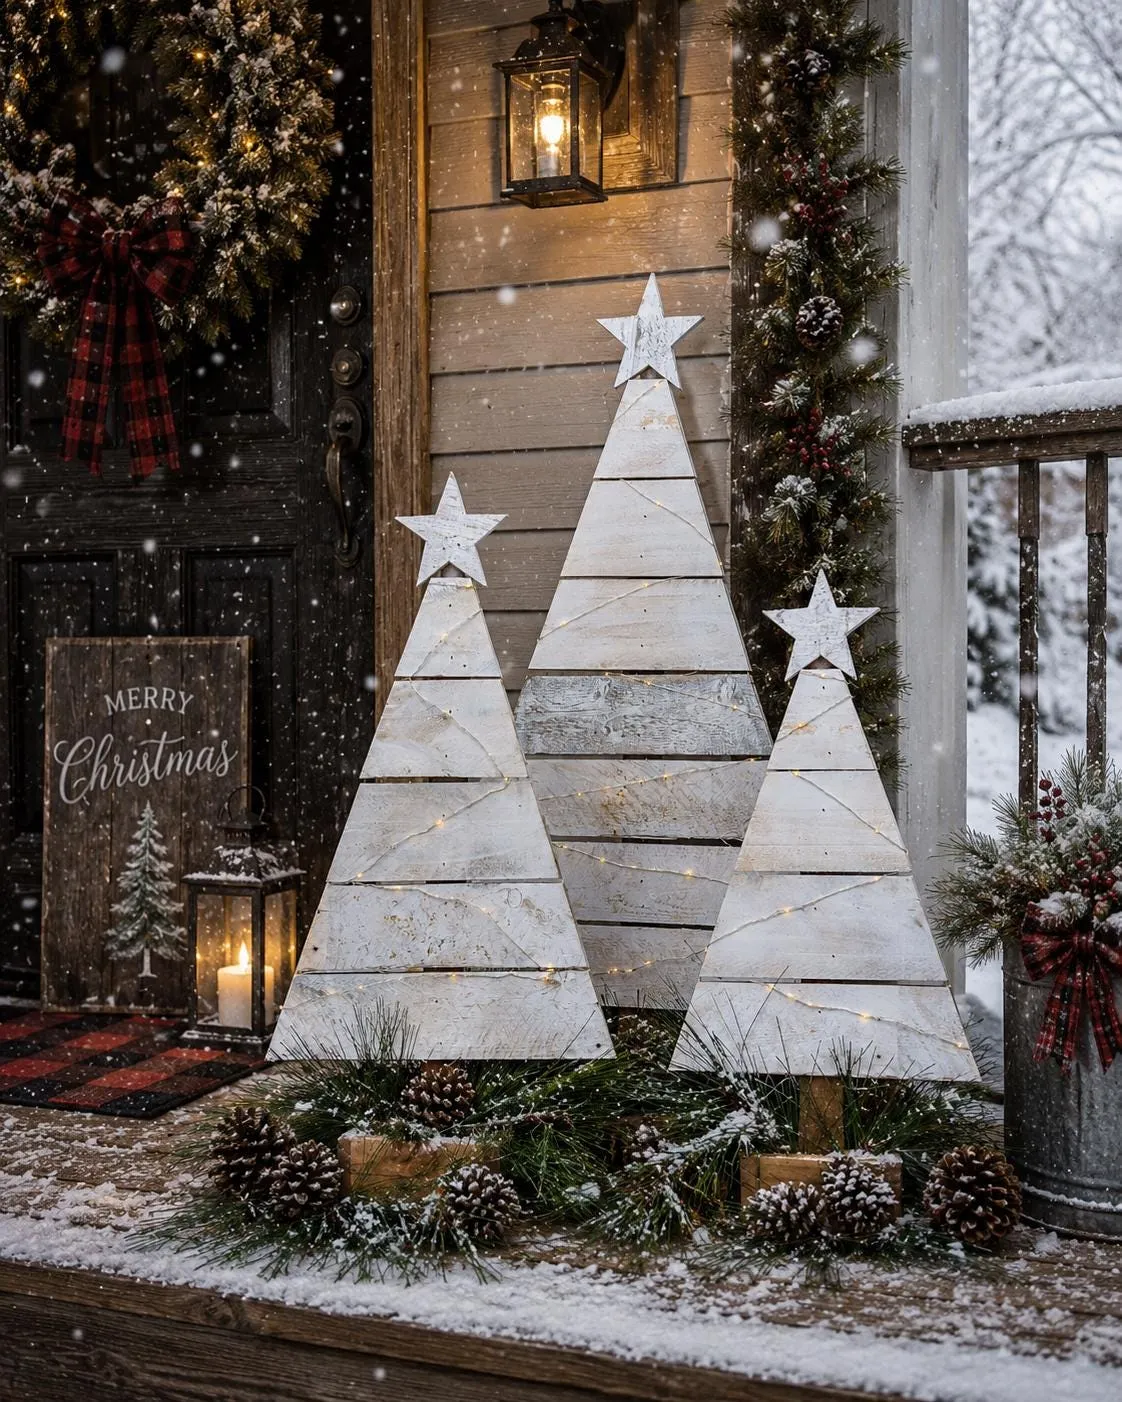
- Space the three trees 10 to 14 inches apart, tallest nearest the door.
- Run one continuous outdoor-rated strand from the door outlet behind all three.
- Secure lights to the plank tops with clear outdoor clips, never staples.
- Tuck pine boughs and pinecones at each base to hide cords and snowmelt stains.
- Add one plaid ribbon per tree at the same height for a repeated rhythm.
About 90 minutes of setup, roughly $60 if you already own the trees.
18. Wall-Mounted Dark Slat Tree Dripping in Gold
Hang heavier ornaments low and lighter ones high. Metal and glass at the bottom keep the tree visually anchored where the wood is widest, and small stars near the top stop the taper from looking cluttered. On a wall-mounted tree there’s a second rule: keep the whole thing within 2 inches of the wall. Anything that protrudes further catches side light and throws odd shadows across the planks in the evening.
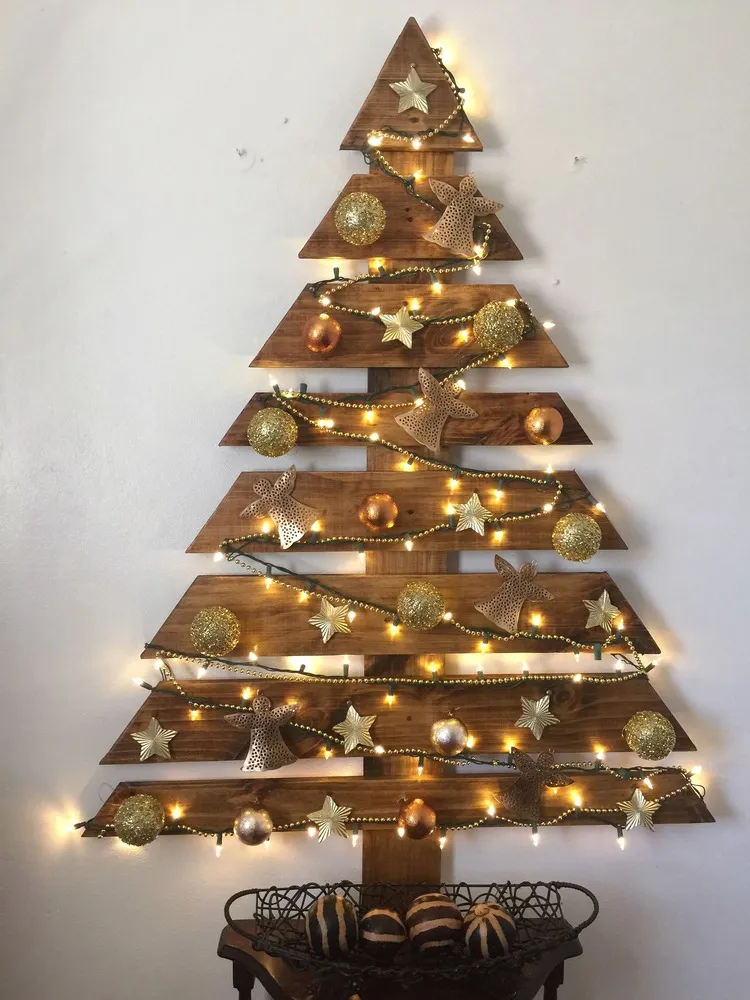
Wall-mounted trees keep growing because of square footage, not aesthetics. Renters in small apartments and anyone with a toddler or a determined dog can’t easily do a floor tree, and a flat tree solves that without looking like a compromise. Expect more of them in 2026 with heavier ornament loading, because people who go flat stop pretending and start decorating the surface like a gallery wall.
19. Light Wood Spiral Tree Against a Dark Paneled Wall
The dark wall is doing more for this tree than any ornament could. Warm light against a dark, low-reflectance surface makes the glow read about a stop brighter than it actually is — the same trick a black backdrop plays in a photograph. The light wood and the dark patterned floor also create a clean value split at the bottom, which grounds a shape that would otherwise look like it’s floating. Take the dark wall away and this exact tree goes flat.
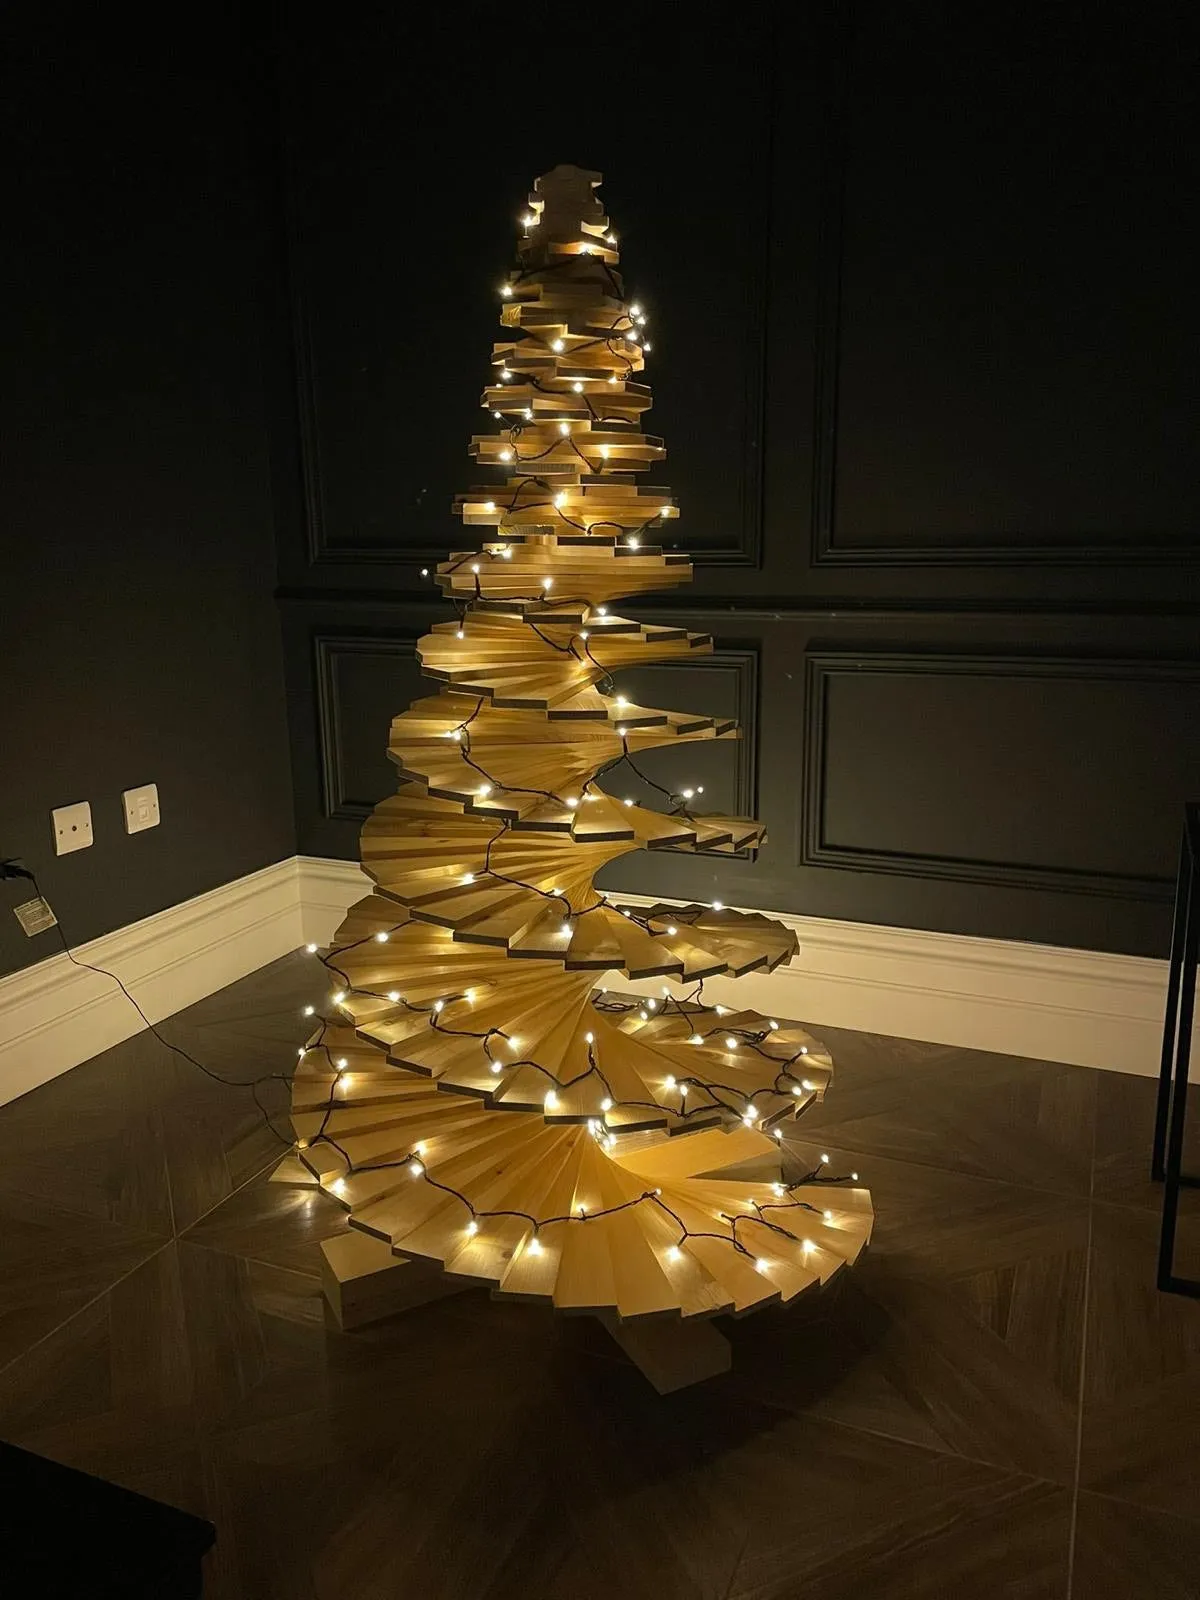
55% light natural wood, 30% dark wall and floor, 15% warm white light. That’s a two-tone formula with one glow accent — simple, and easy to move around the house. Put the same tree against a cream wall and you’ll need to add a dark rug or a charcoal console to keep the contrast alive. The lights aren’t decoration in this composition. They’re the only thing separating wood from wood.
20. Tiered Light Planks With Felt Elves and Candy Canes
- Measure your display surface — a tiered tree this size wants a 24-inch-deep table or a 30 by 30 inch floor footprint.
- Count your outlets and batteries. Several short strands beat one long one, but each needs power.
- Pick your ornament story now: felt, wood, or glass. Mixing all three is what makes these look cluttered.
- Check the weight of the top tier — stacked decor up high needs a wider base plank than you’d guess.
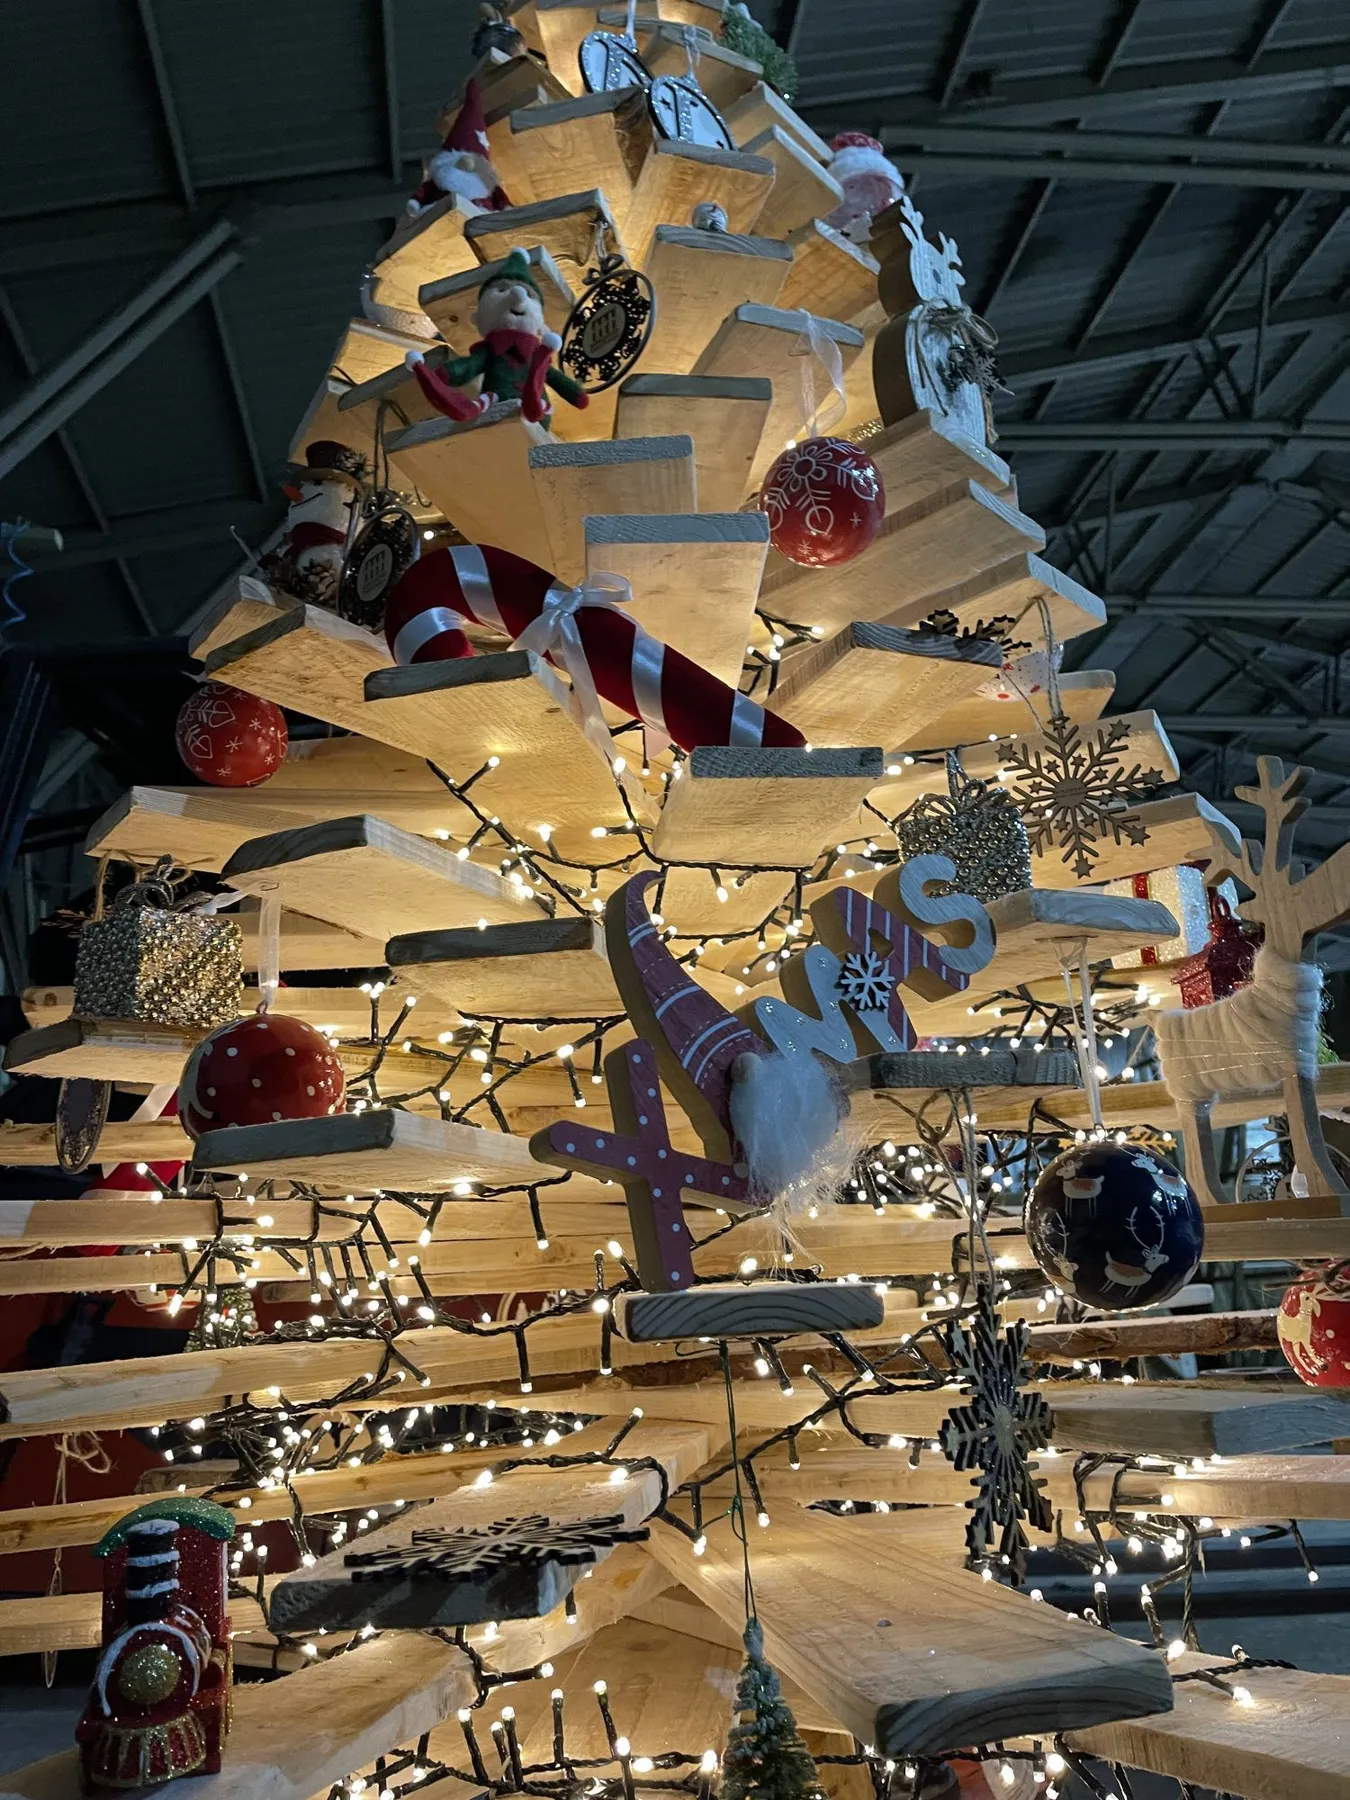
- Pallet slats, cut and sanded: free–$20
- Warm white mini lights, two strands: $10–$24
- Felt elf and gnome figures: $14–$32
- Wooden snowflake and reindeer cutouts: $8–$18
- Assorted baubles: $10–$25
- Wood glue, brads, polycrylic: $10–$18
Total: $52 to $137. A store version of this exists at $300+, and it won’t have your grandmother’s candy cane on it.
21. Distressed Green Chevron Tree on a Concrete Step
Chevron angles look great in a photo and brutal in reality if you cut them freehand. Each side of the V needs to be identical in length and mirrored exactly, or the whole tree leans like it’s had a long day. Make one template from cardboard, trace it onto every slat, and cut them all at once with a stop block on your miter saw. Exterior paint on cut ends also needs sealing — chevron planks expose a lot of end grain, and that’s exactly where water gets in.
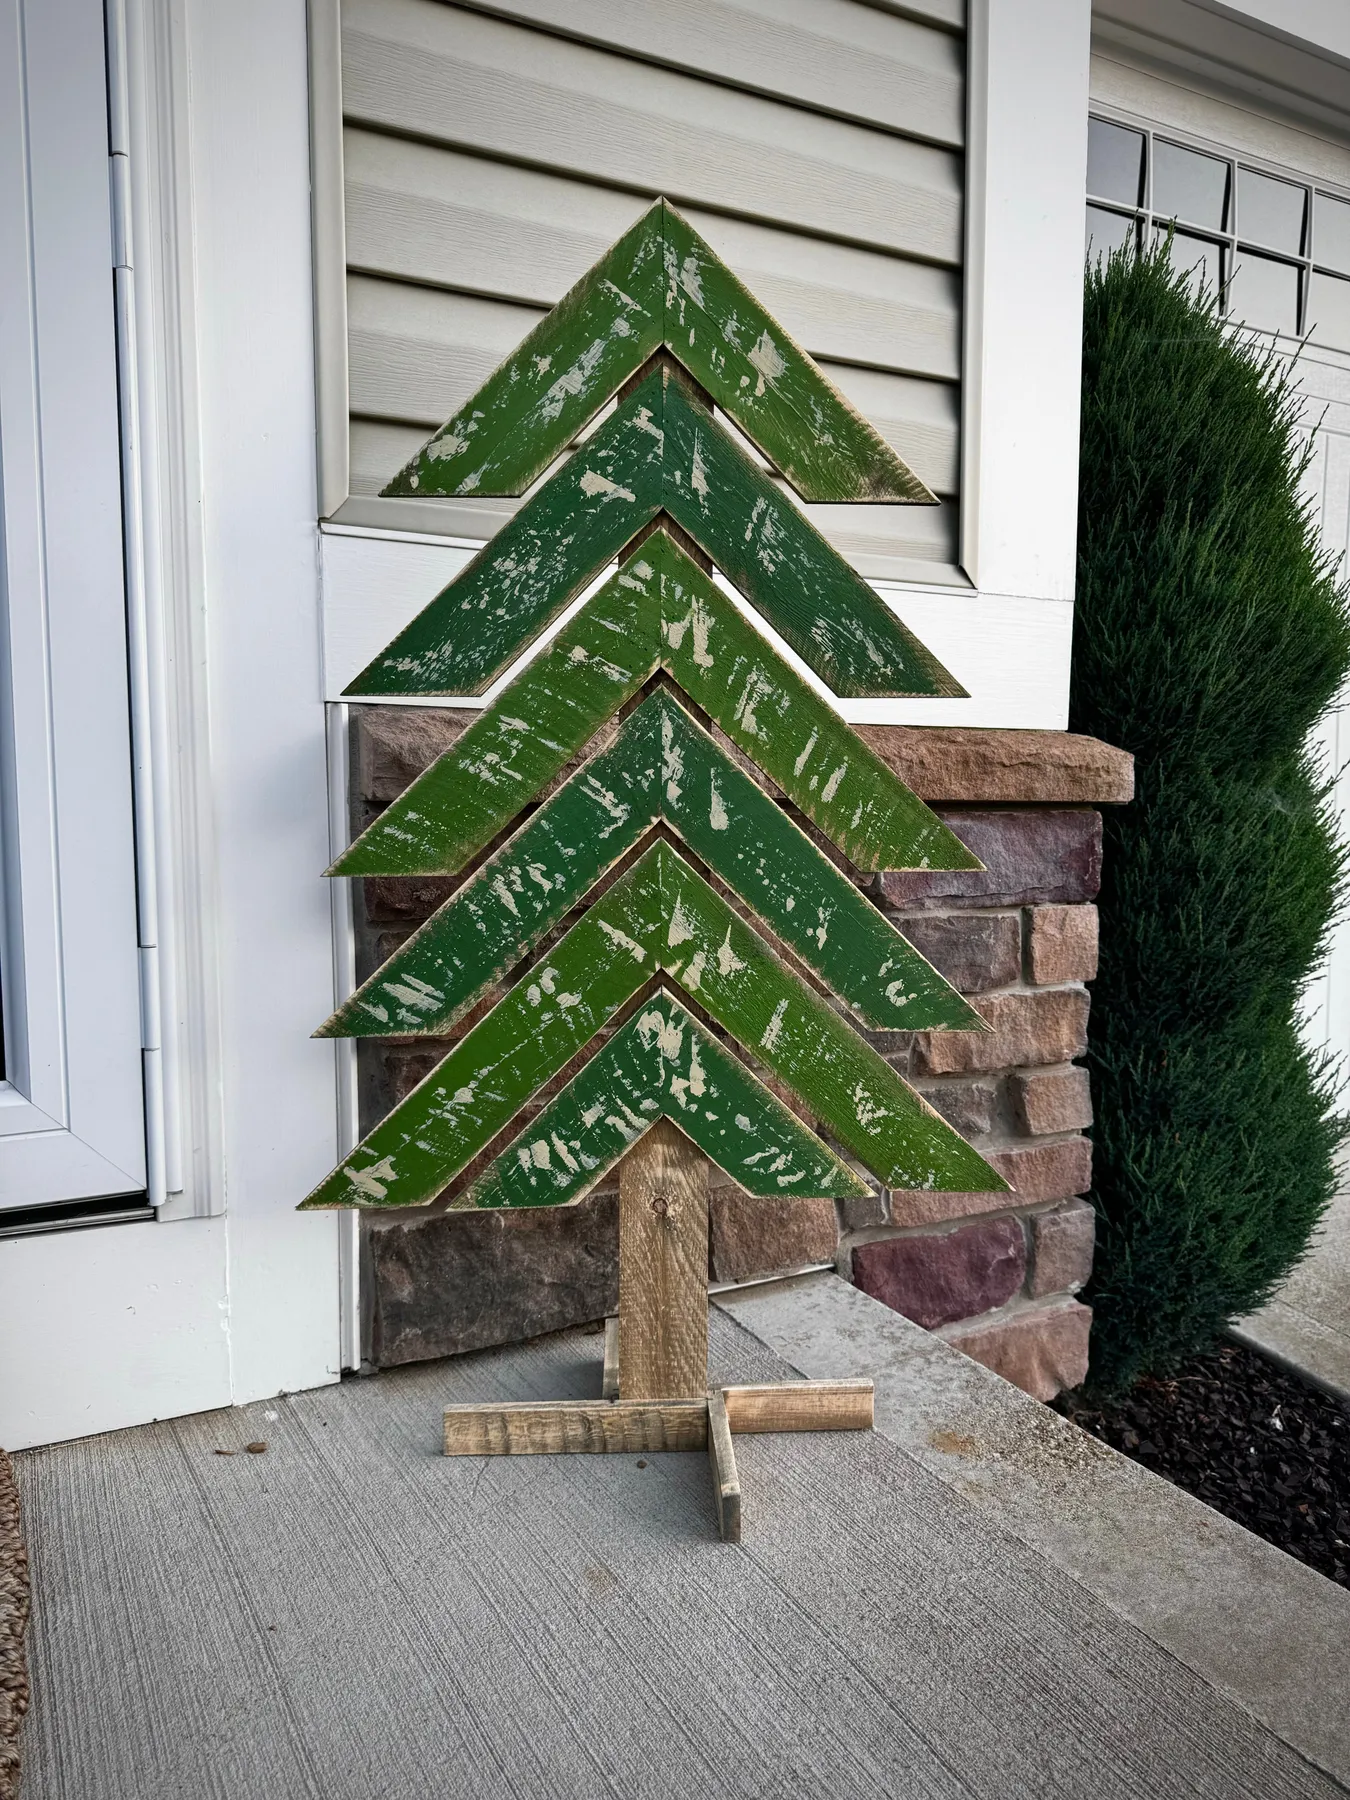
The visible trunk and cross base. Without them, this is a stack of green boards. With them, it’s a tree that grew a trunk, and the cross base reads as a planter stand. That one move takes the piece from wall decor to something that can stand on a porch step on its own — which is why it doesn’t need to lean on anything. It costs one extra board and about ten minutes of work.
22. Three Mini Trees Tucked in a Round Wood Tray
Set the tallest tree at the back left of the tray and angle it about 15 degrees. Straight-on rows of similar objects look like inventory; a slight rotation creates overlapping triangles, which reads as depth on a tabletop. Group the ornaments in odd numbers — three and five, never four — and let one ornament rest on the tray floor rather than on a tree. That single loose object is what keeps a vignette from feeling arranged by someone with a tape measure.
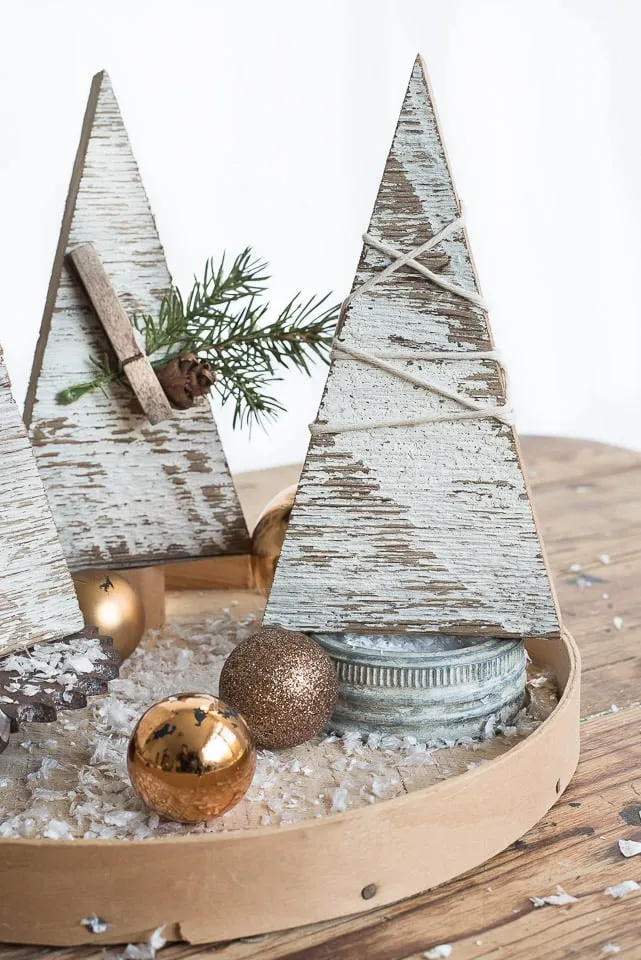
Dollar Tree carries small unfinished wood trees in packs, and a bag of faux snow is about $1.25. Gold and bronze ornaments come from thrift stores year-round for a quarter apiece — people unload Christmas decor in January and again in July. The round wood tray is the one piece worth buying new ($12–$25 at Target), because a flimsy tray won’t hold weight evenly across its base. Realistic total: $18 to $30, versus $85 for a styled set.
23. Whitewashed Vertical Boards With a Beaded Garland
- Cut five to seven vertical boards to graduated heights, then whitewash with diluted paint.
- Lay them face down on a flat surface and screw two cross braces across the back.
- Mark the tree triangle lightly in chalk — base width should be about 70% of the height.
- Staple the light strand along the chalk line, then wipe the chalk away with a damp cloth.
- Drape the beaded garland in a loose S, not a straight line, and hang ornaments off it.
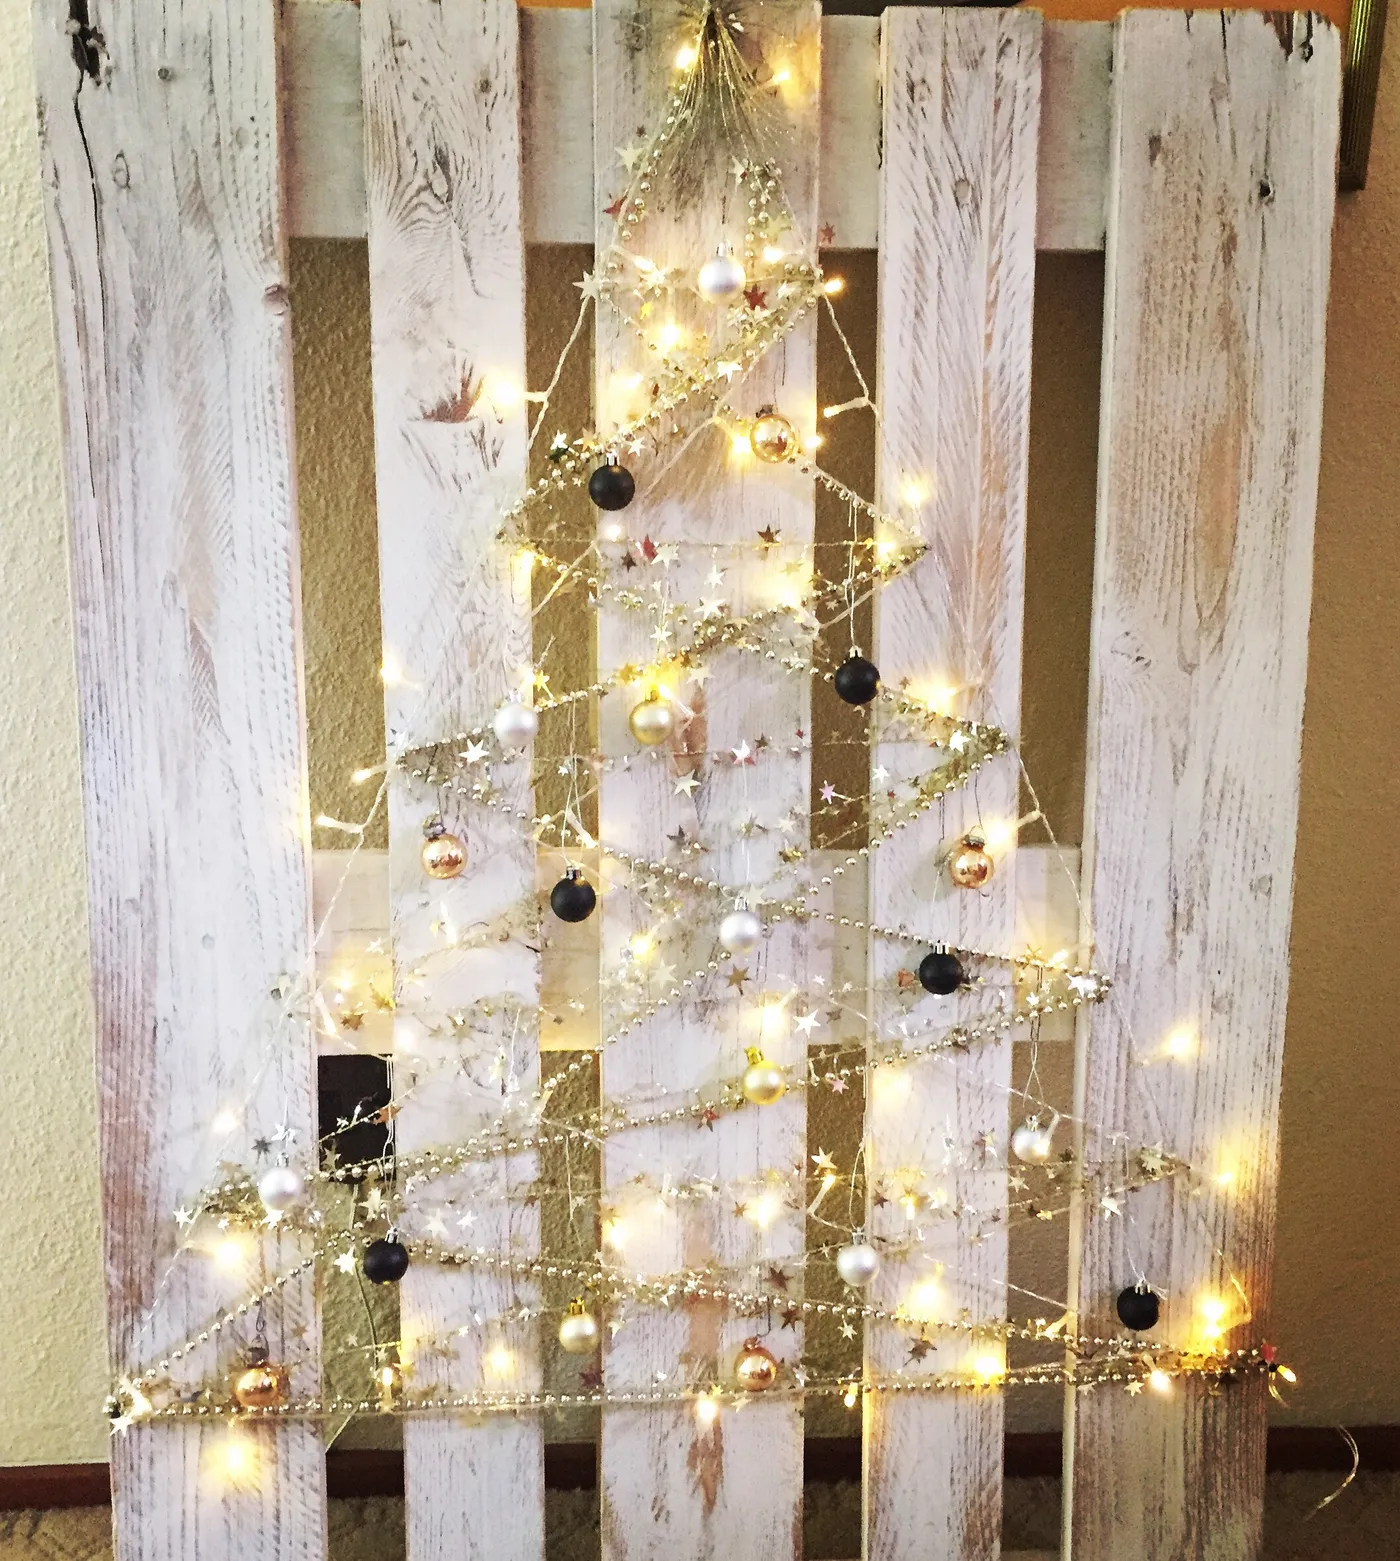
Half a day, about $45 in materials, and no two will ever come out the same.
Flat trees have a height ceiling that floor trees don’t. Past about 5 feet, a vertical-plank tree gets top-heavy and the cross braces start showing through the gaps whenever light hits from the side. Keep this build between 36 and 54 inches and lean it or mount it. If you want real floor-tree presence, a stacked spiral scales up far more gracefully — see Idea #19 for that approach.
24. Pallet Tree Outlined in Lime Green With Pom-Poms
Pom-poms on a pallet is peak 2026 holiday DIY — soft, colorful, and nearly impossible to break. It traces back to the kid-friendly Christmas search wave and the wider move away from fragile glass everything, especially in homes with toddlers, cats, and enthusiastic dogs. Painting an outline instead of a solid tree shape is the tell that this was made by someone with a few seasons behind them. Expect the look to stick around: it’s cheap, repairable, and nothing about it dates.
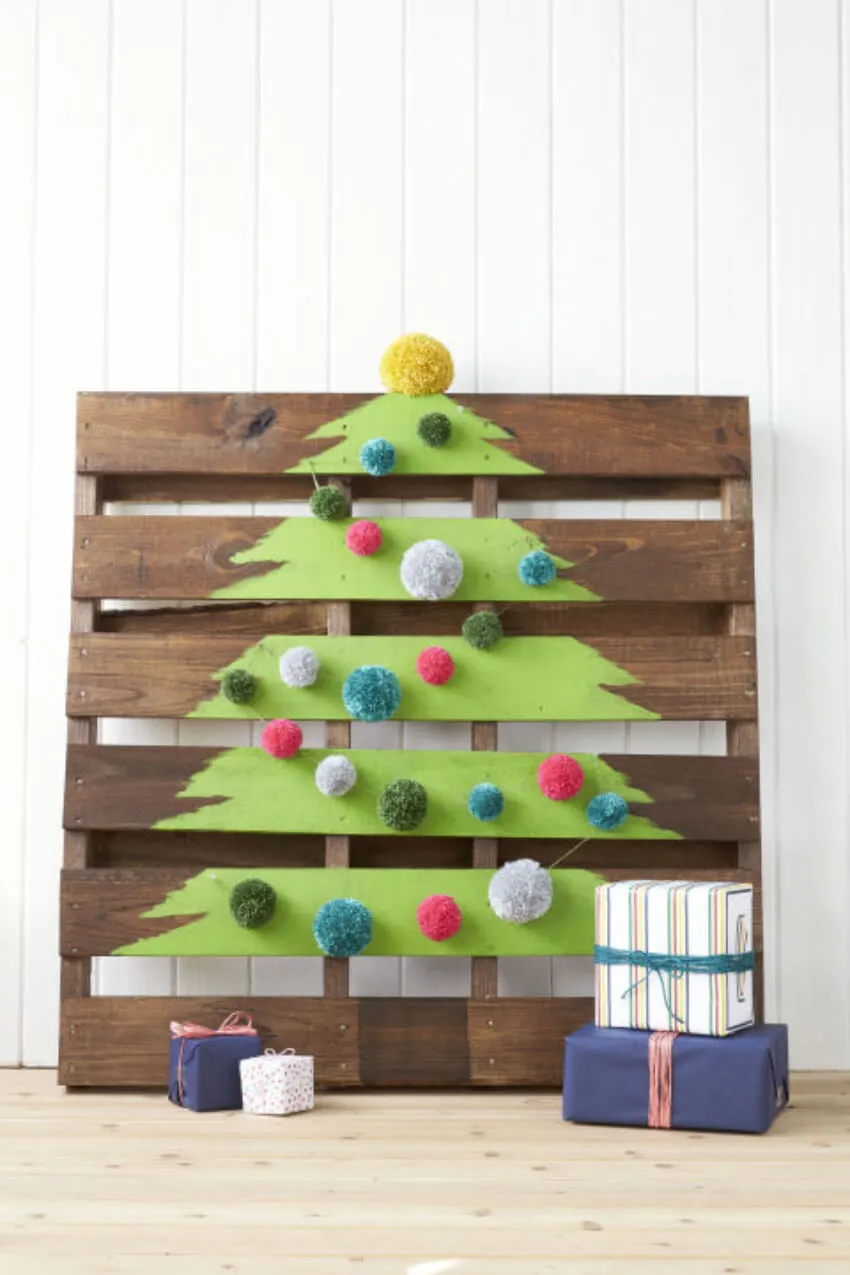
Pom-poms collect pet hair like a lint roller, and hot glue fails in warm rooms — a few will drop every season. Keep a glue gun and a bag of spare poms in the decoration bin. Gifts at the base are charming until a toddler decides they’re for opening; if that’s your house, use wrapped empty boxes or tuck them behind the pallet. Wipe the painted outline with a dry cloth only — anything damp will lift the green at the edges.
25. Mint Green Tree Painted Straight Onto a Pallet
65% dark rustic wood, 25% mint green paint, 10% scattered color from the ornaments. Mint is a cool color sitting on a warm brown base, and that slight temperature tension is what keeps this piece interesting — a pure white tree painted on the same pallet would look flatter and far safer. If mint isn’t your palette, swap to sage for a more muted read or soft coral for warmth, and keep the coverage at roughly a quarter of the surface. The ratio is doing the heavy lifting.
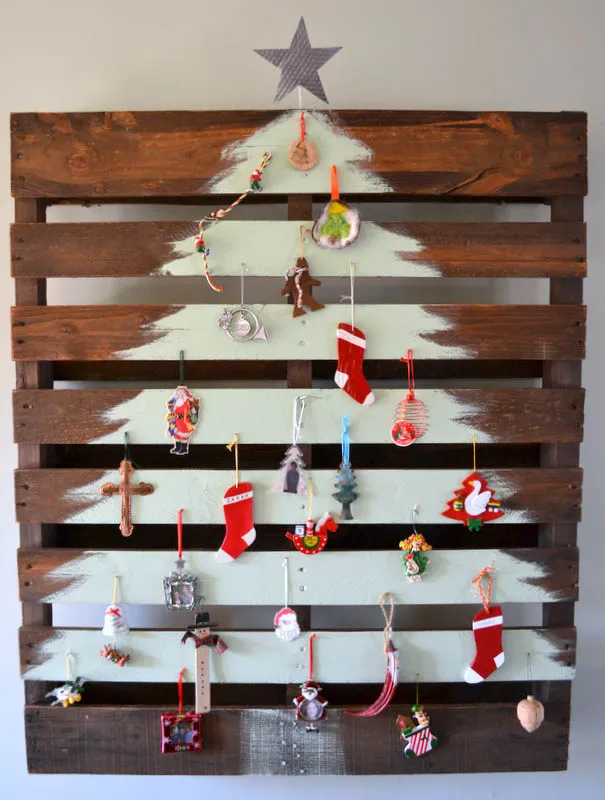
Repetition with variation. The same small brass hook repeats across the painted shape at even intervals, but every ornament hanging from it is different — size, shape, color, subject. That combination reads as abundance rather than clutter, and it makes the tree endlessly editable. Find a better ornament in July? Swap it in. Almost no other piece of holiday decor gives you that much room to change your mind over the years.
26. White Painted Pallet Tree With Red Bows and Gifts
- Pallet, reclaimed: free–$15
- White exterior paint, one quart: $14–$24
- Red bows, box of twelve: $6–$12
- Red and gold ornaments, 20-piece set: $18–$40
- Red star topper: $5–$15
- String lights, 20 ft: $8–$18
- Wrapping paper and ribbon: $10–$20
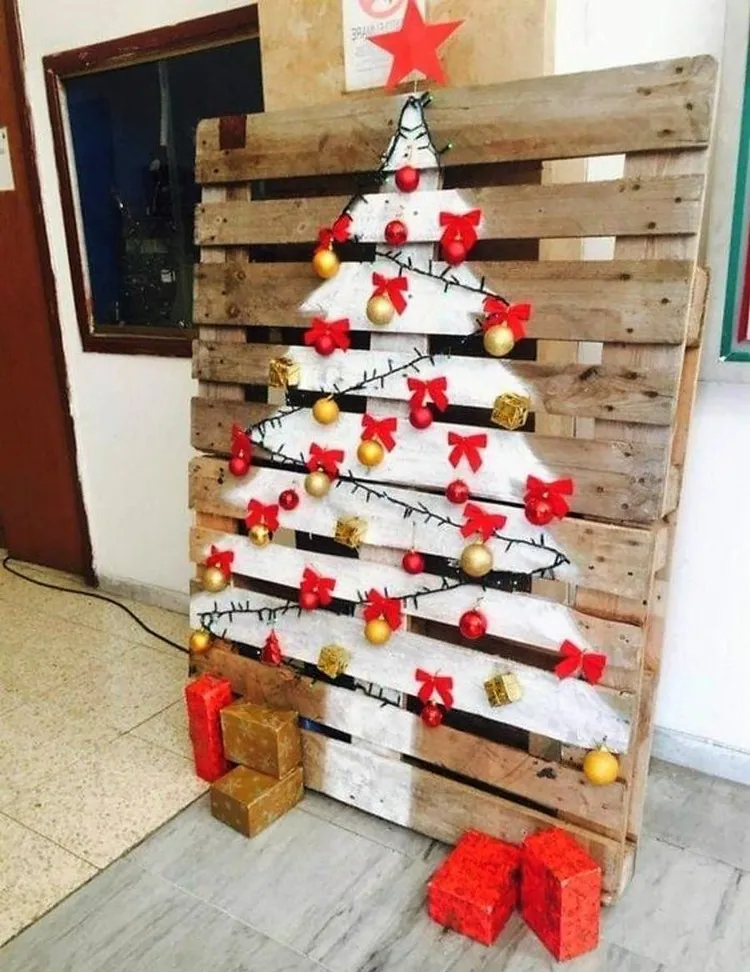
Total: $61 to $144. Buying ornaments right after Christmas drops that by half — easily the single best money move on this list.
Paint the tree shape, then let it dry a full 24 hours before hanging anything on it. Latex on raw pallet wood stays soft for a surprisingly long time, and ornaments hung early will smudge the edges you just crisped up. Keep bows at a consistent height too — about two-thirds down each row — and choose flat 3-inch bows rather than poufy 5-inch ones. Oversized bows on a pallet this rustic push the piece from charming straight into cartoonish.
27. Minimalist Slat Tree Between Blue and Grey Seating
The light blue sofa. A light wood slat tree on its own is pleasant but generic. Set between a soft blue couch and a grey armchair, it becomes the neutral in a color conversation instead of the star of the room — and that’s much harder to pull off than it looks. The wood and the blue share the same muted value, so nothing shouts, and the white walls hold the whole thing together. Take the blue away and you have a nice tree in a beige room.
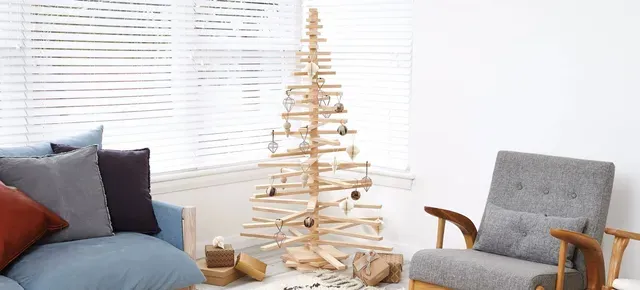
Slat trees have gaps, and gaps show everything: cords, wall scuffs, whatever is behind them. If you’re placing one in front of a window with blinds, know that daylight will silhouette every edge. It looks intentional and airy in photos; in person it can read as unfinished if the wall behind is scuffed or the paint is patchy. Fix it with a fresh coat of flat white on that wall, or move the tree to a solid surface.
28. Three Painted Slat Trees Set on the Lawn
Paint is the entire budget here. A quart each of red, green, and white exterior paint runs about $60 total, and you’ll use maybe a third of each — buy sample pots for $5 to $8 instead and you’re at $18. Slats come free from two pallets. Lights, bows, and tinsel are about $25 at Walmart or Dollar Tree. That puts all three trees under $50, compared with $150 to $400 for comparable outdoor decor sets at big-box stores.
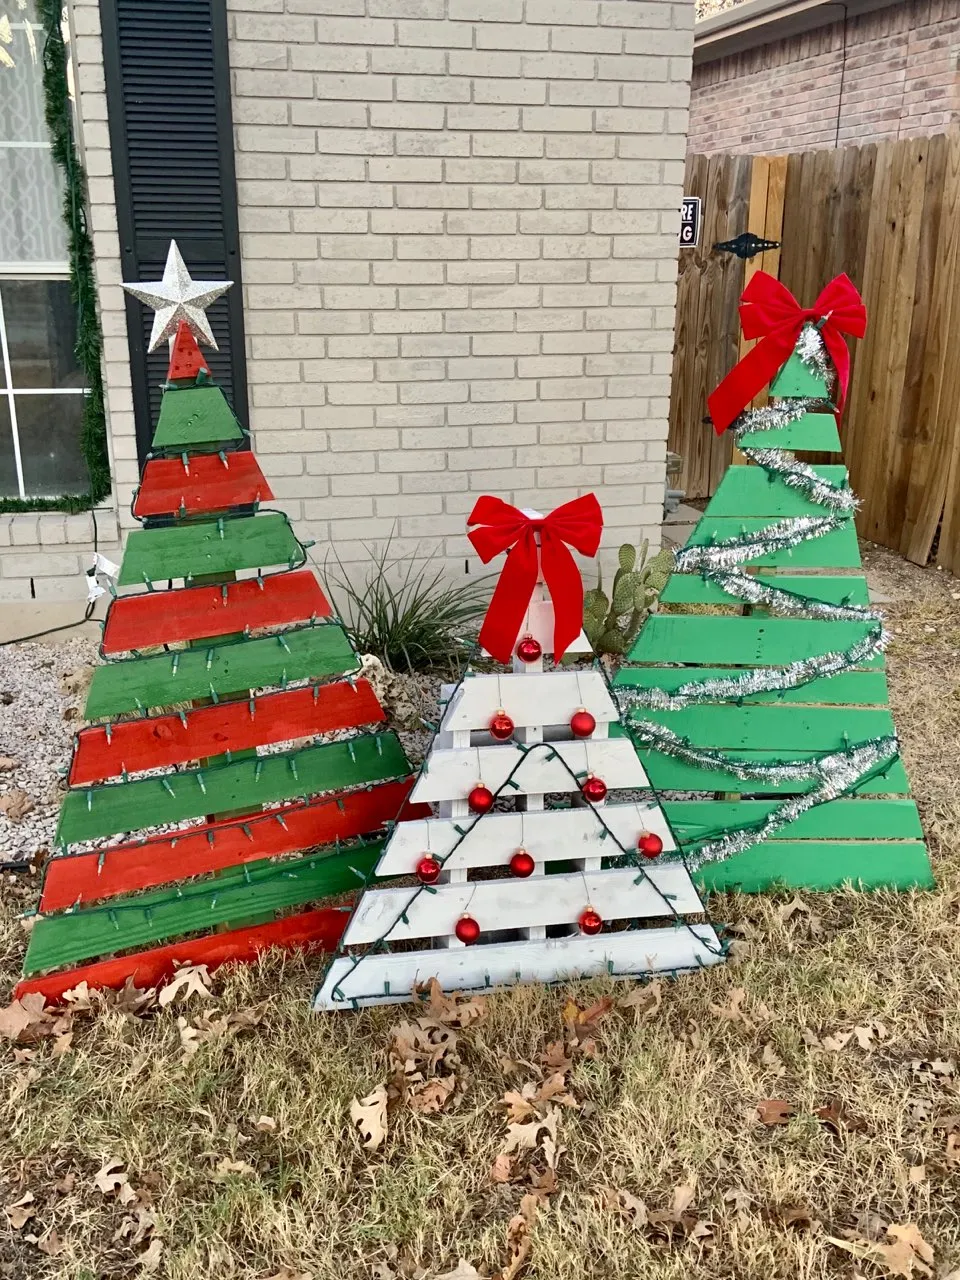
- Pull slats from two pallets and sort them into matching lengths.
- Prime and paint each set in one color — two thin coats beat one thick one.
- Assemble in A-frames with two angled legs and a cross brace at the back.
- Attach bows at the same height on each tree for a repeated rhythm.
- Stake the legs 2 inches into the ground so wind can’t lay them flat.
One weekend for all three, roughly $50 if you’re thrifty with paint.
29. Chipped Green and White Planks Against Aged Siding
Against a weathered facade, pallet trees read best when they’re slightly smaller than the plane they sit against — otherwise they compete with the siding instead of calming it. Aim for 36 to 44 inches tall with a 26-inch base, grouped with 8 to 12 inches of breathing room between them. Anything taller starts to look like it’s trying to cover the wall. On rough or uneven ground, wide bases matter too: an A-frame with two legs will wobble, so add a third point of contact.
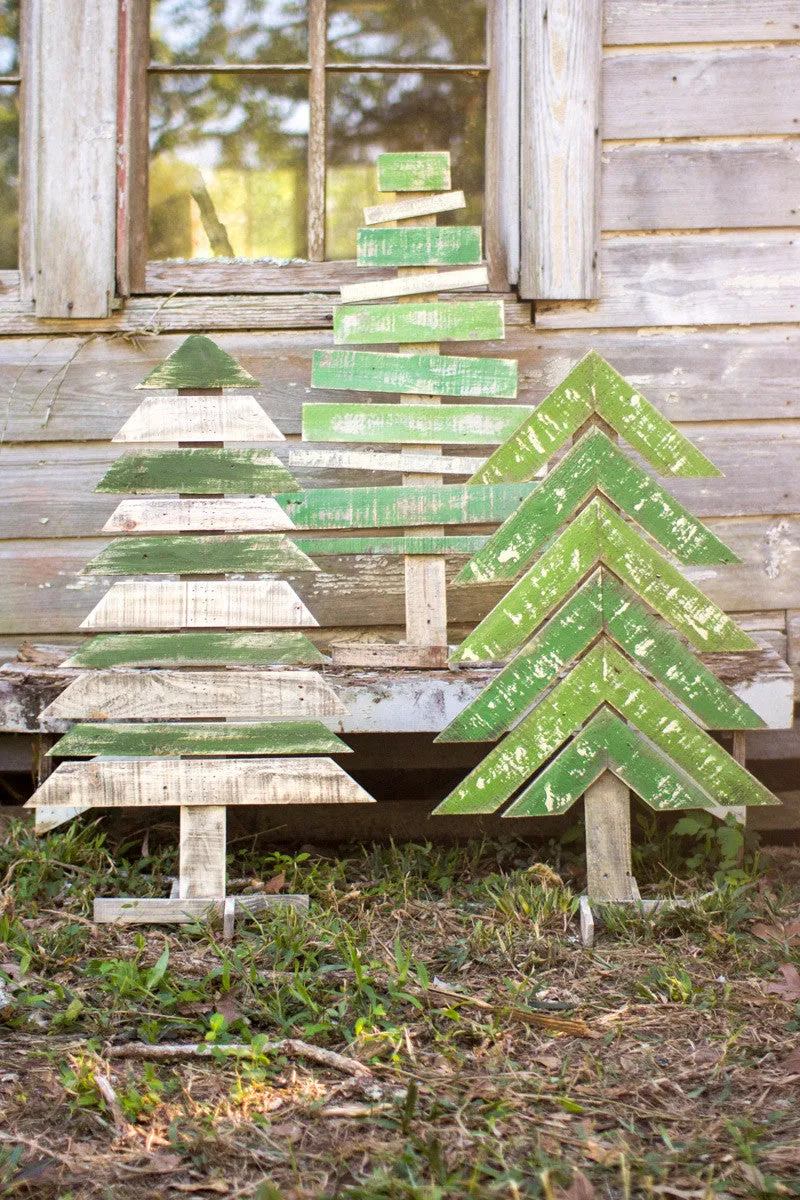
Deliberate imperfection, repeated three times. Chipped paint on one tree looks like neglect; on three it looks like a concept. The alternating green-and-white planks in the middle tree also give the group a focal point, so your eye has somewhere to start instead of scanning endlessly. And the V-shaped plank tree breaks the horizontal rhythm without breaking the palette — the same principle as varying frame sizes on a gallery wall.
30. Natural and Sage Stepped Tree Cutouts by the Door
An open stepped frame is basically a leaf-and-debris trap. If it lives on a porch, plan on a quick shake-out every week or two through fall and winter, and expect cobwebs in the interior corners by mid-season. Natural wood left outdoors will silver to grey within a year — often the point, but know it’s coming. A yearly coat of penetrating oil keeps the natural one looking intentional; the painted green one needs nothing at all.
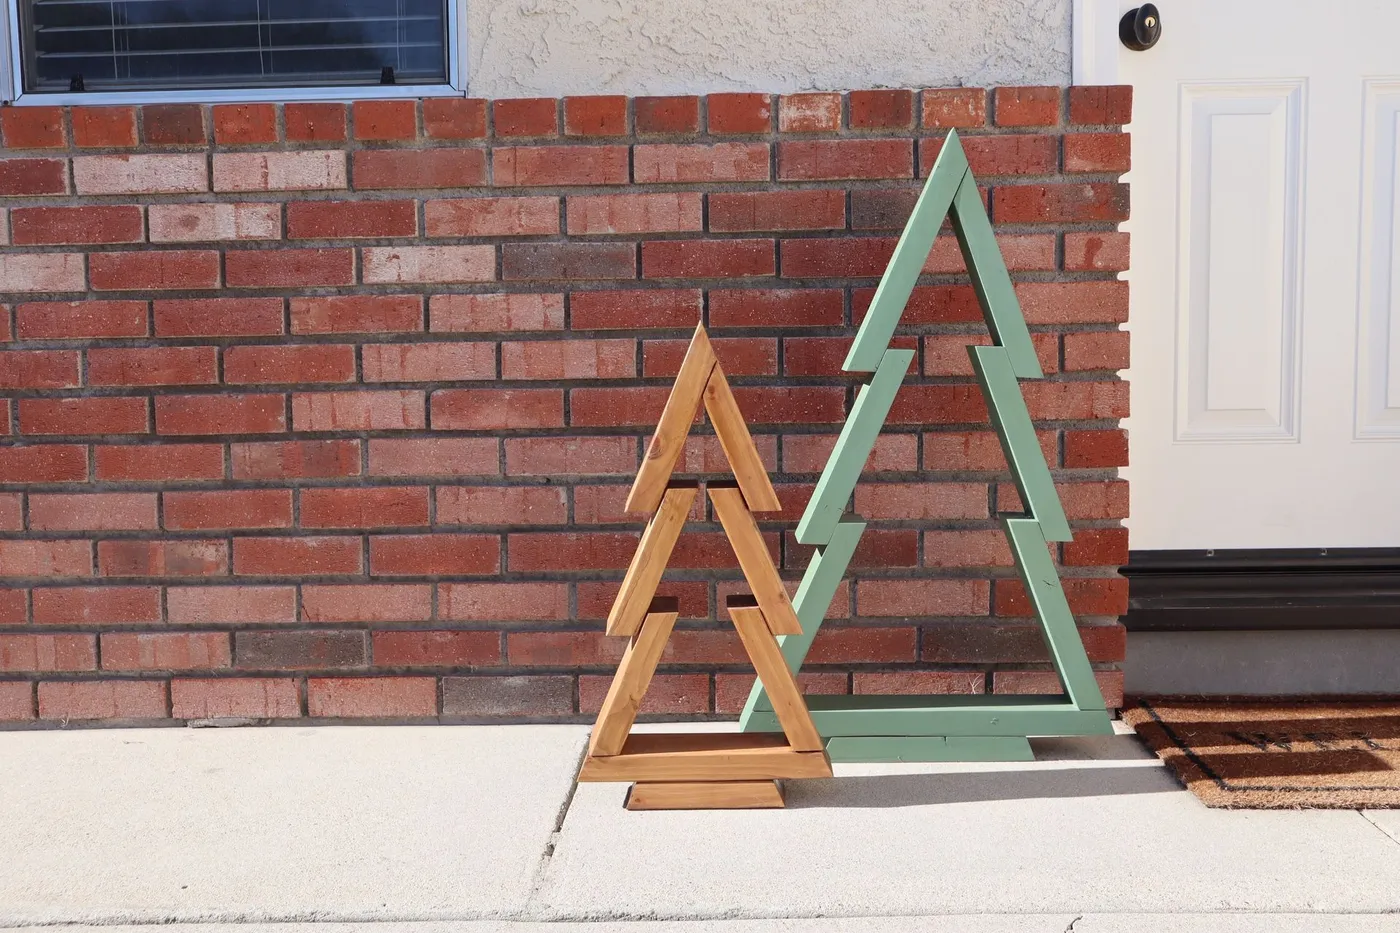
- Measure your door width — this pair looks best when the grouping totals about 80% of the doorway.
- Check for a covered overhang. Open frames hold water if they sit out in the open.
- Confirm your drill can handle 2x material if you’re building frames rather than cutting flat boards.
- Decide the finish now: raw wood silvers, painted green fades. You can’t switch later without sanding.
31. Tiered Wooden Tree Shelf With Frosted Silver Trees
70% light natural wood and white, 20% silver metallic, 10% fresh green from small accents. Frosted silver and bottle-brush trees are low-contrast by nature, so they need the white shiplap behind them to keep from disappearing. Put this shelf against a dark wall and the whole thing turns muddy. Swap silver for warm brass and it reads golden and rustic rather than frosty and modern — same shelf, same layout, entirely different season.
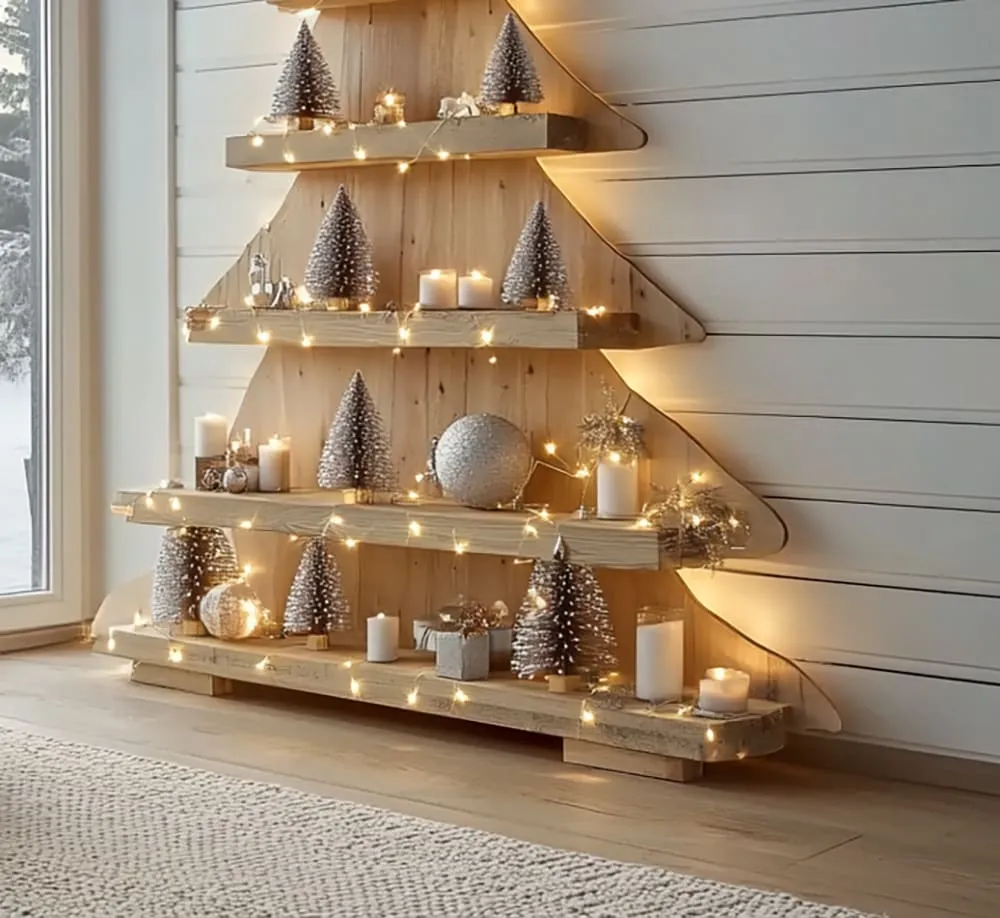
- Wood for the tiered shelf frame: $40–$90
- Miniature frosted bottle brush trees, set of eight: $16–$35
- White pillar candles, set of four: $14–$30
- Silver glitter ornaments: $10–$22
- Warm white string lights: $8–$16
- Paint, screws, wood glue: $12–$20
Total: $100 to $213 — a real investment, but it comes back out every December for a decade and can hold books in January.
32. Spiral Plank Tree With a Purple Wall Wash
Accent color works best in uplight here, not in ornaments. The purple comes from an LED wash hitting the wall, which means the tree itself stays wood, silver, and dark — you get the color without committing to a purple holiday for years. That’s a one-outlet change. Small color-changing uplights run $15 to $30 and can go back to warm white in January. Try the same effect with purple ornaments instead and you own the theme whether you want to or not.

The purple wall wash. Everything else here — the spiral wood, the silver, the snowflakes — is a finely tuned neutral composition that would be lovely and a little sleepy on its own. The uplight turns the wall into part of the decoration and makes the wood glow from behind, which is why this tree looks lit rather than merely decorated. Lose the wash and you lose the mood entirely.
33. Two Chevron Trees, One Raw and One Whitewashed
Reclaimed is a marketing word. You can buy new 1x4s at Home Depot for around $6 each and get the same look with a coffee-and-steel-wool stain, or skip staining altogether and leave them raw. Chevron cuts also produce a lot of offcuts, so a miter saw pays for itself fast here. Facebook Marketplace regularly has free lumber and old fence panel listings — weathered cedar fence boards are perfect for this and already have the patina you’re trying to fake. Compare with Idea #11 for the horizontal version of the same idea.
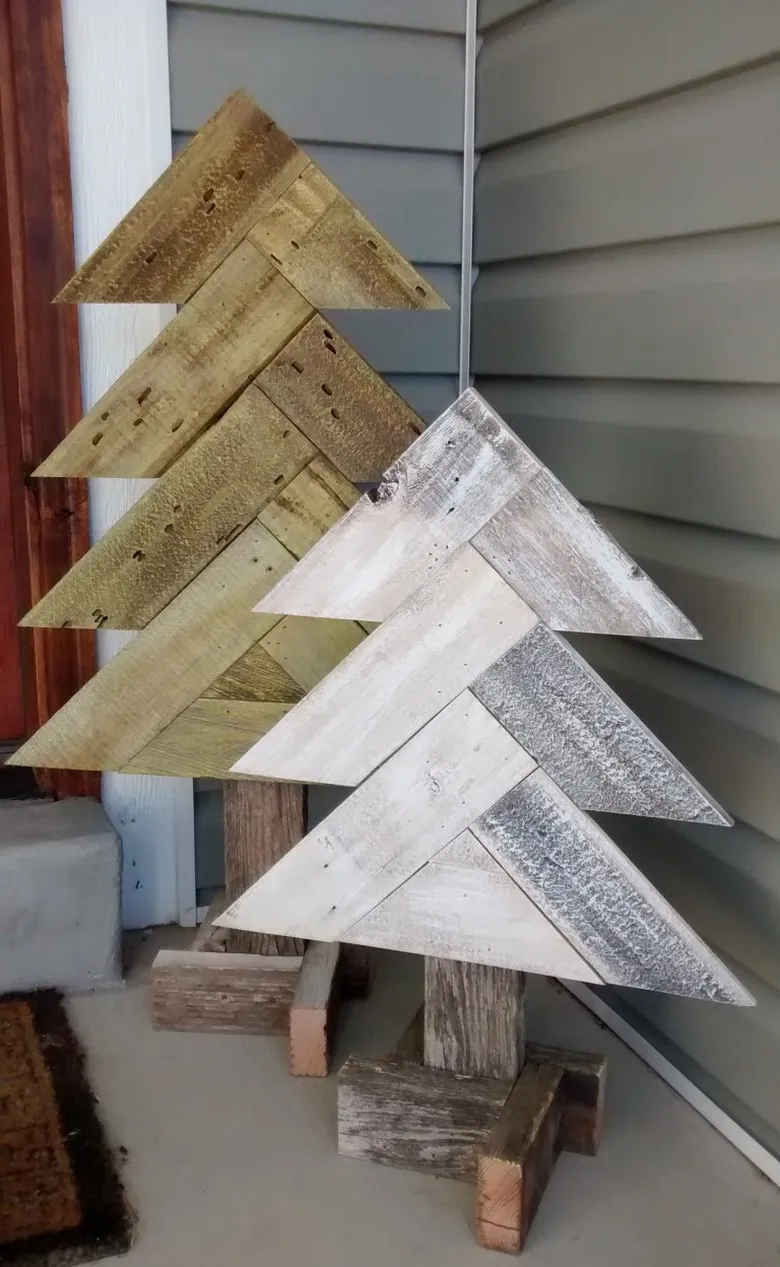
Chevron trees want to be either clearly small or clearly big — mid-size ones look like they couldn’t decide. For a porch, 40 to 48 inches tall with a 30-inch base reads confidently next to a door. For a mantel or console, stay under 20 inches. The block bases add about 4 inches of height each, so measure with them attached. Keep the pair at least 10 inches apart too; closer and the chevrons visually merge into one shape.
34. Weathered Gray Pallet Lit Into a Tree Silhouette
- Sand the weathered pallet lightly and seal it — grey wood sheds fibers onto everything below.
- Sketch the silhouette in chalk: base 28 in. wide, apex about 6 in. from the top edge.
- Staple the light strand along the chalk line, doubling the strand at the outer edges.
- Hang the paper star and snowflakes from the topmost lights using clear thread.
- Wire the pine branch to the bottom corner and tuck pinecones around the battery pack.
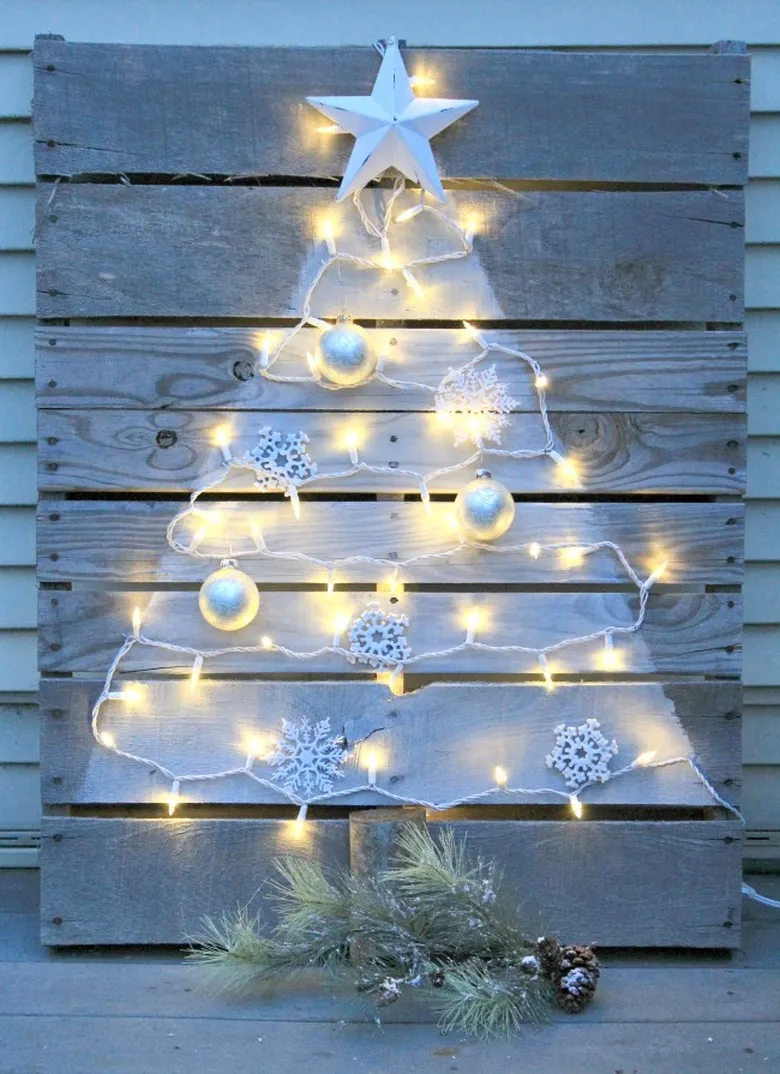
About 90 minutes, and under $30 if you already have the pallet and a strand of lights.
- Weigh your pallet — a full one runs 30 to 40 pounds and needs a proper wall anchor or a sturdy A-frame.
- Confirm where the battery pack will live. It’s the one part people always forget to hide.
- Check that your star and snowflakes are white-white, not cream — cream against grey wood reads dirty.
- Decide indoor or covered outdoor now. Untreated pallet wood should never sit in direct rain.
Go Pull a Pallet Apart — You’ve Got This
Thirty-four versions of the same free board, and not one of them needs a perfect cut or a steady hand. Start with the simplest build that fits your space, seal the wood, and let the lights do the heavy lifting — that’s genuinely the whole formula.
📌 Save your favorite to Pinterest now, so when December sneaks up on you again, you already know exactly which one you’re building.