
32 Jaw-Dropping Homemade Christmas Ornaments You Absolutely Need to Craft This Holiday Season
There’s a particular kind of Pinterest spiral that begins with “homemade Christmas ornaments” and ends three hours later with you elbow-deep in polymer clay, wondering if you even own a glue gun. We’ve all been there — and this year, the payoff is genuinely worth it.
We spent weeks working through Etsy, Michaels, Amazon, Target, and the workbenches of real makers to pull 32 ornaments that still look good once the glitter settles. Ideas run from about $6 in supplies to $85 for a full mantel and tree setup, with budget and luxe versions compared side by side.
Inside you’ll find rustic wood-slice styles, nostalgic hand-painted figures, whimsical felt characters, and winter-natural accents built from dried orange and cinnamon. And stay until the end — we break down the most common mistakes that can ruin these looks.
📌 Save this to Pinterest for later — you’ll want to revisit these ideas.
1. A Tiny Clay Santa Living Inside a Clear Glass Bauble
Strip away the striped string, the wooden table, the blurred fairy lights, and you’re left with the one element carrying this whole ornament: the hand-sculpted red Santa standing in a drift of white foam beads. Everything else is staging. Swap him for a plastic figurine from a dollar bin and the piece flattens into craft-fair territory.
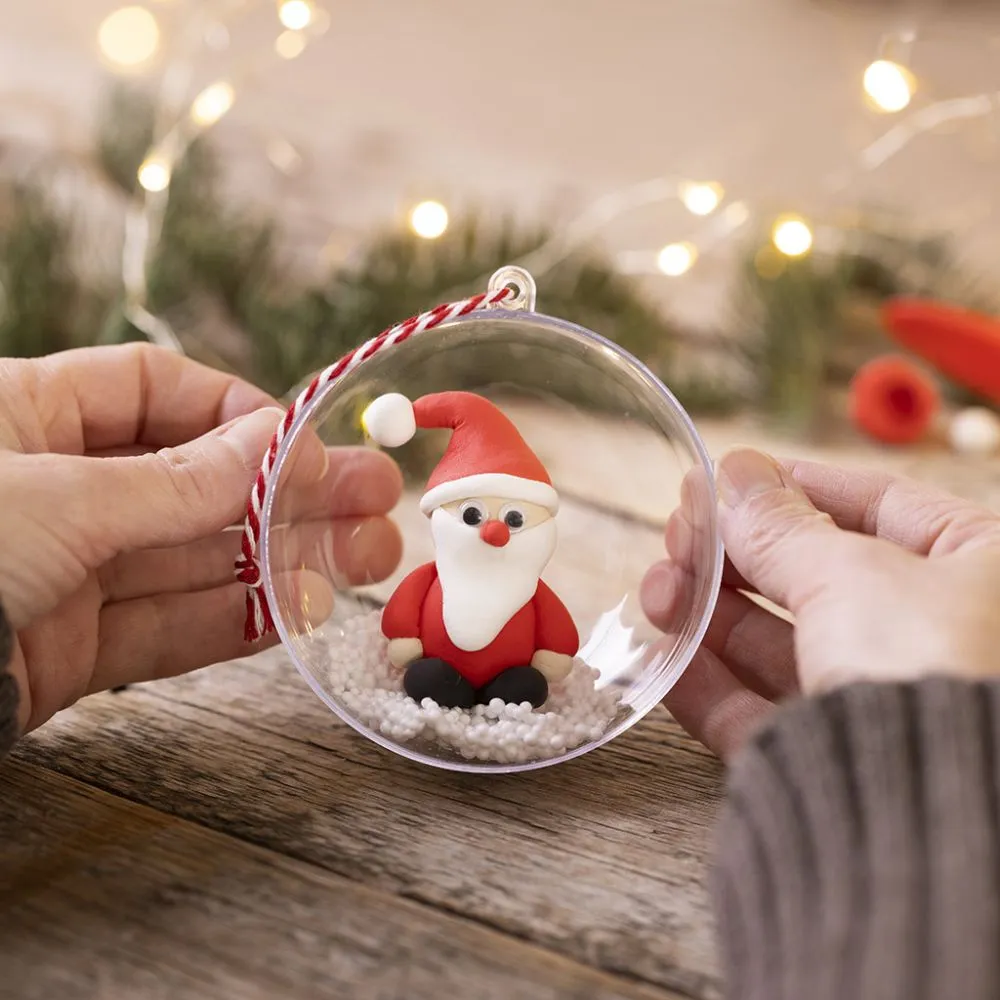
A slightly lumpy, thumbprint-visible clay figure is the point — that’s what makes it read as made by a person rather than bought in a set. Keep the rest of the ornament deliberately plain. Restraint makes him read as special instead of crowded.
- Sculpt a 1-inch Santa from oven-bake polymer clay — red body, white beard, black belt. Bake per package directions, usually 15 minutes at 275°F.
- Let it cool completely, then seal with one thin coat of matte varnish so color doesn’t transfer to the glass.
- Pour 2 tablespoons of white foam beads into a 3-inch clear sphere using a paper funnel.
- Press the Santa onto a dot of clear craft glue at the center of the beads, holding 30 seconds.
- Thread a red-and-white striped cord through the cap and knot twice.
About 90 minutes plus cooling. Materials run $8–$12 for a batch of six.
2. Gold and Silver Glitter, Piled Like Loose Jewels
The mixing formula here runs about 50% warm gold, 35% cool silver, and 15% white. That last number does quiet work — the silver glitter snowflakes act as the white, which keeps the cluster from turning into one brassy blob. Flip the ratio entirely and you get an icy pile instead: 50% silver, 35% gold, 15% white. Same ornaments, completely different mood.
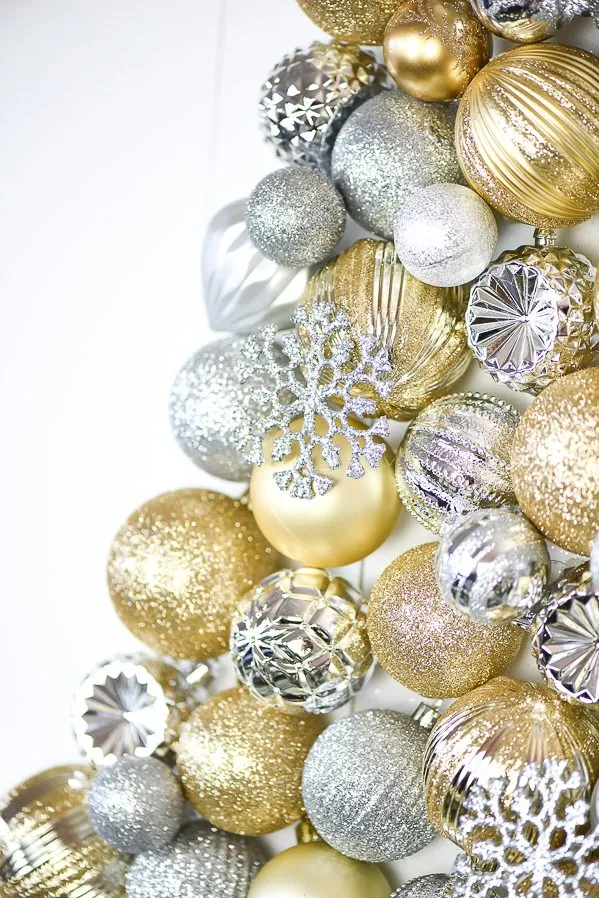
Want it warmer still? Push gold to 65% and swap the snowflakes for cream matte baubles. The rule holds either way — one metal always leads, and the white gets sprinkled in last rather than mixed evenly.
You can build this pile without touching a designer ornament shop. Start at Dollar Tree for the shiny and matte spheres at $1.25 each; they read surprisingly expensive when clustered. Then hit Facebook Marketplace in early November, when people unload last year’s full sets for $10–$15 a box. Thrift stores hide the odd shapes — ribbed, faceted, and vintage glass for $0.50–$2 apiece. The only place worth real money is the glitter snowflakes, because cheap glitter sheds everywhere. Budget about $35 for a cluster this dense instead of $150.
3. Clear Baubles Filled With a Kid’s Own Drawings
Here’s what separates a keepsake from a sad crumpled paper ball: cut the drawing into a 3½-inch circle, then curl it loosely around a pencil so it springs against the inside of the glass instead of lying flat at the bottom. A flat insert slides around and looks like debris. A curled one stands up and reads instantly as a scene.
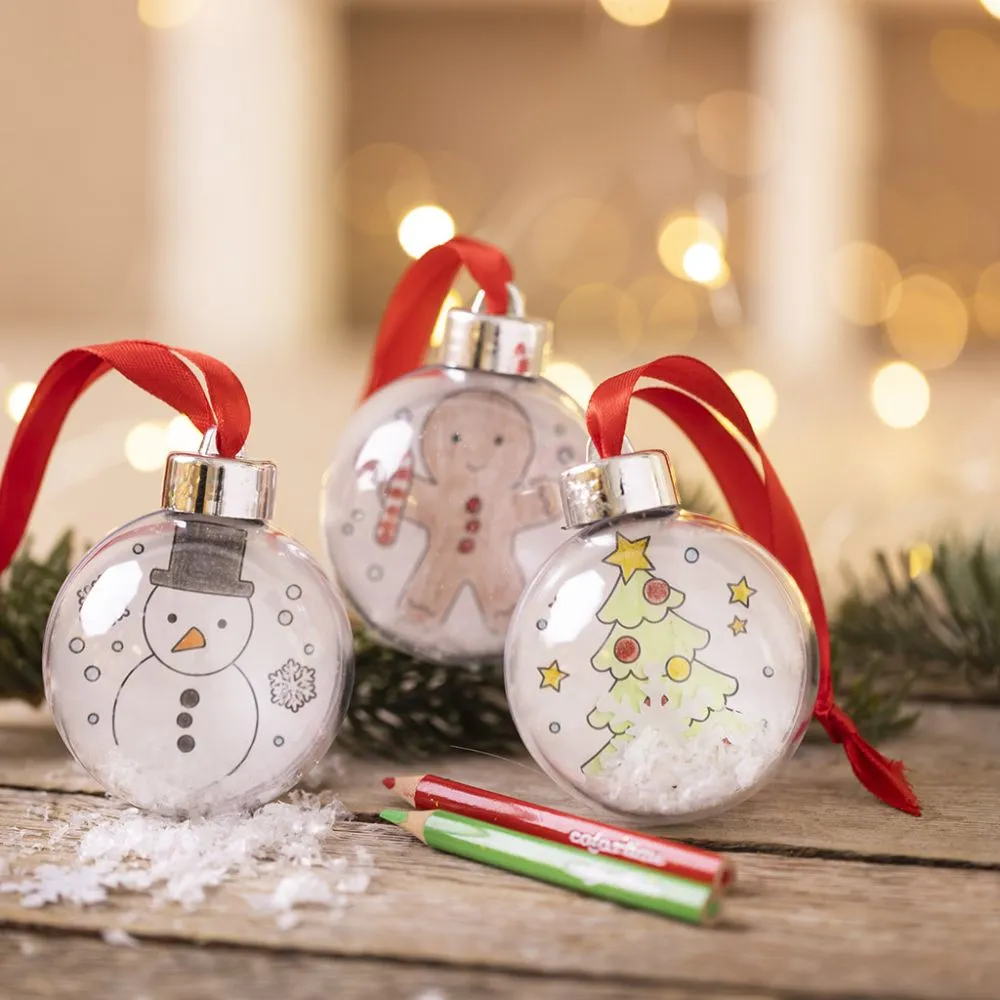
Do this before you add snow, and keep the drawing marker-and-crayon only — pencil smudges against glass. This pairs nicely with the clay Santa in Idea #1 if you’re making a set; same clear sphere, completely different personality.
- Trace a 3½-inch circle onto white cardstock and let the kids draw inside it.
- Curl the circle around a pencil and slide it through the ornament opening, letting it spring open.
- Add one teaspoon of faux snow through a paper funnel — less than you think you need.
- Replace the cap, thread a red satin ribbon through, and knot twice so it hangs straight.
Twenty minutes each, roughly $3 per ornament once you own the funnel and snow.
4. Snowmen Painted Straight Onto Glitter-Filled Glass
Three things are quietly working here. Contrast first: opaque white snowman paint against glitter-filled glass gives the eye something crisp to land on, which is why these read from across the room. Then repetition with variation — same snowman, three different base colors in red, teal, and pink, so the set feels collected rather than purchased.

And scale discipline. Each snowman stays small enough that three fit comfortably on a 3-inch sphere. Cram a fourth on and the whole thing turns to noise.
Glitter-filled glass is heavier than it looks. Three on one branch and you’ll get a slow sag by New Year’s, so spread them across separate branches and use a wire hook rather than ribbon for the structural hold. The paint is the other weak spot — acrylic on glass chips at the rim when ornaments knock together in storage. Wrap each one in tissue and skip the plastic bin shuffle. If the tree sits near a heating vent, move it; the glass sweats and the glitter clumps.
5. Wood Slices Painted With White Trees and Hung on Jute
- Wood slices with bark, 12-pack: $12–$18
- Acrylic craft paint in white, plus a fine liner brush: $6–$10
- Jute twine: $3–$5
- Small drill bit or eye screws: $4–$7
- Clear matte sealer: $6–$9
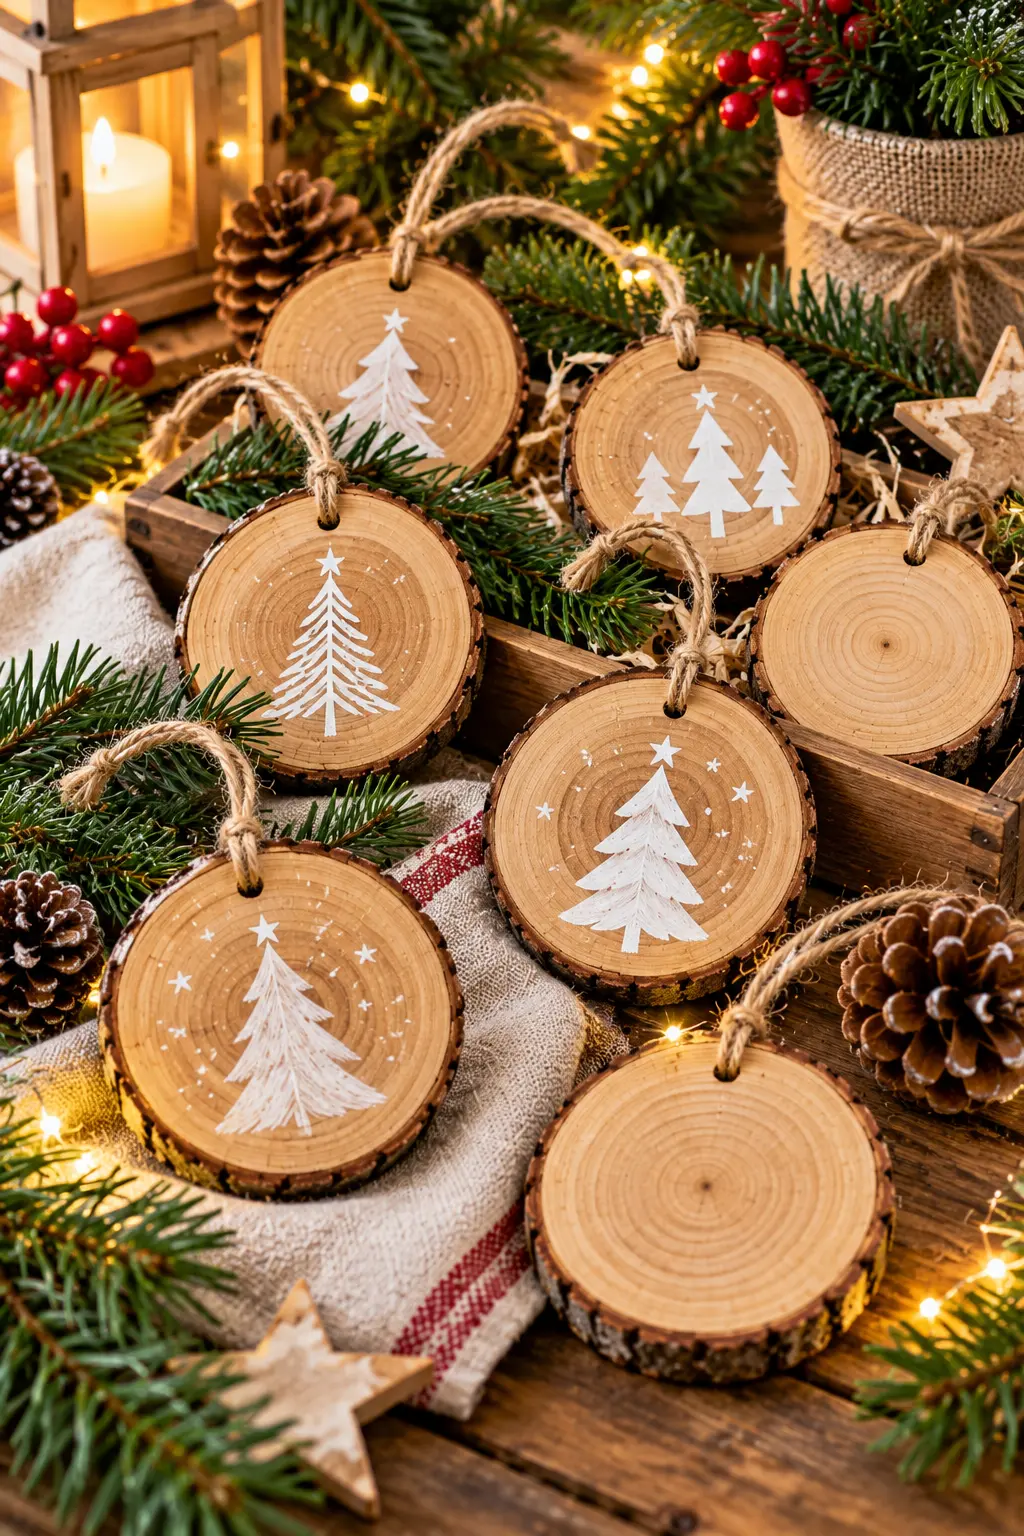
Total: $31–$49 for a dozen ornaments, about $3 each.
Budget alternative: buy pre-cut slices at a dollar store and skip the drill by hot-gluing twine loops to the back — roughly $14 for the same dozen.
Paint the tree first, then the snow, never the other way around. White acrylic grabs pigment and turns grey within seconds, so the moment a green brush touches a finished snow line, you’re repainting. Lay down your white tree silhouette, let it dry a full 20 minutes, then add trunk and stars. Seal the whole face with matte sealer before hanging — bare wood wicks moisture from a warm room and crisp white edges go soft by mid-December.
6. A Miniature Glittered Sleigh Hauling Three Tiny Gifts
The sleigh is charming, but the element that makes this ornament work is the three tiny gifts riding on top — specifically that they’re wrapped in two different papers, red plaid and plain kraft. That mismatch is the whole trick. It says someone wrapped these by hand, one at a time, which is the exact feeling you’re chasing.
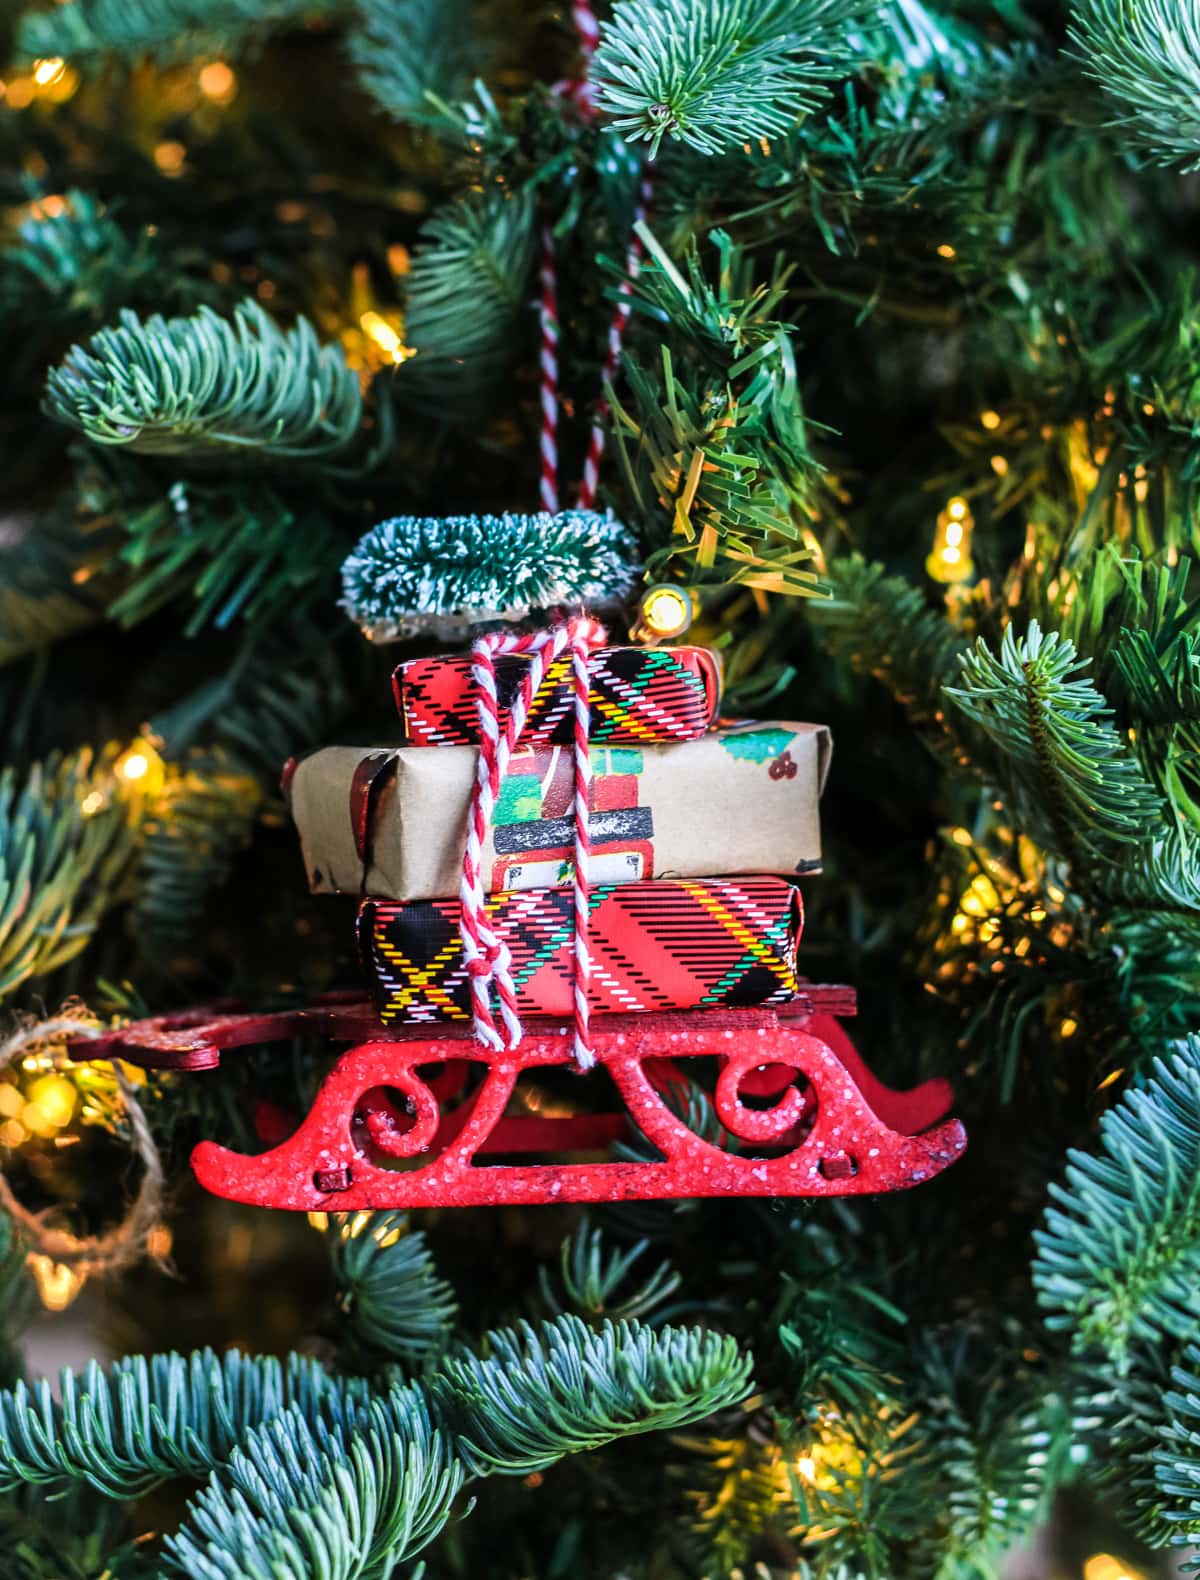
Wrapped uniformly, the sleigh reads as a manufactured trinket. Mixed papers tied with red-and-white baker’s twine read as a story. Keep the little bottle brush tree above as an accent only and don’t let it compete with the cargo.
This one earns its keep on a tree six feet or taller. At four or five feet, the sleigh gets lost among the branches and the gift stack becomes an unreadable blob. Give it a branch in the lower-middle third where people actually look, and leave 4–6 inches of clear space around it. On a tabletop tree, skip it entirely and go with flat wood slice ornaments instead — they hold their detail at any size. Shelf display works too if you hang it at eye level from a hook.
7. A Photo Bauble With a Twine Bow and One Gold Bell
- Print your photo at 2 inches square on matte paper — glossy reflects the glass and kills the image.
- Cut a ½-inch margin of white cardstock around the print and glue the two together for stiffness.
- Add a teaspoon of faux snow, then slide the photo in face-forward so it rests against the front curve.
- Thread natural twine through the cap into a bow, then wire a small gold bell to the knot.
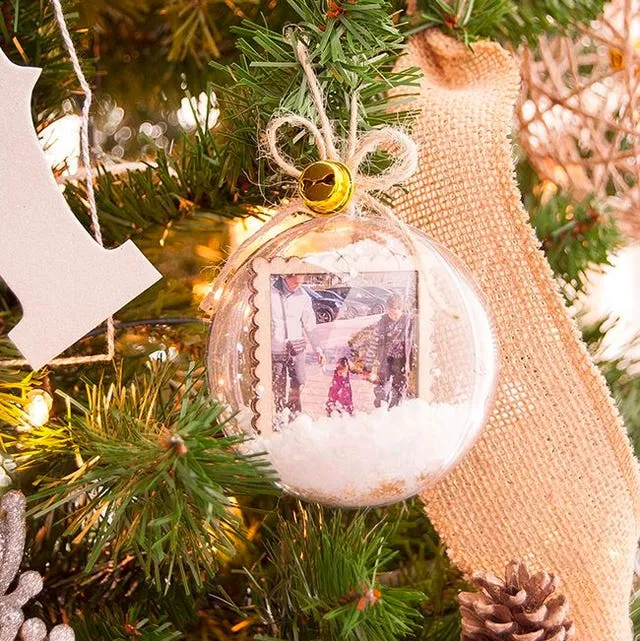
About 25 minutes each, roughly $5–$7 per ornament if you’re printing at home.
Photo baubles are the one ornament here that will genuinely degrade. Matte photo paper fades in direct sun within a season or two, so keep them off a sunny window ledge and away from the tree’s brightest bulb clusters. The twine bow loosens every time you unpack it — a dot of clear glue on the knot solves that permanently. Faux snow settles over time, so give each one a gentle shake in December. Plan on refreshing the photo every three or four years.
8. A Glass Candy Ornament Filled With Real Sprinkles
Sprinkles are the entire design, so quantity matters more than anything else. Fill the sphere only about 60–70% full. Any more and the sprinkles jam the opening during assembly, and the candy looks packed and heavy instead of loose and rattly. Use long rod-shaped jimmies rather than nonpareils — the tiny balls clump and read as static from across the room. Check that your glass has a wide enough neck; most candy-shaped ornaments do, but a 12mm opening is the minimum for jimmies to pass through without crushing.
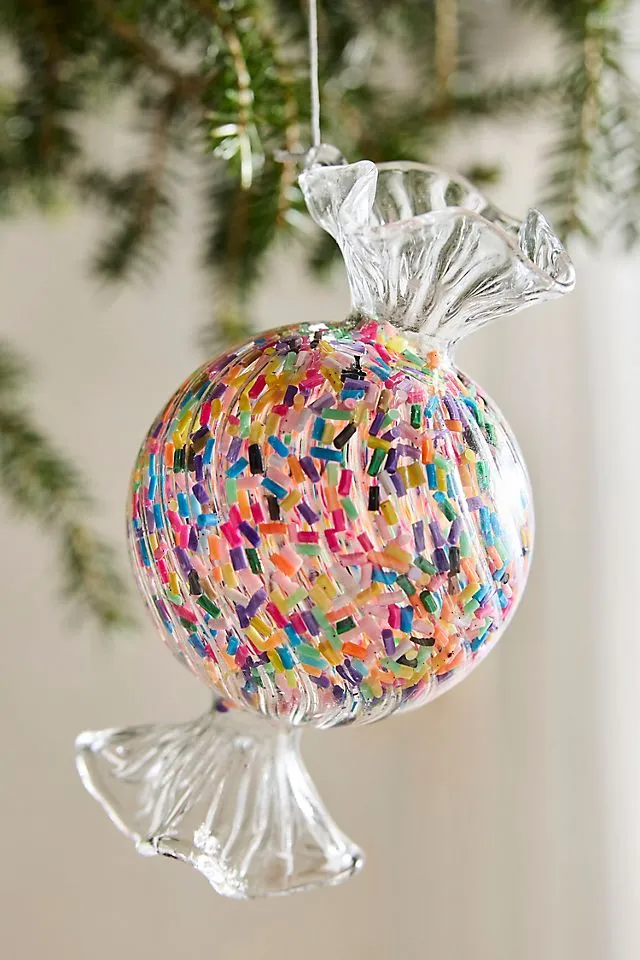
Candy-themed ornaments have been climbing on Pinterest since the kitschy-Christmas swing started, and this is the year it goes fully candy-shop. Two things drive it: pastel holiday palettes finally breaking the red-and-green monopoly, and people wanting ornaments that look unmistakably handmade without requiring painting skill. Filling glass is the low-skill, high-impact version of that. Staying power is solid — the glass form itself is classic, only the filling is trend-driven, and you can empty and refill it in ten minutes.
9. Campers, Mailboxes, Donuts and Helicopters in One Joyful Mix
The charm isn’t any single ornament — it’s the refusal to take the theme seriously. A camper, a mailbox, a donut, and a helicopter in the same display shouldn’t work, and it does because they share three things: glittered finish, saturated red-and-green palette, and nearly identical size. Cohesion comes from finish and scale, not subject matter.
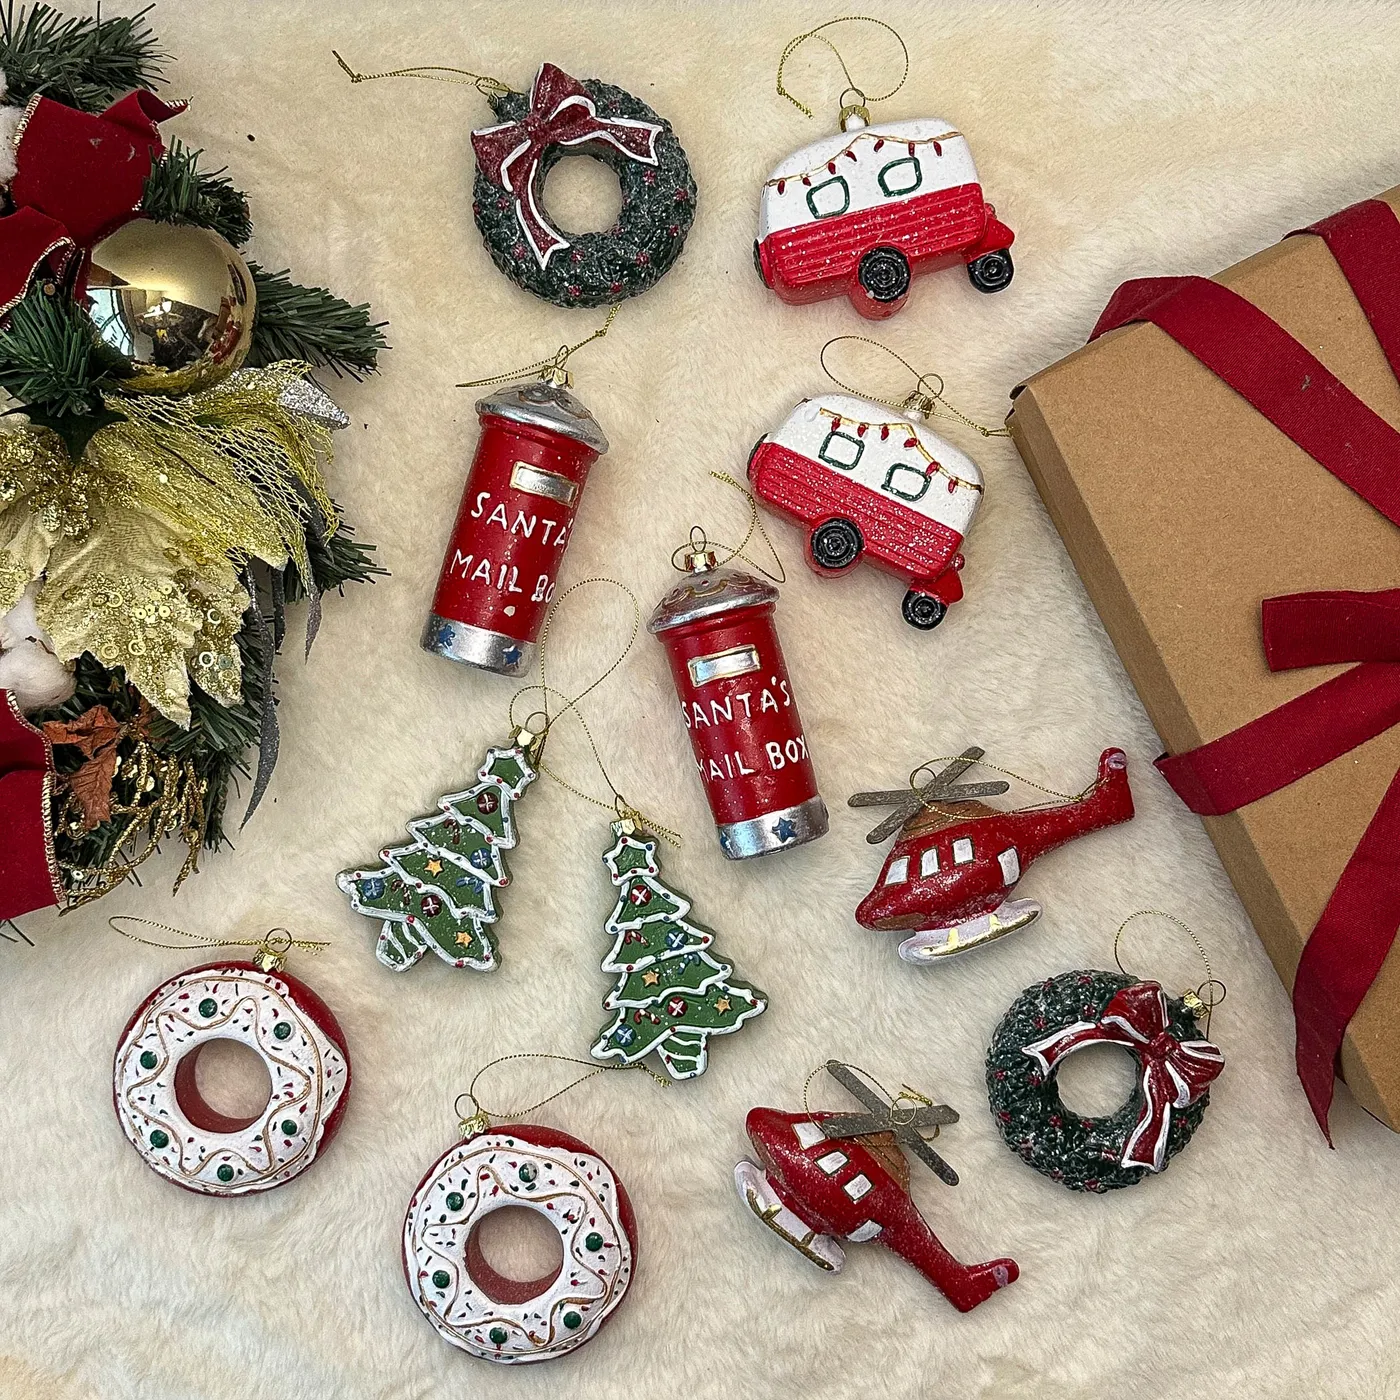
Set the same eclectic mix on a fluffy cream surface, as here, and it reads as a curated collection instead of clutter. That soft neutral base is doing more than you’d think.
This is the cheapest idea on the whole list and it isn’t close. A 12-pack of mixed wood cutouts or blank shapes runs $6–$9 at Michaels or Walmart, and one bottle of craft paint covers all of them. Glitter is where people overspend — one small tub of fine gold and one of green, about $8 total, is enough for a decade. Add twine you probably already own. Realistic total: $20, versus $60–$80 buying finished versions. Compare with Idea #5 if you want the more restrained take.
10. A Textured Red Monogram With Snowmen on Top
Letter ornaments live or die on weight balance. Anything wider than 2 inches in the middle will twist on the branch, so hang it from two points — thread the ribbon through both top corners of the letter instead of a single center hole. That kills the spinning completely.

Hang it low and slightly inward, too. A monogram is a spotlight piece and looks lost at the very top of the tree. Nine inches above the skirt, front-facing, is the sweet spot.
The tiny pair of snowmen perched on the crossbar is the reason this works. Without them, it’s a red letter — personal, nice, forgettable. With them, it’s a scene, and the letter becomes the structure holding a story up rather than the story itself. Spend your detail effort there: give the snowmen tiny red hats, keep them small, and let their grey fluffy accents sit slightly behind them so they read as a backdrop. Small figures, big payoff.
11. Yarn Tassels and Wooden Beads Across a Stone Mantel
The garland formula runs about 55% yarn tassels, 25% wooden beads, 20% negative space. That last fifth keeps it from looking like a craft-store explosion — you need visible bare string between clusters. Colors land at 60% off-white, 25% deep green, 15% deep red, a softer and more vintage read than a straight candy cane ratio.
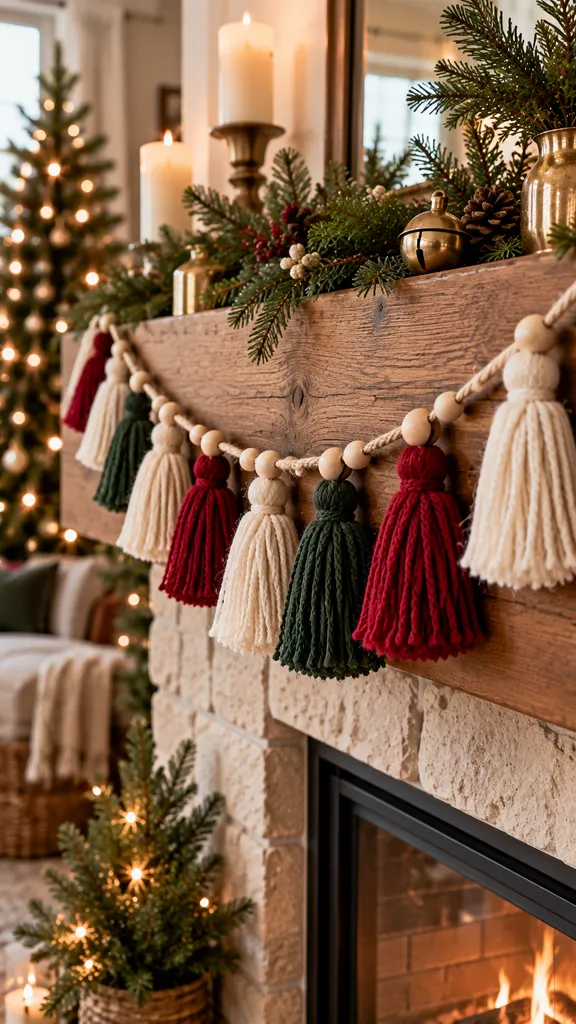
Want it more modern? Flip to 60% dark green with off-white tassels and skip red entirely. Swap the wood beads for black ones and it turns Scandinavian in one step.
- Yarn in three colors, one skein each: $12–$18
- 25mm wooden beads, 40 count: $8–$12
- Jute or cotton string: $4–$6
- Cardboard for tassel templates, or a tassel maker: $0–$9
- Fresh or faux evergreen garland: $18–$35
Total: $42–$80 for a 9-foot mantel garland and swag.
Budget alternative: skip the fresh garland and use a $12 faux cedar garland from Target, then fluff the branches by hand — about 85% as good for roughly half the cost.
12. A Needle-Felted Dog With a Gold Bell Collar
- Roll a 2-inch oval of white wool roving into a firm core, felting with a single needle until it holds shape.
- Add a brown patch for the ear and a smaller one for the eye, working the needle at a shallow angle so the surface stays smooth.
- Felt the muzzle and a short tail, checking proportions against a photo every few minutes.
- Thread a black cord collar, slide on a 6mm gold bell, and knot it snug against the neck.

Roughly two hours for a first attempt, about $9 in supplies. Buy your needles in a five-pack — they snap.
Needle felting has a sharp learning curve and an honest failure mode: you will stab your finger. Finger guards cost $4 and are worth it. The other reality is that felted wool is a magnet for dust and pet hair, and it pills if it rubs against branches all season. Hang yours on the outer edge of the tree where nothing crushes it, and keep it above toddler height — loose roving looks chewable and, unfortunately, is. If you have a shedding dog, store this one in a sealed bag rather than an open box.
13. A Plush Tree Ornament Stitched With a Sleeping Fawn
Two principles carry this one. First, texture contrast at close range: flat white fabric against stitched pinecones and clear sequins gives the eye multiple depths inside a 4-inch object. Second, color restraint — white, light blue, and a whisper of red, with all the green coming from the real tree behind it. The ornament never competes with the pine, which is a smart way to design for a green backdrop. Add a bold red motif and it would fight the branches instead of resting on them.
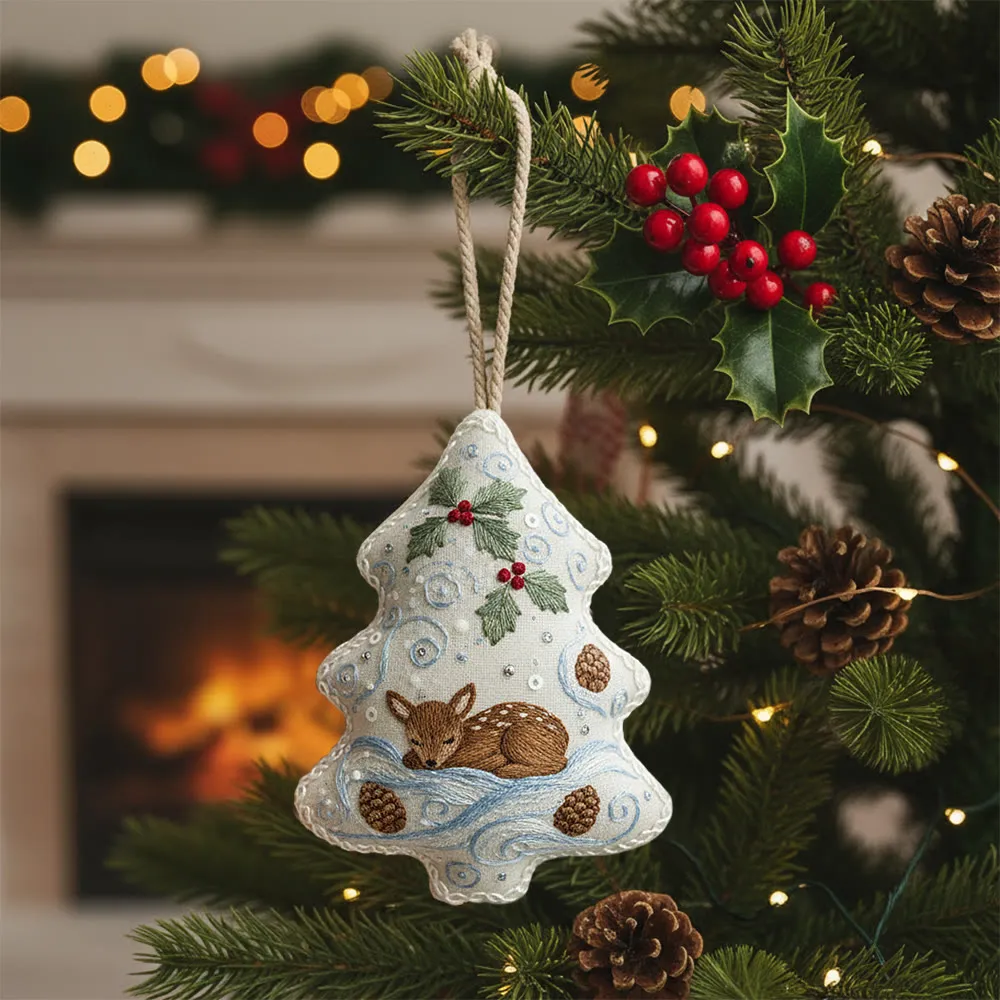
Plush ornaments collect dust in a way glass never will, and the embroidery thread dulls when they do. A monthly pass with a lint roller during December takes ten seconds. Sequins are the real risk — they’re stitched, not glued, so they usually survive, but one snagged thread pulls a whole row loose. Secure it immediately with a backstitch rather than waiting. Stuffed fabric also holds cooking odors if it hangs near a kitchen, so air it out for a day in January before storage.
14. A Distressed Star Painted Like a Village at Dusk
Distress the base before you paint, not after. Rub the bare star with fine steel wool in the direction of the grain, then apply one thin wash of watered-down brown acrylic — about 1 part paint to 4 parts water. Let it dry fully. Now your gold and white strokes sit on top of visible texture instead of looking like stickers on a smooth surface.
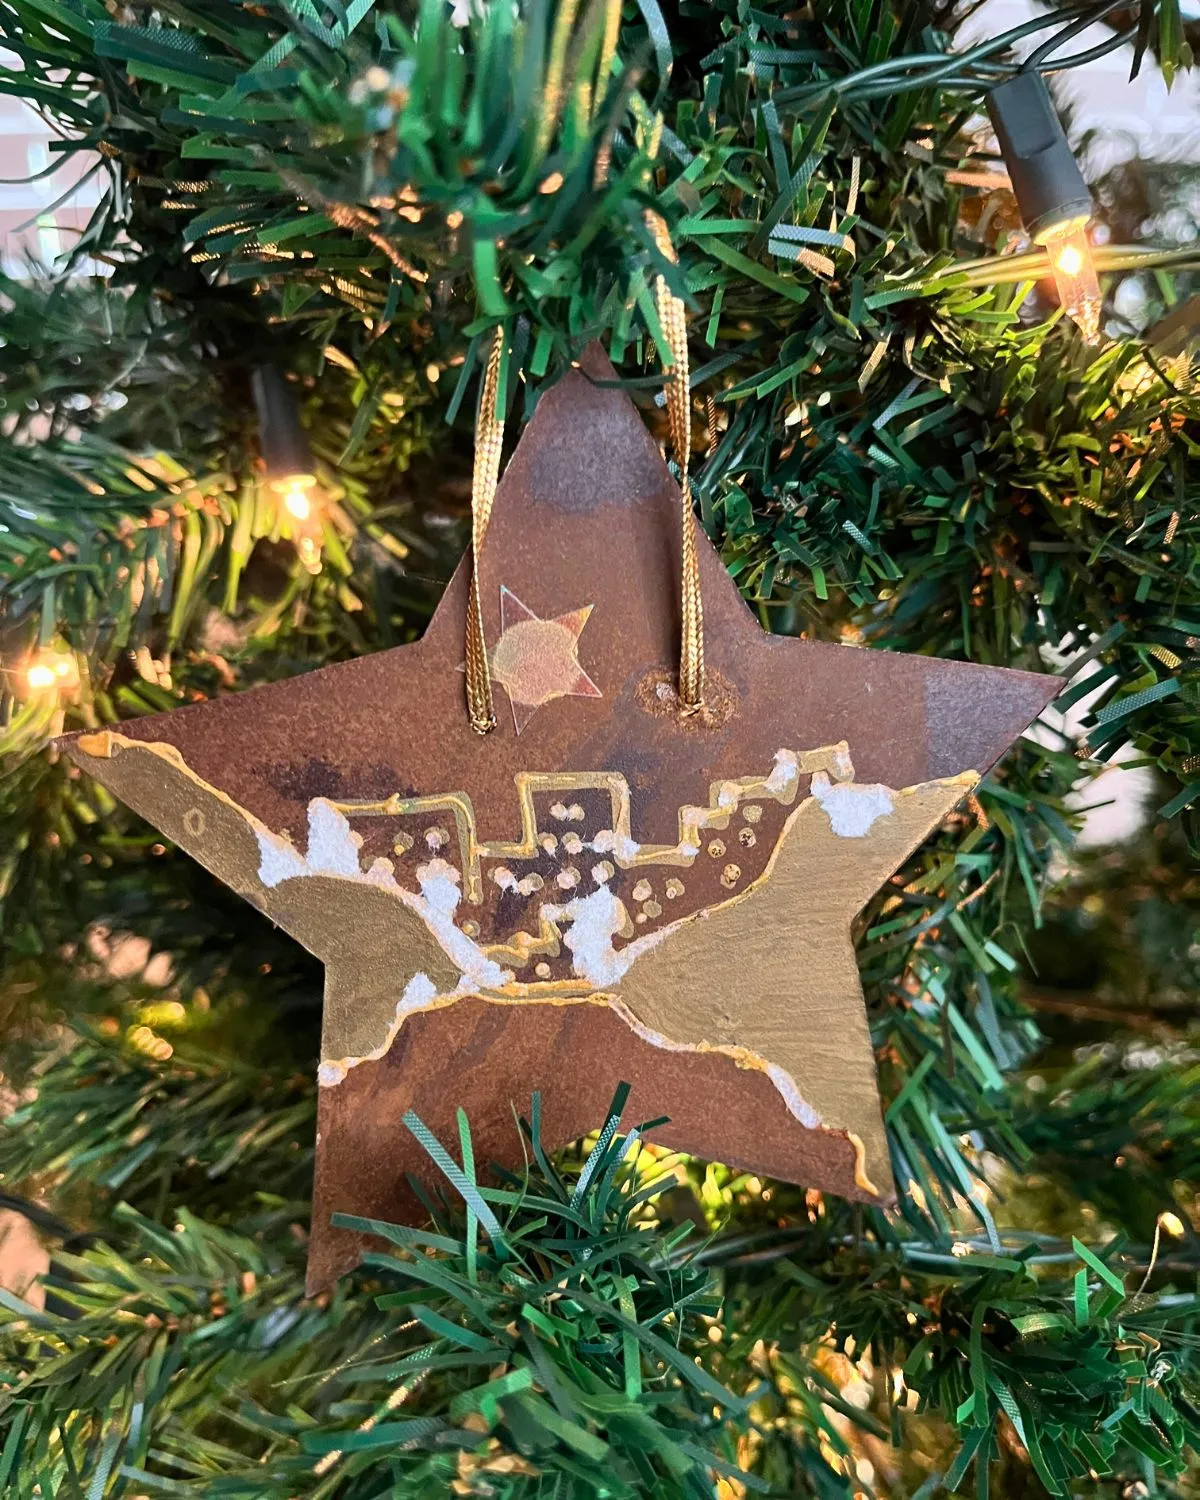
When you paint the abstract village motif, work from the largest shape to the smallest and stop while it still looks loose. Overtidiness is what ruins rustic. If you love this metallic-on-rustic combination, compare with the gold and silver cluster in Idea #2.
The palette runs about 60% dark reddish-brown base, 25% metallic gold, 15% white. That white keeps the gold from reading as cheap brass — it acts as a highlighter, not a color. For a lighter version, flip to 60% cream base with 30% gold and just 10% brown wash showing through. Swapping the gold braided cord for jute twine shifts this from antique European to straight farmhouse. Small swap, different room.
15. Felt Trees on Dowels, Buttoned and Trimmed With Rickrack
- Cut two felt tree shapes per ornament and blanket-stitch around the edges, leaving the bottom inch open.
- Slide a 6-inch dowel up through the opening and hot-glue it in place inside the felt.
- Sew buttons on randomly — mix sizes and colors, but keep them on the upper two-thirds so the tree still reads as a tree.
- Glue white rickrack across in a zigzag and finish with a light dusting of fine glitter.
- Push the dowel into a small wooden base and secure with a dab of glue.
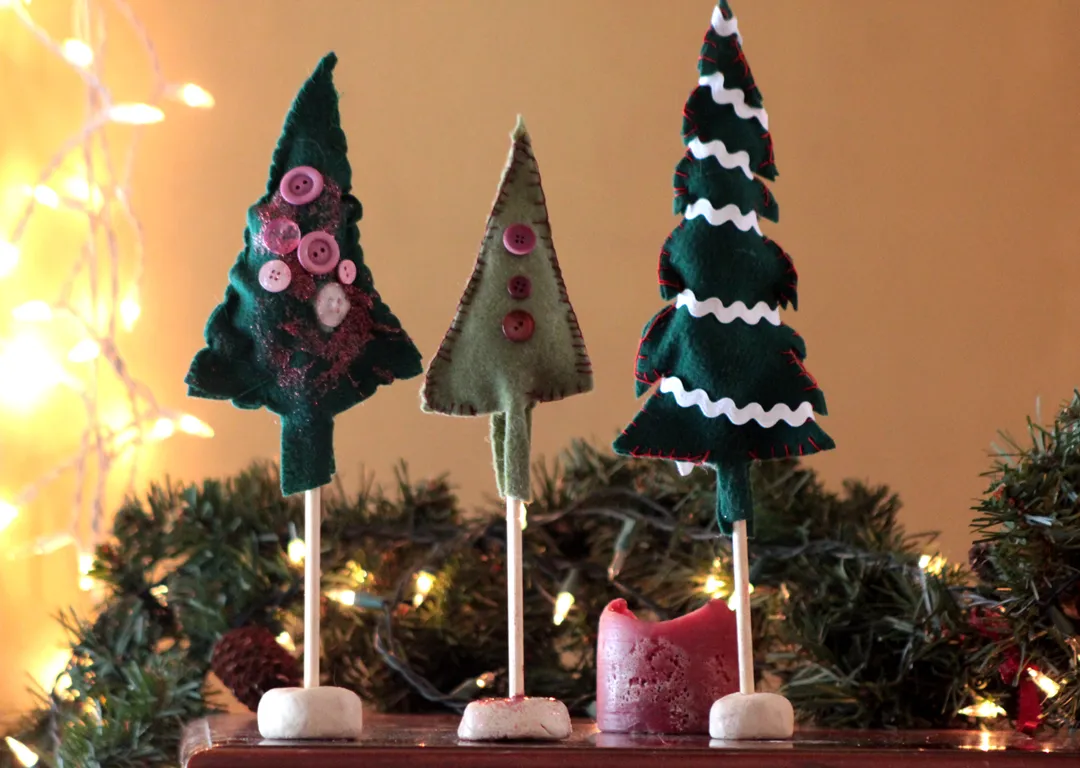
About 40 minutes each, $4–$6 in materials.
- Felt sheets in dark and olive green, 6: $3–$5
- Assorted buttons, mixed bag: $4–$8
- White rickrack ribbon: $2–$4
- Dowel rods and wooden bases, 3 sets: $6–$10
- Fine glitter and craft glue: $6–$9
Total: $21–$36 for a set of three standing ornaments.
Budget alternative: use a mixed button bag from a thrift store for $2 and skip the wooden bases by pushing dowels into small blocks of floral foam covered in felt — about $12 total.
16. White Baubles Painted With Children in Winter Scenes
Painted-figure ornaments are riding the heirloom nostalgia wave that’s been building on Pinterest for a few seasons, and this year is peak — crafters are buying blank white spheres by the dozen. The cultural driver is simple: after years of minimalist beige holidays, people want ornaments that feel like they came out of a grandparent’s attic. Hand-painted children’s scenes hit that note without looking dusty. Staying power is high, because unlike most holiday trends, this one gets better each year as the set grows.
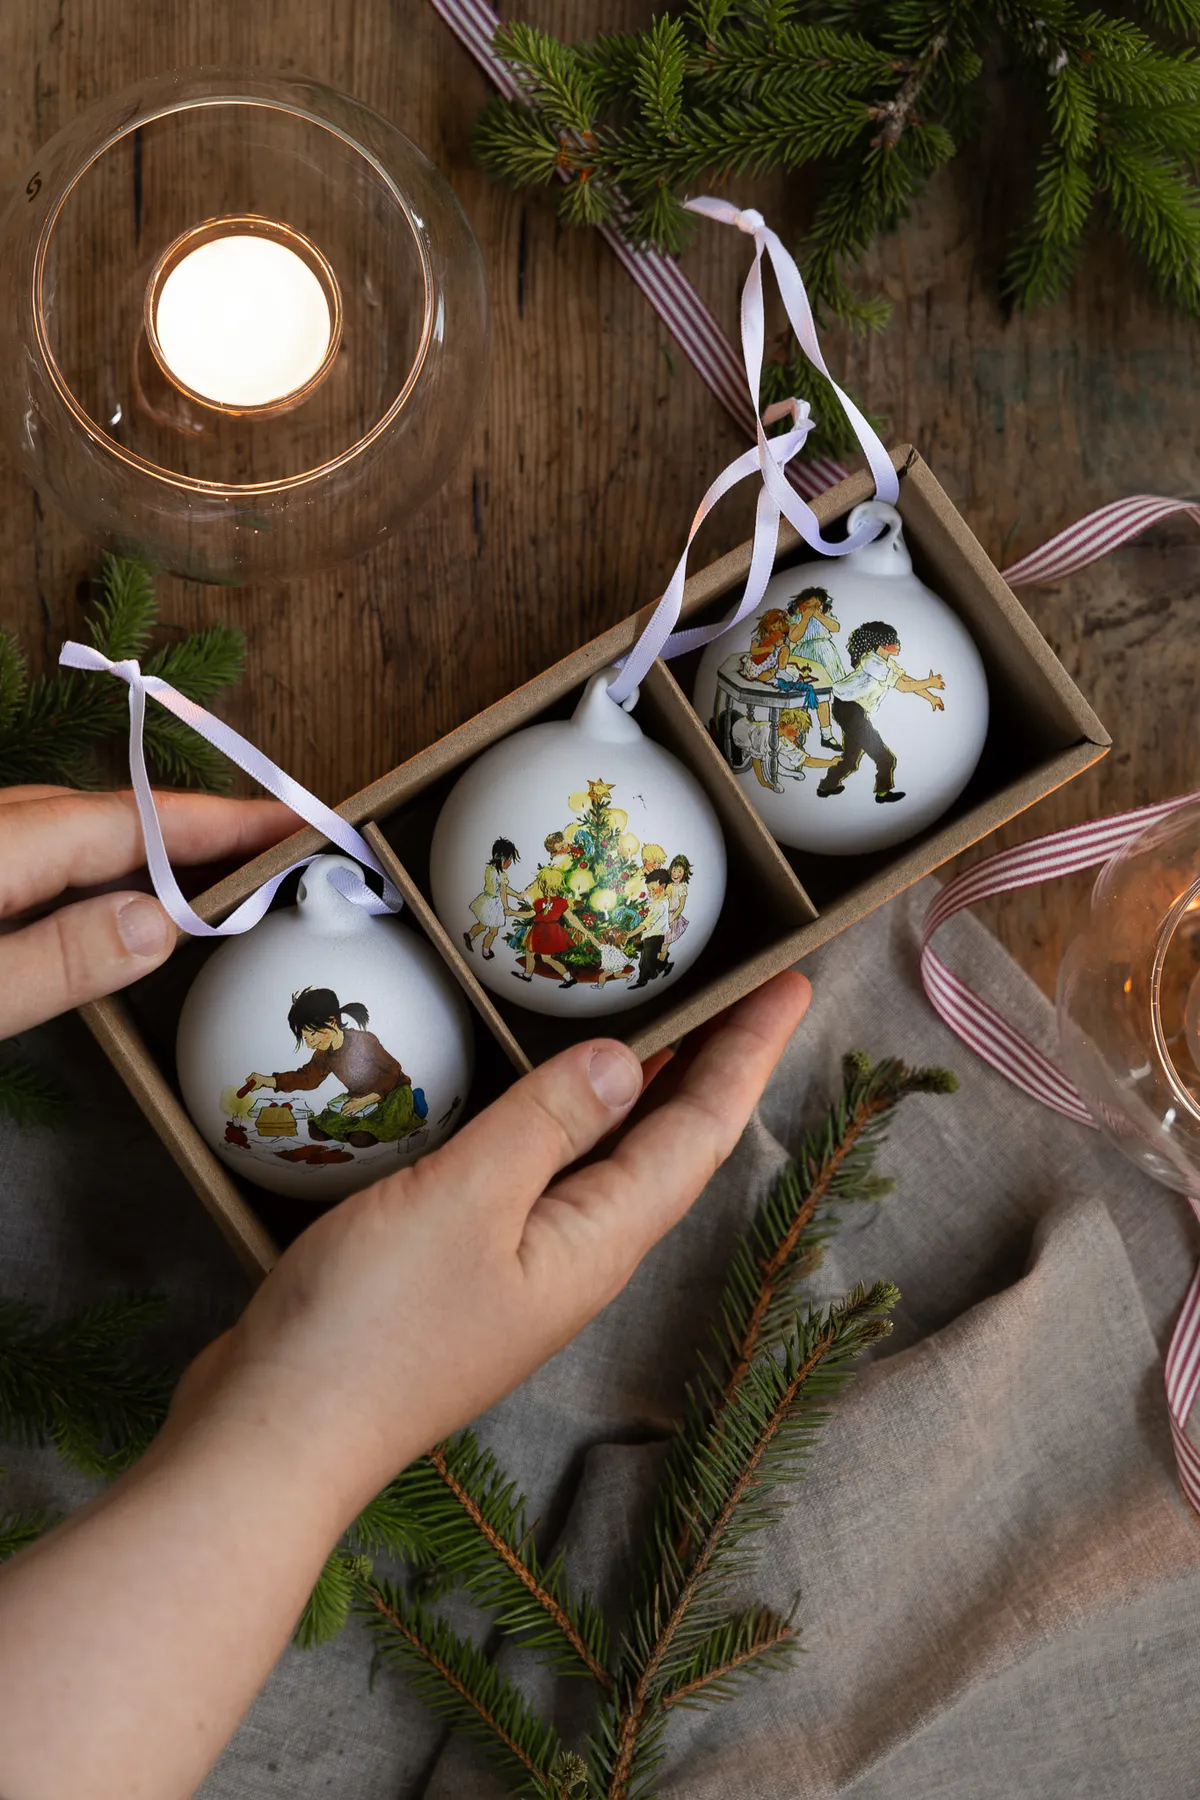
Work on a turntable, or spin the ornament on a pencil held sideways — you need to rotate it in your hand without touching wet paint. Base coat every sphere with two thin layers of flat white acrylic and let them cure overnight before any figures go on. Then paint from the back forward: background elements first, faces last. Faces dry fastest and smudge easiest. A 10/0 liner brush is non-negotiable for eyes and smiles; anything thicker and your figures look like they’ve been crying.
17. Pink Paper Baubles Buttoned Like a Sewing Box
Paper, buttons, and ribbon — that’s genuinely it. A pack of colored cardstock runs $5, and a mixed button jar from a thrift store is $2–$4 and will outlast your kids’ interest in crafting. Metallic sequins add $3. Red ribbon loops come off any spool you already own. Realistic total: under $20 for a dozen ornaments, and if you’re using construction paper you may already have everything in a drawer.
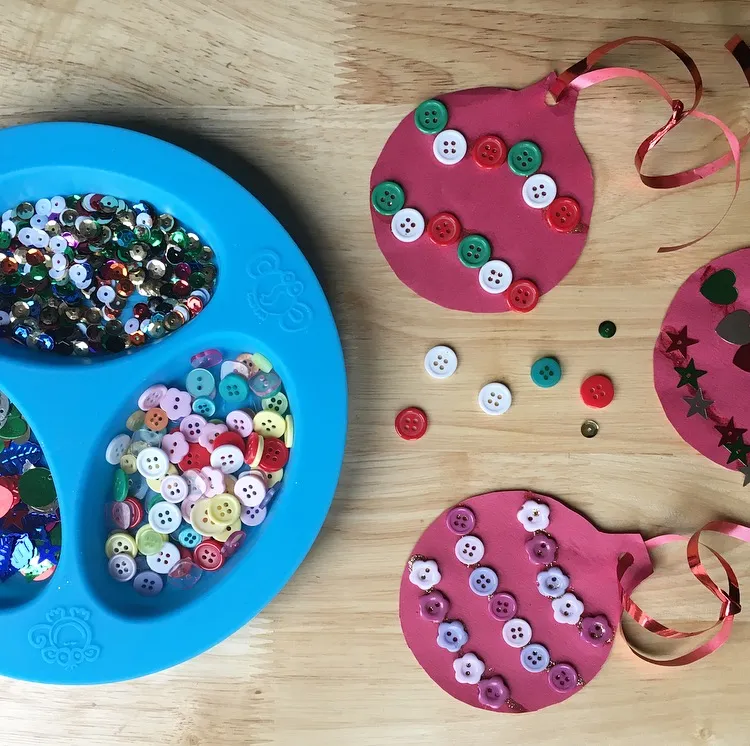
This is the version to make with kids who lose interest in ten minutes — low stakes, fast result, no drying time. One note from experience: the pastel flower-shaped buttons and the bright red-and-green ones look like two different projects, so pick a lane before you start gluing.
- Check whether your paper is cardstock or construction — construction curls and fades within a season.
- Decide your hanging method before you glue; a punched hole with a reinforcement beats tape every time.
- Sort buttons by size into small bowls so kids aren’t digging through a jumbled jar mid-project.
- Lay down a silicone mat. Sequins escape, and you will find them in June.
18. Hand-Painted Scenes and Plush Pups Under Satin Ribbon
The champagne satin ribbon woven through the branches is doing the most work here, and it’s the element most people skip. Without it, you have a tree with lovely painted ornaments and plush animals that looks like two collections sharing space. The ribbon is the connective tissue — it gives the eye a continuous line to follow and ties the pink, sky blue, and grey figures into one palette. Run it in loose swags 12 to 18 inches apart and let it sit behind the ornaments rather than in front of them.
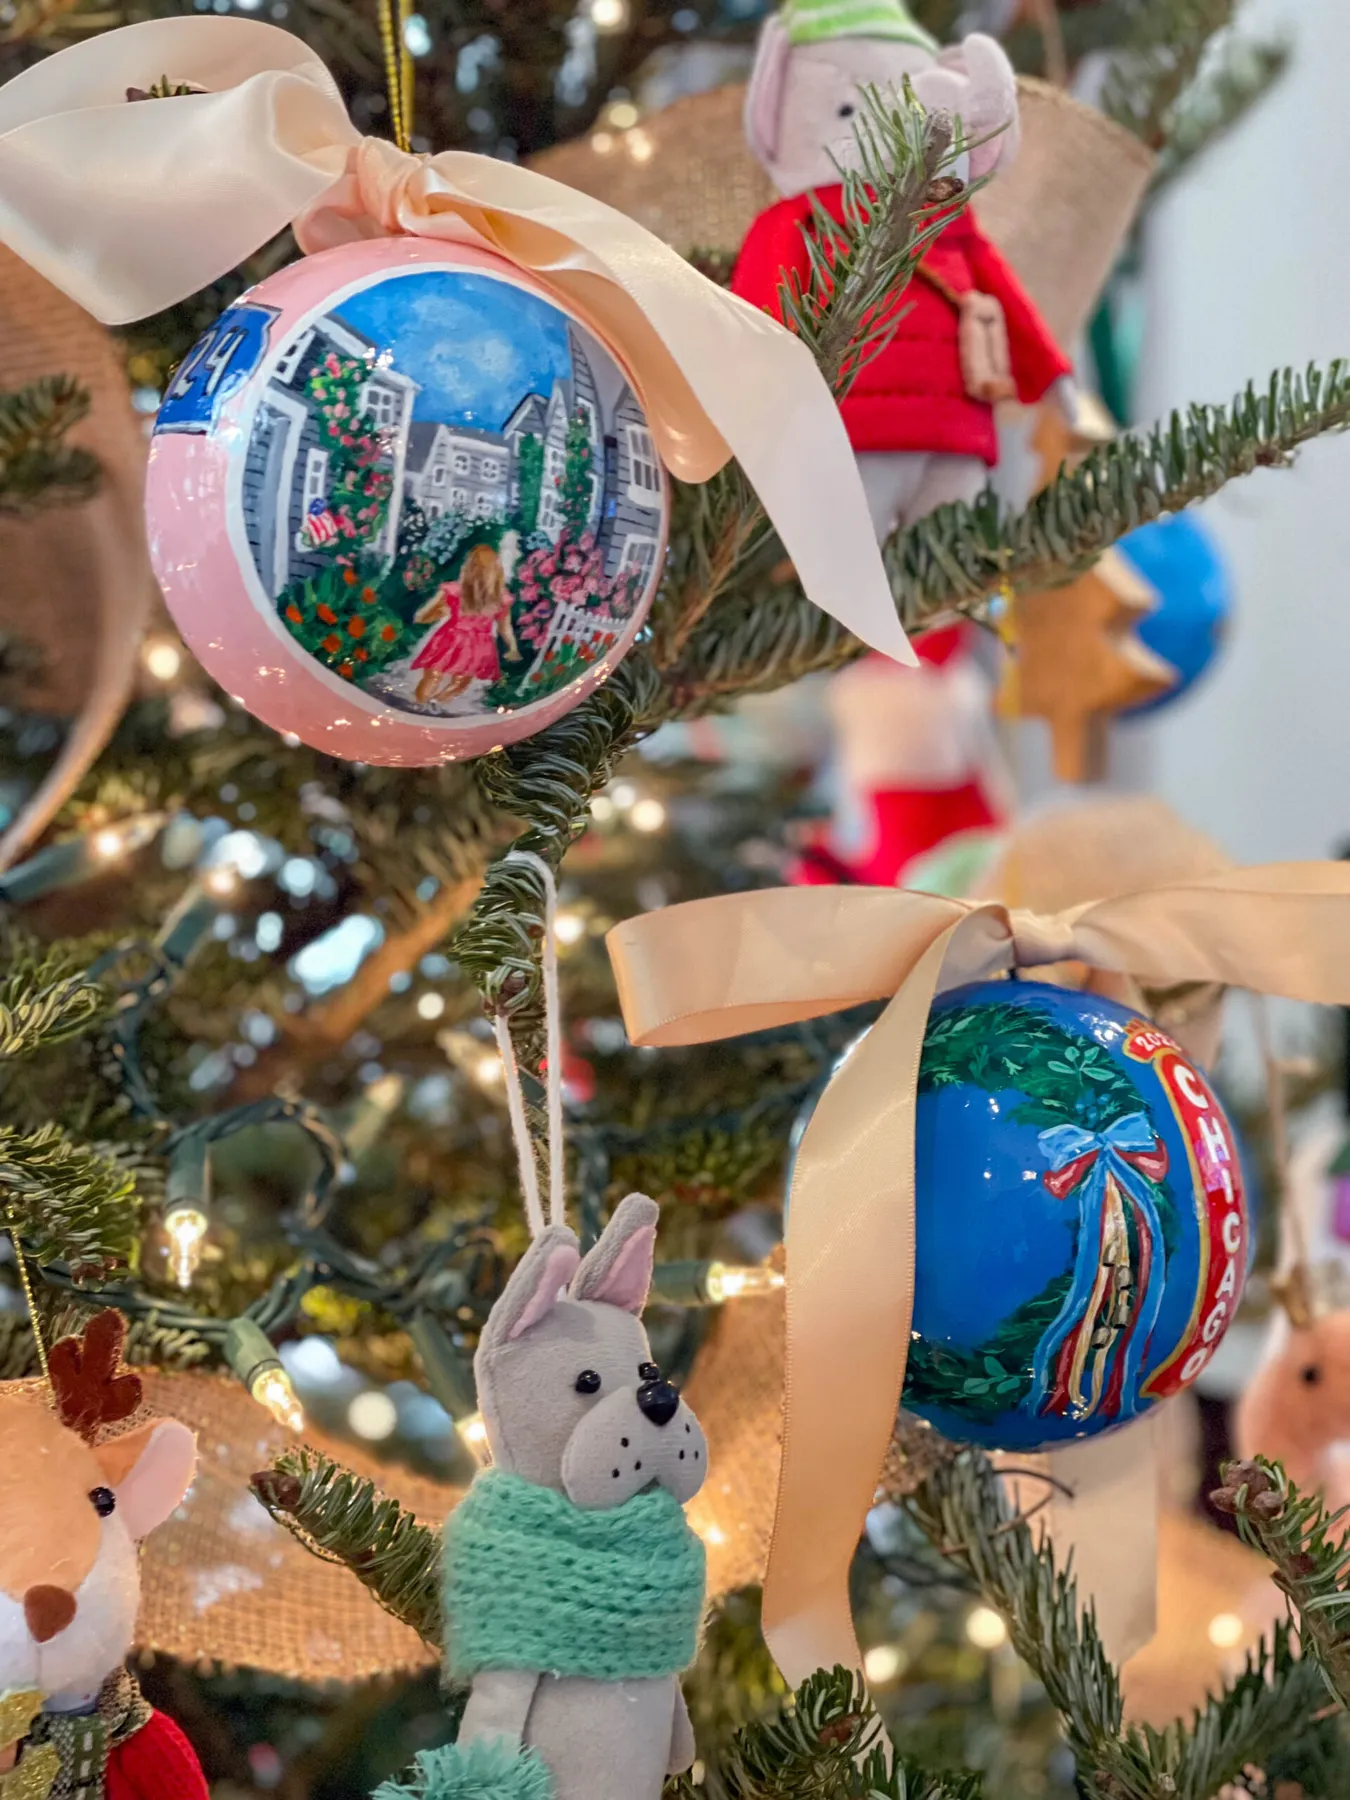
Plush ornaments and string lights are a bad combination if you’re not careful. Bulbs generate real heat, and a felt animal pressed against an incandescent bulb for six hours will scorch. Use LEDs, keep plush pieces at least 3 inches from any bulb, and check them the first week. The hand-painted spheres have their own issue: paint chips at the cap opening where the hanger rubs. Touch up with a dab of matching acrylic every January before you pack them away, not next December.
19. White Baubles Faked Into Birch Bark
Birch bark works because of a very specific ratio: roughly 70% white, 20% charcoal, 10% warm brown. Push the dark patches past 25% and the ornament stops reading as birch and starts reading as a cow. The thin horizontal brown lines — the lenticels — are the detail that sells it, and they should be sparse and slightly irregular.
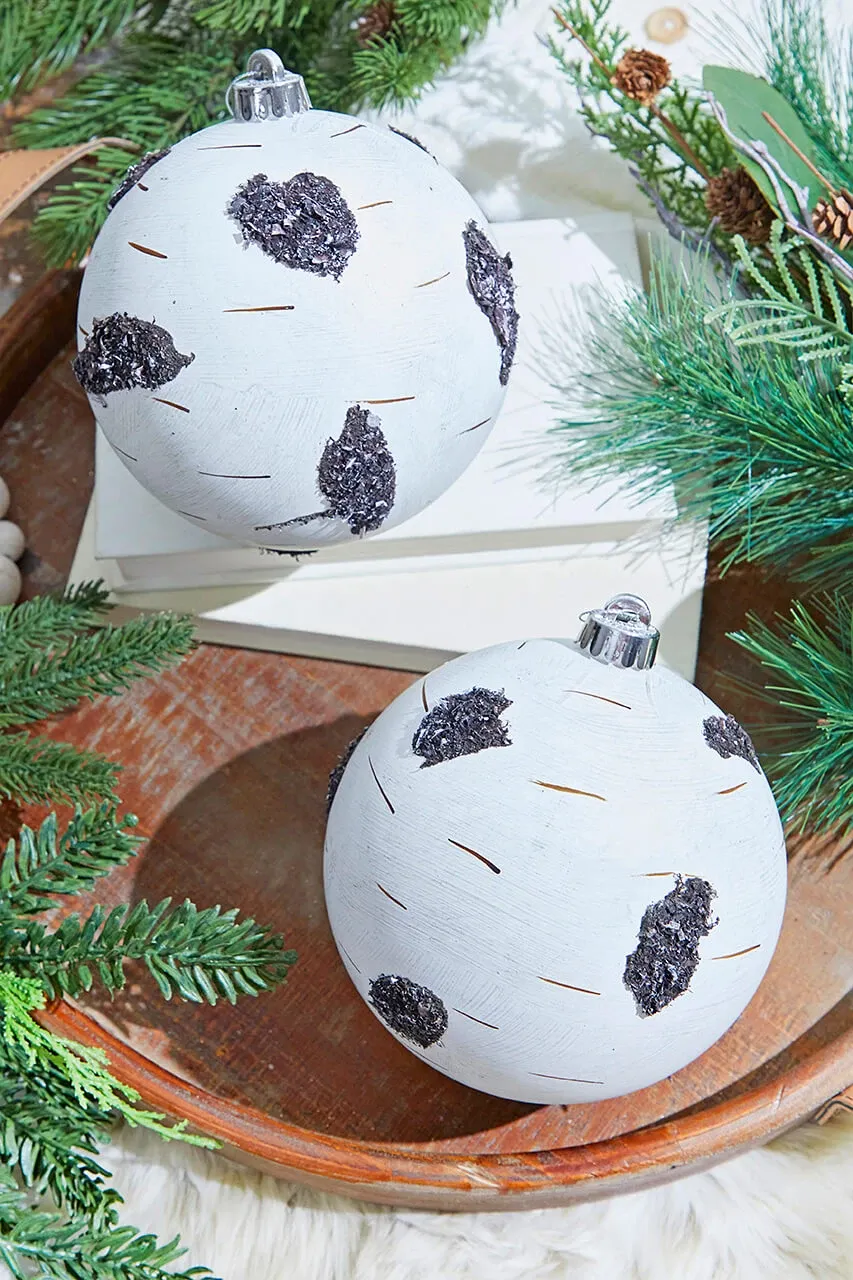
For a winter-white version, drop the brown entirely and use soft grey instead; the ornament turns cooler and more Scandinavian, especially against silver caps. Compare with the dried orange and cinnamon version in Idea #30 if you want the warmer side of this natural look.
- Coat a white sphere in matte white acrylic and let it dry completely, about 30 minutes.
- Tear a small piece of sponge, dab it in charcoal grey, and blot most of it off on paper first.
- Press the sponge onto the sphere in irregular patches, heavier near the cap and lighter toward the bottom.
- Draw thin horizontal brown lines with a fine liner brush, spacing them unevenly.
- Seal with matte varnish so charcoal doesn’t smudge onto your hands.
About 45 minutes per ornament, $4 in supplies.
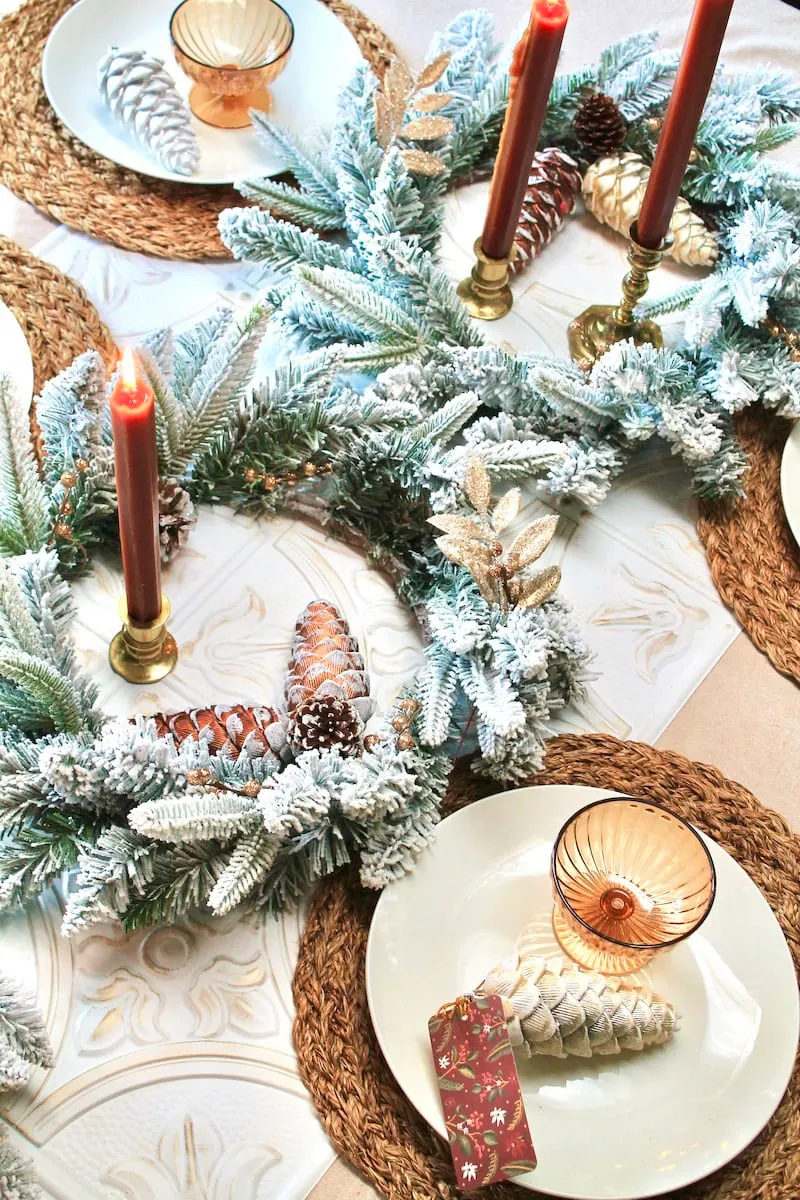
20. A Flocked Garland Centerpiece With Copper and Amber
A centerpiece this dense needs a table at least 48 inches across, and it genuinely prefers a round one. A flocked garland ring takes up 14–16 inches of diameter, so on a narrow rectangular table you’ll have no room for plates. Ceiling height matters less than candle clearance — keep flames at least 12 inches below any hanging fixture.
- Round table: 48–60 inches across
- Rectangular table: 72 inches long or more
- Garland ring diameter: 14–16 inches
- Candle height: 8–10 inches from the tabletop
Three things make it work. The flocked white on green gives a snow-dusted edge that hides gaps where branches don’t meet. The burnt orange candles and copper pinecones are an unusual pairing against evergreen — they warm the whole table without introducing red. And the mix of finishes on the pinecones, natural, flocked, and metallic, creates rhythm at eye level. It also solves a practical problem: a centerpiece low enough to see across but tall enough to matter.
21. Buffalo Check Ribbon, Wood Slice Words, Stone Fireplace
- Buffalo check wired ribbon, 2.5-inch, 10 yards: $12–$20
- Wood slice ornaments, 12-pack or DIY from a branch: $12–$20
- Frosted bottle brush trees, set of 6: $10–$18
- Dark green stockings with faux fur cuff, 2: $30–$60
- Woven basket and filler: $18–$35
- Warm white LED string lights: $12–$22
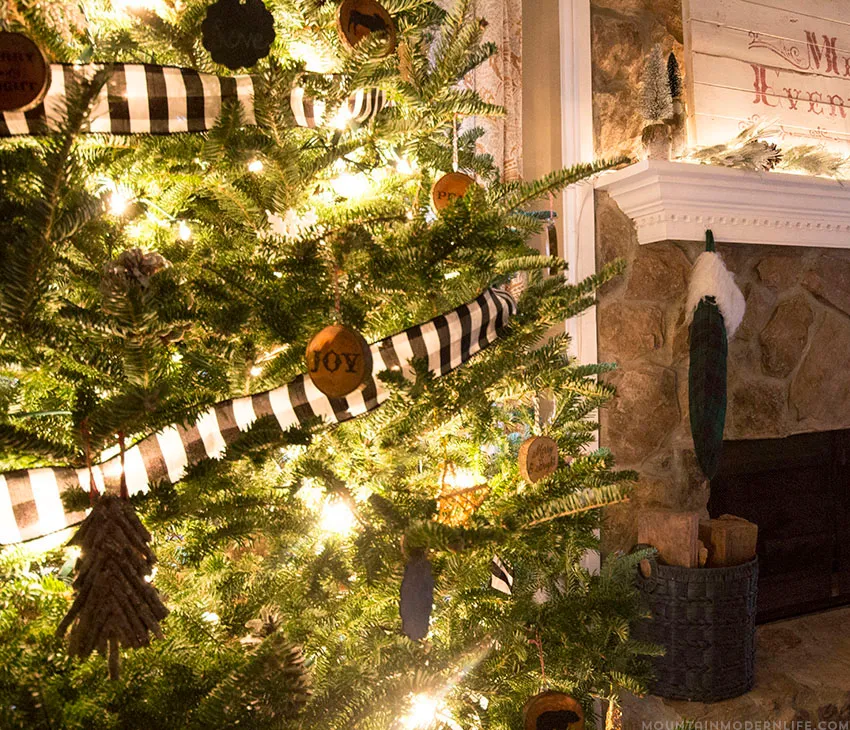
Total: $94–$175 for the full tree and mantel setup.
Budget alternative: cut your own wood slices from a fallen branch, use a $6 roll of buffalo check ribbon from Walmart, and buy stockings in a 2-pack for $15 — roughly $60 all in.
The buffalo check ribbon is the fastest way to make a tree look styled, and also the fastest way to make it look wrapped. Run it in diagonal swags 18 to 24 inches apart, tucking each end into a branch rather than looping it around and around. Two rolls go a long way. Second: wood slice ornaments are heavy. Six clustered on one side will visibly pull the tree, so distribute them evenly and weight the base if your stand has a narrow footprint.
22. Fabric Trees With Real Cinnamon Stick Trunks
Use real cinnamon sticks for the trunks — buy them in bulk, about $8 for 50, rather than raiding your spice drawer, because you want consistent 3-inch lengths. Hot-glue the stick to the fabric tree, then wrap twine around the joint twice and knot it at the back. That mechanical hold stops the trunk snapping off when the ornament swings.
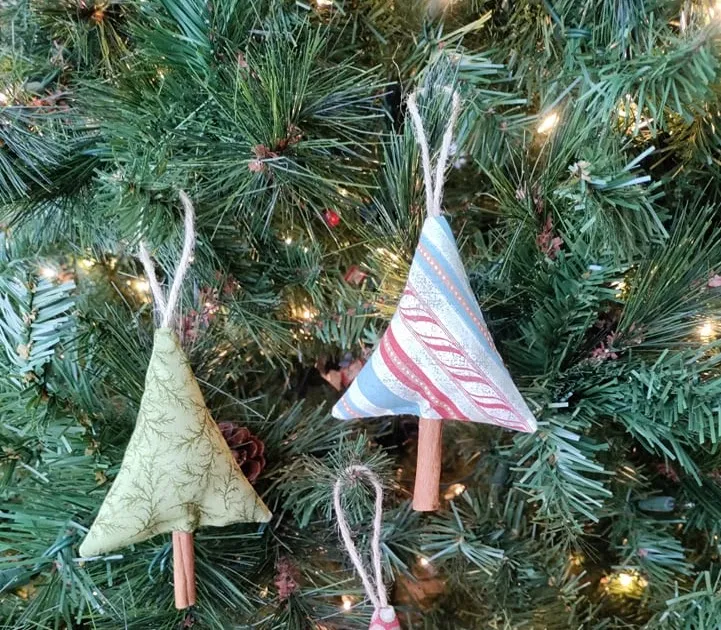
Cut your fabric on the bias so the tree edges fray slightly. Intentional fraying is what makes a fabric ornament look handmade instead of unfinished.
Cinnamon looks lovely and releases scent for about two months — after that it’s purely visual. Refresh the sticks every other year if you want the smell back. Fabric ornaments should be hand-washed, never machine-washed, and only if the glue has fully cured; hot glue softens in warm water and you’ll lose the trunk. The bigger issue is fade. Light greens and blues go grey after two or three seasons in bright sun, so rotate their position on the tree each year. That alone doubles their lifespan.
23. A Teal Half-Sphere Snowman Diorama
The teal interior of the half-sphere is the detail you can’t substitute. A clear half-dome with the same tiny snowman inside looks flat and generic. The painted teal inner wall acts like a colored backdrop at a photo shoot — it lifts the white snowman forward and gives the whole piece an unexpected cool-toned glow. It’s a two-minute paint job that changes everything. If teal isn’t your palette, navy or deep green works equally well, but the inside must be painted.
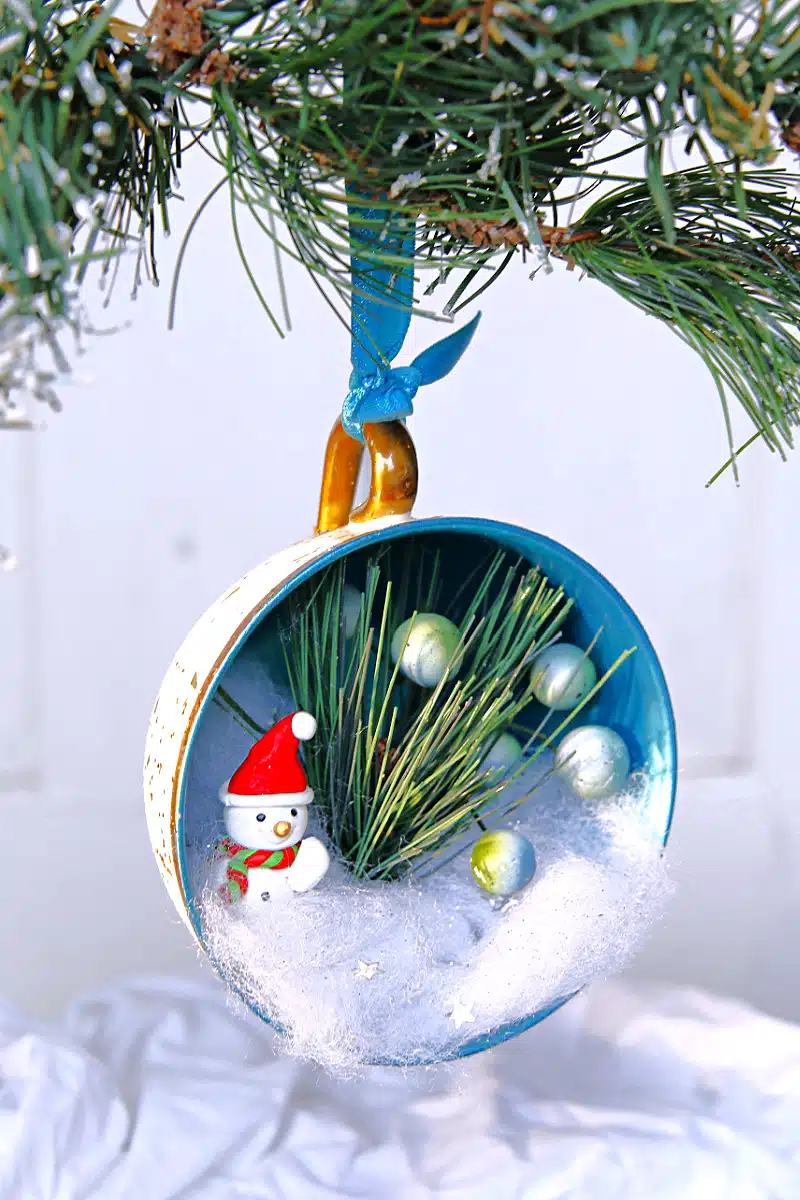
- Paint the inside of a half-sphere with two coats of teal acrylic, working quickly so it doesn’t pool. Dry overnight.
- Distress the outside with a sponge and white paint, then add a thin gold edge along the rim.
- Glue a 1-inch snowman figurine to the flat base, then build up faux snow around it with clear glue and glitter.
- Scatter three tiny iridescent baubles and a few glitter stars into the scene.
- Seal, attach a teal ribbon to the top hangers, and cure 24 hours before hanging.
Two hours across two days, roughly $10 per ornament.
24. A Stuffed White Tree With One Embroidered Poinsettia
The strongest move here is restraint against a busy tree. The ornament is nearly all white with one bold red poinsettia, and it sits on a fir full of natural pinecones and holly berries. The white plush becomes a quiet pause between the textured natural elements around it.
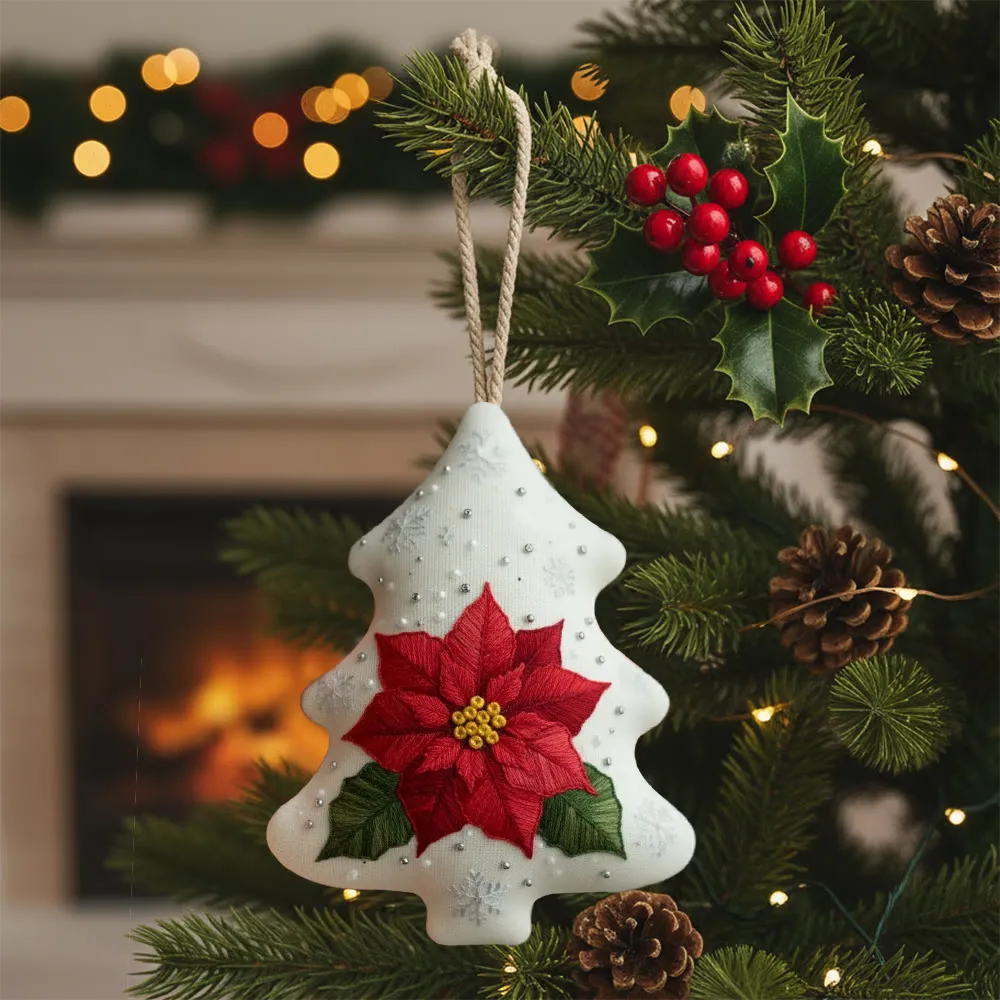
Second, the silver beads are doing scale work — they’re tiny, and they make the ornament feel precious rather than cute. Third, the braided rope hanger is thicker than a ribbon would be, giving the piece visual weight at the top so it hangs straight instead of tilting.
At roughly 5 inches tall, this is a mid-size ornament and it needs a tree of at least 6 feet to feel balanced. On a 4-foot tree, the white fabric reads as one big blank patch. Hang it in the upper third where the fir is fuller and the white has dark green to sit against. If your tree is smaller, scale down to a 3-inch version or use the felt tree ornaments in Idea #15, which hold detail at smaller sizes.
25. A Beaded Blue Fish That Shouldn’t Work (But Does)
Beadwork on a curved surface needs a starting anchor, or the whole thing drifts. Glue one large bead at the tail end first and let it cure for an hour — that’s your north star. Then work outward in rows of no more than six beads, pressing each into a thin line of tacky glue rather than a blob.
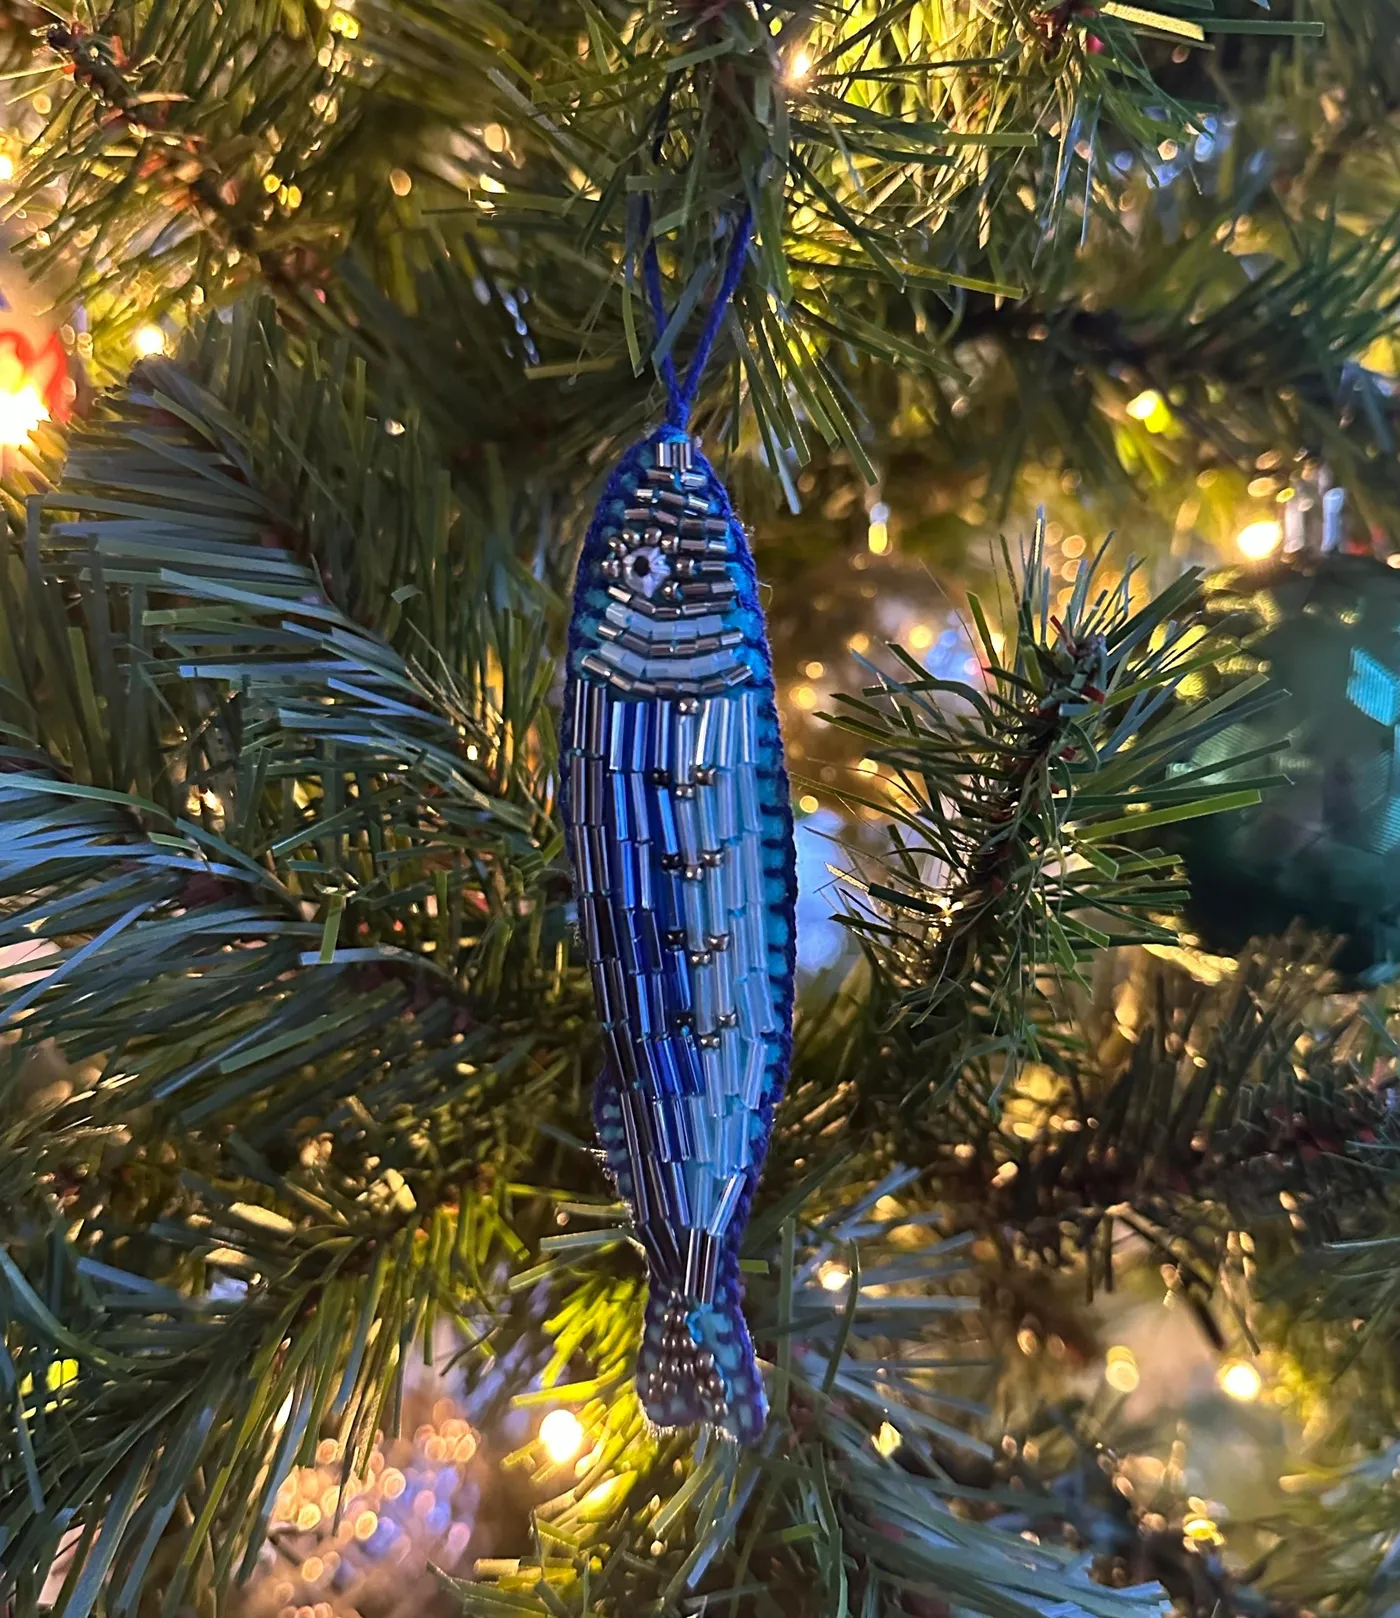
A fine-tip applicator bottle makes this doable. Regular craft glue lays down too much, and it bleeds between bugle beads, which kills the sparkle and leaves visible cloudy patches under the glass-like finish.
Beaded ornaments are gorgeous and fragile in one very specific way: the hanging loop. The thread holding the top bead carries the full weight of the ornament every time you hang it, and that’s where they fail. Reinforce the loop with a second pass of thread and a dab of clear glue, and you’ll get a decade out of it instead of two seasons. Dust with a soft brush, never a cloth — bugle beads snag on fabric. Store flat in a padded box, not dangling.
26. Felt Reindeer, Robin and Christmas Pudding on Distressed Wood
- Wool or wool-blend felt in beige, brown, red, white: $10–$16
- Embroidery floss, 6 colors: $4–$7
- Polyester stuffing: $3–$5
- Freezer paper for cutting templates: $4–$6
- Embroidery needles and a small hoop: $6–$10
- Dried orange slices and pinecones, dried at home: $0–$6
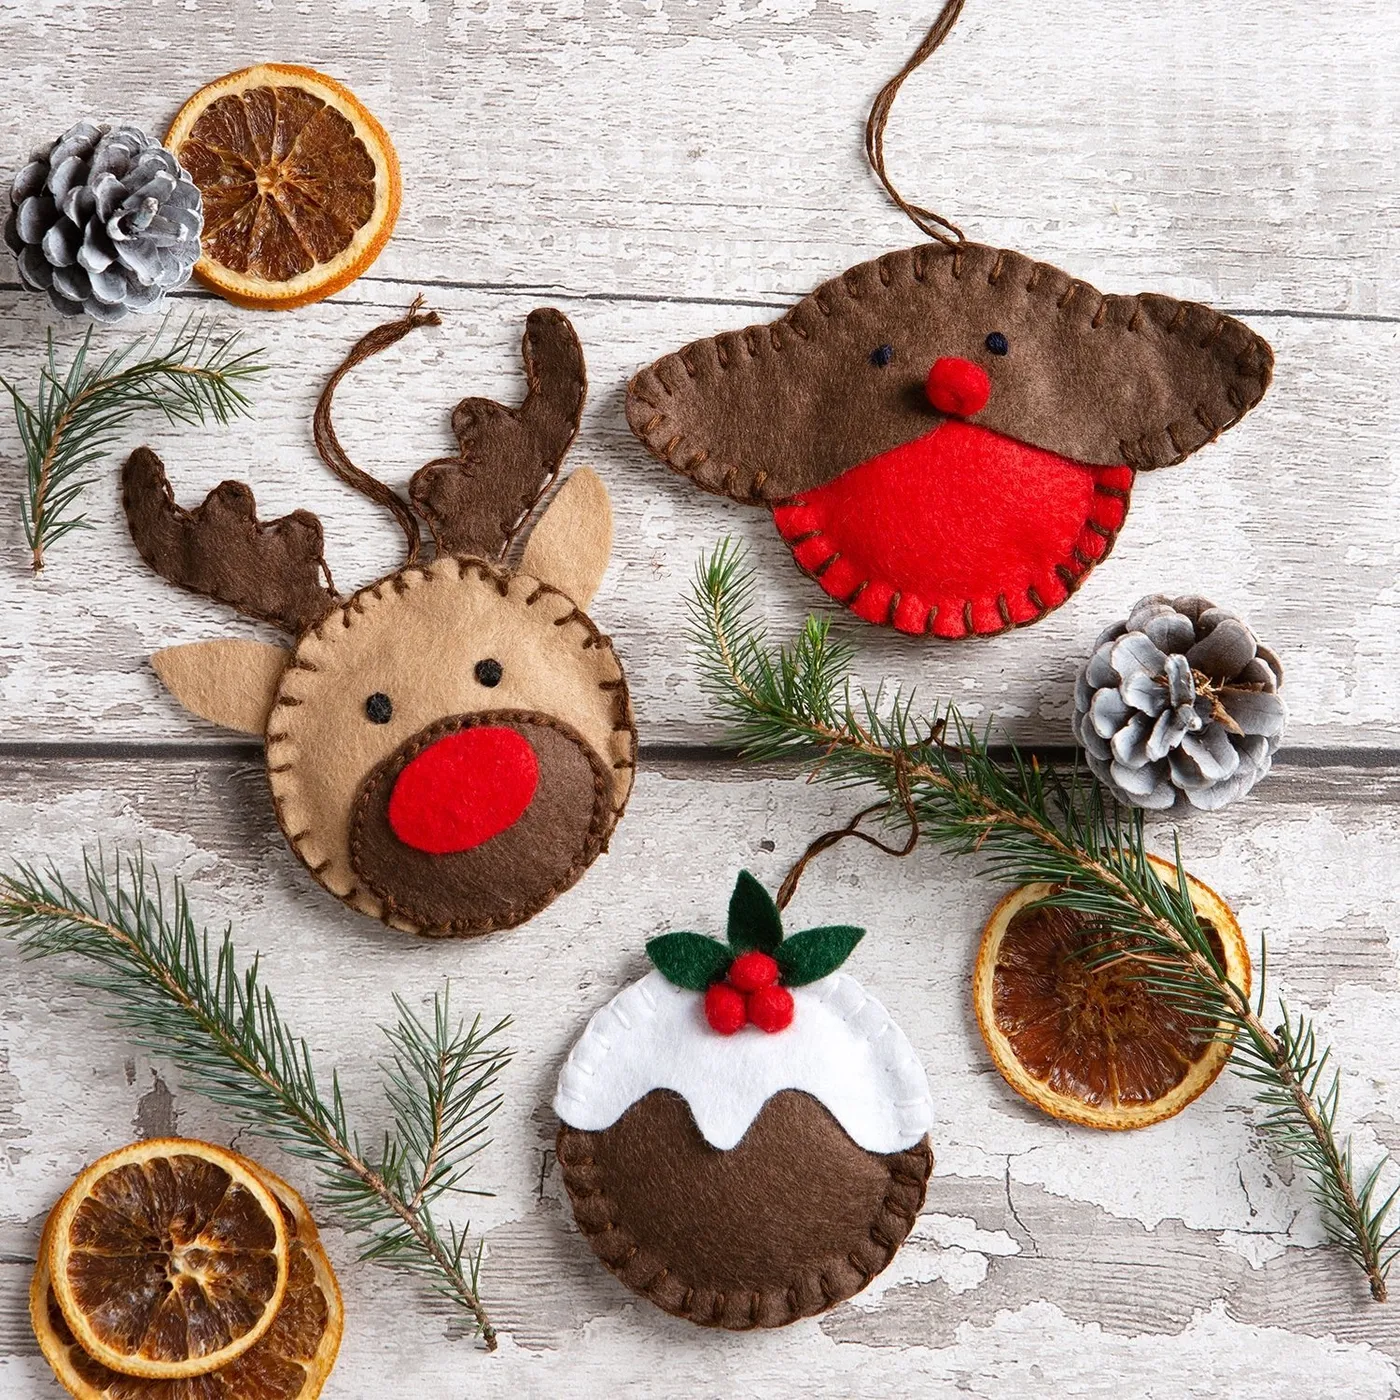
Total: $27–$50 for a set of six felt ornaments.
Budget alternative: use acrylic felt at $0.50 a sheet and skip the hoop — six ornaments come in around $14, though the edges won’t hold as crisp a shape.
Felting and hand-stitched wool have quietly outpaced glitter ornaments on Pinterest for two years running, and it tracks with a larger shift: people are buying less and making more, and they want objects that look like they took time. The natural-accent styling — dried orange, pinecones, bare pine — is the same aesthetic behind the cottagecore Christmas look, which has settled into a permanent seasonal standard. This one has staying power because it isn’t dependent on a color trend. Beige, brown, and green never go out.
27. A Mini Winter Scene Sealed in Buffalo Plaid
The formula is 45% clear glass and white snow, 30% deep green, 15% buffalo plaid, and 10% red. The plaid is the ruling accent — it’s the only pattern in the piece, which is precisely why it works. Add a second pattern inside the scene and it falls apart.
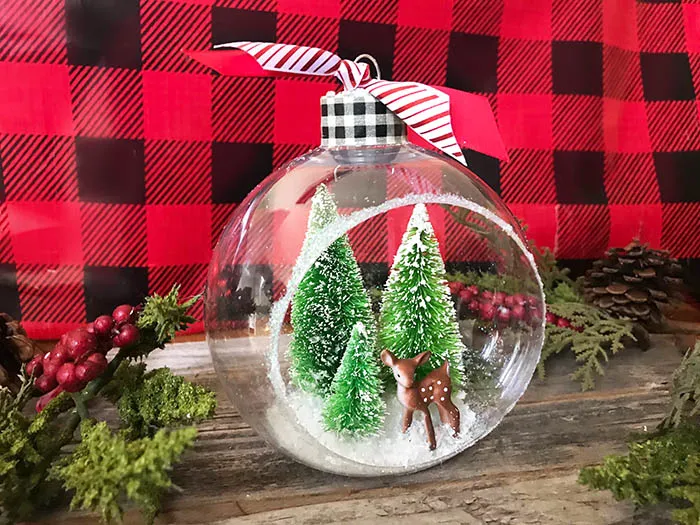
For a warmer version, swap the red-and-black plaid for a red-and-cream check; the whole ornament goes from rustic lodge to vintage kitchen instantly. The buffalo check cap and red-and-white striped ribbon aren’t fighting because the stripes are a solid-line pattern and the plaid is a grid. Two different structures, no collision.
- Confirm your ornament opening is at least 20mm — bottle brush trees won’t fit through anything smaller.
- Test-fit the deer figurine on the base before gluing; many are too tall for a 3-inch sphere.
- Buy two packs of bottle brush trees to get three matching sizes.
- Cut your plaid fabric on a flat surface and mark the check line you’ll align the cap to.
- Keep long tweezers on hand — you’ll need them to place the snow.
28. Blue Baubles With Painted Snowmen, Drying in an Egg Carton
This might be the smartest low-cost approach in the entire list, and it starts with an egg carton. Blue glass ornaments in a 12-pack run $12–$18 at Walmart or Michaels in early November. White acrylic paint plus one black and one orange fine-liner, with a couple of purple and teal paint pens, totals about $15 and will cover dozens of ornaments for years. Cardboard egg cartons are free at any grocery store and are genuinely the best drying rack for painting spheres.
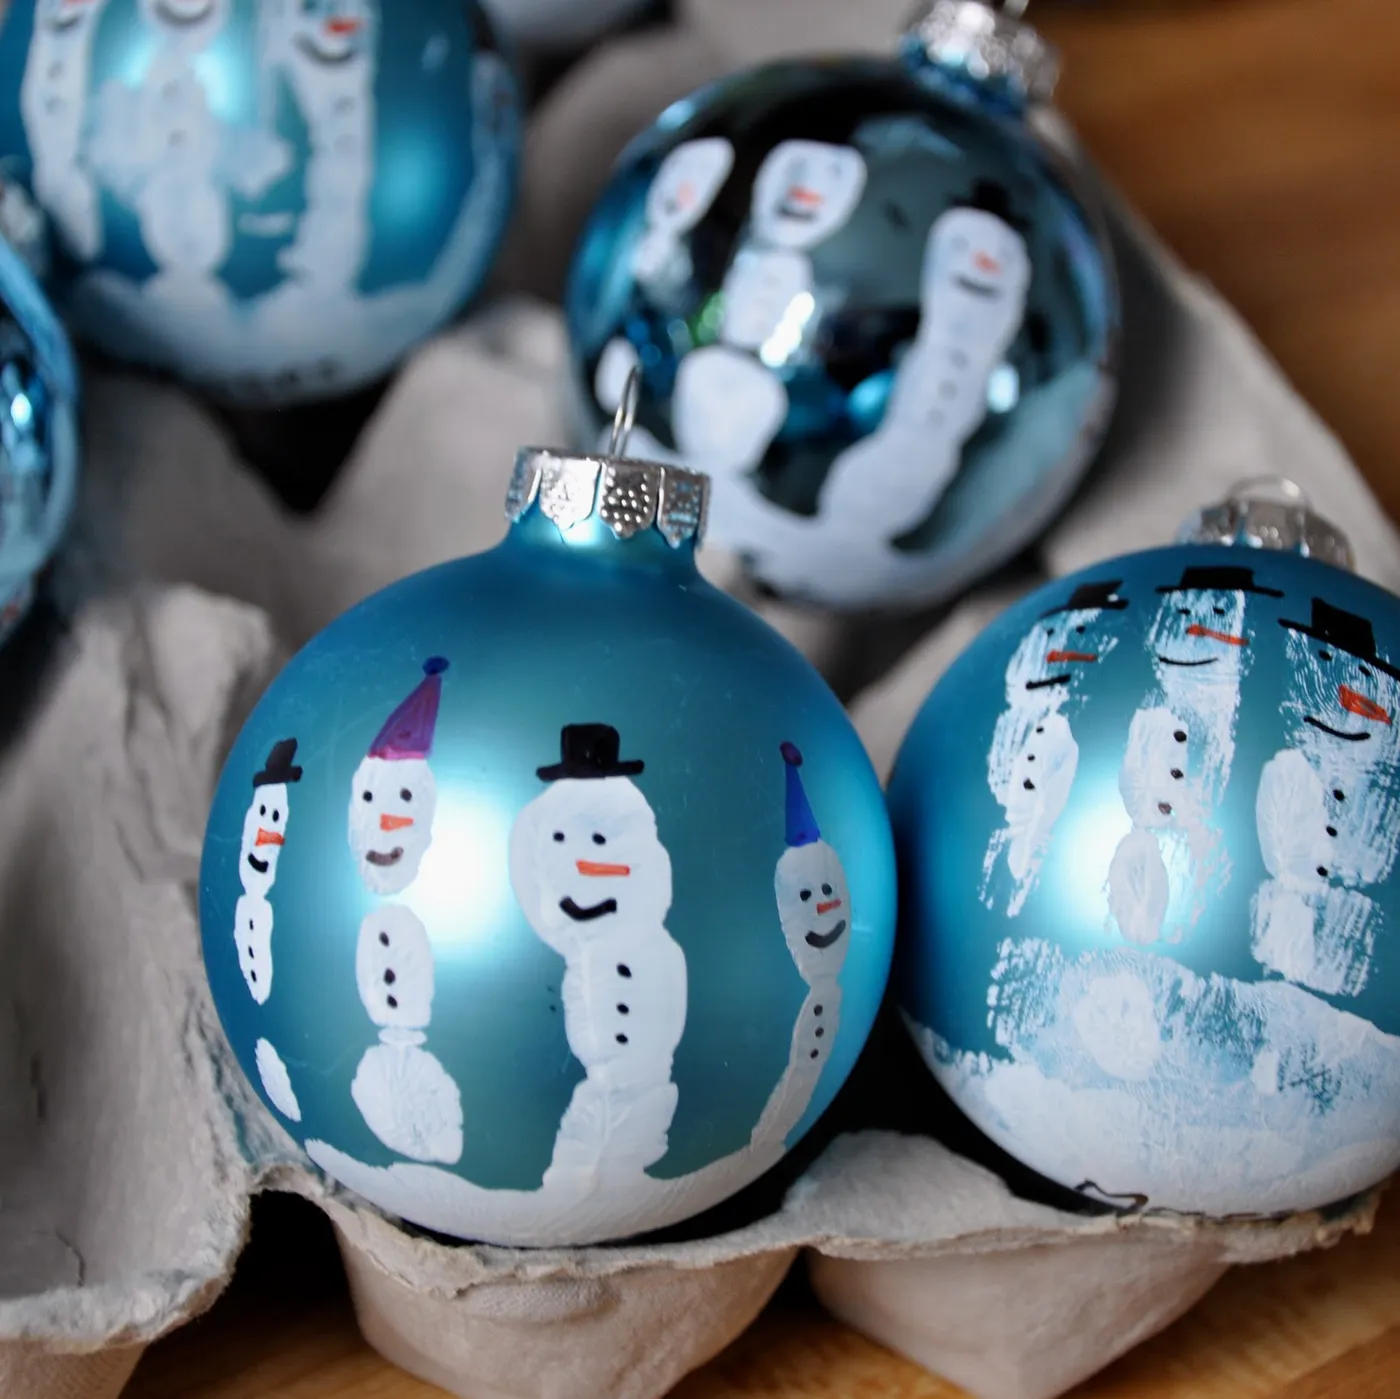
Paint the snowmen with the ornament resting in the carton cup so it can’t roll. Work in stages and let each color dry: white body first, 20 minutes; then black hats and eyes; then orange carrot noses last, because those are the tiniest marks and you want a steady hand. Use a 10/0 liner or a fine paint pen. Skip gloss varnish on the top — matte keeps the glass from looking like plastic under warm lights.
29. A Felt Pancake Stack With Strawberries and Butter
Let’s be honest about the pancake ornament: it’s absurd, and that’s the appeal. What it isn’t is a beginner project. Felt food requires even stitching and consistent stuffing, or the layers bulge unevenly and the stack won’t sit straight. Budget two hours for your first one. It’s also the ornament most likely to get squeezed by guests who assume it’s soft — tell them it isn’t. And if you have a cat, hang it high; those felt strawberries are exactly the right size for batting practice.
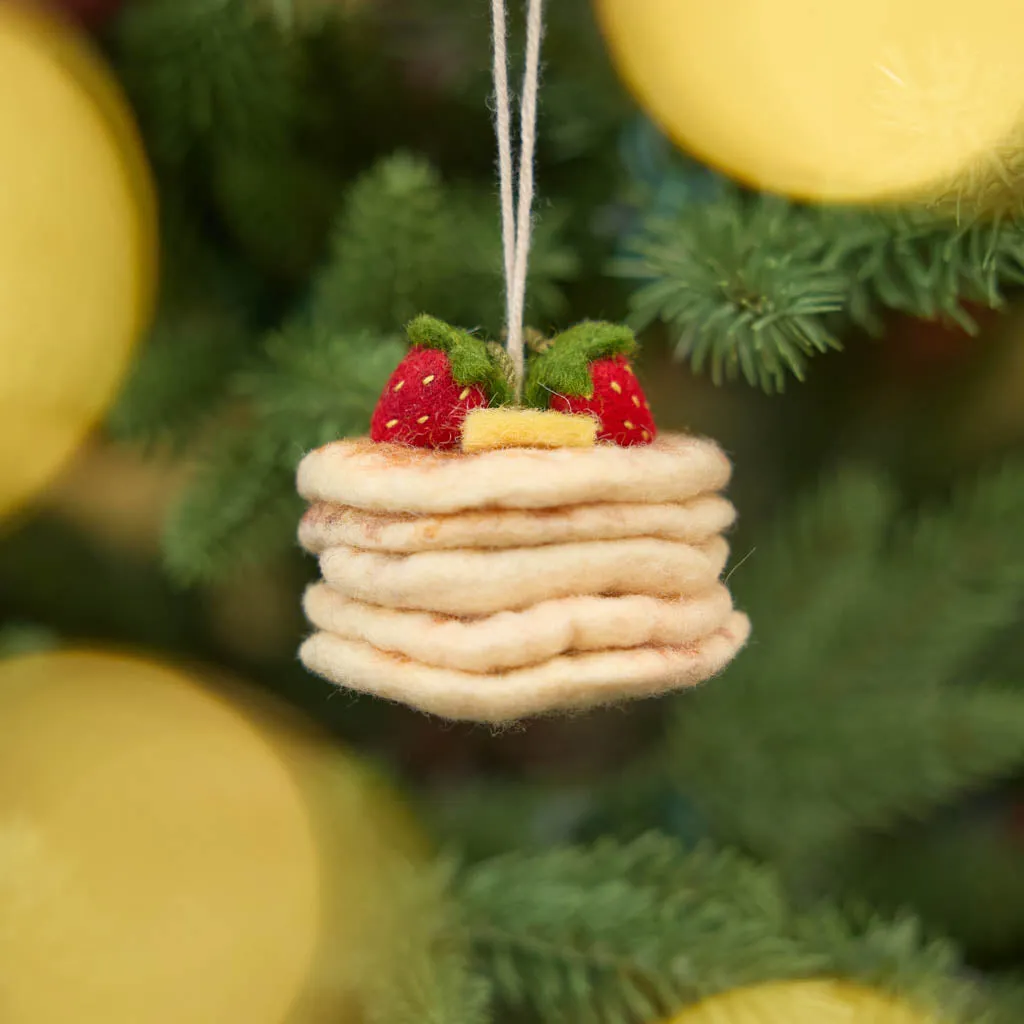
Felt food works for one reason: it’s recognizably specific. A generic felt ball is nothing. A stack of pancakes with two strawberries and a square of butter is instantly, unavoidably a stack of pancakes, and that recognition is the joke. The styling does the rest — cream felt against deep green pine and soft yellow lights keeps the palette warm instead of cartoony. Color discipline matters here: cream, red, green, one small yellow accent. Add a third strawberry and it tips into clutter.
30. Dried Orange, One Cinnamon Stick, One Small Pinecone
- Slice oranges ¼-inch thick and dry them at 200°F for 3–4 hours, flipping once, until leathery.
- Drill a small hole near the edge of each slice with a 1/16-inch bit, working slowly to avoid cracking.
- Thread jute twine through the orange, then wrap twice around a 3-inch cinnamon stick.
- Tie on a miniature pinecone at the bottom and knot tightly.
- Leave a 4-inch loop at the top for hanging.
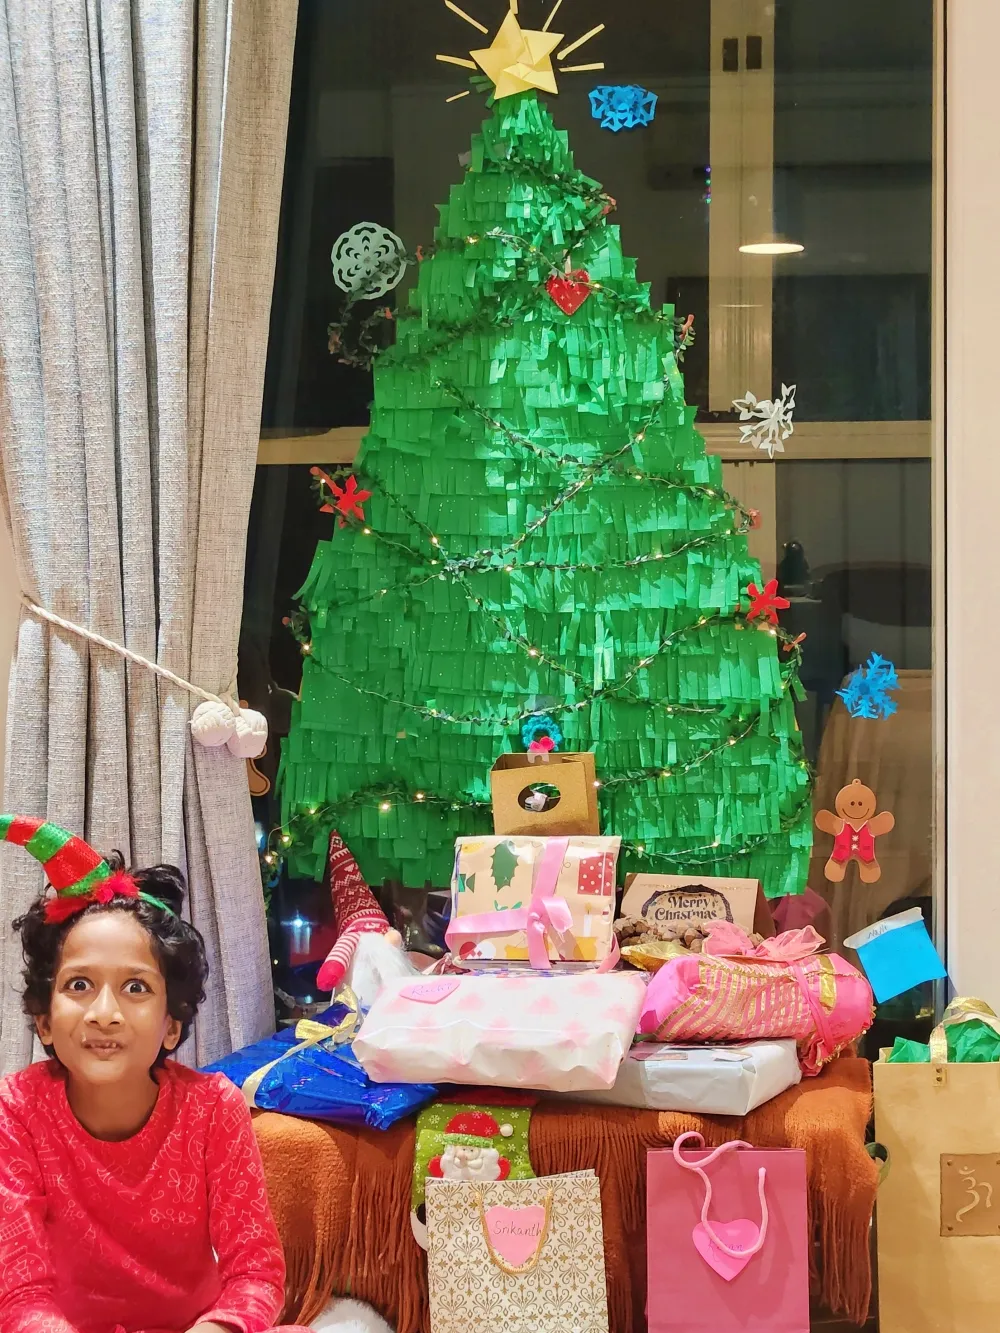
Roughly four hours, most of it oven time. About $1.50 per ornament.
Almost nothing here costs money if you plan ahead. Oranges are cheapest in December — a bag of navels runs about $5 and yields 15–18 slices. Cinnamon sticks in bulk are $8 for 50. Mini pinecones come free from a walk, though you should bake them at 200°F for an hour to kill anything living inside. Jute twine is $3 for a large spool. Realistic total: $16 for a dozen ornaments, and the house will smell incredible for weeks.
31. An Evergreen Wreath With Silver Deer and Rose Gold
A wreath this full needs a door at least 32 inches wide, and the finished piece should measure 22–26 inches across to look generous rather than skimpy. On a standard 36-inch front door, a 24-inch wreath leaves a comfortable 6 inches of door showing on each side. For interior walls you can go larger.

- Front door, standard: 22–24 inch wreath
- Double doors: 18 inches per door
- Interior wall or mantel: 26–30 inches
- Hanging height: centered at eye level, about 60 inches from the floor
The silver deer figures are what elevate this from a nice wreath to a memorable one. Without them, it’s metallic baubles and red berries — pretty, completely standard. The deer add narrative, and they’re small enough that guests discover them one at a time instead of seeing everything at once. Place two or three, not a herd, tucked slightly into the greens so they appear to be standing among branches. If your entry is narrow, the flocked table garland in Idea #20 fills the space without blocking a walkway.
32. Paper Stars, Paper Snowflakes and a Trace of Silver Tinsel
- White cardstock or heavy paper: $6–$10
- Red felt or fabric scraps: $4–$8
- Silver tinsel garland, 2 strands: $6–$12
- Warm white LED string lights, 300 count: $18–$30
- Baker’s twine or thin ribbon: $4–$6
- Snowflake and star cutting templates: $0–$8
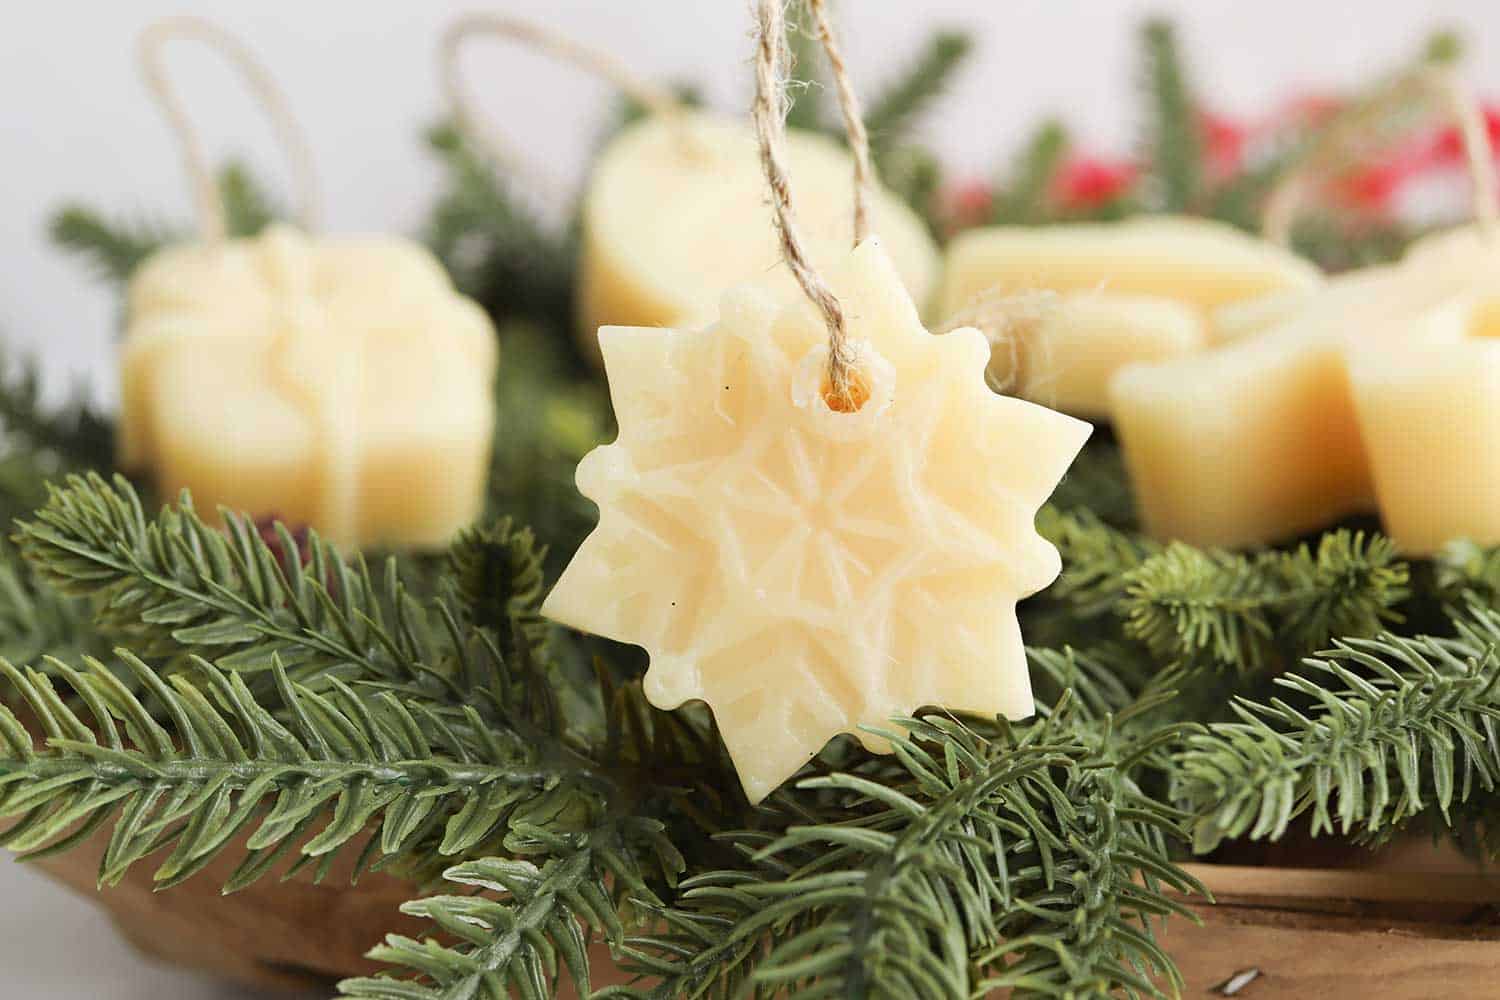
Total: $38–$74 for a fully handmade tree’s worth of ornaments.
Budget alternative: print templates for free and cut ornaments from paper grocery bags or last year’s greeting cards — under $15 total, and the recycled paper gives a nice mottled texture.
Density is the design here. The tree is packed — paper stars, snowflakes, red fabric accents and tinsel all competing — and it works because every ornament shares the same two colors. White and red on green, repeated forty times, reads as abundance instead of chaos. The second principle is material honesty: paper, fabric, and metal all look like what they are. Nothing is pretending to be something else, and that’s why a handmade tree like this can hold its own beside a fully styled one.
Go Make Something Slightly Imperfect
Thirty-two ornaments, and not one of them requires a steady hand or a $200 class — the thumbprints, the slightly crooked snowmen, and the frayed felt edges are what people remember on your tree twenty years from now. Start with one, see how it goes, and let the set build itself over a few Decembers.
📌 Pin your favorite idea now so you can find it again when the craft store aisles get crowded — and tag us when it’s hanging.