29+ Stunning DIY Cinnamon Ornaments to Make Your 2026 Holidays Unforgettable
You know that feeling when the tree looks great in photos and then you get up close and it’s just… shiny plastic? That’s the exact reason cinnamon ornaments keep climbing on Pinterest every November. They cost pennies, they smell like a bakery, and they photograph like a 1970s holiday catalog in the best possible way. We gathered 29 real ideas from real homes, and every single one is something you can actually make at your kitchen table.
We spent serious time browsing Etsy, Target, and Amazon — plus a lot of late-night scrolling through craft forums — to bring you only what’s worth your attention this year. Budgets here run from about $6 for a batch of plain dough ornaments to $48 if you’re styling a whole centerpiece with candles and dried citrus. The styles lean rustic farmhouse, natural woodland, vintage Christmas, and just a touch of cottagecore.
The 2026 version of this craft is less “kindergarten project” and more “quiet luxury for people who own a rolling pin.” And stay until the end — we break down the most common mistakes that can ruin these looks.
📌 Save this to Pinterest for later — you’ll want to revisit these ideas.
1. Cinnamon Dough Tree Ornament With a Blue Gingham Bow
A gingham bow is a cheap trick that reads expensive. Cut your ribbon on the bias — a diagonal slice, not a straight one — so the ends don’t fray into a fuzzy mess after a week on the tree. For an ornament this small, keep the bow under 2 inches wide and tie a double knot before you form the loops; single-knot bows slide down a slick cinnamon dough surface overnight. One spool of 3/8-inch gingham covers roughly forty ornaments.
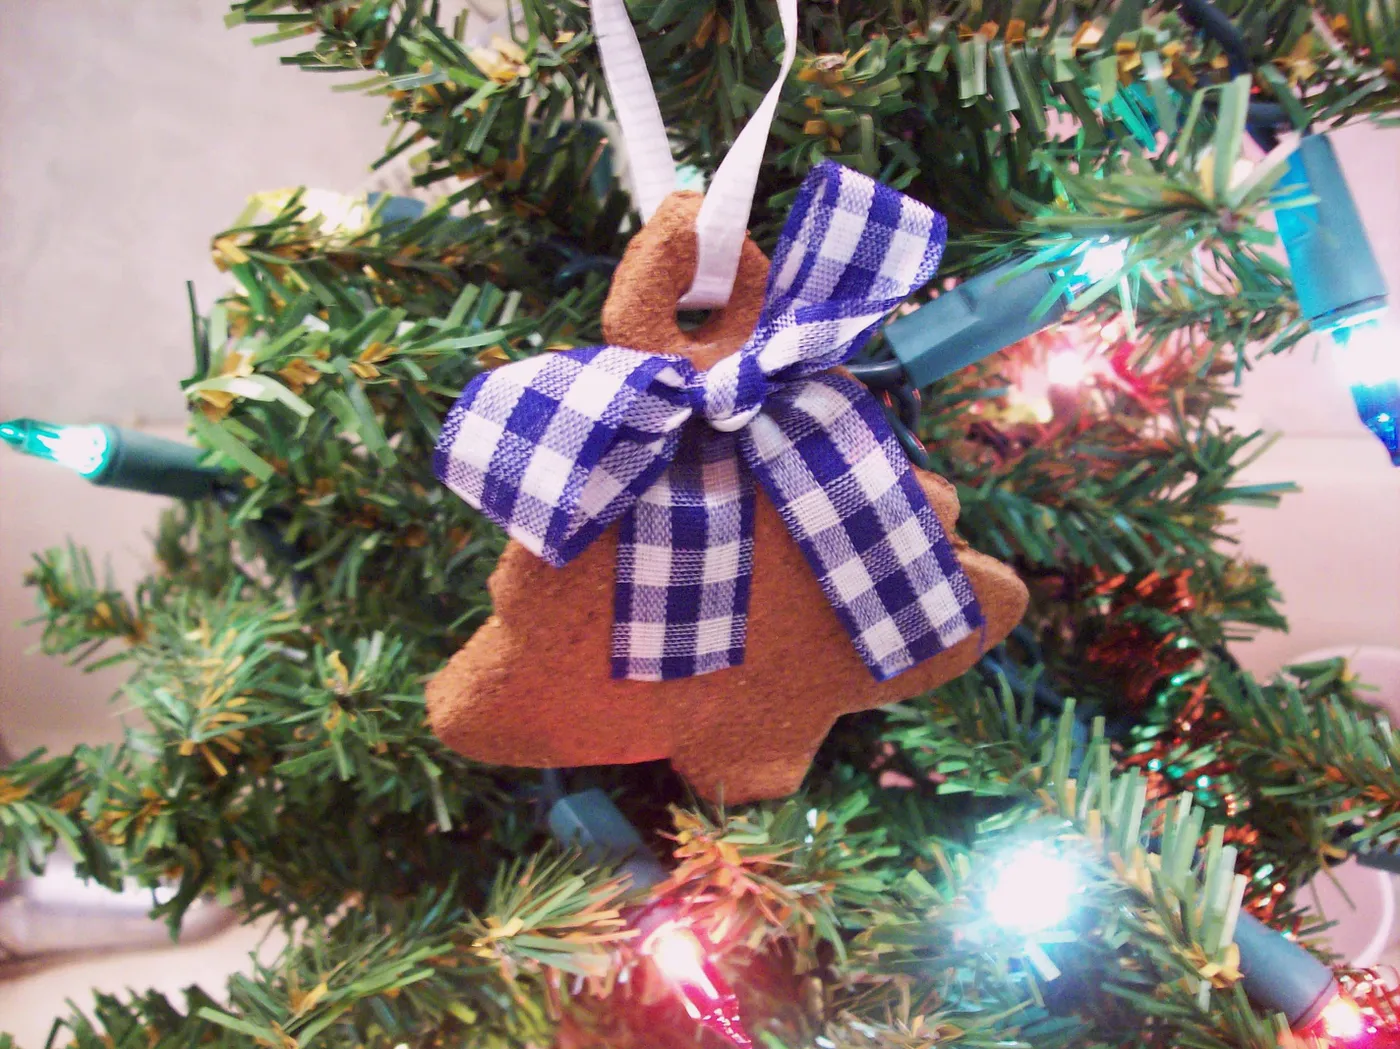
What makes this one land is temperature contrast. Cinnamon dough is warm brown and matte; the royal blue gingham is cool and crisp. Put those two next to multi-colored string lights and the ornament stops looking homemade in a bad way and starts looking collected. The white ribbon hanger does quiet work too — it disappears against the lights, so the eye only registers the tree shape and the bow.
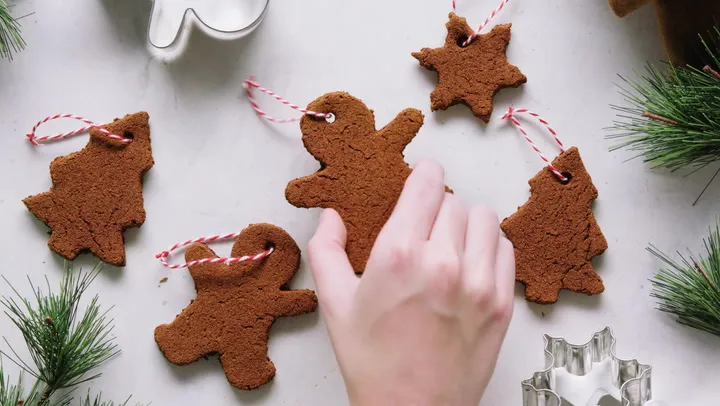
2. Cookie-Cutter Gingerbread Men With Red-and-White Twine
A gingerbread man is the hardest shape in the set because arms snap. Work the dough cold and follow this order:
- Chill the rolled dough 20 minutes before cutting.
- Dip the cutter in flour, then press straight down — no twisting.
- Lift with a thin spatula, not your fingers.
- Poke the hole 1/4 inch from the top edge, never closer.
- Dry low and slow at 200°F for 2 hours, then cool completely.
Total time: about 3 hours, most of it hands-off.
Here’s the thing nobody mentions: cinnamon ornaments are not cookies. Bake them at 350°F like cookies and the arms curl up and the whole batch smells burnt instead of cozy — they dry, they don’t bake. Also worth knowing: the red-and-white twine looks best at about 4 inches, long enough to loop over a branch without the ornament sitting flush against the needles.
3. Dried Orange and Cinnamon Stick Tree With a Star Anise Topper
The star anise on top is doing 90% of the work. Without it, this is a stack of dried orange slices and sticks — pretty, but shapeless. The star anise crowns the stack, gives it a point, and adds a dark, almost licorice note that balances the sweet citrus. Glue it last, after the oranges have fully dried, or the steam from a fresh slice will loosen the bond and you’ll find the topper on the floor by New Year’s.

- Dried orange slices (2 oranges): $3–$5
- Cinnamon sticks, 12-pack: $4–$8
- Star anise, small bag: $4–$7
- Hot glue sticks: $3–$5
- Twine or ribbon: $2–$4
Total: $16–$29 for about eight ornaments. Budget alternative: skip the star anise and cap the stack with a cinnamon stick tip instead — saves $5 and looks nearly identical from across the room.
4. Star and Heart Cinnamon Ornaments With Whole Cloves
The formula here is simple and it travels:
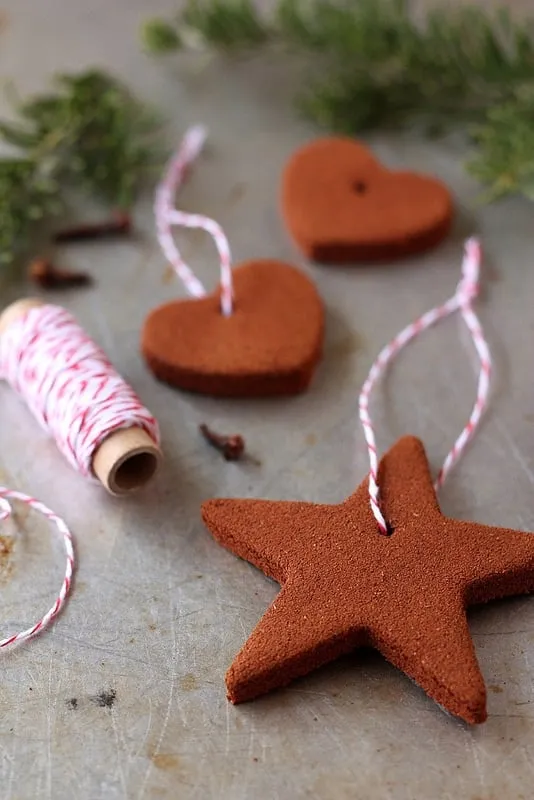
- 70% warm brown base — the cinnamon dough itself
- 20% crisp white — the baker’s twine hanger
- 10% dark punctuation — whole cloves pressed into the surface
Swap the cloves for black peppercorns and you get the same visual rhythm with a sharper scent. Swap the twine for cream velvet ribbon and the whole thing turns softer, more Victorian. Keep that 70/20/10 split and you can restyle this ornament six different ways.
Press cloves in while the dough is still damp — within ten minutes of cutting — and push them in at an angle rather than straight down. Straight-down cloves crack the surface as the dough dries and shrinks around them. If you want star points to stay sharp, cut them with a bench scraper instead of a knife; one firm rock corner to corner gives you a clean edge with no drag marks.
5. Cinnamon Stick Snowflakes Tied With White String
- Pick three cinnamon sticks of equal length — roll them on the counter to check.
- Cross them at the center into a six-point star.
- Wrap white string around the crossing point eight to ten times, pulling snug.
- Tie a double knot and leave a 5-inch tail for the hanger loop.
- Dot the joint with a tiny bit of glue so the sticks don’t fan open.
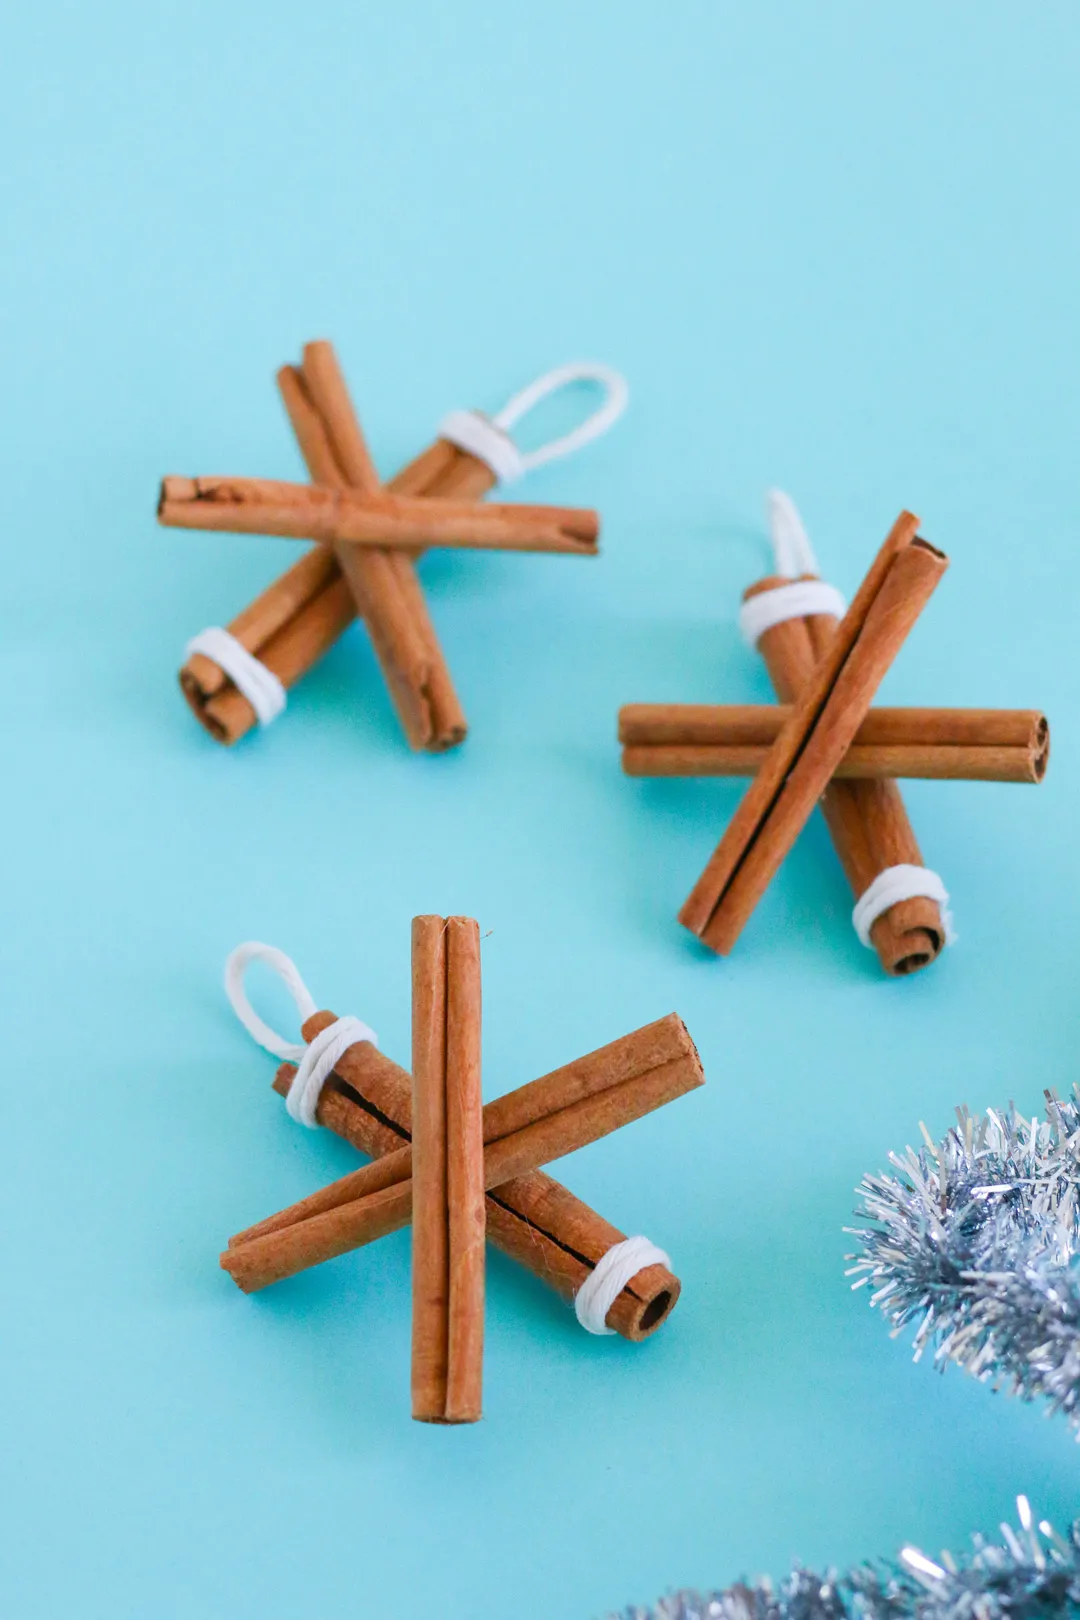
Time: 6 minutes per ornament. Cost: about $1.20 each if you buy cinnamon sticks in bulk.
It’s the white string, not the cinnamon, that makes these work. Brown sticks on a dark surface would read as a pile of bark without that bright binding pulling them into a shape. The string also does structural work — the wraps are what hold the star together, so don’t cheat on the count. Six wraps and it wobbles. Ten and it’s solid enough to survive a season in a box.
6. Bundled Cinnamon Stick Ornaments Topped With Star Anise
Three sticks, not two, not five. Three gives you a bundle with a flat back and a rounded front that hangs correctly against a branch, while two sticks spin and five look like a bundle of firewood. Cut them to 3 inches, the sweet spot for a 7-foot tree — anything longer catches the light cord. Tie with jute twine in a square knot so it doesn’t slip under the weight of the star anise pod.
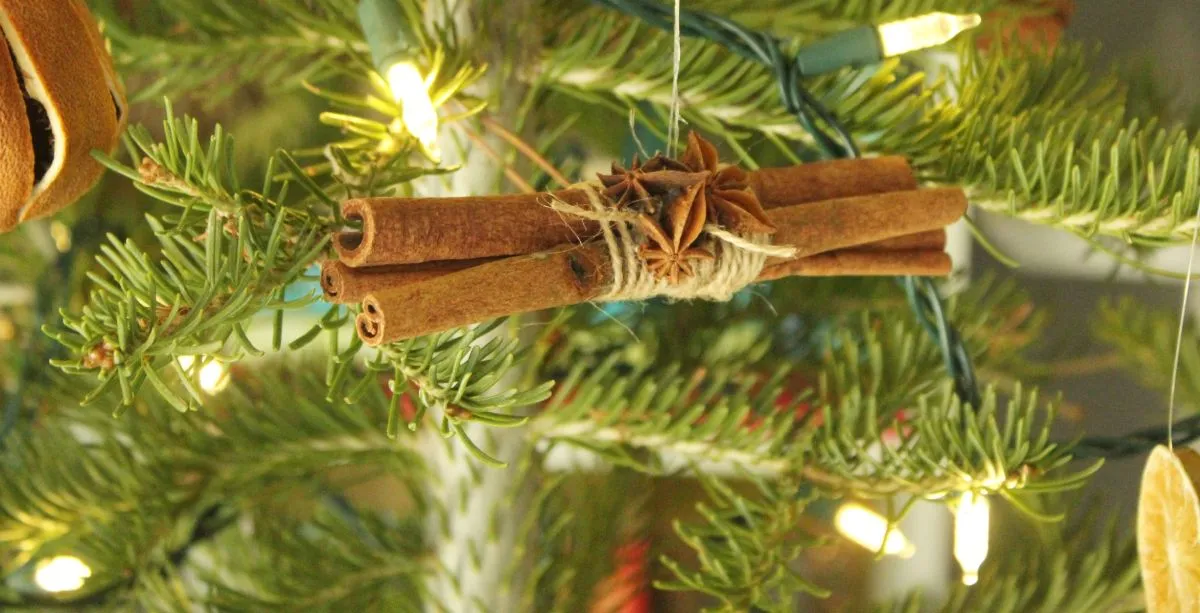
These read as substantial, so they want a big tree. On a 7- to 9-foot tree, hang them in the gaps between larger ornaments — they fill space without adding visual noise. On a tabletop tree under 4 feet, three-stick bundles overwhelm the whole thing; go with the slimmer cinnamon stick snowflakes instead, roughly half the volume. Ceiling height doesn’t matter here, but branch spacing does.
7. The Skewer Trick for Clean Ornament Holes
- Dough rolled to an even 1/4 inch — measure it, don’t eyeball it
- A wooden skewer or paper straw, not a needle
- Ribbon cut to 5 inches before you start threading
- A baking mat, so nothing sticks and nothing tears
- Twenty minutes of hands-off chilling time
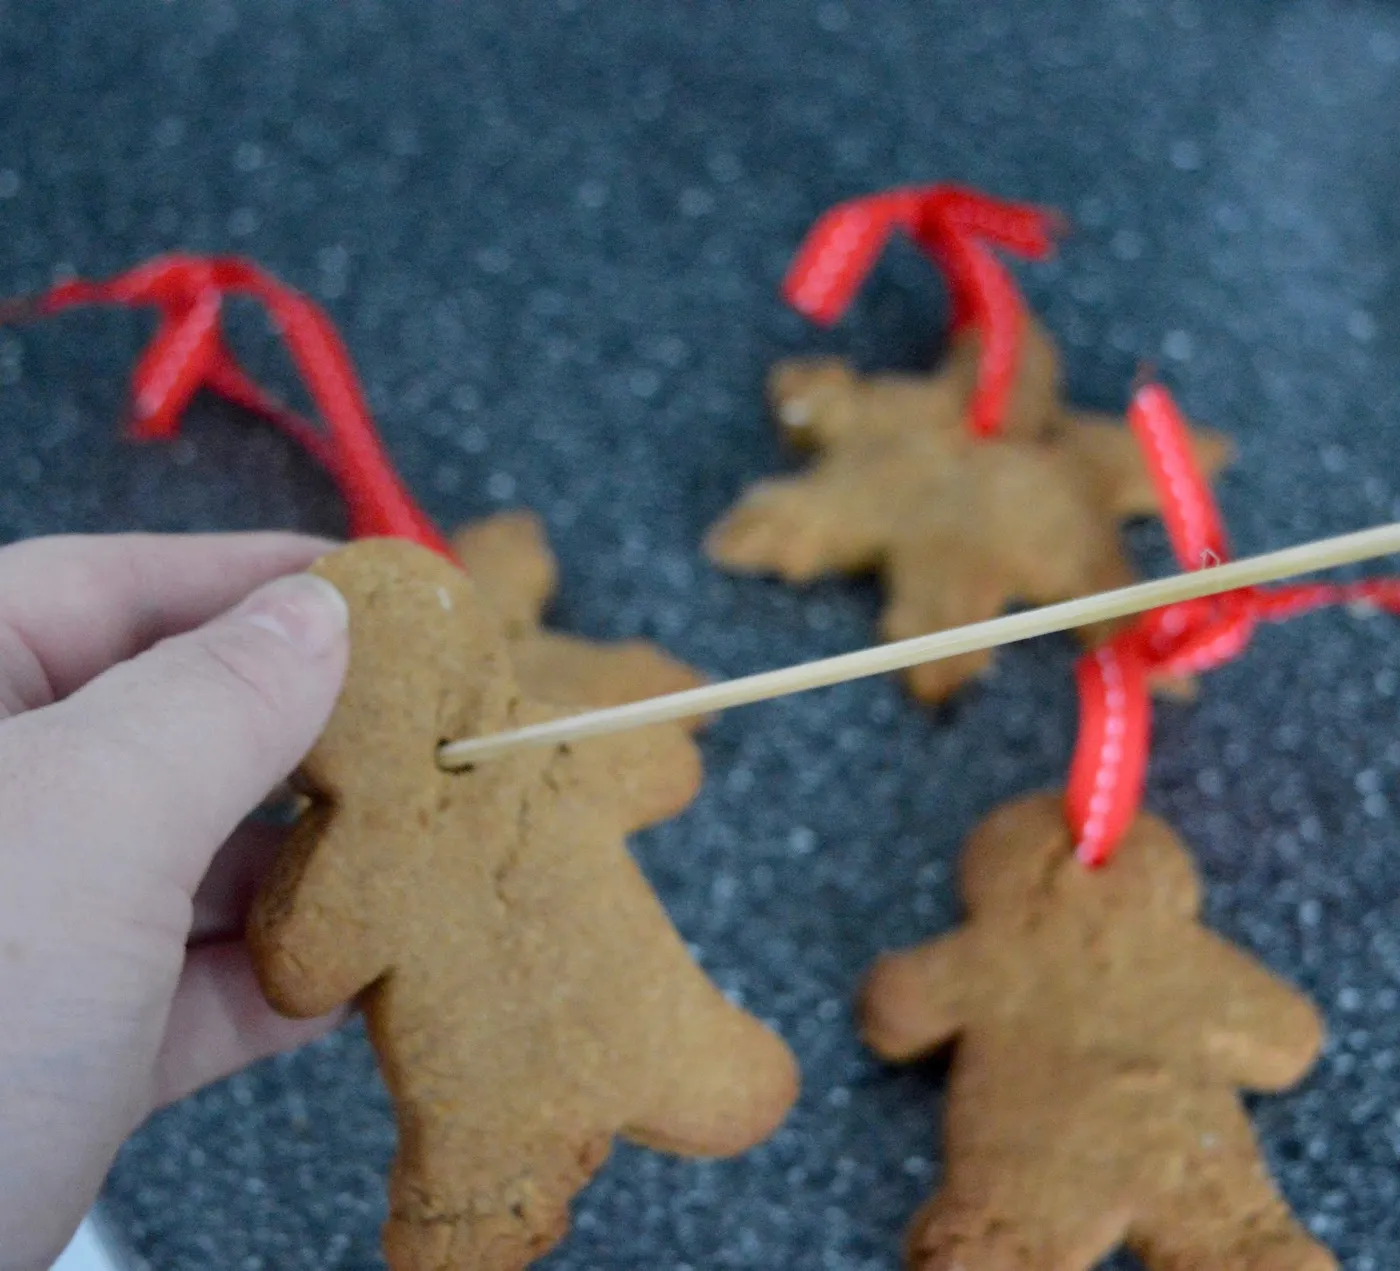
The skewer goes in at a slight angle and twists as it exits — that’s what keeps the dough from doming around the hole.
Red ribbon on brown dough is the entire visual story of these gingerbread men, and it only works because the hole is clean. A ragged hole makes the ribbon sit crooked, and a crooked ribbon makes the ornament look rushed. The skewer also compresses the dough slightly at the edge, strengthening the rim so it doesn’t crumble as you thread.
8. Six Iced and Glittered Cookie Ornaments on a Dark Table
- Cinnamon dough batch (makes 20-plus): $6–$10
- Cookie cutters, set of six: $8–$14
- White icing pens or royal icing: $5–$9
- Gold and red edible glitter: $6–$12
- Beads and tiny embellishments: $4–$8
- Ribbon for hangers: $3–$6
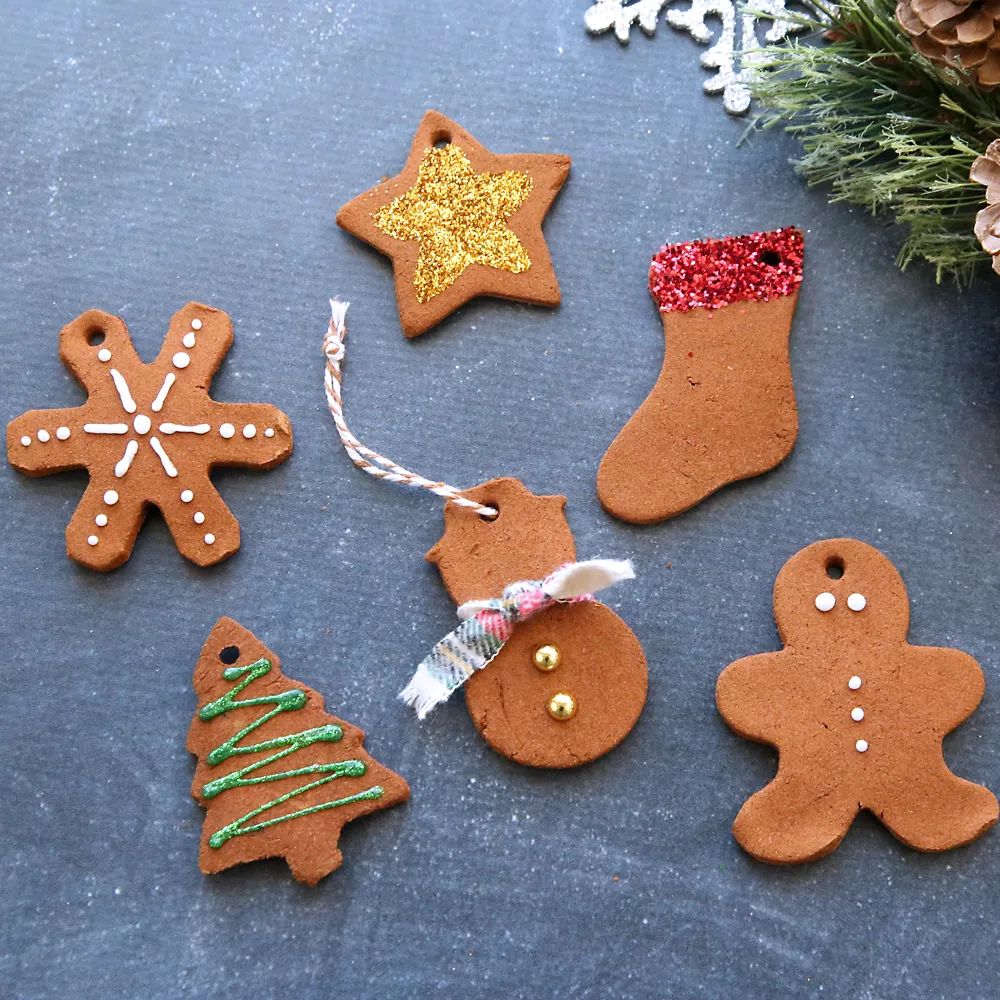
Total: $32–$59. Budget alternative: one icing pen and a jar of plain gold glitter gets you 80% of the look for about $14 — the extra shapes are a nice-to-have, not the point.
Look closely and there’s a system: every ornament uses the same three colors, just in different proportions. Mostly brown, then white icing lines, then a small hit of gold or red. Nothing introduces a fourth color. That’s why six wildly different shapes still look like a set instead of a pile.
9. Felt Gingerbread Garland on Striped Ribbon
You can make this for the price of a coffee. Brown felt sheets run about 40 cents each at any craft store, and one sheet yields four gingerbread bodies. Red-and-white striped ribbon: $3 a roll. A bag of polyfill for stuffing: $4, and you’ll use a third of it. Total for a 6-foot garland: roughly $12. Compare with the baked version in Idea #2 — same silhouette, zero oven time, and it survives being stuffed in a box.
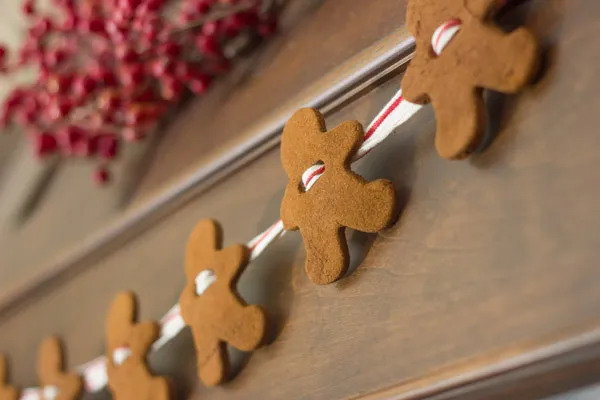
Felt is the low-effort option, and that’s exactly why it’s worth considering. No cracking, no crumbling, no humidity damage. What it does collect is dust, so plan a quick vacuum with a brush attachment each December before it goes up. Keep it out of direct sun — brown felt fades to a sad tan after two or three summers in a bright window. Spot clean with a damp cloth, never machine wash.
10. Stamped Cinnamon Dough Ornaments on Green Checkered Cloth
Stamped and imprinted dough ornaments are having a moment because they photograph like heirlooms. Search interest has been climbing since 2023 and hasn’t dropped — partly because the tools are cheap, partly because a stamp lets you make something that looks hand-carved in about four seconds. The green checkered cloth underneath is no accident either; that whole vintage-kitchen-textile look is driving a lot of what’s on Pinterest right now.
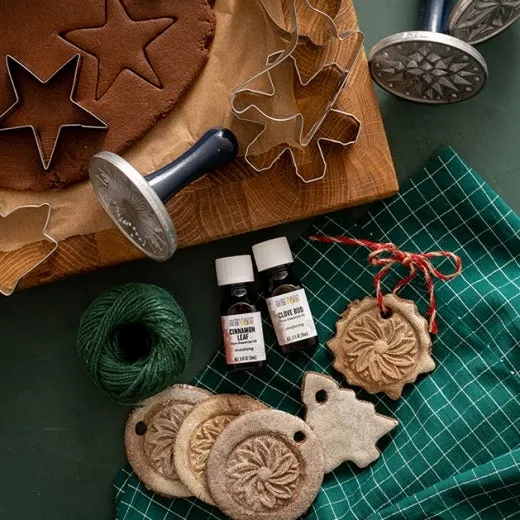
Two things are happening in this setup. First, repetition: the same stamp pressed at the same depth on every shape creates a pattern that reads as intentional. Second, negative space — the star shapes leave real gaps between impressions, so the eye gets rest. Stamp edge to edge and the dough just looks busy. Press, leave a margin, repeat. That’s the whole trick, and it works on any shape you own.
11. Rustic Star and Disk Ornaments With Checkered Ribbon
Sixty percent warm brown dough, thirty percent off-white surface, ten percent red checkered ribbon. That’s the recipe, and it’s why these look calm instead of cluttered. Change one variable at a time: swap the checkered ribbon for solid cream and you get a quieter, more Scandinavian feel. Swap the cream surface for dark wood and the same ornaments turn moody and cabin-like. Keep the ratios and the palette holds.

Disk-shaped cinnamon ornaments are the ones that break. A circle has no structural weak point, sure, but it also has no landmarks, so people roll them too thin and they snap in half on the tree. Go 1/4 inch minimum, and let them dry a full 24 hours before you handle them at all. Cinnamon dough shatters, and it shatters brown.
12. Snowflake-Iced Star Cookie on Red Woven Fabric
The red background is the secret weapon. White icing on brown dough is a low-contrast combination — pretty, but it goes flat in photos and on a busy tree. Put that same ornament against red woven fabric and the white lines pop like a graphic. This is a styling lesson worth stealing: your ornaments will look better on a tree with some color depth than on an all-white or all-green tree with no variation.

A piping bag costs $8 and a set of tips costs $12, but a zip-top bag with the corner snipped off does the same job for nothing. Royal icing from a tub is $5 and pipes cleaner than homemade for beginners. Skip the specialty snowflake tip — a plain round tip and a steady hand reads just as crisp once it dries. Whole project, first ornament included: under $20.
13. Two-Wick Tin Candle Styled With Cinnamon Sticks
Two wicks means you need to burn it long enough for the whole surface to melt — usually 2 to 3 hours — or you’ll get tunneling and waste half the wax. For the styling: set the cinnamon sticks at an angle rather than flat, leaning against the tin, and let them extend past the candle’s edge by an inch. Flat sticks look like clutter; angled sticks look placed. Keep them at least 4 inches from the flame.
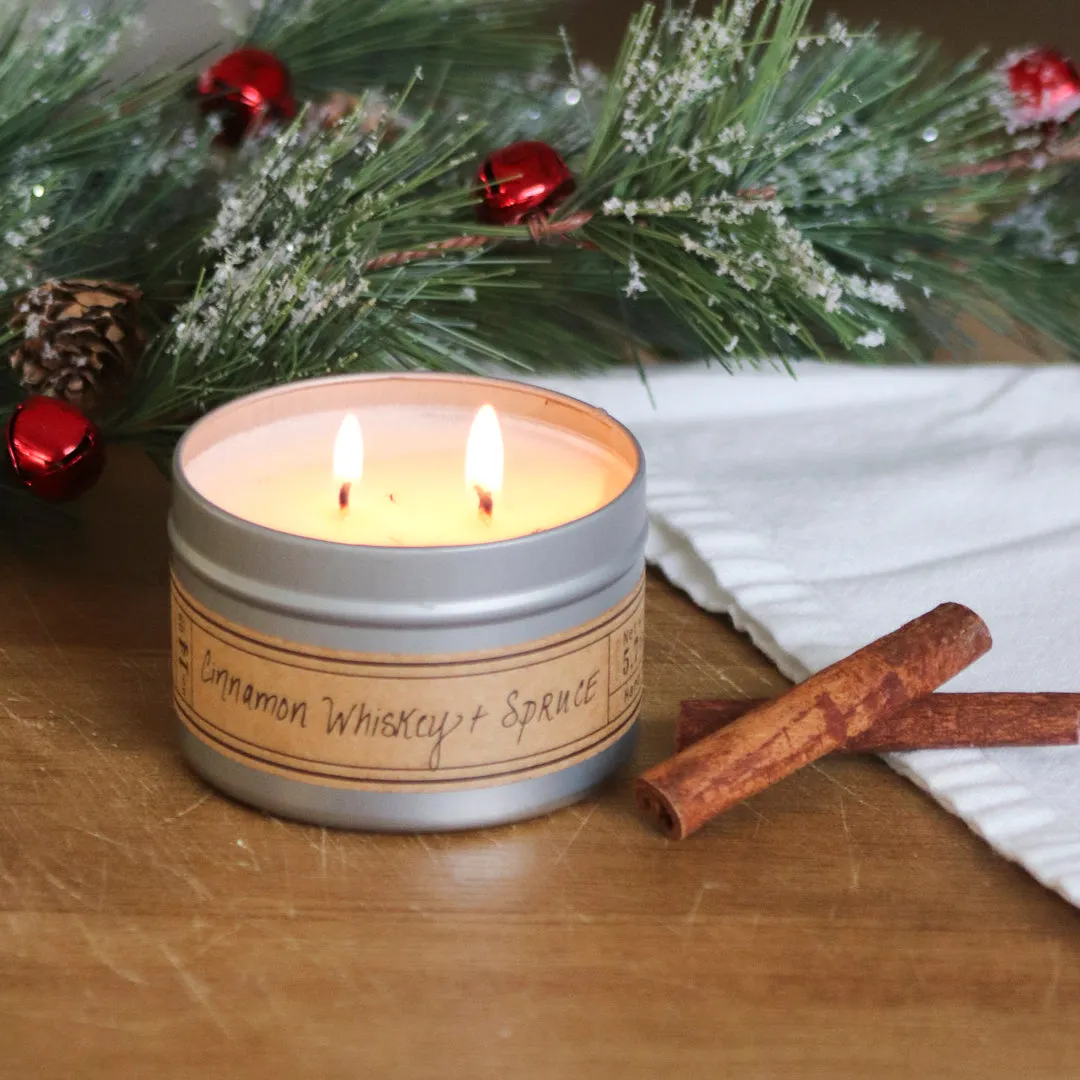
This vignette needs a surface, not a shelf. Give it 14 to 18 inches of width on a console or sideboard and it holds together; cram it into 8 inches and the frosted garland, tin, and sticks start fighting. Works at any ceiling height, but it wants to sit below eye level so you see the flame rather than looking down on it. For a smaller version, see the candle-and-spice pairing that fits on a nightstand.
14. Berry-Studded Tree Ornament on Frosted Fir
The red berries. Take them away and you have a brown tree shape on a green tree — technically fine, visually invisible. Those small red dots give the ornament its own internal rhythm and let it hold its own against white-frosted branches that would otherwise swallow it. Push them in while the dough is damp, spaced unevenly on purpose. Perfectly even berries look machine-made, and that’s the opposite of what you want.
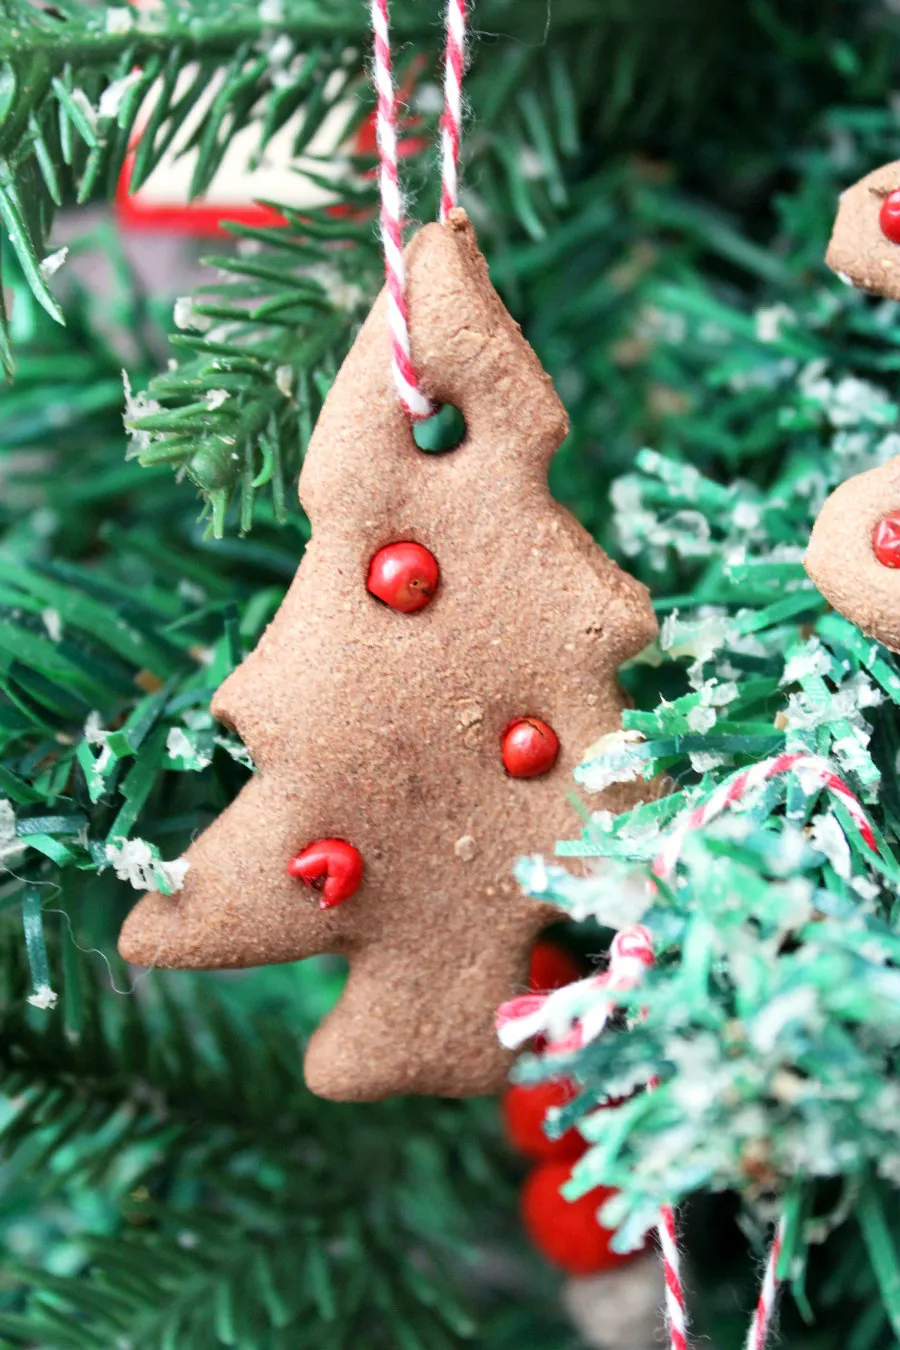
Berries are the first thing to go. If you’re using real dried cranberries, expect them to fade to burgundy and then brown within a season. Plastic or felt berries hold color for years but read slightly less natural up close. Store these ornaments flat, not stacked — the berry bumps press into whatever’s underneath and leave dents. A shoebox with tissue between layers costs nothing and doubles their lifespan.
15. Cookie Ornaments With Red, Green, and White String
- Cinnamon dough batch: $6–$10
- Striped baker’s twine, three-color set: $6–$10
- Red glitter: $4–$7
- Small poinsettia or holly picks: $6–$12
- Gold accent paint pen: $4–$6

Total: $26–$45 for a set of about a dozen. Budget alternative: plain red string instead of striped twine, and skip the gold pen — down to $18, and honestly nobody at a distance will know.
Thread the string before the ornaments are totally dry. Slightly damp dough grips the string, so the hanger sits exactly where you put it instead of sliding loose. Use a figure-eight knot on the back rather than a loop around the top — a loop squeezes the dough edge and eventually chips it. Also: make the hole a full 1/4 inch, because striped string is thicker than it looks.
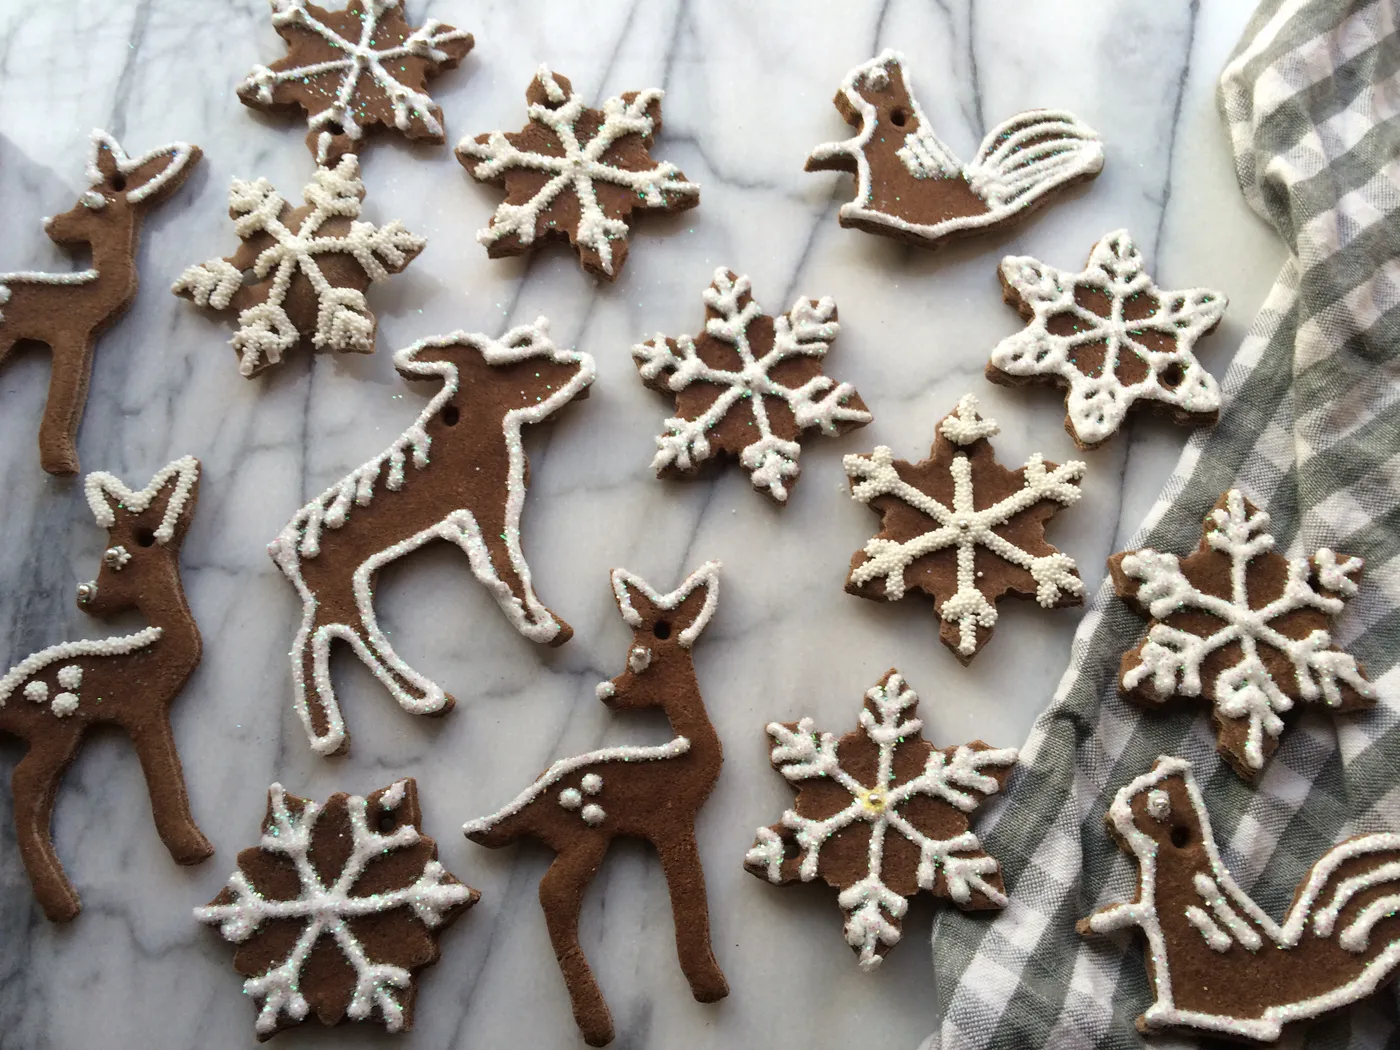
16. Icing-Piped Cinnamon Ornaments on Marble
- Let the ornaments dry at least 24 hours — icing won’t stick to damp dough.
- Load a piping bag with thick royal icing, not a thin glaze.
- Pipe the outline, let it set 10 minutes, then fill in.
- Keep the dots small and evenly spaced; over-piping is the most common error.
- Cure overnight before hanging.
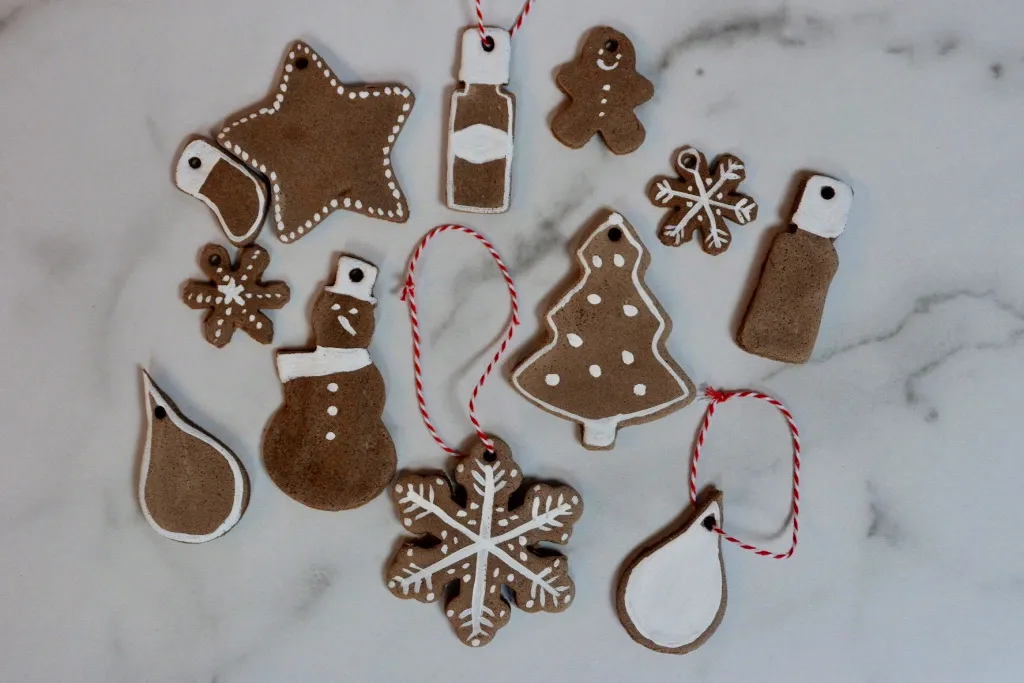
Time: 15 minutes per ornament once you’re comfortable. Icing cost: about $5 for a whole batch.
Three reasons the white-on-cinnamon look keeps working:
- Contrast — white reads instantly against a dark base, so simple shapes still register from across the room
- Consistency — every ornament gets the same white line and the same dot rhythm
- Restraint — no color added, so a mixed set never looks chaotic
17. Tiny Cinnamon Stick Bundles With Berry Sprigs
Small bundles with a six-stick count and a 2.5-inch length are the most flexible thing on this list. They work in a bowl, on a tray, wired into a wreath, or tucked into napkin rings. The one requirement is a container with a rim — a low bowl, a wooden trough, a cake stand — because loose bundles on a flat surface just look like debris. Give them at least 9 inches of bowl diameter and they’ll read as a centerpiece.
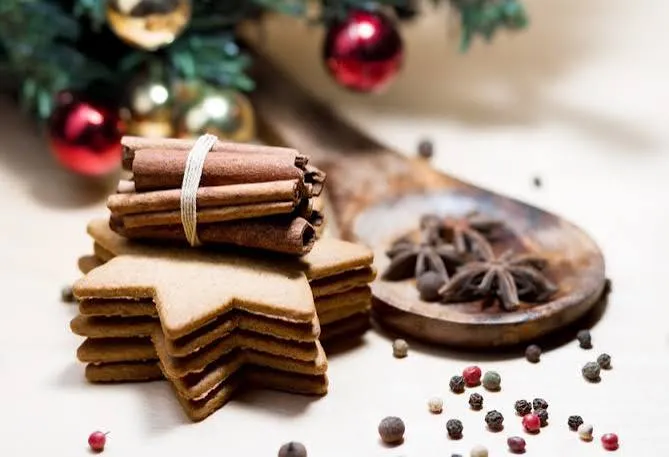
It’s the berry sprig. A bundle of cinnamon sticks tied with twine is a nice smell and nothing more. Add two or three small red berries and a single green leaf and suddenly it’s a small composition with a focal point. Keep the berries off-center — cluster them on one side of the tie. Centered berries look like a button; off-center berries look like something grew there.
18. Green Candle Vignette With Cinnamon and Star Anise
Color-matched candles — green wax, in this case — became a real thing around 2024 and it’s still going strong, because a colored candle carries a table setting without any flowers. Pair it with whole spices and you’ve got the “quiet holiday” look dominating 2026 boards: nothing sparkly, nothing oversized, just warm wax and brown texture. It has staying power because it’s basically three objects on a coaster.
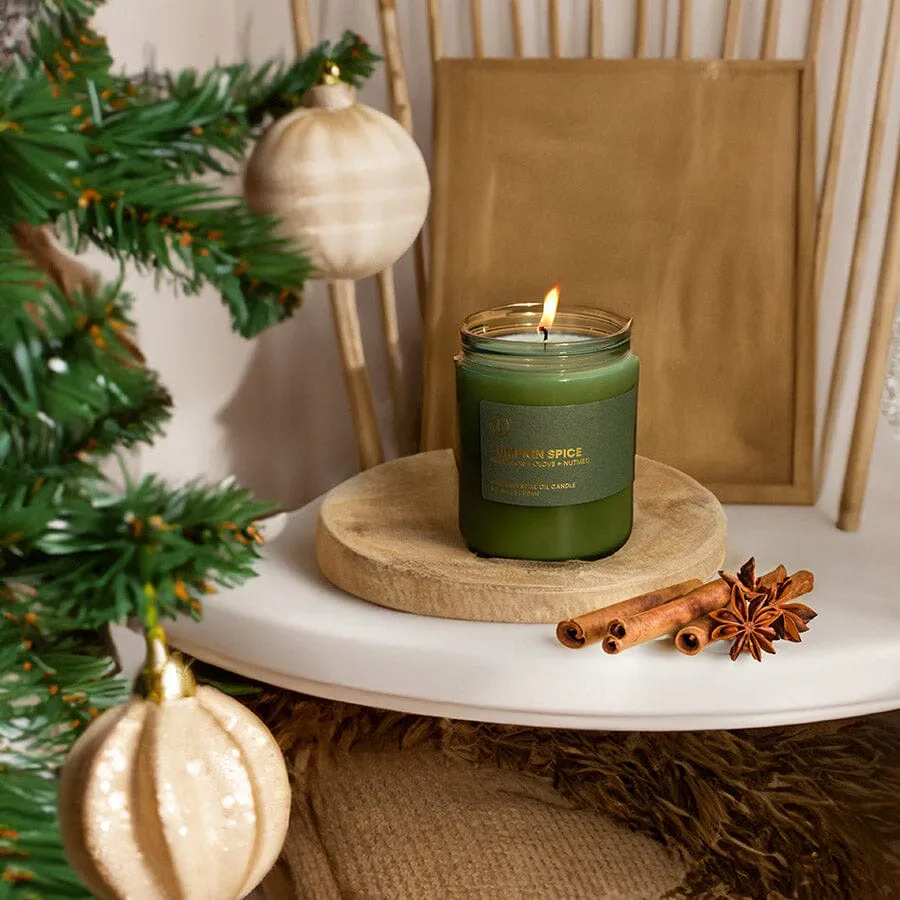
Two warnings. First, cinnamon sticks near an open flame are a fire risk, not an aesthetic — keep them a solid hand-span away from the wick and never directly beneath it. Second, green candles show soot. Trim the wick to 1/4 inch every single time or you’ll have a black smudge on that pretty green wax by the third burn. Star anise near heat also throws a very strong scent — great in a hallway, overpowering at dinner.
19. Reindeer Ornament With a Single Red Nose
One red dot on a brown animal shape and the whole thing reads as Rudolph. That’s economy. The frosted branch tips do the rest — white edges behind a mid-brown ornament give it separation so it doesn’t disappear into the green. Note the hanging string is the same red-and-white stripe used elsewhere in the set. That single repeated material is what makes a tree full of mixed ornaments look curated instead of accumulated.
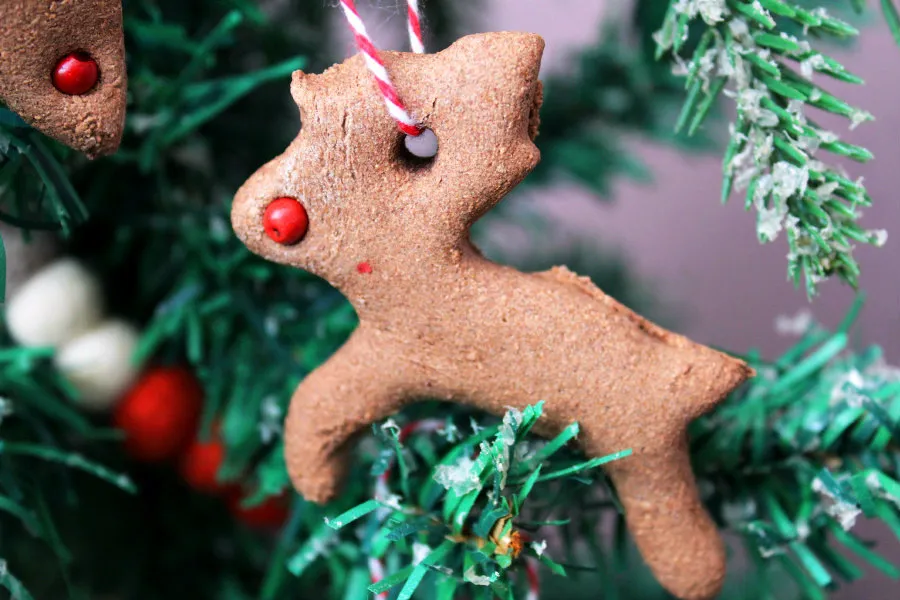
Seventy percent brown, twenty percent green-and-white from the tree itself, ten percent red. That’s the whole palette, and it’s why this ornament can hang next to almost anything. Want to extend the set? Swap the red nose for a black one and you get a completely different animal with zero new supplies. The formula survives the swap because the ratio never changes — only the ten percent does.
20. Hole-Punching With a Striped Paper Straw
- Cut your shapes and move them onto the baking mat.
- Use a paper straw, not plastic — paper grabs the dough and cuts cleanly.
- Position the hole 1/4 to 3/8 inch from the top edge.
- Press straight down and twist gently as you pull out.
- Check the hole before baking — it shrinks about 10% as the dough dries.
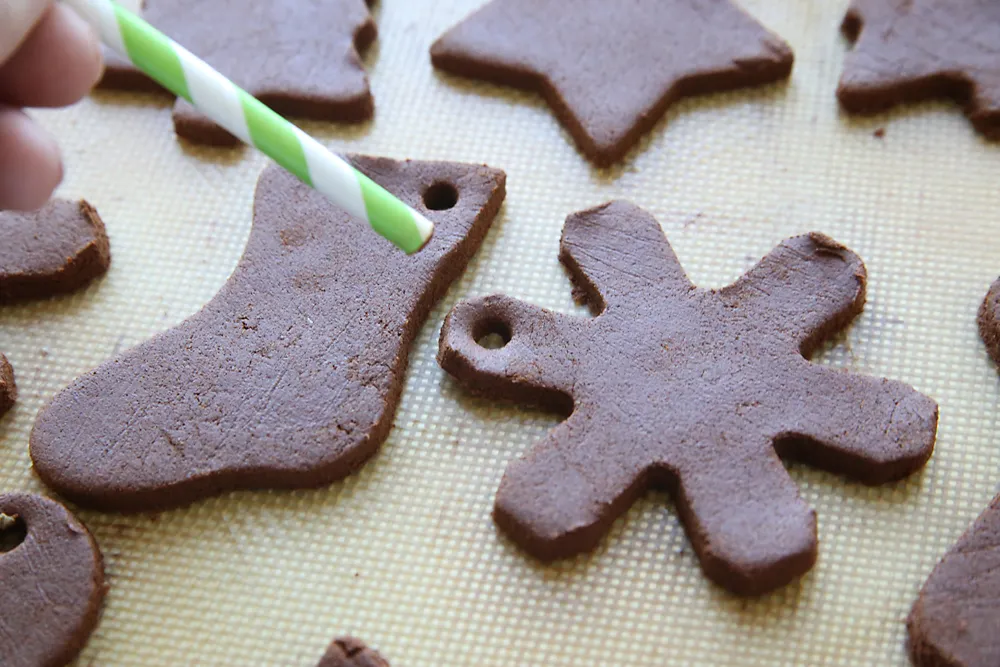
Total time: 20 seconds per ornament. A box of 100 straws costs $3.
- Dough at room temperature, not fridge-cold
- Baking mat or parchment down before you cut anything
- Straw at least 1/4 inch in diameter
- Holes punched before baking, never after
- A spare straw, because they crush after about 30 ornaments
21. Star, Tree, Gingerbread, and Sheep on Parchment
Four shapes, one batch of dough, one spool of striped twine. Total spend: about $11 if you already own cookie cutters, $19 if you don’t — and a four-piece cutter set from a big-box store runs under $8. The parchment paper underneath is doing the styling for free; that warm tan surface is why the reddish-brown ornaments look rich rather than muddy. Skip the fancy display board. Paper is the look.
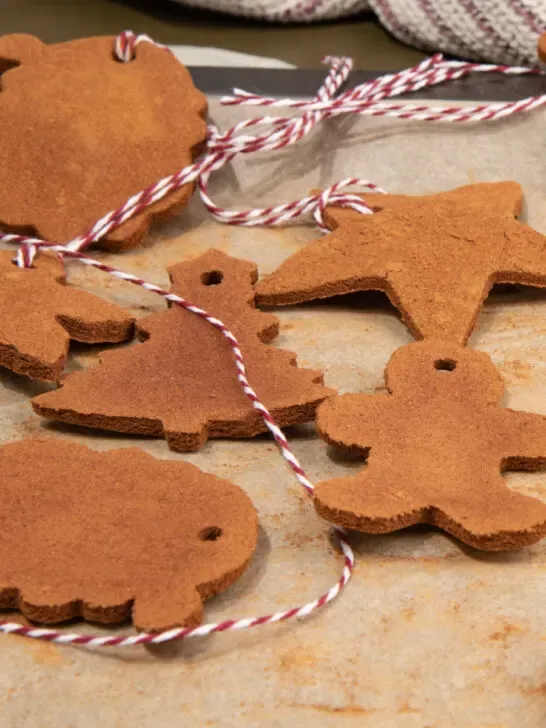
Flat ornaments like these are the ones to make in bulk, because they layer in a box without breaking. Make 20 instead of 6 — you’ll use them on the tree, on gifts, and on a garland. Small shapes under 3 inches work on tabletop trees; anything 4 inches and up belongs on a full-size tree where it can breathe. If your tree is narrow or pencil-shaped, stay under 3.5 inches or they’ll stick out sideways.
22. Dark Gingerbread Man Against Deep Green Pine
Dark brown ornaments on a dark green tree is a risk. Get it wrong and they vanish. What saves this one is the warm yellow lighting and the glossy red berries nearby — both lift the brown so the silhouette still reads. If your tree lights are cool white, this exact ornament will look muddy and you’ll wonder why it photographed so well for someone else. Warm bulbs or nothing.
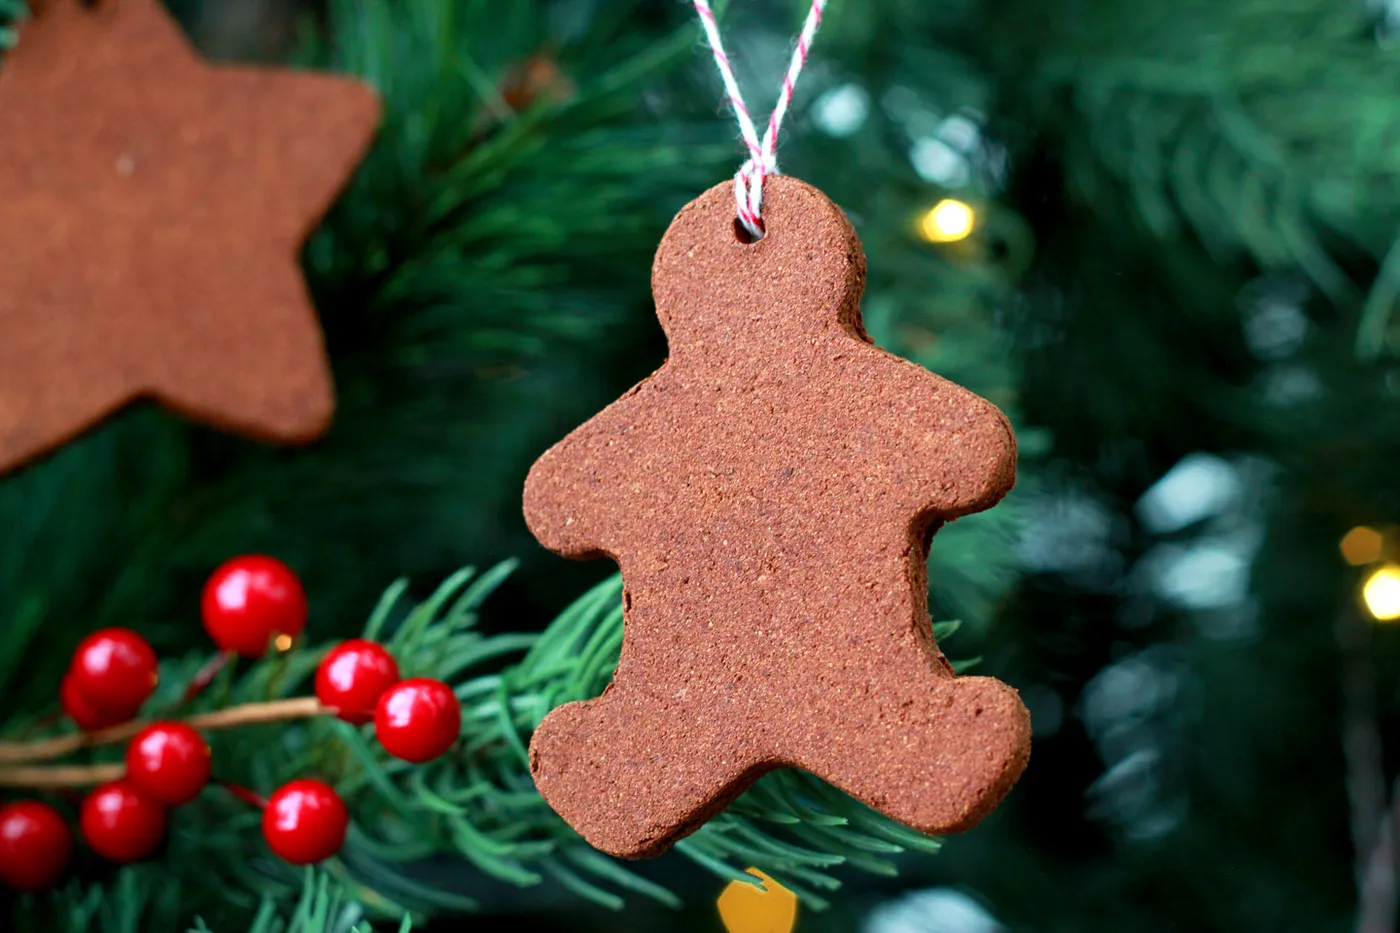
Hang dark ornaments against lighter neighbors and let them sit slightly in front of the branch rather than pressed into it. A 3-inch gap between a dark ornament and the needles gives the silhouette room to read. Also: rotate a dark assortment by shape rather than color — a dark gingerbread man, then a dark star, then a dark bell. Shape variety is what keeps a monochrome tree from turning into a brown blur.
23. Cinnamon Stars and Hearts With Dried Orange Slices
Fifty percent brown dough, thirty percent orange, twenty percent dark green. That’s the garland formula, and it’s essentially a classic autumn palette borrowed for December. Dried orange slices are the connector — they sit between the shapes and give the eye something to land on between brown-on-brown. Swapping orange for dried apple rings makes it softer and more neutral; swapping in dried cranberries makes it sharper and more traditional.
- Dried orange slices, 2 oranges: $3–$5
- Cinnamon dough batch: $6–$10
- Pine sprigs (real or faux): $5–$10
- Twine: $2–$4
- Star and heart cutters: $5–$9
Total: $21–$38, and you’ll have leftovers. Budget alternative: buy a bag of pre-dried citrus for $4 instead of drying your own — the oven method takes 3 hours before you even start on dough. See Idea #3 for what to do with the leftover fruit.
24. Wooden Bowl Centerpiece With Baubles and Spices
This is the lowest-maintenance arrangement on the list, but it’s not zero. Cinnamon sticks in an open bowl collect dust fast and they’re impossible to wipe — plan on replacing them each season, which costs about $6. Dried orange slices crumble after a month or two of handling. The baubles and the bowl are the only permanent pieces. Realistic annual refresh cost: $10 to $15, and you can dump the whole thing out and rebuild it in five minutes.
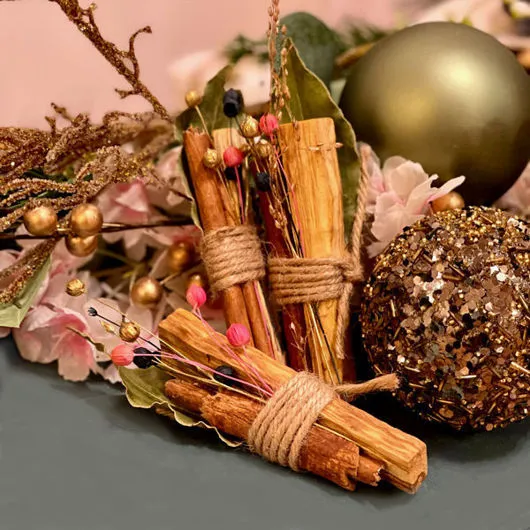
Bowls of ornaments as centerpieces replaced the big floral arrangement for a lot of people around 2024, and by 2026 it’s the default move for anyone who doesn’t want to buy flowers in December. The twist here is mixing natural material with shiny baubles — half woodland, half department store. That tension is exactly what’s trending: not fully rustic, not fully glam. Warm, mixed, and a little bit undone.
25. Cinnamon Bundles With Pink Berries and Olive Baubles
The pink berries are the surprise. This whole composition — brown sticks, matte olive bauble, gold glitter branches — would be perfectly tasteful and completely forgettable without that unexpected shot of dusty pink. It’s the one element that isn’t part of the obvious holiday palette, and that’s precisely why it works. Rule of thumb: if everything in a vignette could be predicted, add one item that couldn’t.

Faux berries cost $4 to $6 a stem and one stem goes a long way. The olive bauble is where people overspend — a single large matte ornament can run $15 at a boutique and $3 at a big-box store, and matte finish is matte finish. Shop the after-Christmas clearance in January for the big ornaments and save 70%. Compare with Idea #17, which uses the same bundles in a completely different setting.
26. Plaid Scrap Tree Ornament on a Cinnamon Trunk
- Cut plaid fabric into 1-inch strips, six per ornament.
- Cut a cinnamon stick to 3 inches for the trunk.
- Glue strips in descending lengths starting at the top, longest at the bottom.
- Anchor each strip to the stick with a dot of hot glue at the base.
- Top with a gold button and a twisted cord loop.
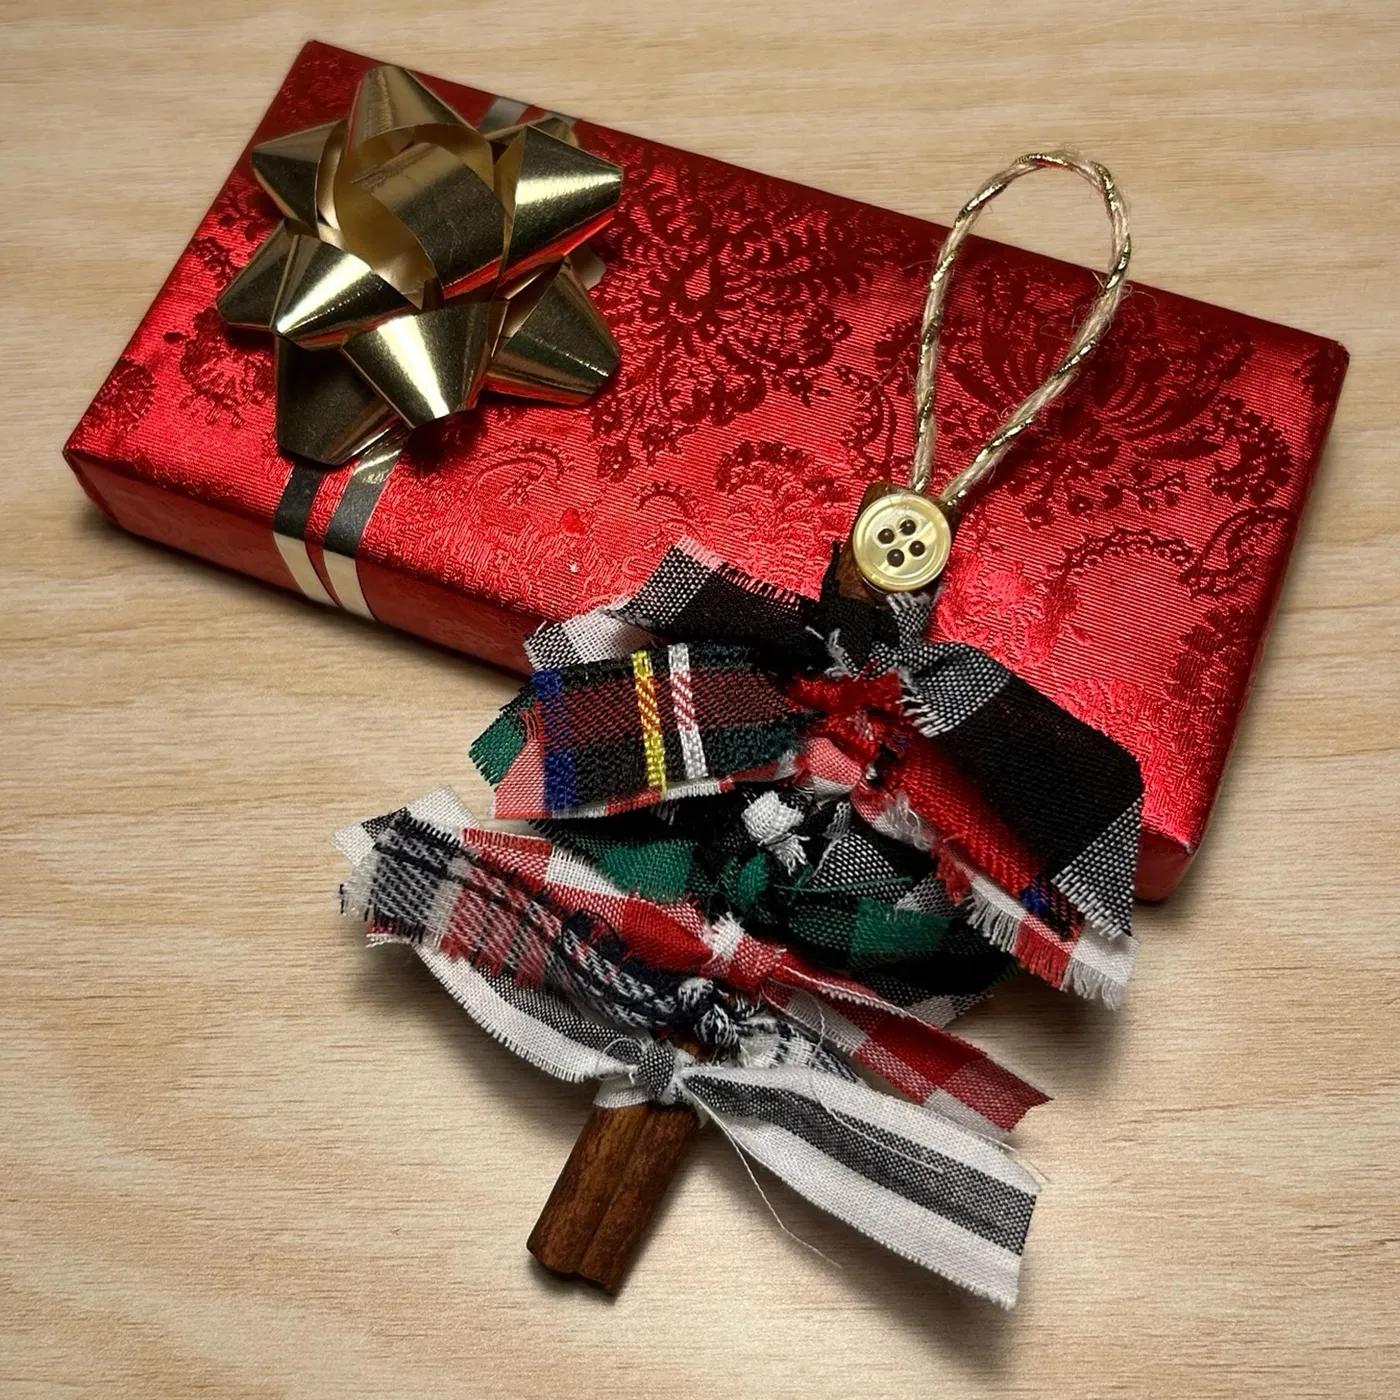
Time: 8 minutes each. Cost: about $1.20 in scraps — this is a leftovers project, not a shopping trip.
Three fabrics or one? One plaid, three ways. If you’re cutting from the same plaid, vary the scale — a strip with mostly red, a strip with mostly black, a strip with more white. That gives you the 60/30/10 mix without buying anything extra. Add a single gold button and gold cord for your ten percent metallic. Mixing two different plaids almost always looks like an accident.
27. Powdered Cinnamon Ornaments With Gold Ribbon
- Cinnamon dough batch: $6–$10
- Embossed rolling pin or stamp: $10–$18
- Powdered sugar or white chalk paint for dusting: $3–$5
- Gold ribbon, 3/8 inch: $5–$8
- Star and tree cutters: $5–$9
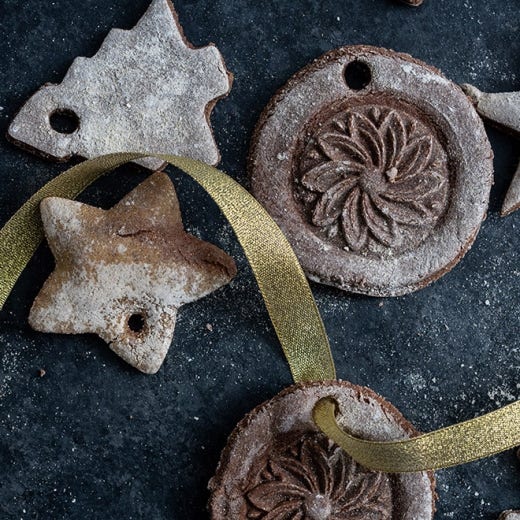
Total: $29–$50, with the embossing tool being the splurge. Budget alternative: press a real lace doily into the dough for a similar pattern at zero cost, and use gold twine instead of ribbon to save $6.
Dusted ornaments read best at 3 to 4 inches, because the powder coating needs surface area to show. Under 2 inches, the dusting just looks like a smudge. These work on a full-size tree and on a mantel garland, but skip them on a tabletop tree — the powder sheds. Group two or three together rather than scattering them; the finish reads as a cluster. Related: Idea #25 shows the opposite approach.
28. Dark Brown Ornaments With Striped and Glitter Bows
- Ribbon cut to 6 inches per ornament, not 4 — dark ornaments need a longer drop
- Bow width under 2 inches, or it overwhelms a 3-inch shape
- Warm white lights, not cool, if these go on a green tree
- A mix of bow styles — two striped, one glitter — not all three the same
- Hangers that sit 3 inches off the branch
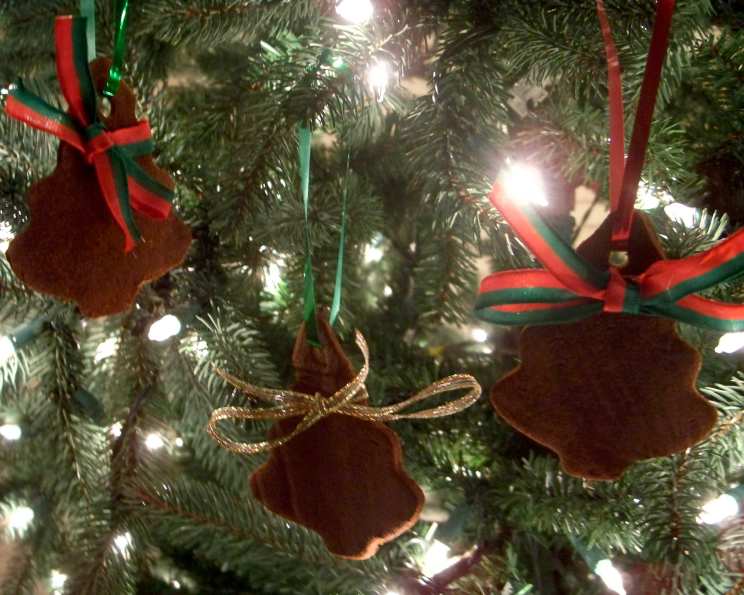
Check the light temperature before you commit. It’s the difference between cozy and muddy.
Irregular shapes are charming until they don’t hang straight. A wavy star or a bell with an off-center hole will tilt every time, and by day three it’s hanging sideways and driving you crazy. Weigh the bottom lightly with a small bead, or just position the hole dead center and slightly high. Also, gold glitter ribbon sheds — put these up last and don’t handle them more than necessary.
29. White Pillar Candle Nestled in Evergreens and Spices
The white pillar candle is the anchor. Everything around it — evergreen, dried orange, pinecones, cinnamon sticks, red berries — is brown and green and busy. A clean white cylinder in the middle gives the eye somewhere to rest and makes the whole arrangement feel designed rather than gathered. Trade it for a colored candle and the composition suddenly competes with itself. One quiet object, surrounded by loud ones.
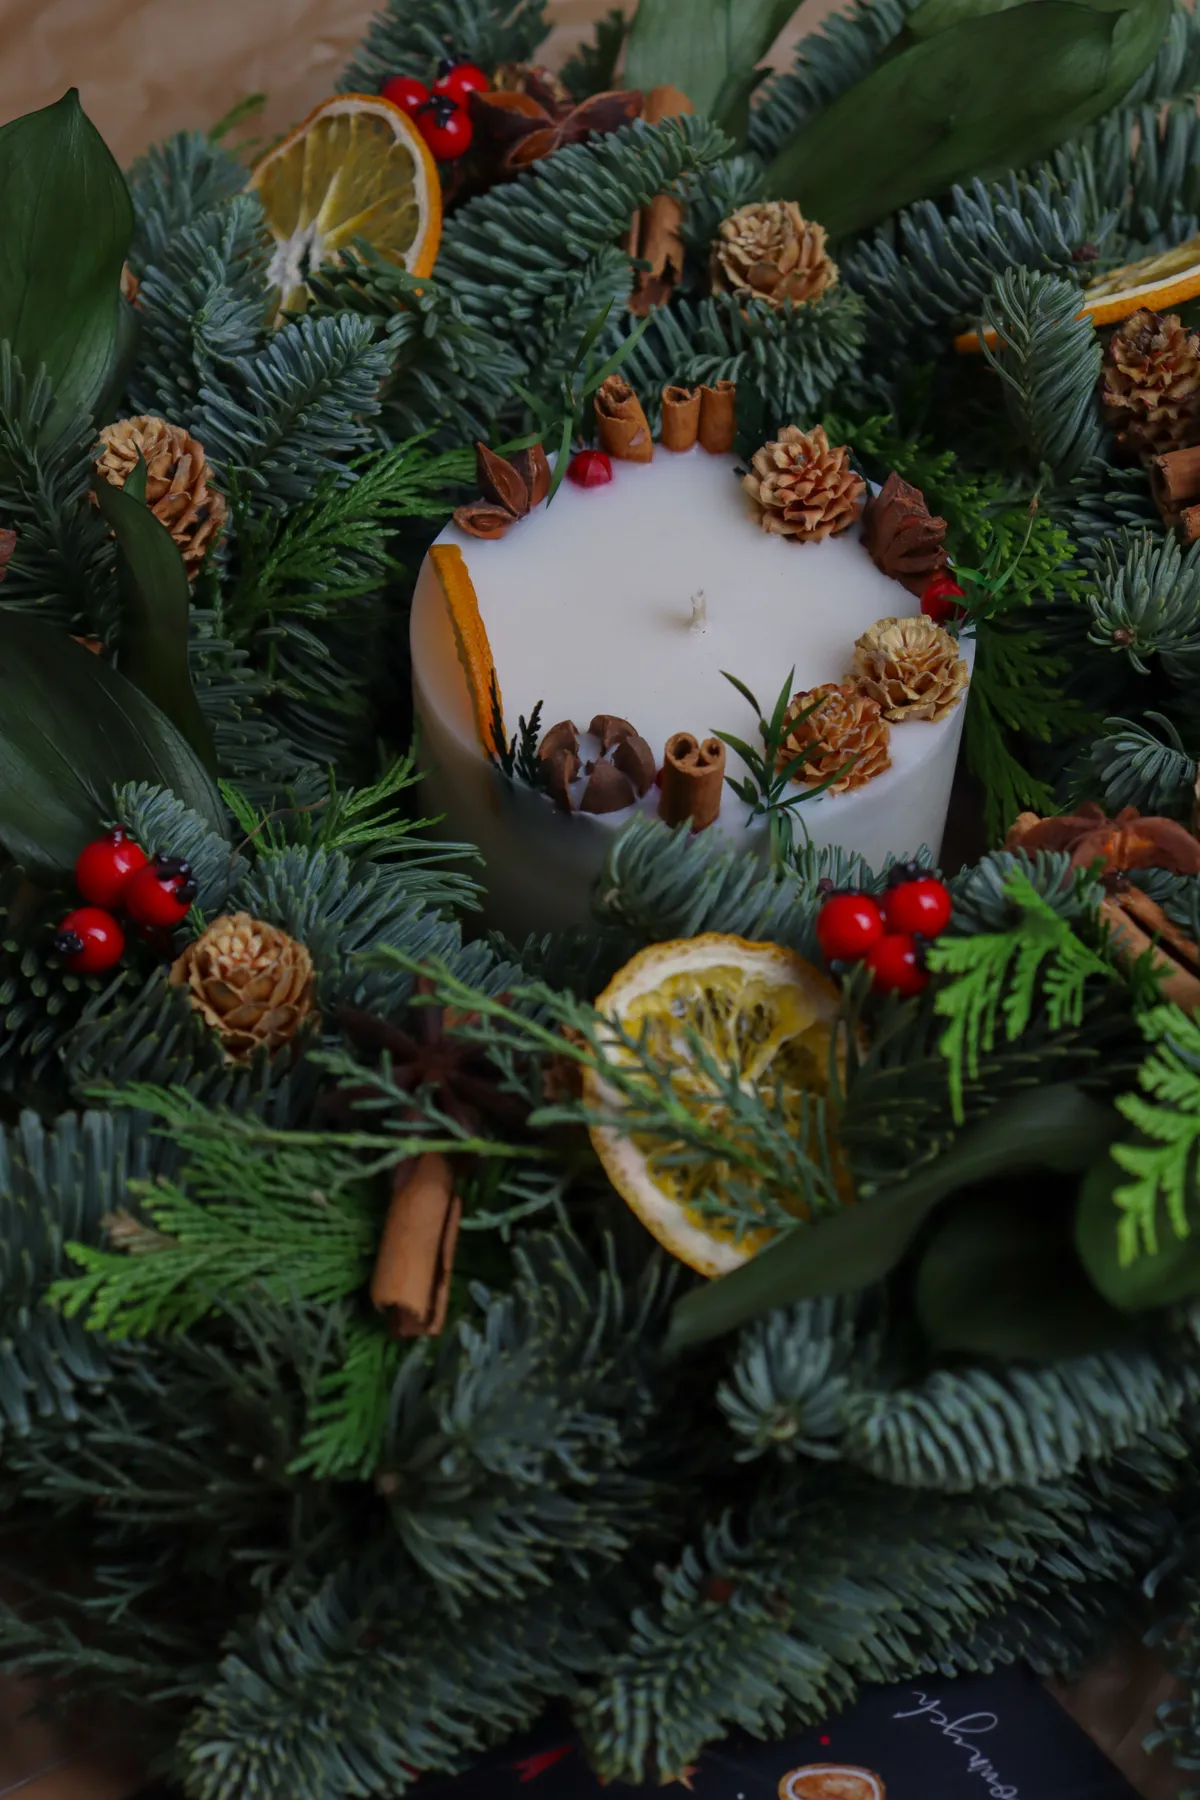
- Set the candle first, centered, and work outward.
- Ring the base with evergreen, laying stems in one direction.
- Tuck dried orange slices in at three points, not all the way around.
- Stand cinnamon sticks upright against the candle.
- Finish with pinecones and berries in the outer ring.
Time: 12 minutes. Cost: about $18 if you forage the greenery, $35 if you buy it. Keep everything flammable well clear of the flame.
Your Kitchen Table Is About to Smell Like December
None of these twenty-nine ideas require special talent — just a rolling pin, a bag of cinnamon, and an afternoon you were probably going to spend scrolling anyway. Start with the three-stick bundles if you want something instant, or the gingerbread men if you’re feeling ambitious.
📌 Pin this guide now so it’s waiting for you when the flour comes out.