34 Stunning and Easy Christmas Crafts You Need to Try in 2026 That Will Delight Everyone
You know that feeling when you’ve saved four hundred Christmas crafts and made exactly none of them? Same. So this year we did the digging for you.
We spent serious time browsing Michaels, Joann, Hobby Lobby, Target, and Etsy to bring back only what’s worth your attention — 34 ideas that actually get finished, from a $4 bead-and-pipe-cleaner set to a $95 dried orange and cinnamon arrangement. You’ll find rustic natural, farmhouse wood, whimsical felt, and kid-friendly paper crafts, with budget and luxury versions compared side by side and every idea shoppable with direct product links.
Pinterest is thick with dried orange garlands and beaded wooden garlands this season, and that’s no accident — crafters want things that look handmade without eating three weekends. And stay until the end — we break down the most common mistakes that can ruin these looks. 📌 Save this to Pinterest for later — you’ll want to revisit these ideas.
1. Twine-Wrapped Mason Jar Lanterns on a Rustic Craft Table
The whole scene works because everything on that table belongs to the same material family — dark wood, clear glass, jute twine, pine. The mason jars read as lanterns because the twine sits just below the shoulder, leaving the glass above it clear so candlelight still spills out. The red berries are the only saturated color in the frame, which is why your eye lands there first.
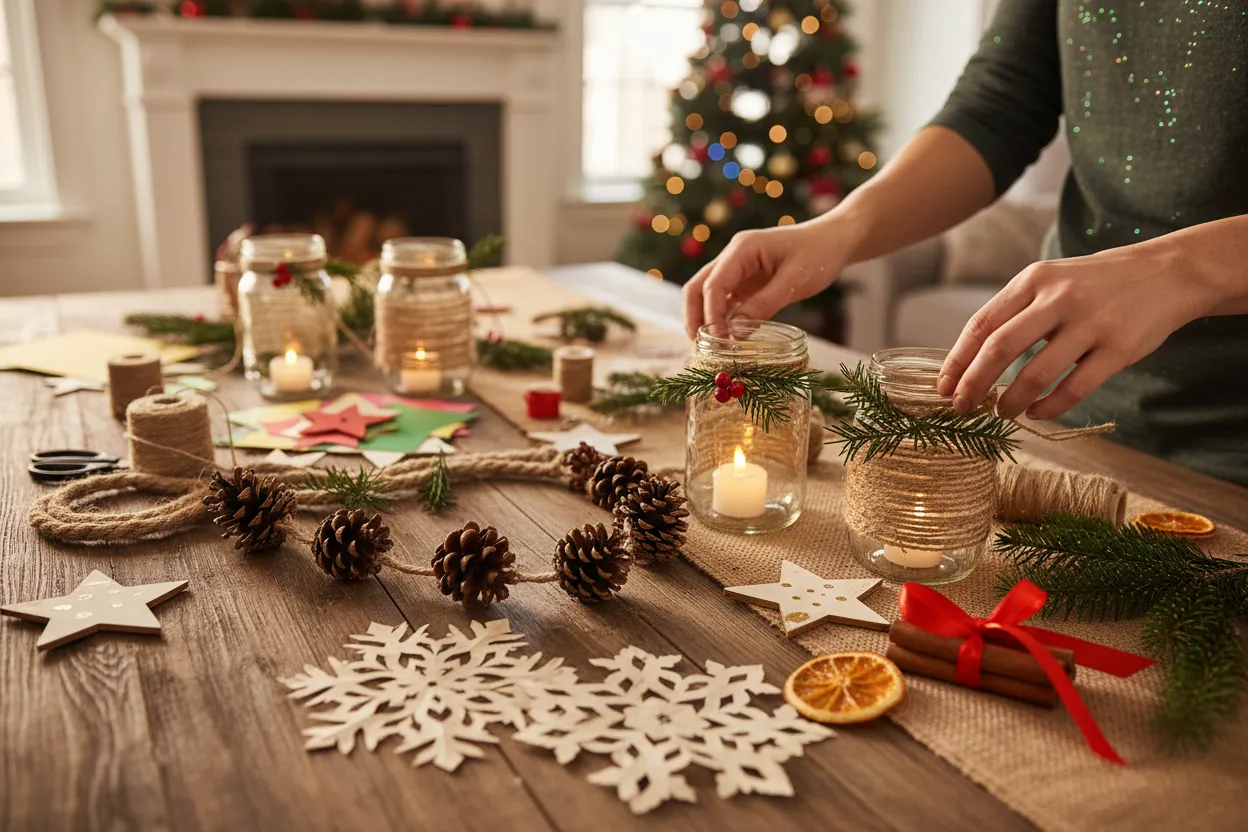
Wrap your twine about an inch below the rim and tie a square knot instead of a bow. Twine doesn’t hold a good bow and it goes messy fast. Then add one evergreen sprig and one berry cluster, and stop. Three attachments per jar is the sweet spot; five and it starts looking like a craft bin exploded. Use a battery tea light if any jute sits above the glass line.
2. Craft Stick Gingerbread Houses with Bead Rooflines
- Glue four brown craft sticks into a square for the base; let it cure a full 20 minutes before touching it again.
- Cut two more sticks in half, angle them into a triangle roof, and glue across the top.
- Paint a small arch in the center for the door — pink, blue, and yellow all read well against brown.
- Line the roof edge with mixed round beads, working one direction so the row stays even.
- Top with a peppermint swirl and thread a red-and-white striped string through the peak.
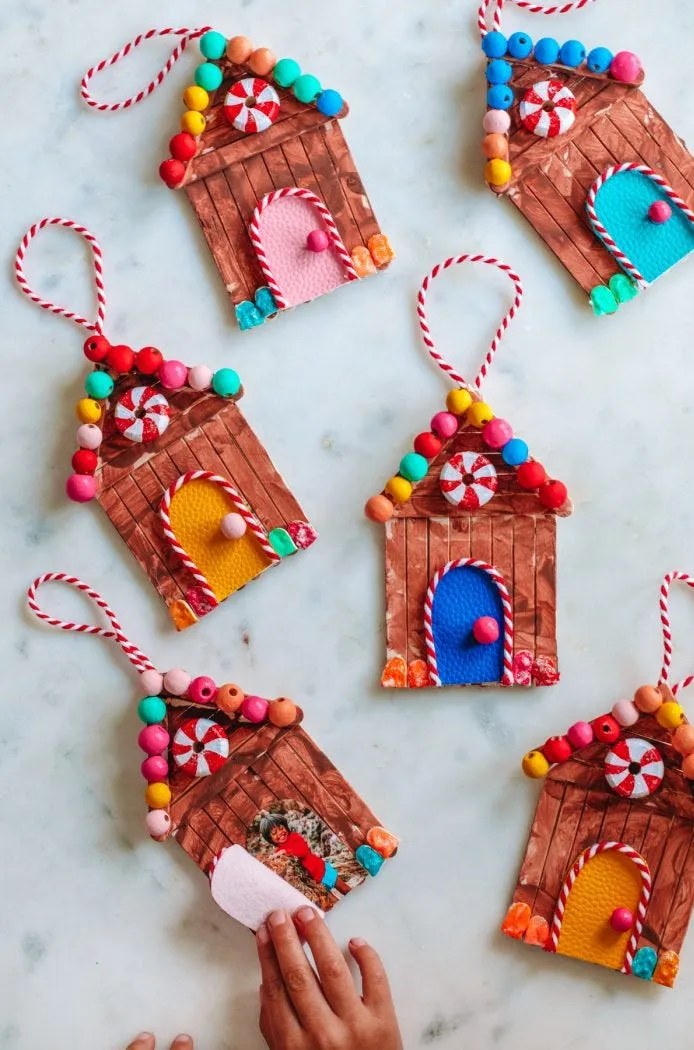
Time: about 25 minutes each. Materials: under $8 for a set of six. Want these without the craft-store run? Dollar Tree sells brown jumbo sticks and mixed bead tubes for a buck each, and you can cut peppermint swirls from a striped gift bag. Skip the paint and let the bare brown sticks be the cookie — it honestly reads more like gingerbread. Six houses, about $6. Compare with Idea #13 for softer handmade energy.
3. Red and Silver Painted Pinecones in a Woven Bowl
- Pinecones: free if you gather, or $6–$12 for a bag of 30
- Red and metallic silver spray paint: $12–$18 for two cans
- Dark woven bowl: $18–$35
- Red mesh fabric: $4–$8
- Cardinal figurine: $10–$22
- Faux pine branches: $8–$16
- Total: $58–$111
- Budget alternative: paint only the top third of each cone, use a thrifted basket, skip the branches — about $30.
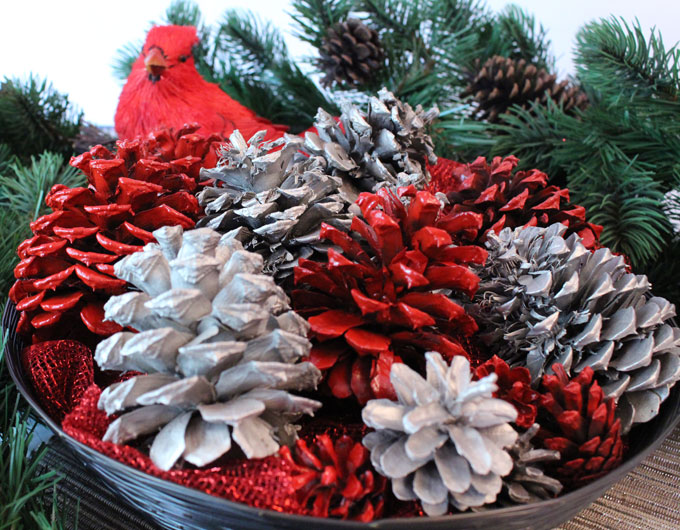
The cardinal is the one thing. Take it out and you have a bowl of painted pinecones: pretty, but anonymous. The little red bird turns an arrangement into a scene, because it gives the eye a character to land on and quietly signals winter rather than generic holiday. Set it slightly off-center and a touch behind the front row so it reads as peeking, not perched on display.
4. A Stacked Wood Slice Tree in a Pebble-Filled Pot
The formula here is roughly 60% natural wood, 25% white, and 15% red and green accents. That ratio is why it reads calm instead of cluttered — the wood does the heavy lifting and the seasonal colors are just punctuation. To shift it for another season, keep the wood and pebbles and swap the berries for dried lavender in spring or small orange slices in fall. You’re protecting the proportions, not the specific accents.
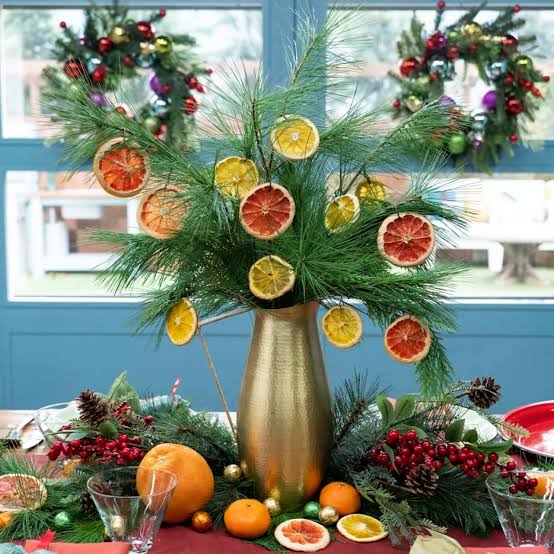
Stacked wood slices need a dead-level base or the whole tree leans. Sand the bottom slice if your cuts aren’t square, and glue each layer as you go — don’t stack dry and hope. Real wood also holds moisture in humid rooms and can bloom a fuzzy white mold, so seal the slices with matte polycrylic if you want this tree back on the shelf next December.
5. Dried Orange and Cinnamon Ornaments with White Beads
- Slice oranges 1/4 inch thick — thinner curls into crisps, thicker molds.
- Bake at 200°F for 3 hours, flipping once at the halfway mark.
- Stack two dried slices and three cinnamon sticks, then wrap the center with twine and knot.
- Thread two white wooden beads onto the hanging loop, one on each side of the knot.
- Hang near, not directly over, a heat source — dried citrus darkens fast above a radiator.
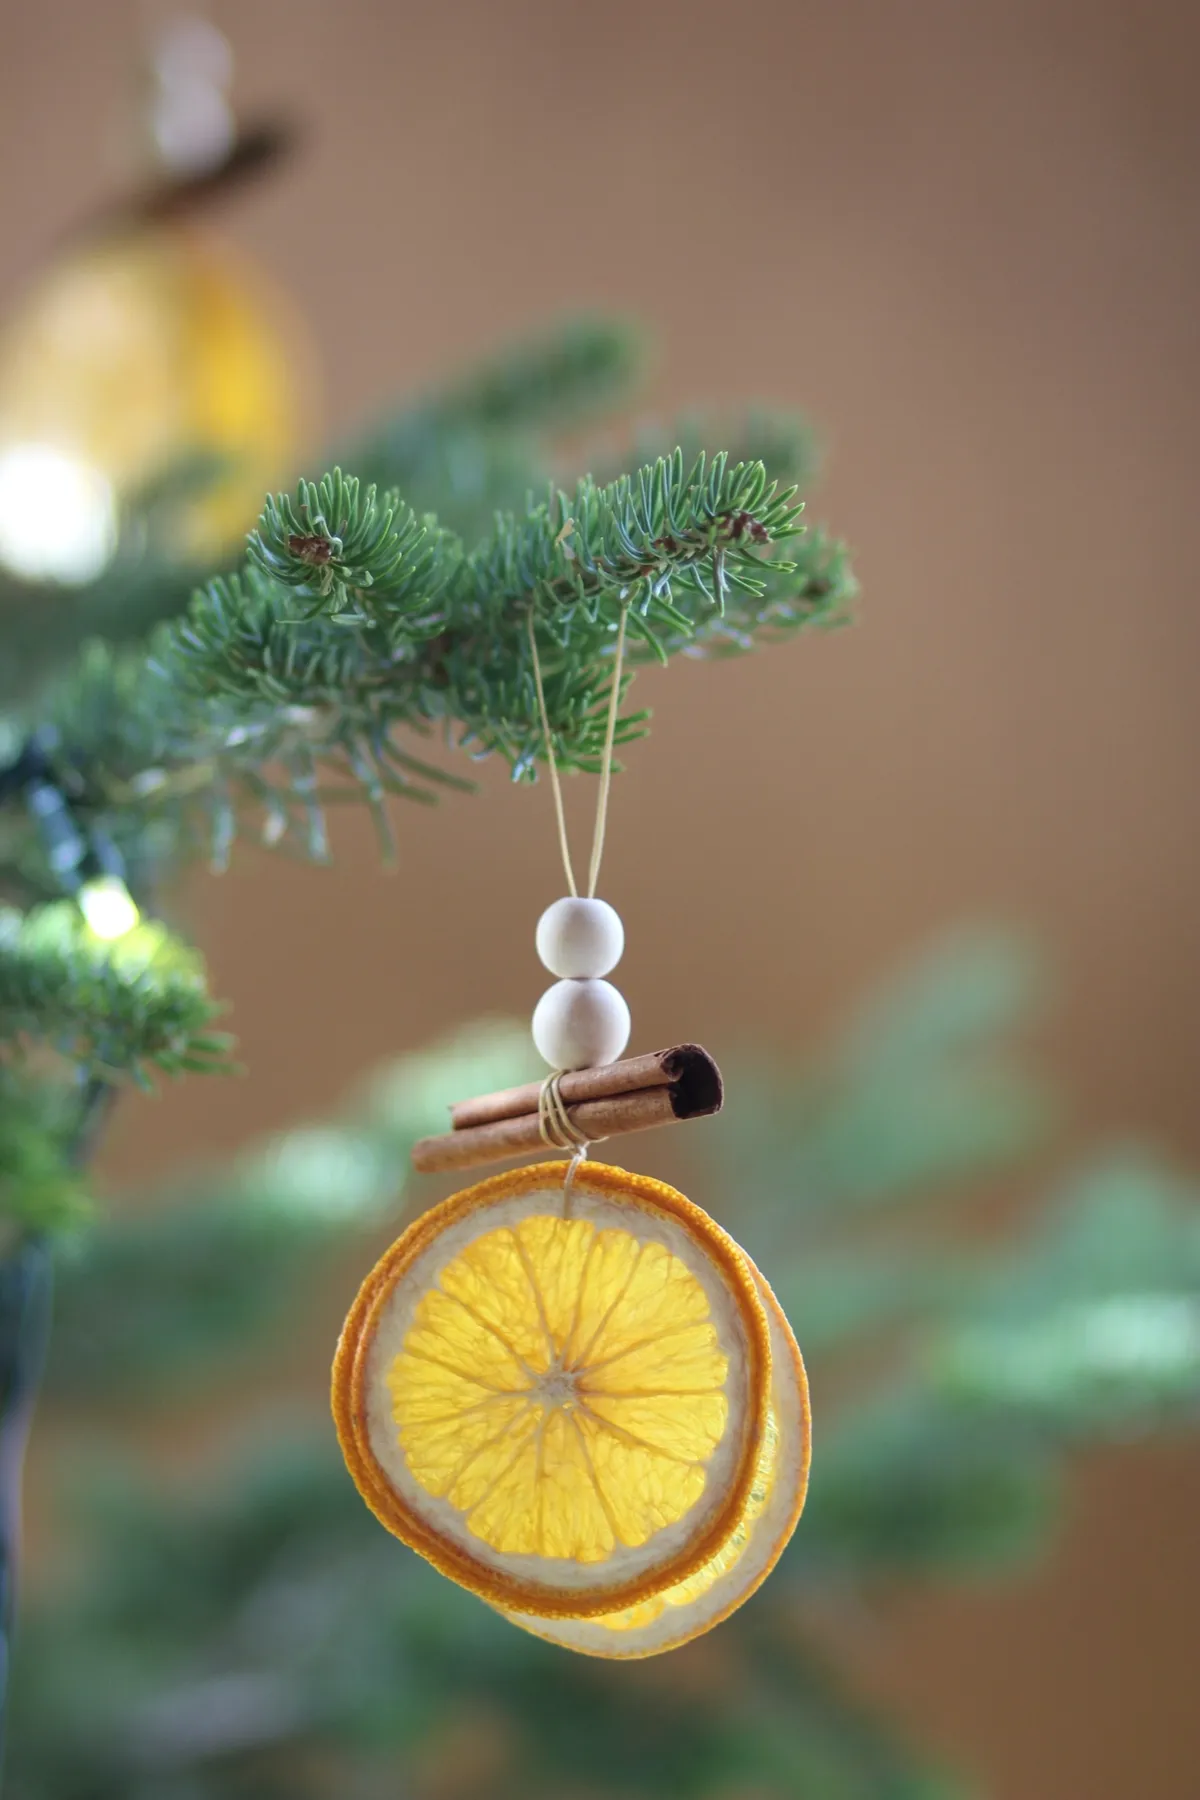
Time: 15 minutes active, 3 hours in the oven. Materials: about $10 for a dozen.
Dried orange keeps two or three seasons if it’s stored flat in a paper bag between Decembers, but humidity is the enemy — one damp storage bin and you’ve got soft brown slices by November. Cinnamon sticks are more forgiving, though they lose their scent after about a year. For the look with zero upkeep, buy pre-dried citrus and refresh the sticks with a drop of cinnamon oil each season.
6. Jeweled Pinecone Trees in a Glitter Dusted Village
Repurpose the single earrings. Every pair you’ve lost one of is exactly the right scale for a pinecone tree — small enough not to overwhelm the scales, sparkly enough to catch tree lights. Thread a hoop over a top scale, hook a gold chain around the midsection, and push a stud into the cone’s core where it grips. You get a jewelry-box look for free, and nobody ever guesses it’s a drawer cleanout.
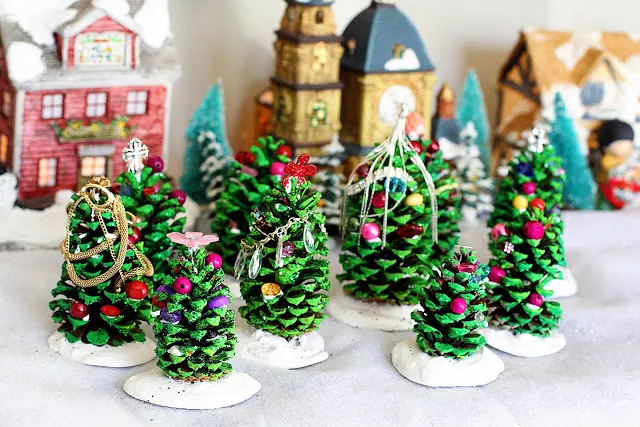
- Green-painted pinecones: $8–$14
- Glitter snow bases (wood slices plus glitter): $10–$20
- Beads and charms: $6–$15
- Repurposed jewelry: $0
- Bottle brush trees: $8–$16
- Miniature village houses: $14–$30
- Total: $46–$95
- Budget alternative: skip the village houses and set the trees on a white cake stand under a dusting of faux snow — about $25.
7. Marshmallow Snowmen Inside Clear Glass Ornaments
- Pop the metal cap and fill the ornament about halfway with mini marshmallows.
- Draw the face directly on the glass with a fine-tip black paint pen — two dots and a small orange triangle nose.
- Add a dotted smile arc, then let the paint cure a full 24 hours before handling.
- Reattach the cap and thread a red ribbon through the loop.
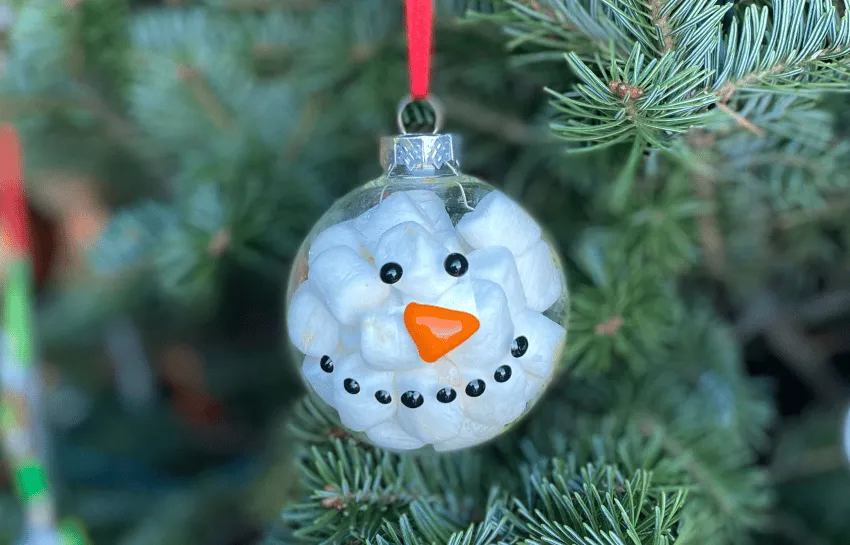
Time: 12 minutes each once you find a rhythm. Materials: about $9 for four.
Real marshmallows inside glass look great for about three weeks, then they shrink and cloud the ornament from the inside. For keepsakes, seal a handful of minis in a small plastic bag and tuck that in, or switch to white foam balls cut in half. Paint pens also smear on curved glass if you handle them too soon, so the 24-hour cure is not optional.
8. A Wrapping and Card Table on Dark Wood
You need a table at least 36 inches wide and about 5 feet long for two people to wrap side by side without elbowing each other. Smaller than that and one person ends up on the floor. This setup shines in a dining room or open kitchen; in a small apartment, run the table lengthwise against a wall and let the tree be the backdrop. For a scaled-down version that fits a breakfast bar, see Idea #24.

- Measure the table — 36 x 60 inches minimum for two people
- Confirm one outlet can handle a glue gun plus tree lights
- Decide where finished gifts will live so they don’t pile up underfoot
- Set a hard stop time; wrapping marathons turn into 1 a.m. regret
- Keep scissors and a lint roller within reach of both seats
9. Popsicle Reindeer and Foam Ball Snowmen
- Glue three brown craft sticks into a triangle for the reindeer head, then add two more as antlers.
- For snowmen, stack three white foam balls in descending size on a toothpick core.
- Add faces with a black fine-tip marker — three dots is plenty, more looks buggy.
- Glue on one felt scarf and one pom-pom nose per figure, then stop.
- Hot-glue each figure to a small wood slice so it stands instead of rolls.
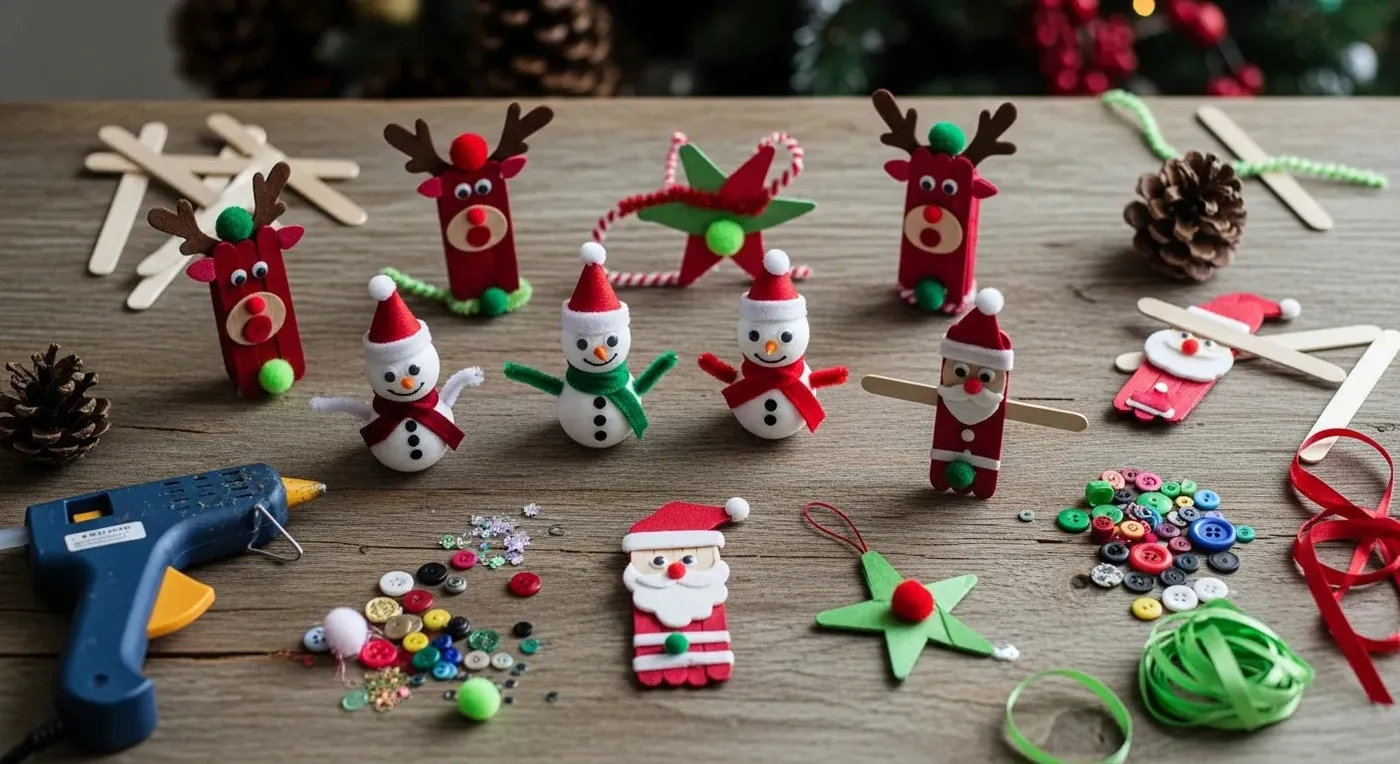
Time: 20 minutes per set. Materials: about $12 for six figures.
This is the craft that refuses to die. Pinterest searches for popsicle stick ornaments climb every November because parents want something a five-year-old can finish in one sitting. The staying power is real — supplies are cheap, they never go out of style, and the finished figures have a lumpy charm that reads handmade rather than manufactured. See Idea #26 for the same kid energy with a paint-and-glitter upgrade.
10. Paper Tube Characters: Reindeer, Tree, Santa, Snowman
Four characters, one silhouette. Same cylinder, same height, same base — the personality comes entirely from what gets glued on. That’s roughly 70% neutral tube and 30% character detail. Keep the tubes uniform and the group reads as a set; vary the heights and it looks like a pile. Switch to a woodland theme and keep the tubes, swapping the felt for brown and cream scraps.
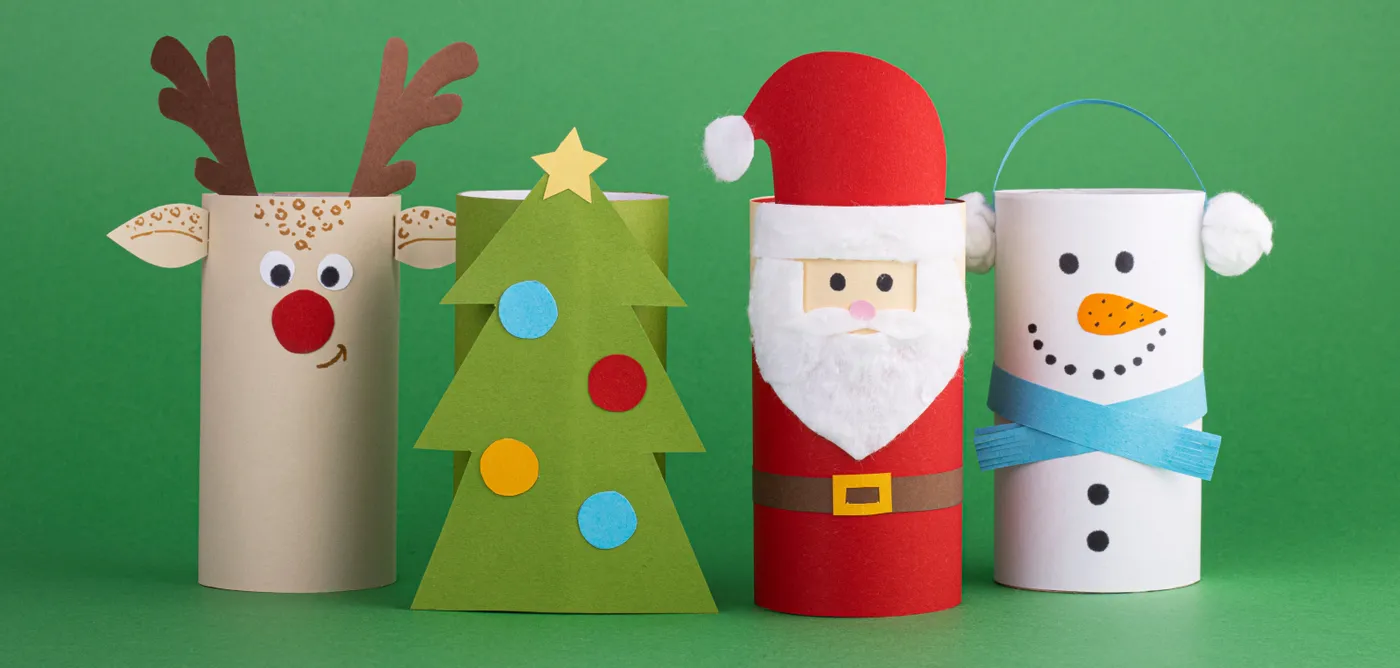
Toilet paper tubes are free and, honestly, the right size. Save them for two weeks, cut to a uniform 4 inches, and cover any printing with a quick coat of acrylic. Walmart sells felt squares for around 30 cents each, and a dollar-store bag of pom-poms covers all four characters. Whole set: under $6. That’s a $30 craft kit’s look, minus the instruction sheet nobody reads.
11. Dark Green Pinecones with Snow-Tipped Scales
What makes this read as a tree and not a pinecone is the paint strategy. Dark green over the whole cone, then white dry-brushed only across the outer tips, mimics the way light hits a real spruce — dark interior, bright edges. The tiny pom-poms then act like ornaments catching light. Without the white tips, the green just goes flat.
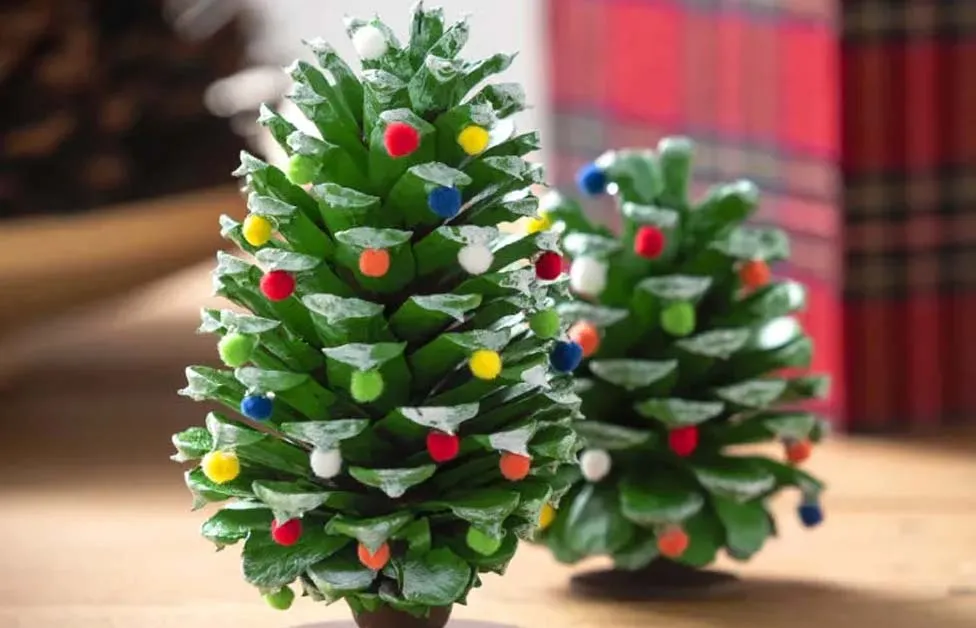
The plaid is the quiet hero. That red-and-dark plaid backing pushes the green forward and makes two pinecones feel like they belong on a farmhouse mantel. Remove it and the same trees look like a school project on a bare table. The contrast is doing the work, not the props.
12. A Rustic Painted Wood Sign with Pinecones and Berries
Grab a plank from the scrap bin at a Habitat ReStore for a couple of bucks, or use an IKEA cutting board as your base and skip sanding entirely. Letter it with a white paint pen — a stencil usually costs more than the wood did. Hot-glue two pinecones and a sprig of faux berries from Dollar Tree, then tie the hanging loop with kitchen twine. About $14 all in versus $55 for a boutique version.
These signs work best at 16 to 24 inches wide on a mantel, and 10 to 14 inches above a doorway or gallery wall. Under 8 inches and it disappears from a few feet away. High ceilings or a big hearth? Size up to 30 inches and thicken the lettering — thin text at that scale reads as a smudge.
13. Light Blue Felt with a Crocheted Snowflake Center
The red button in the middle of a white crocheted snowflake. It’s a silly small thing, but it’s why this reads finished instead of unfinished — crochet alone can look like a doily, and the button turns it into a decision. It also gives the eye one warm note in an otherwise cool ornament, which is exactly what makes it pop against dark green branches.
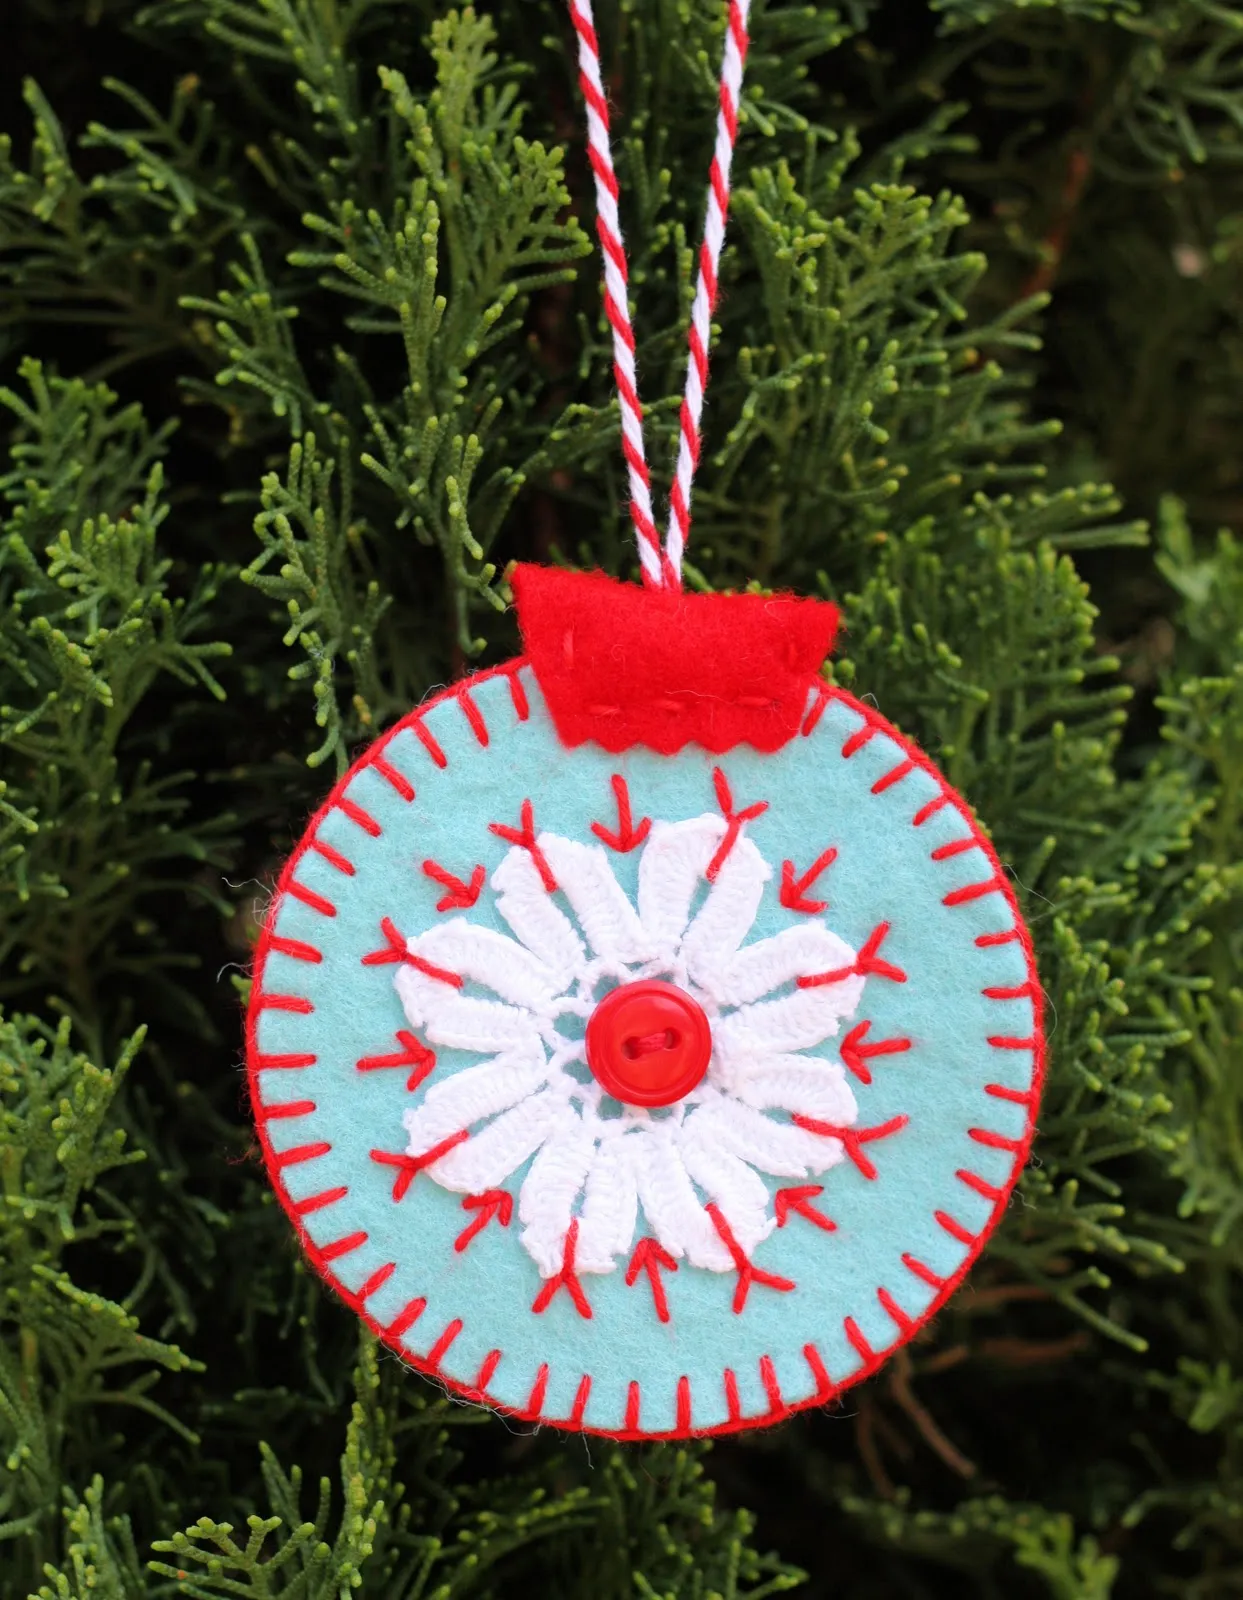
Crocheted snowflakes are only as good as their starch. Unstarched thread goes limp in humidity and sags within a season. Dip the finished snowflake in a 50/50 mix of white glue and water, pin it flat on wax paper over foam board, and let it dry overnight — that’s what holds the points. Hand-wash the felt base only; the crochet won’t survive a machine.
14. Clay Santa Heads and Felt Picks on Dark Wood
- Air-dry clay, 2 lb: $12–$18
- Acrylic paint set: $10–$16
- Felt squares in greens and greys: $6–$12
- Red-and-white twisted cord: $5–$9
- Small star and dot embellishments: $5–$10
- Total: $38–$65
- Budget alternative: skip the clay and build the whole set from felt and cardboard — about $15, and kids can actually help.
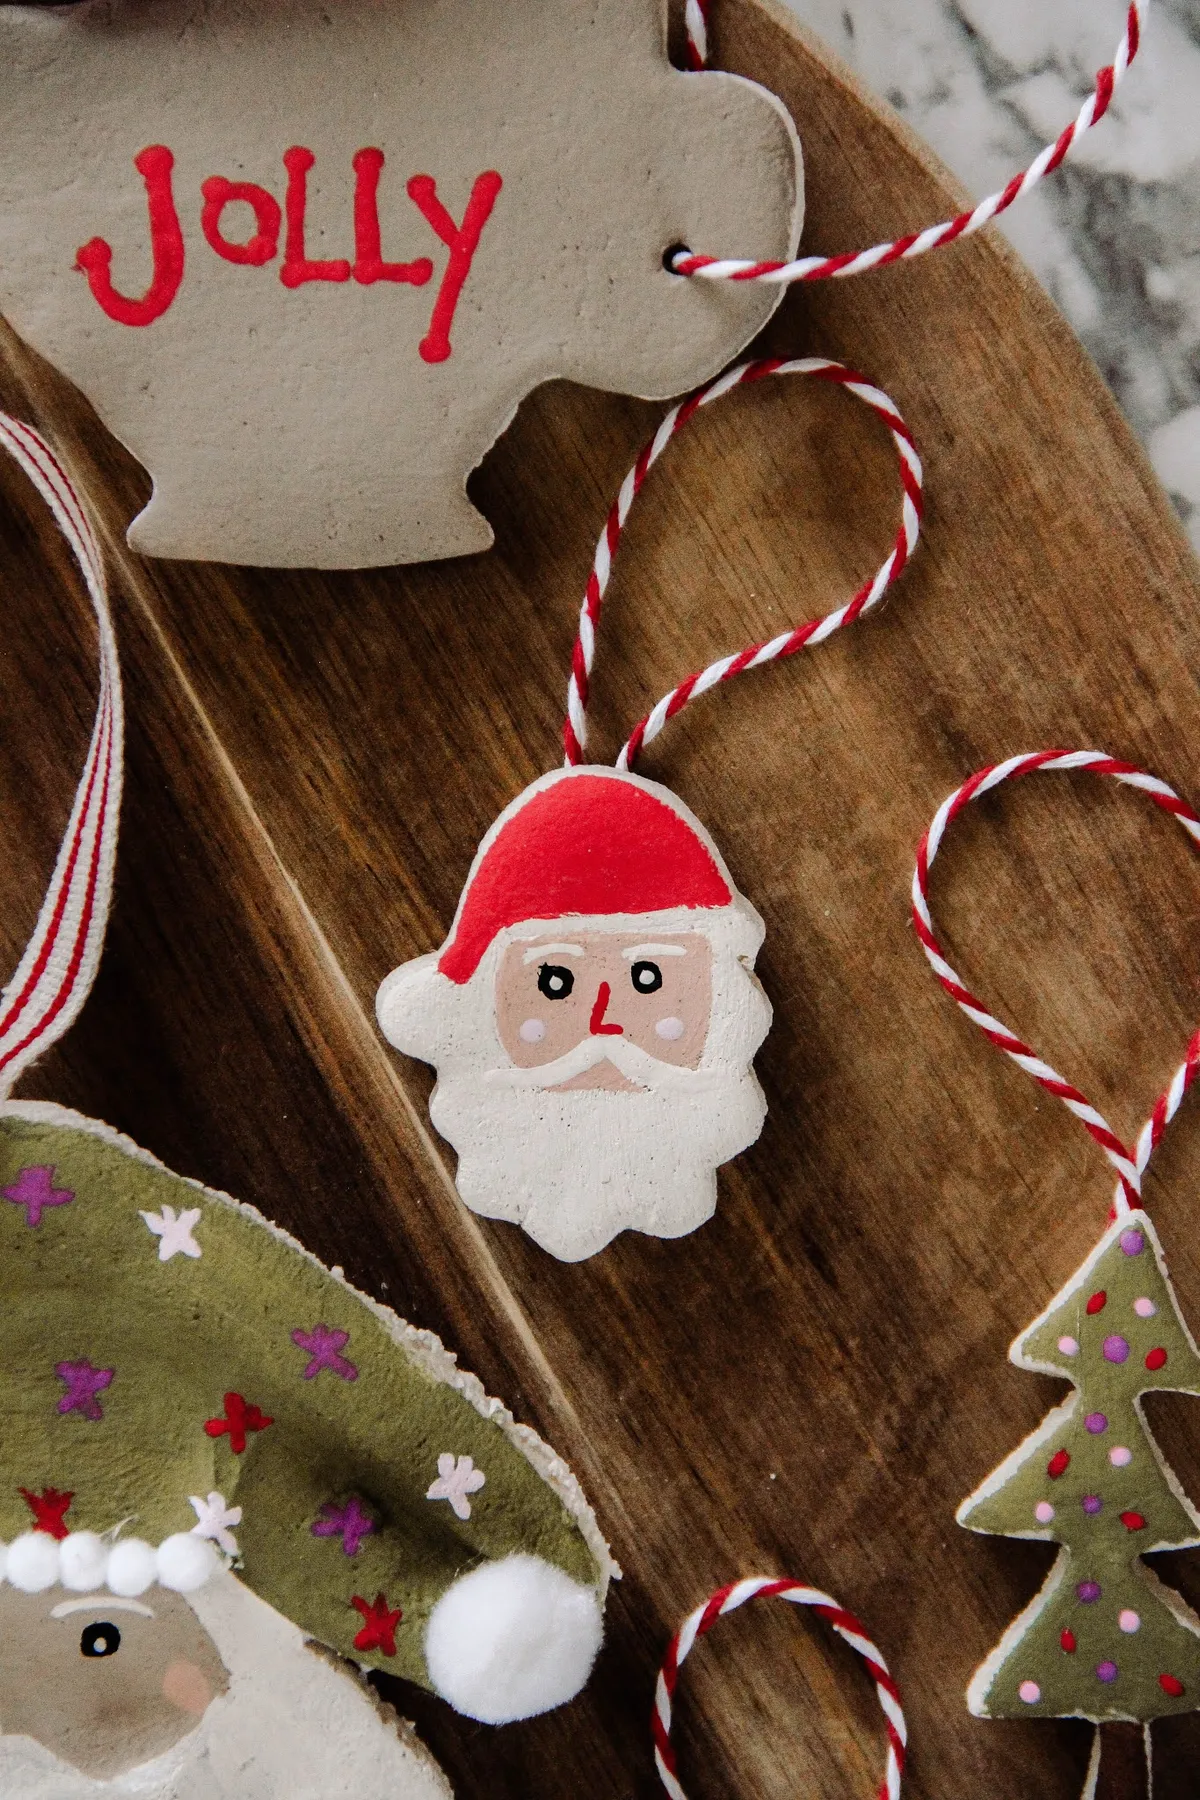
Stamped letters are the difference between handmade and homemade-in-a-rush. Roll the clay to an even 1/4 inch, press a rubber stamp into each letter while it’s still damp, then let it dry 24 to 48 hours — not four. Paint the recessed letters rather than the raised surface, wipe the excess with a damp cloth, and you get crisp relief lettering that looks shop-bought.
15. A Red-Hatted Gnome Wrapped in Dark Green Velvet
Three things are working here. The velvet ground — dark green makes red and white read as jewel tones instead of candy colors. The frosted pine, which ties the gnome’s white body to the branches so nothing floats. And the berry clusters, just large enough to balance that red hat without competing with it. Take away any one and it’s a tchotchke on a shelf.
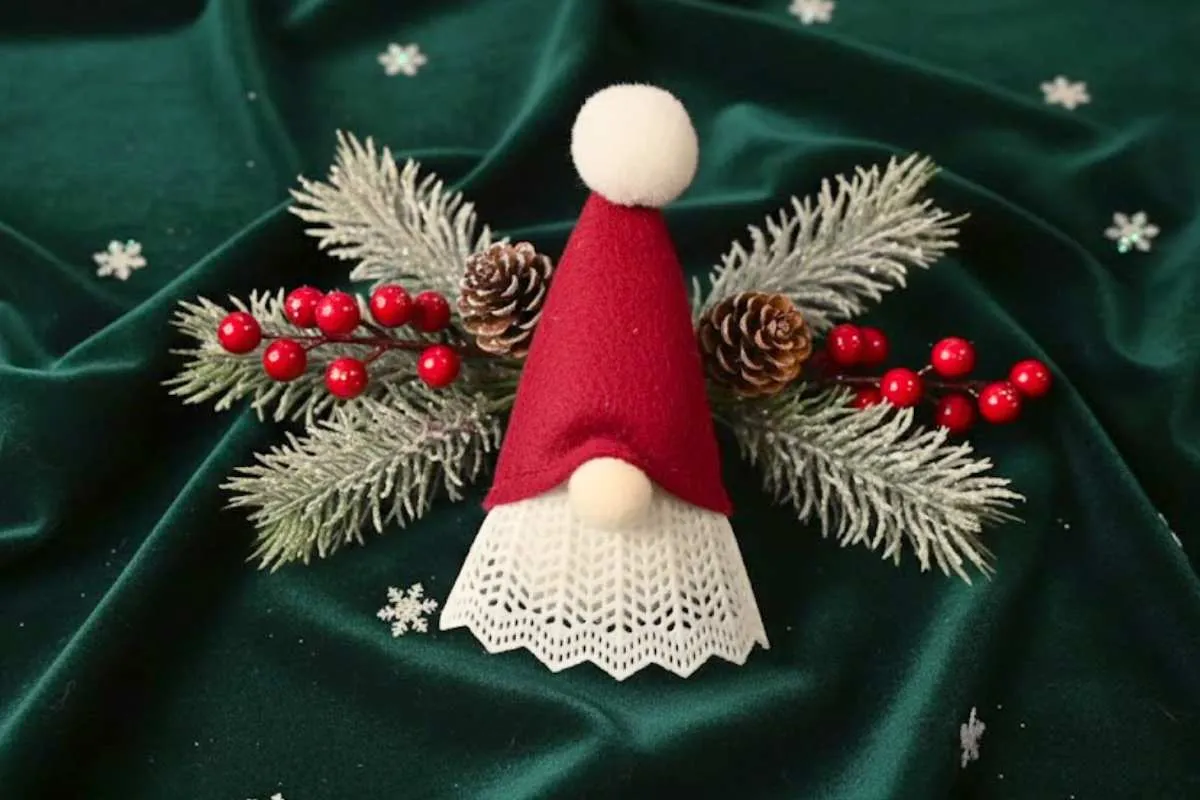
Faux frosted pine sheds. Move it once and you’ll find white flakes on the velvet for a week. Shake new branches outdoors before styling and keep a lint roller nearby. Real pinecones should get an hour in a 200°F oven to kill anything living in them, and red berry sprigs fade to pink in direct sun, so keep this off a south-facing sill.
16. Accordion-Folded Parchment Snowflakes
This is a 90/10 formula: nine parts white paper, one part green accent. The folded pleats create their own shadow pattern, so you don’t need color to make them interesting — the texture does that work. To recolor the whole group, keep the folds identical and swap parchment for kraft paper and the pine sprigs for dried eucalyptus. Same silhouette, entirely different mood.
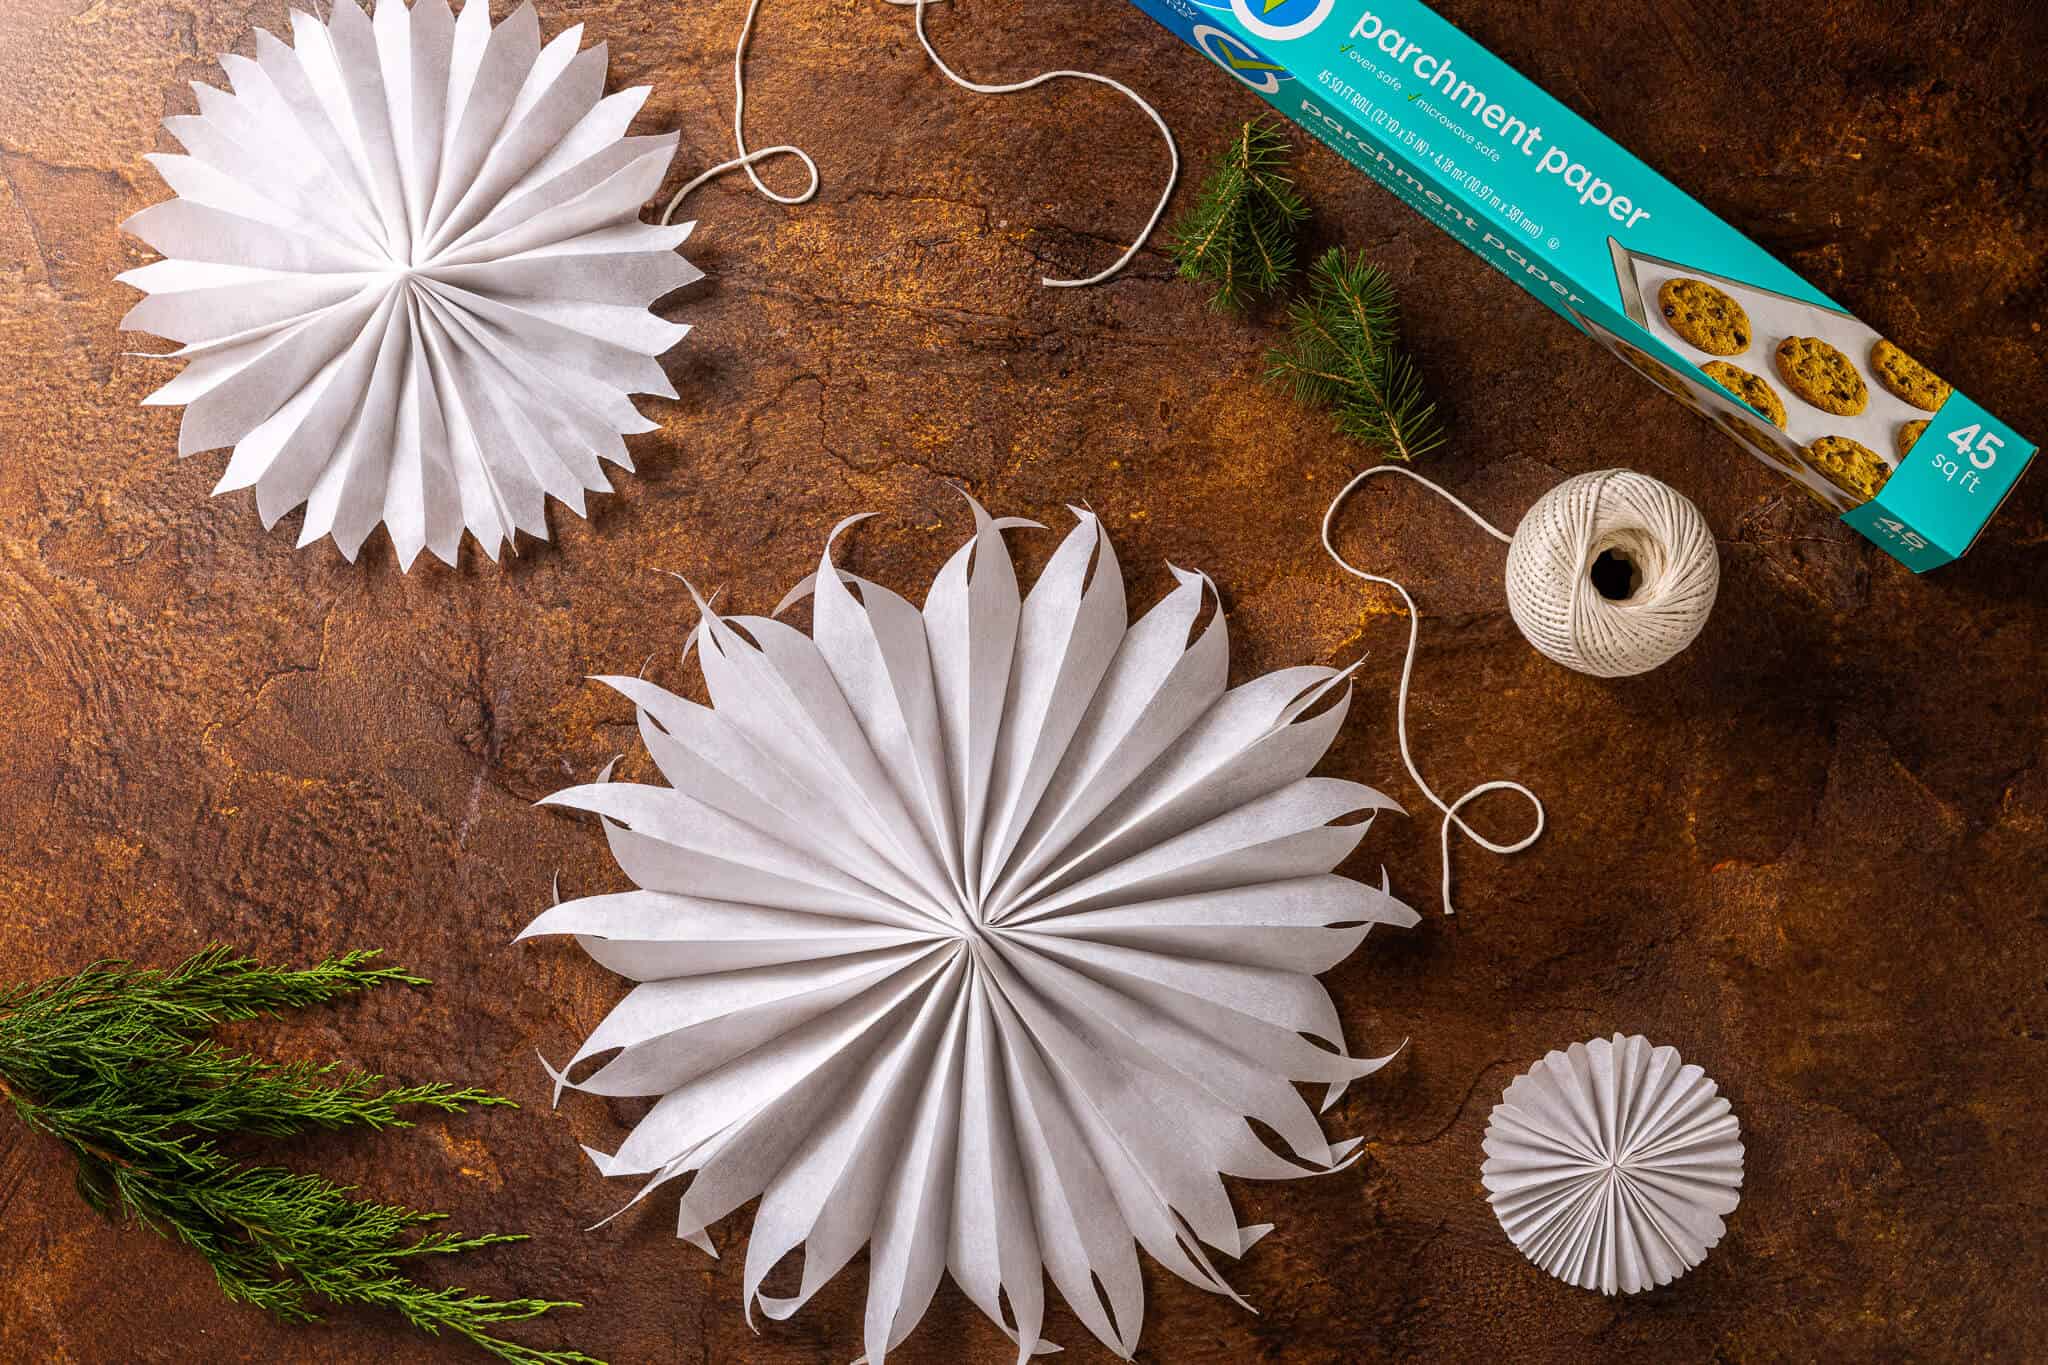
Parchment paper is in your kitchen drawer right now. Cut 6-inch strips, accordion-fold at half-inch intervals, pinch the center with twine, and fan the layers — that’s the whole project. IKEA’s 200-foot roll runs about $5 and makes dozens, and cotton twine is roughly $3 a spool. If you want the same sculptural look with more sparkle, see Idea #23.
17. Red Felt Santa Hats with Faux Fur and Holly
Cut felt with sharp fabric shears, not the scissors from the junk drawer. Dull blades crush the fibers and leave a fuzzy, uneven edge that no amount of stitching hides. Cut the fur band a quarter inch wider than you think you need — faux fur loses about that much pile when you sew through it. Stitch the holly on before the fur, because the band is thick enough to jam a needle mid-stitch.
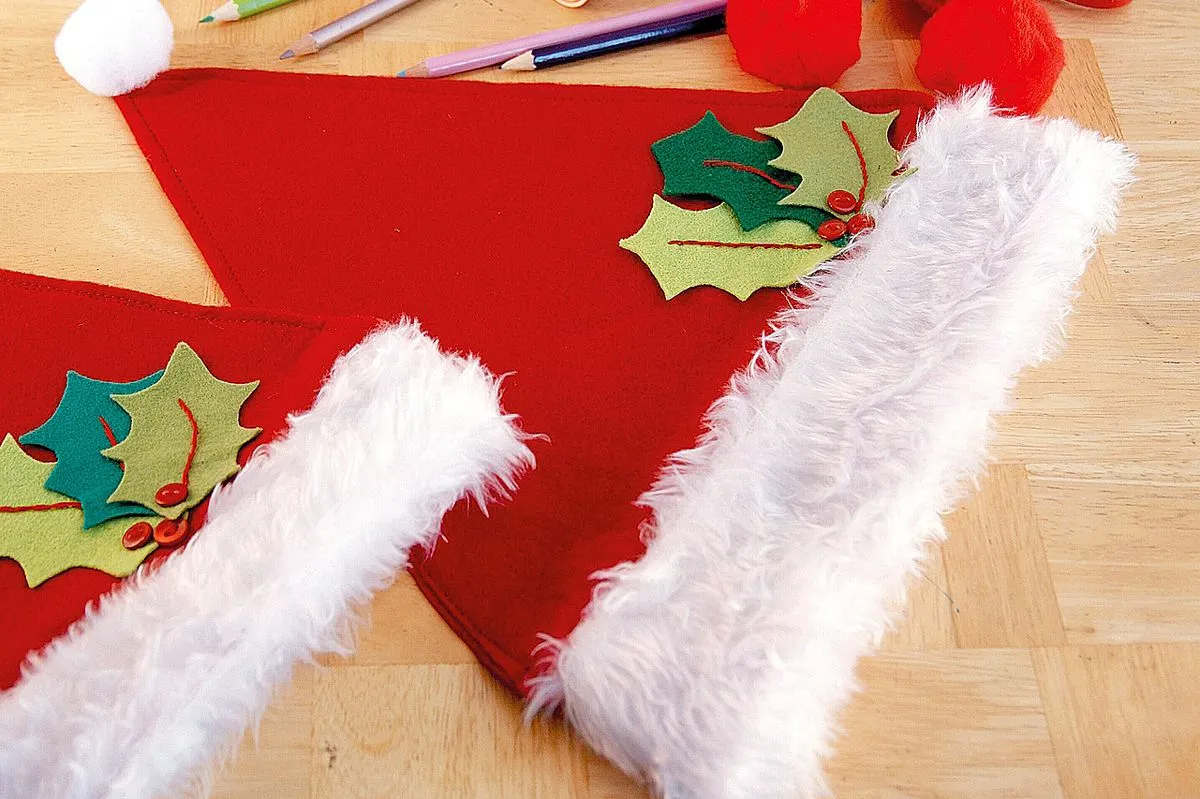
Blanket stitching around the edge in a contrasting thread. It adds fifteen minutes and it’s the only reason these read as handmade objects rather than cut shapes. Blanket stitch also seals the felt’s raw edge, so the hat keeps its round shape instead of stretching out of true after a season in a storage bin.
18. Floating Winter Jars with Cranberries and Paper Snowflakes
- Fill a clean jar two-thirds with water and drop in a handful of fresh cranberries.
- Cut snowflakes and stars from white paper, then tie each to a length of clear fishing line.
- Tape the line to the jar’s rim so the cutouts float at different heights.
- Add three pine sprigs, then wrap the neck with twine and a small tag.
- Change the water every four days — cranberries cloud it fast after that.
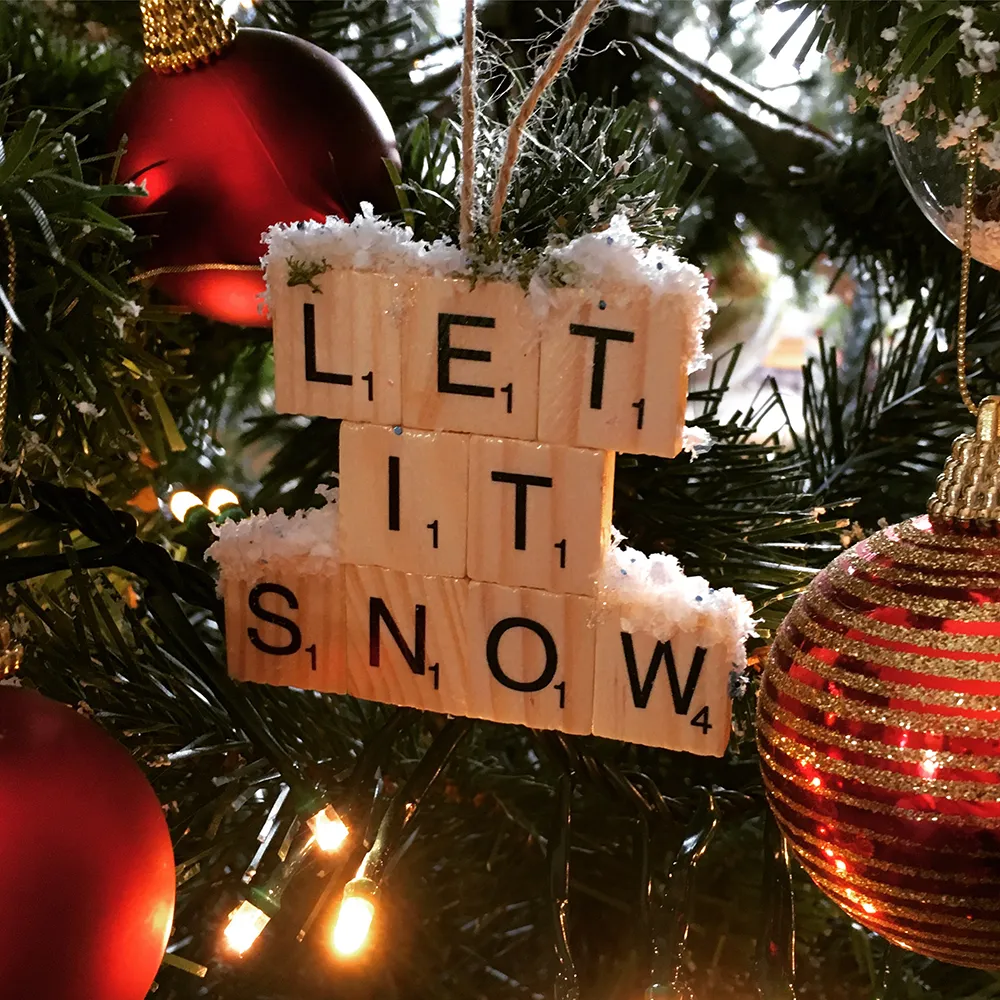
Time: 10 minutes per jar. Materials: about $5 if the jar comes from the recycling bin.
Think of it as 70% clear, 20% red, 10% green and white. The transparency is the point: because most of the jar is empty, the berries and paper read as floating rather than stuffed. To shift the palette, swap cranberries for whole kumquats or halved figs and keep everything else identical.
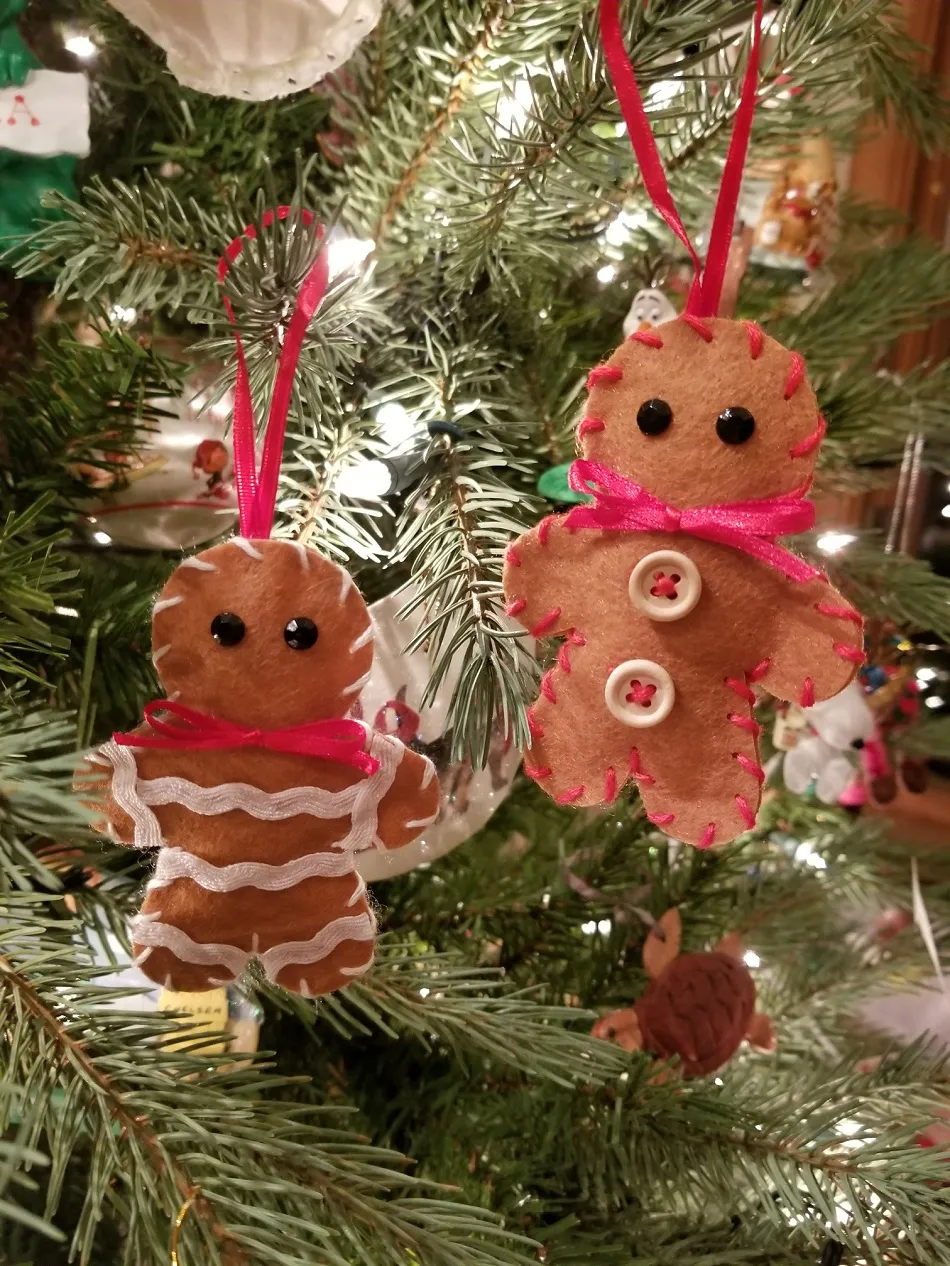
19. A Flat Brown Gingerbread Man on Faux Pine
The restraint is the design. No painted icing, no buttons, no glitter — just a flat brown silhouette and a striped cord. It works because the striped string does the decorative work paint usually does, and the ornament stays legible from across the room. A busy gingerbread man disappears into the branches. This one registers instantly, and the cord is the color.
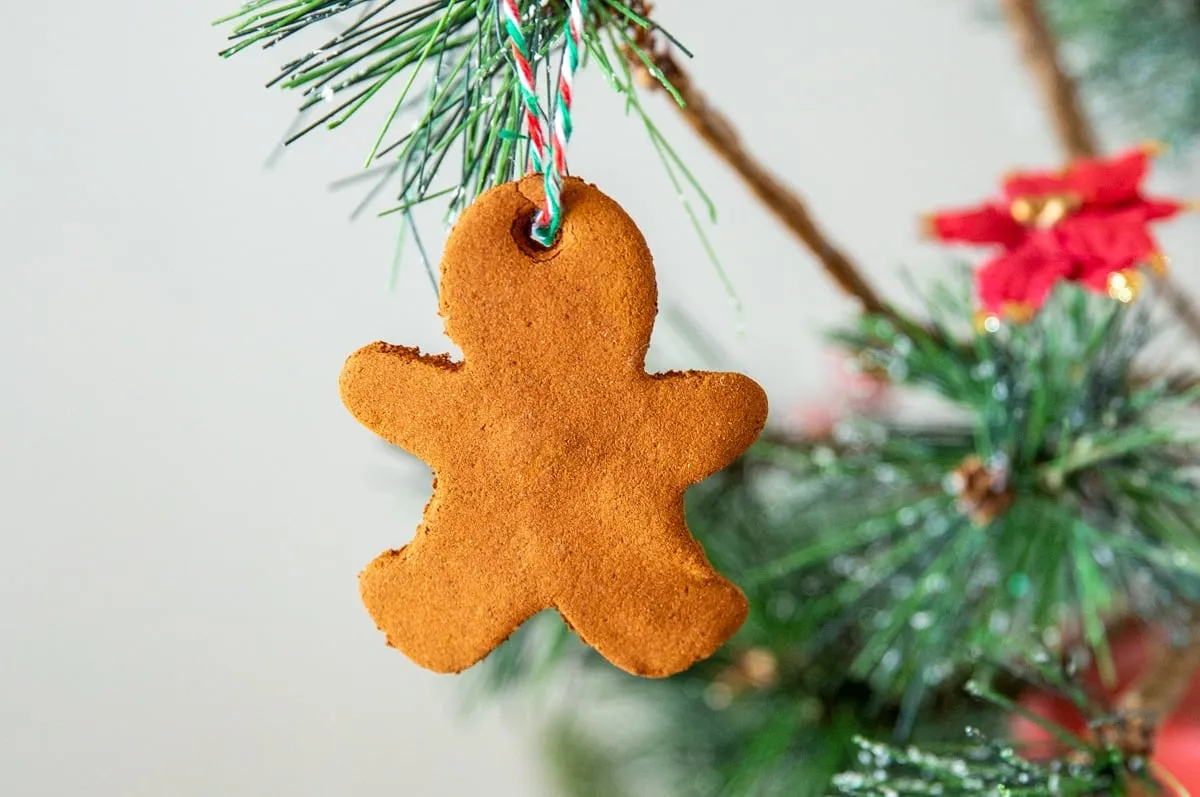
Flat ornaments like this want 3 to 4 inches between them so the silhouettes stay readable, which is roughly 12 per foot of branch. On a 6-foot tree that’s about 60 to 70 ornaments — far fewer than most people hang. On a tabletop tree under 3 feet, cut that to six or eight total.
20. A Needle Felted Dog in a Tiny Santa Hat
The gold bell at the collar. It’s barely visible at a glance and it costs almost nothing, but it turns a generic felt animal into somebody’s specific dog. It’s a detail you only notice up close, which is exactly what makes the ornament feel personal instead of mass produced.

Needle-felted ornaments shed like a real dog. Expect loose fibers on your tree skirt for the first season, and don’t hang one where a curious pet can reach it — the wool is tempting and the tiny bell is a choking hazard. Felt them firmly if you’re making your own; soft felting pills within a month. A comb-through every December keeps the surface tidy.
21. Textured Gingerbread Men on Frosted Pine
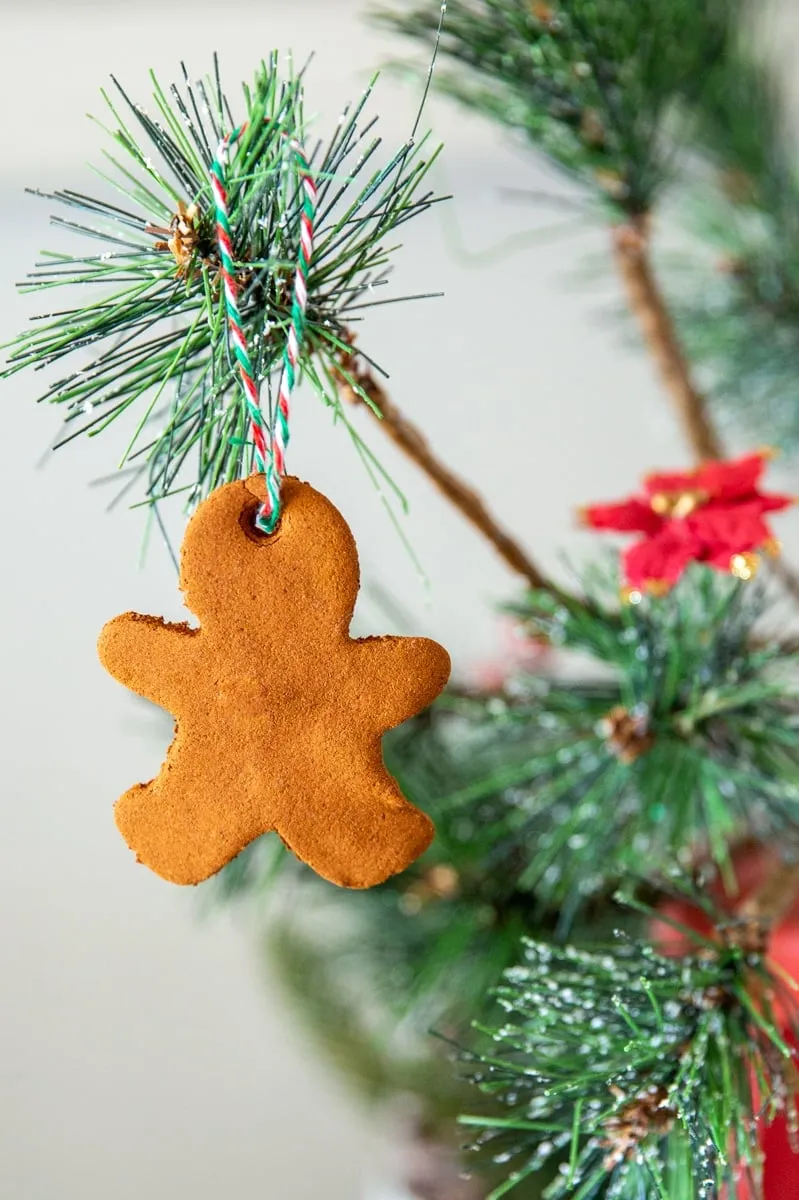
Textured gingerbread ornaments read best when they’re slightly bigger than feels right — aim for 4 to 5 inches tall on a full-size tree. Anything under 3 inches gets swallowed by the branches, especially on a flocked tree where the white specks compete. Hang them flat-side out, too; a gingerbread man turned sideways loses his entire silhouette.
- Gingerbread ornament blanks, set of 12: $12–$18
- Cinnamon-scented paint or acrylics: $8–$14
- Red, green, and white striped twine: $5–$9
- Flocked pine picks or garland: $14–$28
- Red floral accents: $8–$16
- Total: $47–$85
- Budget alternative: cut shapes from cardboard, coat them in a cinnamon-and-glue paste, punch a hole for twine — about $11.
22. Half-Dipped Pinecones with Wooden Stars
60% natural brown, 30% white, 10% pale wood. The trick is the partial paint — dipping only the tips keeps the pinecone’s texture visible, which is what makes this read restrained rather than coated. For a cooler palette, keep the exact same dip depth and swap white for matte pearl. The proportion is doing the work, not the color.
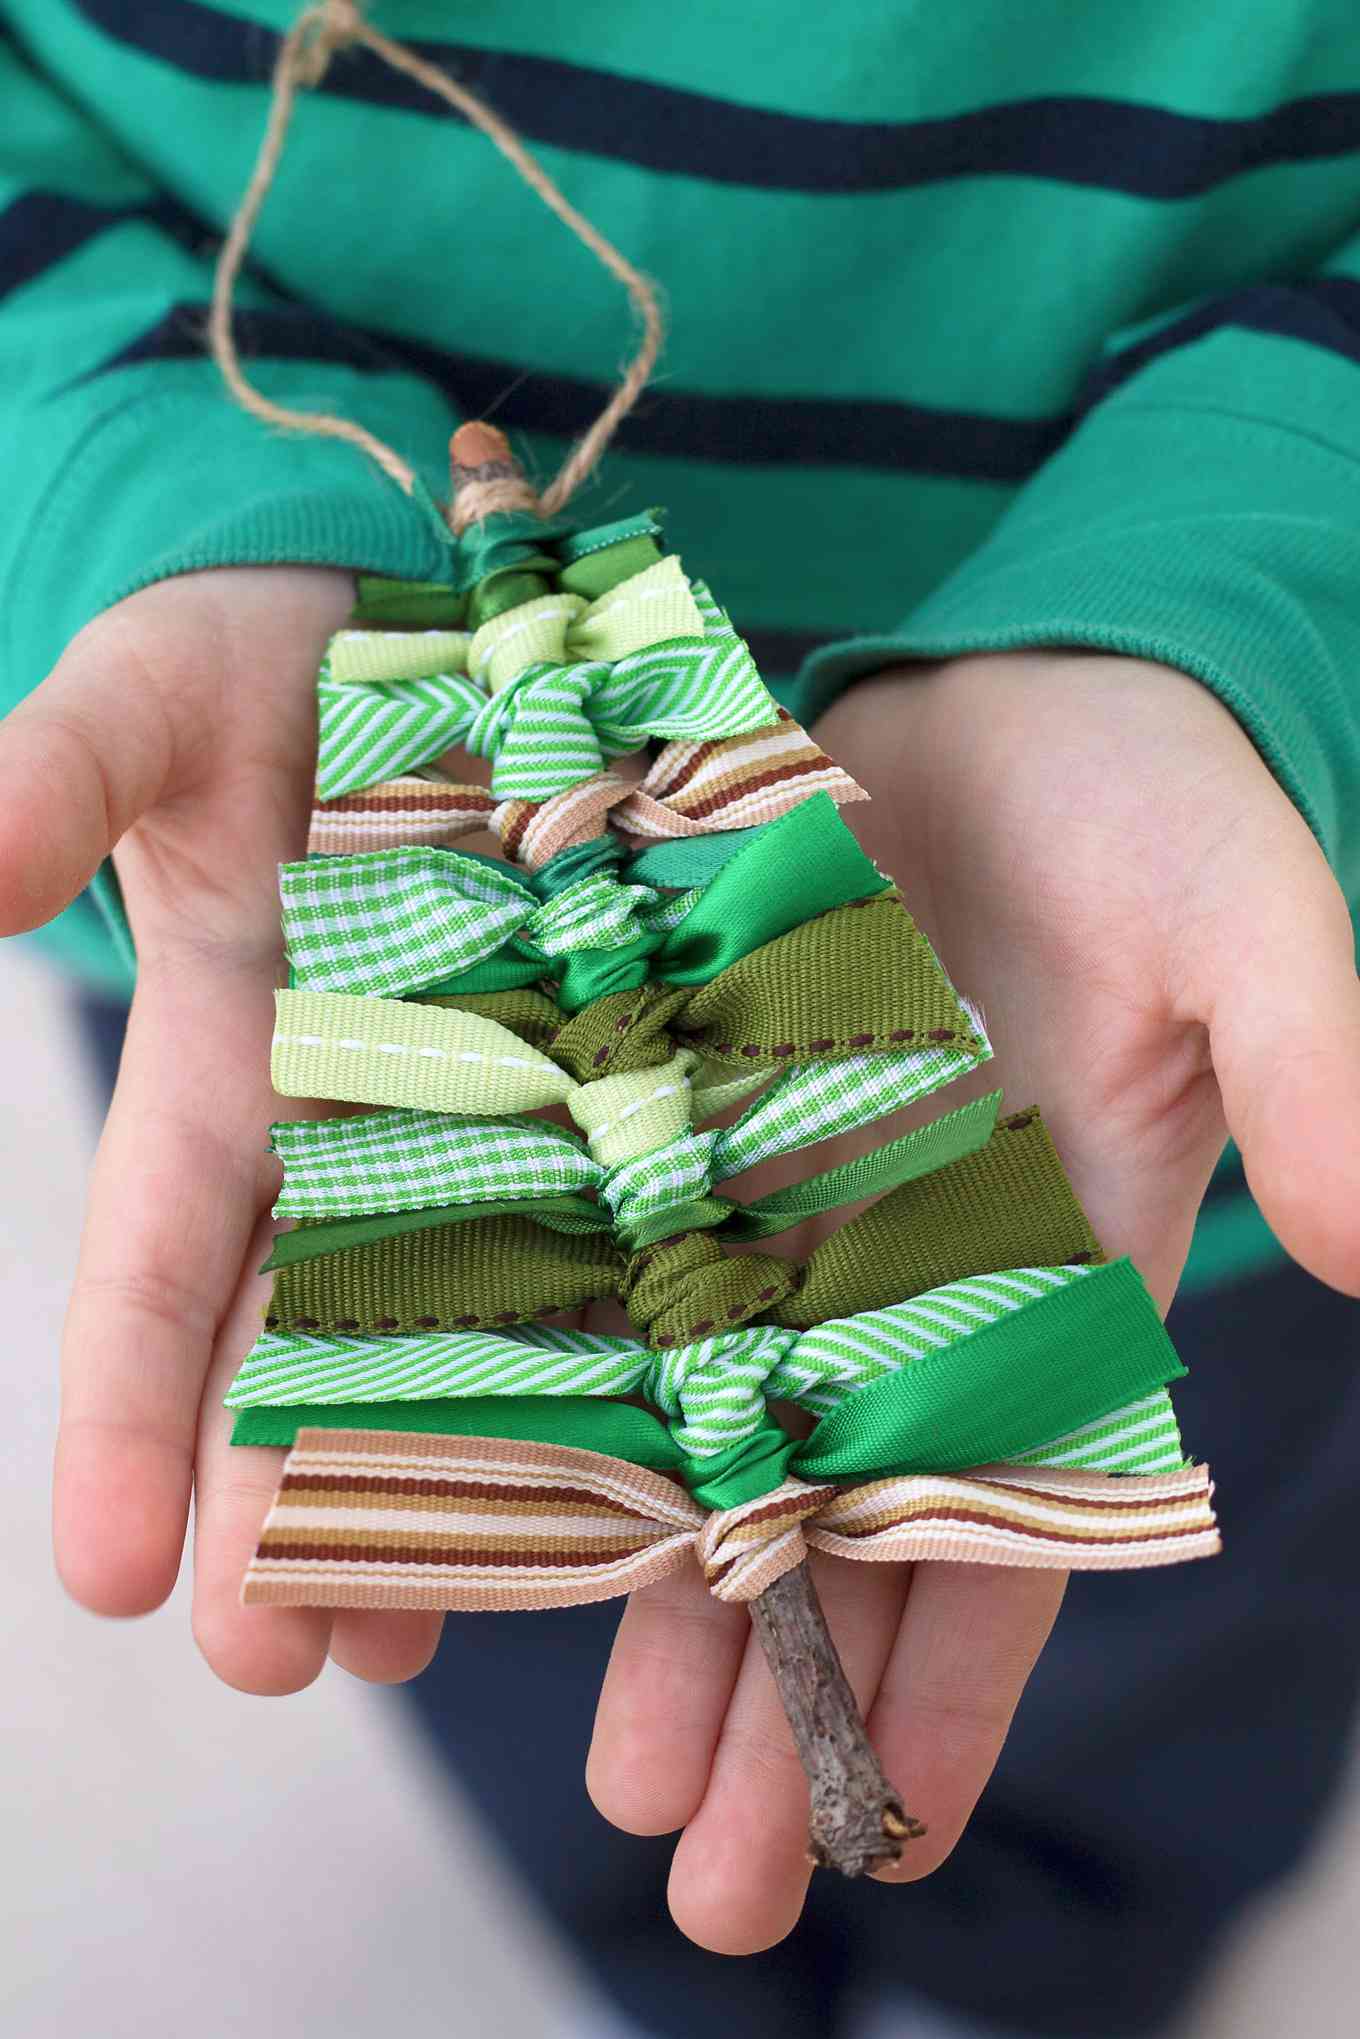
The wood cutouts are the only real expense here, and you can skip them. Pinecones are free if you have woods nearby, and a $4 bottle of craft paint does twenty of them. Thread everything on a $3 roll of jute for a garland under $10. If you want the stars, Walmart sells 30 unpainted wood shapes for around $4.
23. Pink and Silver Sequin Ornaments, Pinned by Hand
Sequined ornaments work best at 3 to 3.5 inches across — smaller and the pins crowd each other, larger and you’re looking at 90 minutes per ornament instead of 30. Plan on 120 to 150 sequins per ball, spaced so each row overlaps the one above by about half. On a 7-foot tree, eight to ten sequined ornaments mixed with matte fills reads luxe. Fifteen and the tree looks like a disco.

Use flat-head pins, not round-head. Round heads sit above the sequin and leave a visible dot; flat heads disappear into the cup entirely. Work in overlapping rows from the top down, like roof shingles, and pin through each sequin’s center hole so the edges hide the pin beneath. Buy pins by the hundred — you’ll use more than you expect.
24. A Parent and Kid Craft Table in Santa Hats
- Play-doh and modeling clay sets: $8–$16
- Colored pencils and markers: $10–$20
- Cardstock and pre-cut paper shapes: $6–$12
- Small gold tabletop tree: $15–$30
- Two Santa hats: $8–$14
- Total: $47–$92
- Budget alternative: hit the Target dollar spot after Thanksgiving and reuse last year’s hats — realistically $20.

Family craft sessions are the 2026 answer to the cookie-decorating party — less sugar, less cleanup, and the kids actually finish something. Pinterest boards for toddler Christmas crafts spike in the first week of December, and this one has legs because the supplies are shelf-stable and reusable year after year. When the little ones are past the taste-testing stage, Idea #29 is the next step up.
25. Beaded Pipe Cleaner Ornaments Built by Kids
This is the rare craft that’s genuinely right for a five-year-old, but watch the bead size. Anything under 10 mm is a choking hazard for kids who still mouth things, and small beads slide straight off a standard pipe cleaner. Look for 12 to 15 mm beads with generous holes. Twist the ends into a tight loop before anything gets hung — a loose wire end scratches branches and small fingers equally well.

- Confirm beads are 12 mm or larger for kids under six
- Set out one bowl per color so beads don’t migrate to the floor
- Use a rimmed tray — rolling beads stop at the edge
- Pre-twist one end of every pipe cleaner into a stopper before handing it over
26. Painted Paper Cutouts on a Bright White Table
A white tabletop changes the equation — you can see every scrap, so the mess stays manageable and the color mixing reads clearly. It also means you need to work bigger: snowflakes 6 to 8 inches across, trees 5 to 6 inches tall. Tiny shapes vanish. On a dark wood table, the same crafts need another two inches to hold their own.
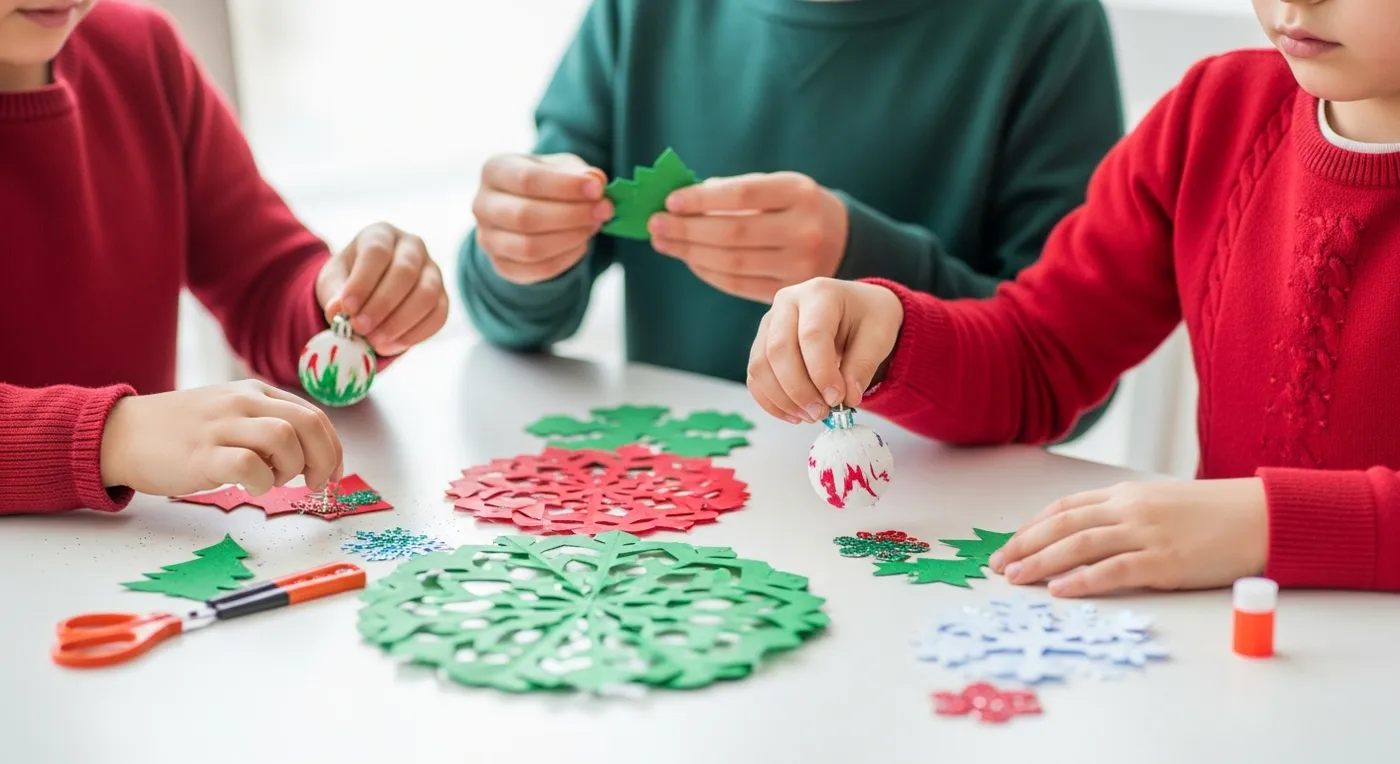
- Fold an 8-inch paper square into quarters and cut notches along every edge.
- Unfold flat and press under a heavy book for ten minutes so it lies smooth.
- Paint ornament bases first, then set them aside to dry while you cut shapes.
- Apply glitter over a tray and tap the excess back into the tray, not the table.
- Seal painted ornaments with a matte spray so the finish survives storage.
Time: about an hour with a small group. Materials: roughly $15.
27. A Snowflake, a Reindeer, and a Green Felt Pick
The dark cutting board as a display surface. Ornaments usually go straight to the tree, but stacking them on dark wood makes each one read as a single object with weight. It’s also the smartest way to photograph them — the dark ground makes white and grey pop, and the marble behind it keeps the whole thing from feeling heavy.
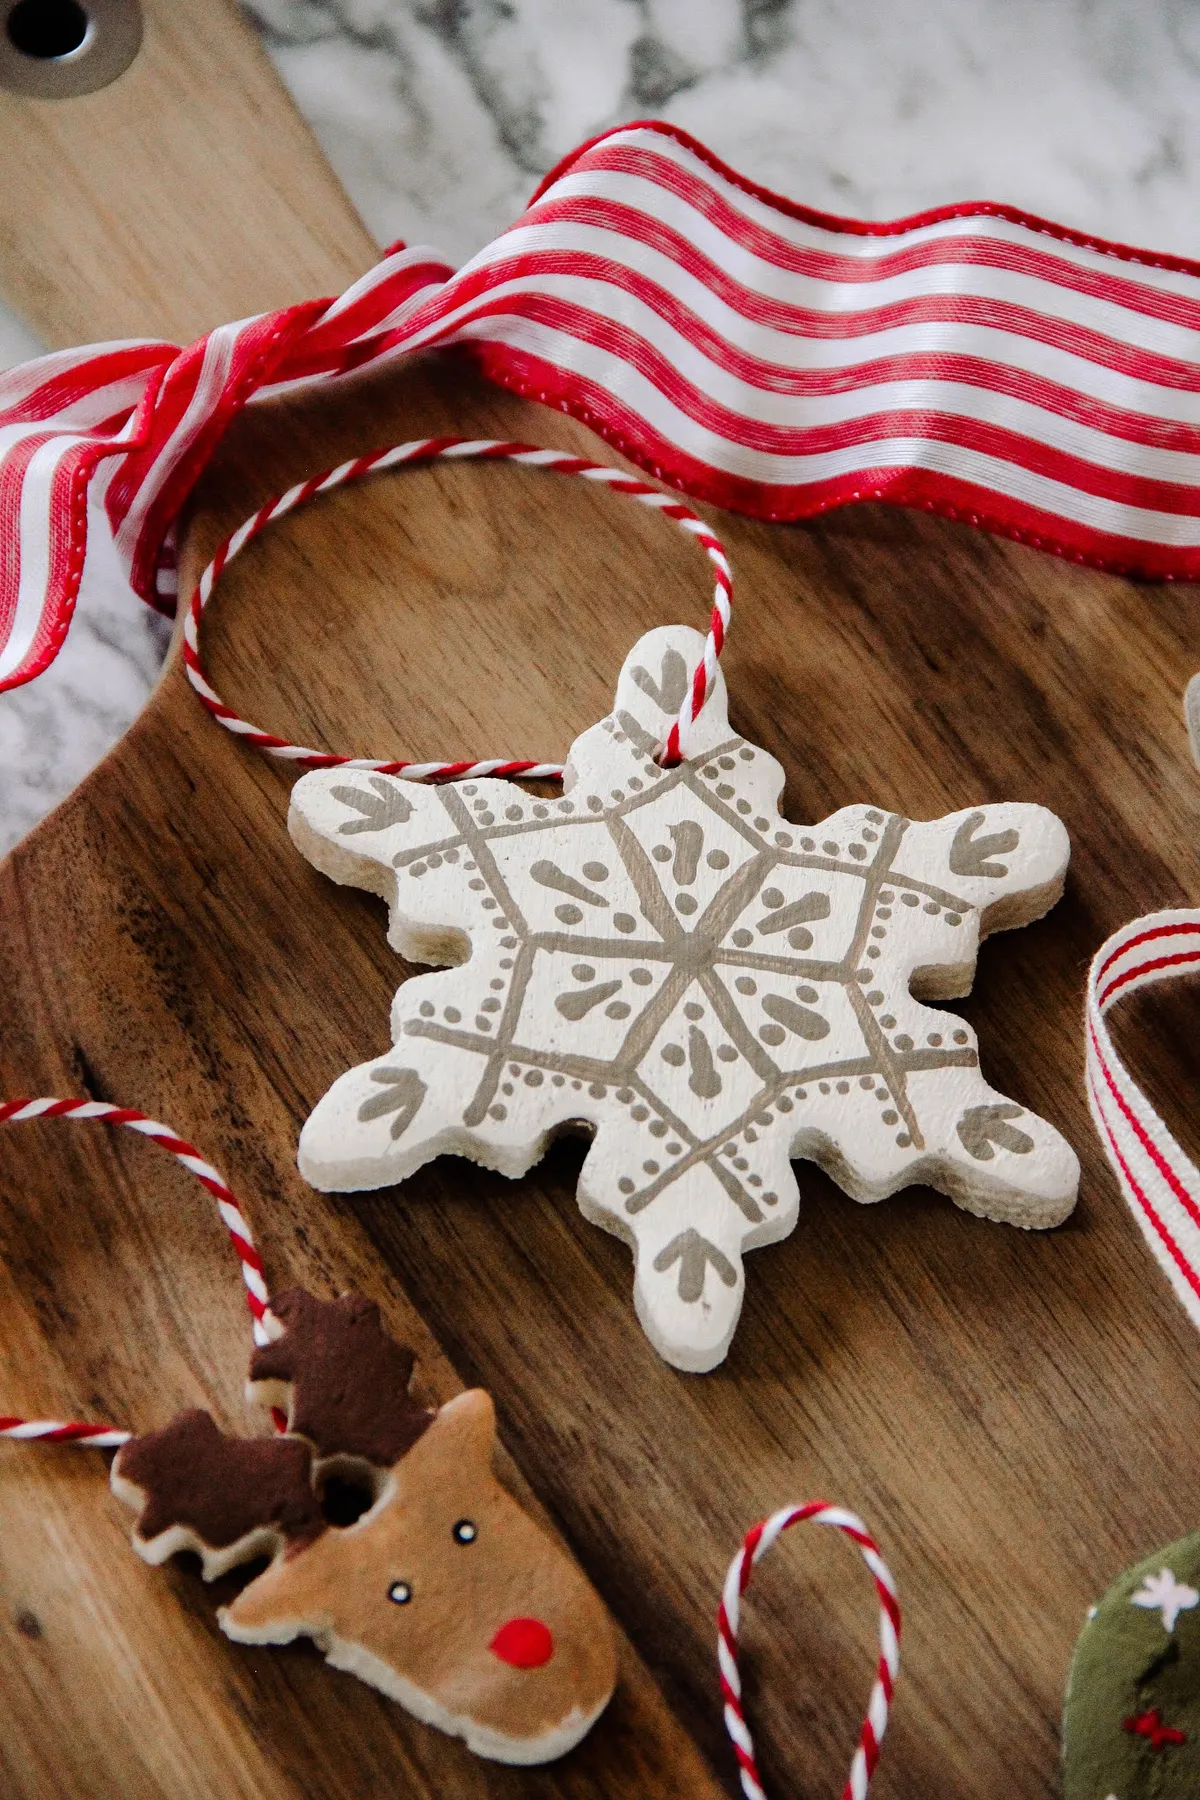
There’s a clear hierarchy in the mix: one large focal ornament, one mid-size character, and one small textured filler. That’s the classic rule of three, and it’s why this doesn’t look like a random pile. The striped ribbon repeats across all three pieces, tying them together visually even though the materials — paper, felt, carved wood — have nothing in common.
28. Clay Ornaments on a Ribbon-Wrapped Board
- Air-dry clay, 3 lb: $14–$22
- Acrylic paints, six colors: $12–$18
- Cookie cutters and stamps: $8–$16
- Red-and-white striped twine: $5–$9
- Wooden cutting board: $0–$25 (thrifted counts)
- Ribbon for the handle: $4–$8
- Total: $43–$98
- Budget alternative: a thrifted board plus homemade baking-soda-and-cornstarch clay lands near $20.
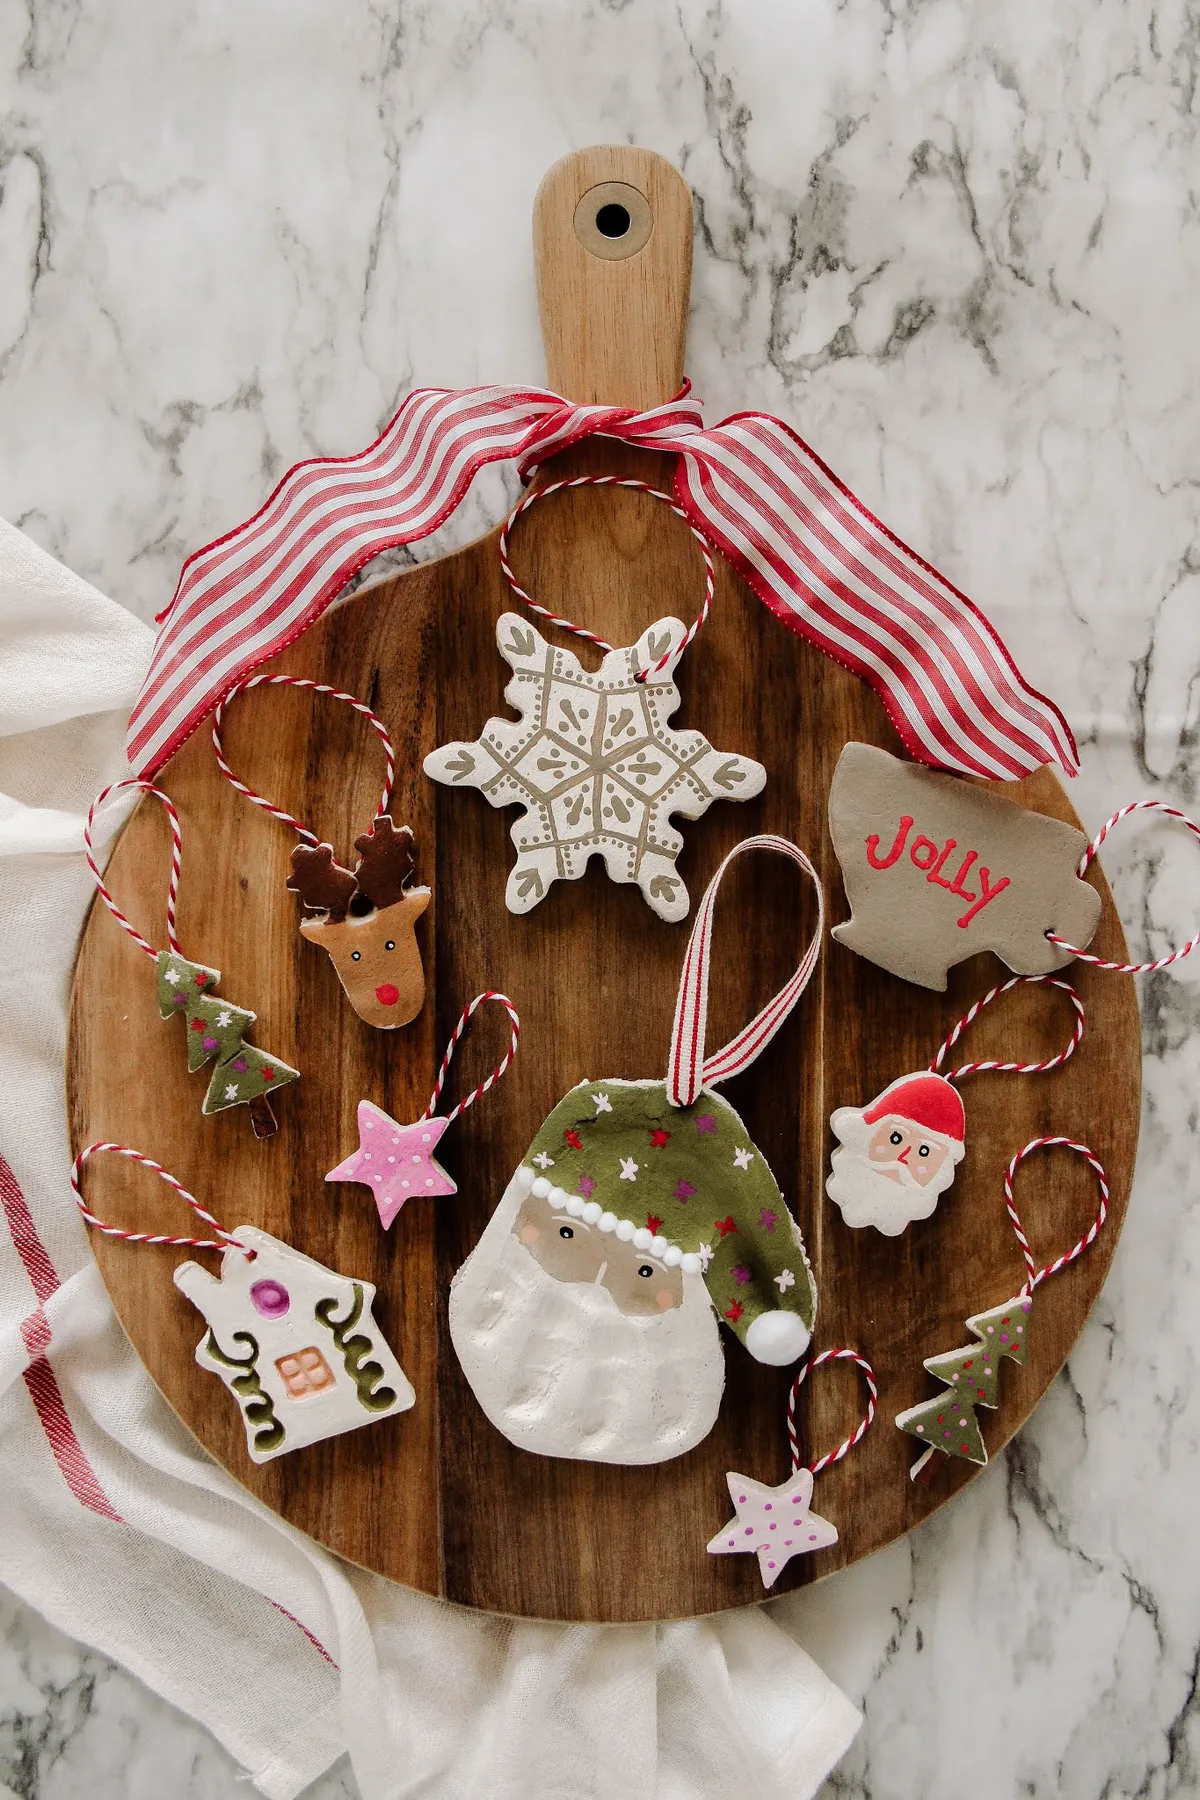
The board is the smartest part of this setup and it’s the cheapest. Goodwill and Facebook Marketplace are full of wooden cutting boards for $3 to $8, and a board with a handle already has a ribbon spot built in. Roll clay to even thickness using two pencils as guides on either side of a rolling pin, then cut with cookie cutters you already own.
29. A Green Paper Tree on a Blue Confetti Ground
- Cut a green paper triangle for the tree and glue it onto blue cardstock, centered.
- Sprinkle white paper confetti over the blue while the glue is still wet.
- Glue white pom-poms onto the tree in a loose triangle pattern for ornaments.
- Top with a single gold glitter star and press firmly for ten seconds.
- Dry flat for an hour before standing it up or mailing it.
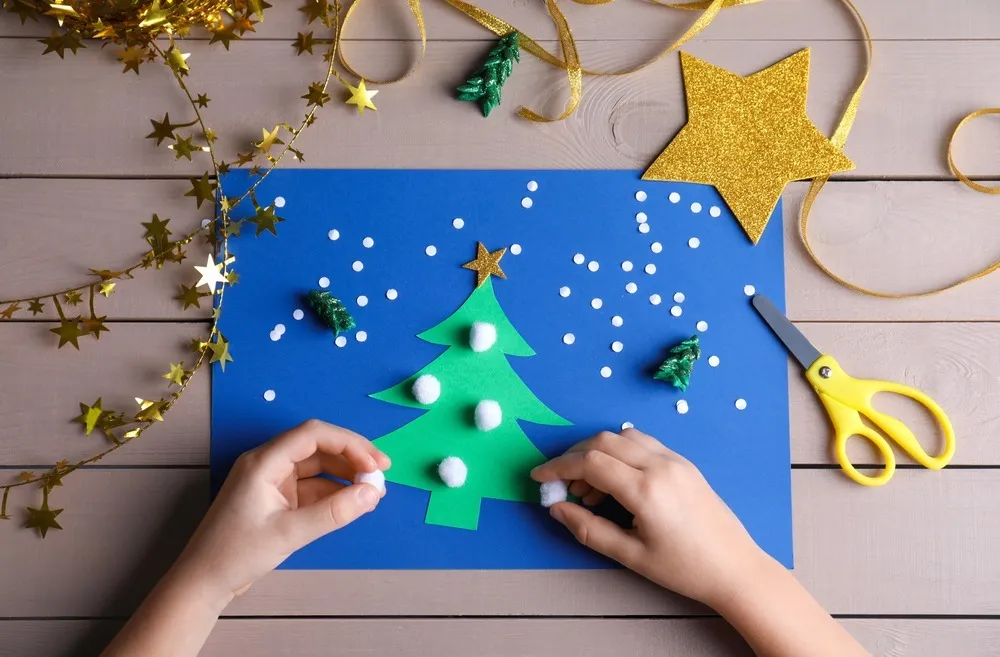
Time: 20 minutes per card. Materials: about $10 for a dozen.
Blue and green is the unexpected pairing driving 2026 holiday crafting. Red-and-green is still going strong, but cool palettes show up more in holiday pins because they photograph beautifully against warm wood and don’t fight a neutral room come January. The gold accents keep it from tipping icy. If you like this palette, try it on Idea #16‘s folded snowflakes.
30. Snowflake Cutting Beside a Brick and Berry Wall
The setting is doing half the work here. Brick, warm wood, and deep green is a 50/30/20 mix worth borrowing: half warm neutral surfaces, a third deep green, a fifth red accent. That’s why the snowflakes look good even though they’re just white paper. If your space is all white and grey, add one brick-toned or wood-toned element before you hang anything.

Paper snowflakes curl. If you’re making a batch to hang, press them inside a heavy book overnight or they’ll droop within a week. Keep them well away from kitchens and bathrooms — paper that absorbs moisture never flattens out again. And thread them with cotton twine rather than fishing line; the line cuts through paper edges over a season.
31. A Wooden Beaded Garland with Layered Snowmen
The layering is intentional. Slotted cutouts sit at different depths along the beaded strand, so the garland has real dimension instead of reading as a flat line of shapes. Unpainted wood also lets the grain do the decorating — paint it and you lose that entirely. It’s the same principle as mixing bead sizes: variation is what keeps a garland from looking like a ruler.
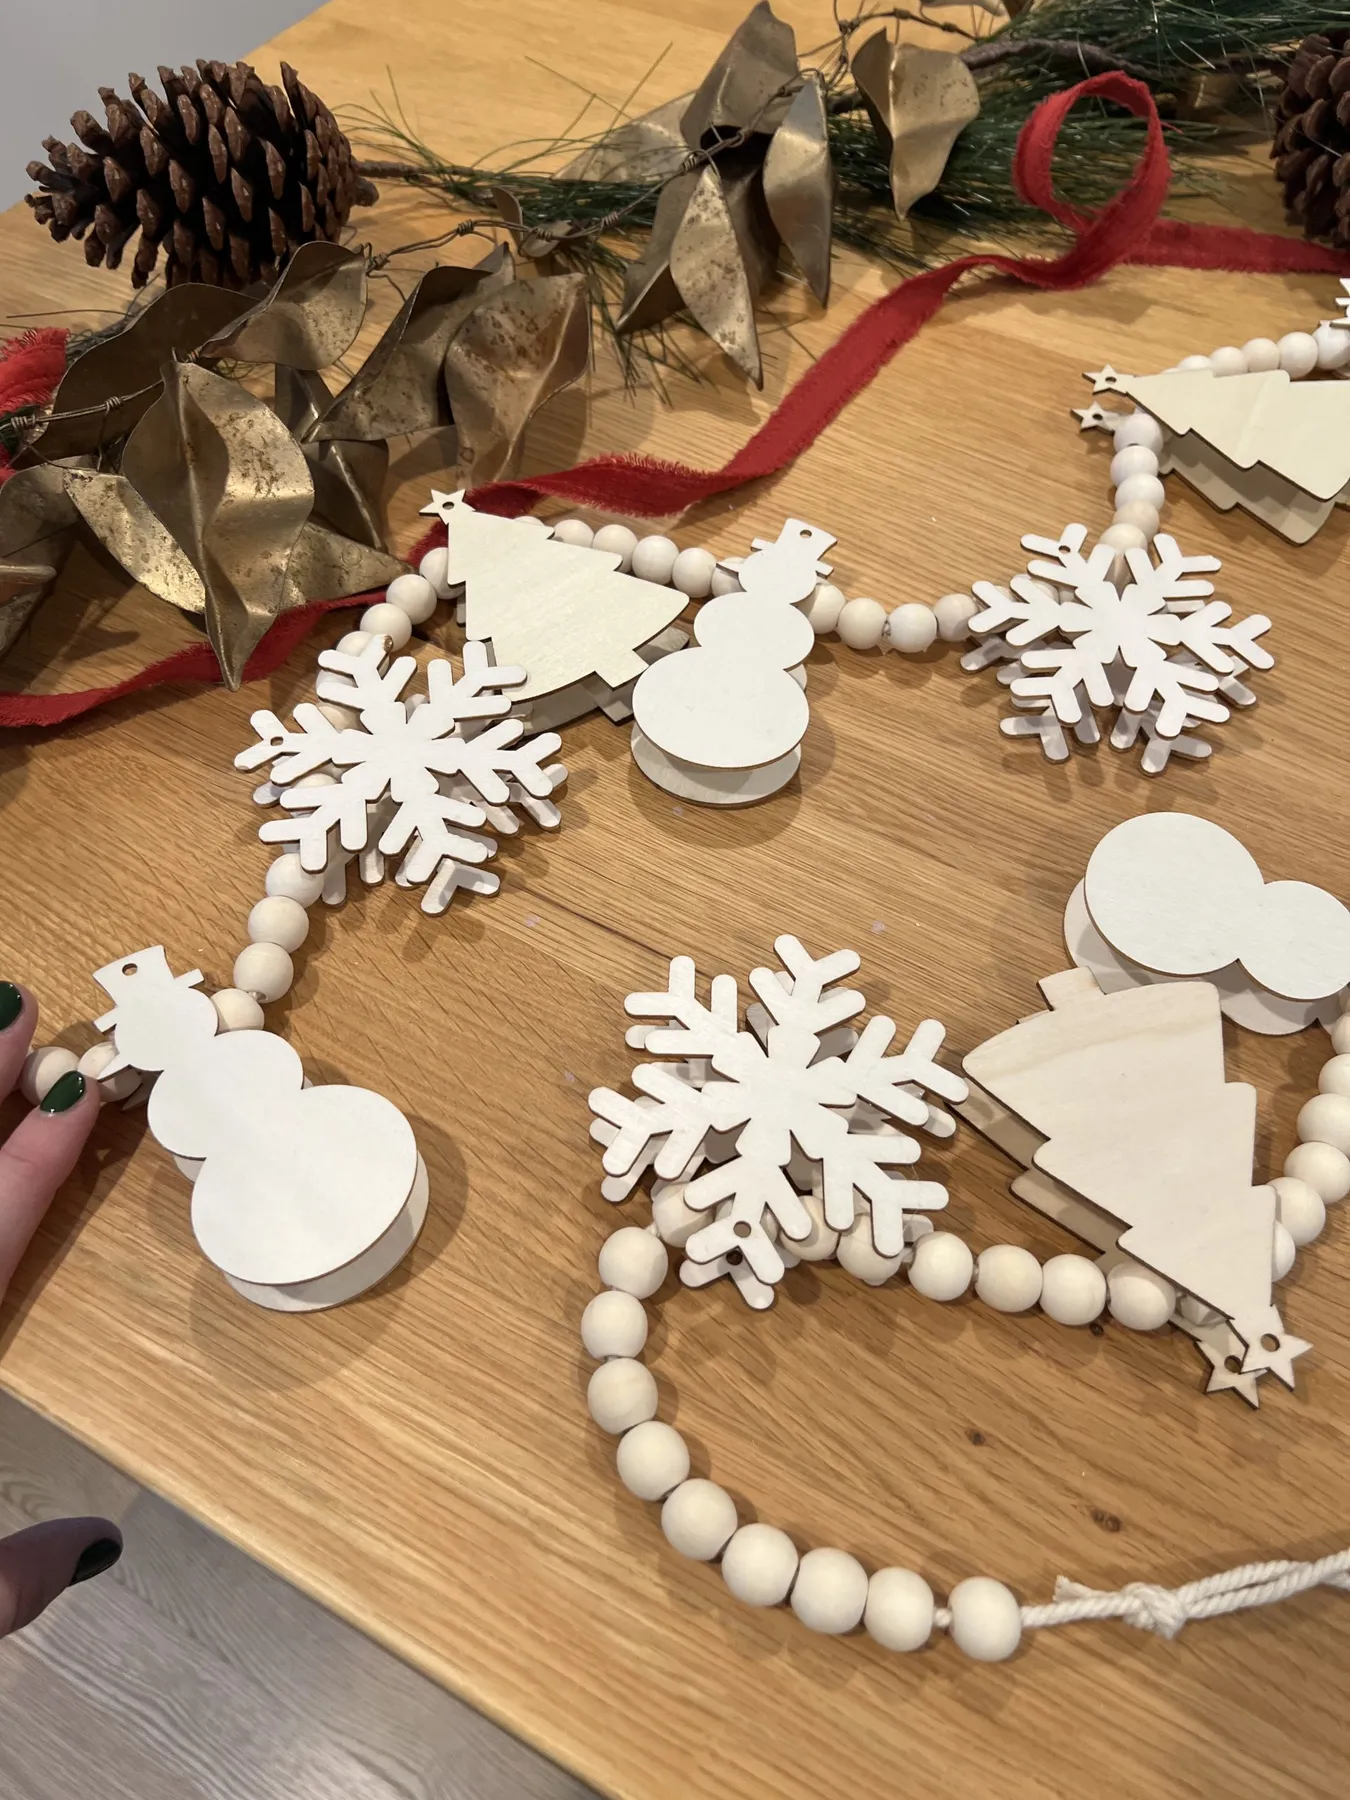
Plan about 6 inches of garland per pinecone or cutout, and 9 to 12 inches between larger elements. That puts a 6-foot garland at roughly 10 cutouts; most people crowd in twice that and the shapes stop registering. On a mantel, run it at least 4 inches off the wall so light gets behind it and the layers show.
32. A Folded Paper Tree on a Glossy Red Plate
Gloss and matte in the same display — that’s the trick with the red plate. A shiny surface under a matte paper tree makes both read better than either would alone. Cut paper at a 1:1.5 ratio (4 by 6 inches is ideal), fold accordion style at half-inch intervals, fan, and glue to a cardstock spine. Use craft glue, not hot glue, on paper folds; hot glue warps the creases.
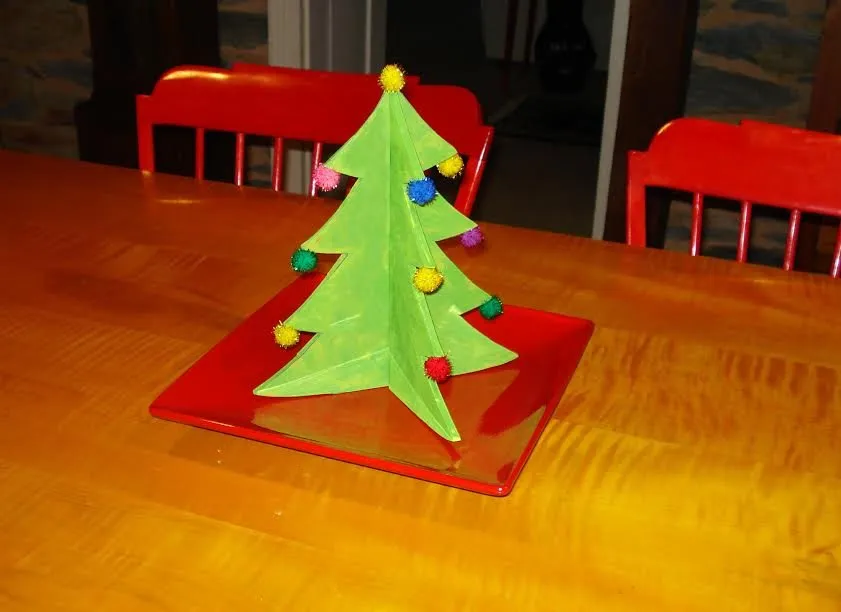
- Light green cardstock: $5–$10
- Mini pom-poms, mixed: $5–$9
- Cardstock spine and base: $3–$6
- Glossy red rectangular plate: $8–$18
- Craft glue and bone folder: $6–$12
- Total: $27–$55
- Budget alternative: thrift a red tray or use a square of red felt instead of the plate — about $15.
33. A Tabletop Tree with Tiny Wrapped Presents
The miniature wrapped presents. They’re small enough to miss on a first pass, and they’re what makes this tree feel like a scene instead of a display. Wrapping paper on a two-inch box is a signal — someone made this, someone’s expecting something. Everything else on the tree is standard. The tiny gifts carry the story.
Miniature ornaments on a small tree is the most maintenance-prone combination there is. Everything’s loose, everything falls off, and a small tree tips easily when you’re constantly redecorating it. Wire the berries and baubles on rather than hooking them, and glue the tiny presents in place so they don’t end up behind the sofa. If you can, store the whole tree bagged and still decorated.
34. A Wooden Bead Star and Two Little Houses
- Confirm the shelf is anchored into a stud — beaded stars and ceramics get heavy
- Measure the wall: this grouping wants at least 24 inches of clear space above
- Check the light; north-facing walls flatten white and natural wood
- Decide on the tallest element first — everything else scales from it
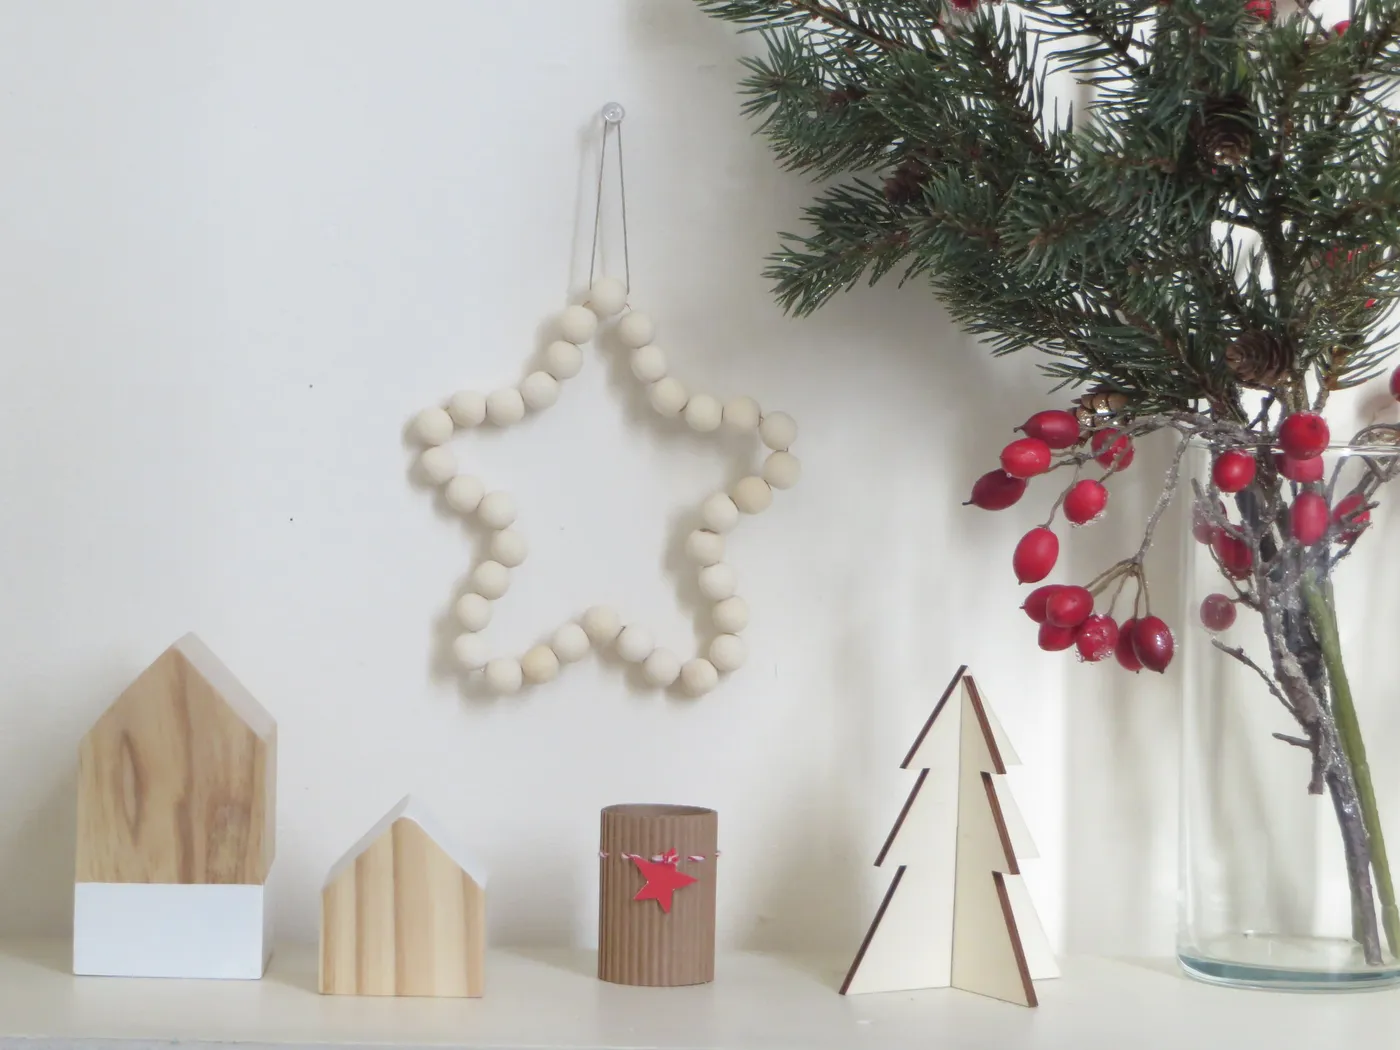
When you’re grouping small objects on a shelf, give the eye an anchor. Here it’s the beaded star, hung slightly off-center and higher than everything else so the arrangement has an obvious starting point. Everything below — houses, tube, tree, vase — stays under that line. Without one tallest or highest piece, small decor reads as clutter no matter how nice each object is.
Your Craft Table Is Already Half Set Up
Every one of these starts with something you probably already own — a jar, a paper tube, a roll of twine, a bag of beads from three years ago. Pick one, give it an afternoon, and you’ll have something on the tree that nobody else has. Pin this to your Christmas crafts board so you’re not starting from scratch next December.