
33 Jaw-Dropping Christmas Village Display Ideas You Need to Try This Holiday Season
You know that feeling when the box of little ceramic houses comes down from the attic and you realize you have absolutely no idea where to put them this year? Same. So we rounded up 33 Christmas village display ideas for 2026 — the ones with moving trains, tiny ice rinks, gingerbread rooftops, and enough warm light to make a whole room feel like it’s snowing.
We spent serious time browsing Etsy, Target, and Michaels to bring you only what’s worth your attention this year — setups that run anywhere from about $6 for a single bottle brush tree to $450 for a full multi-level platform and carousel system. Budget and luxury versions are compared side by side, so you can see exactly what the extra money actually buys you.
Inside you’ll find cozy nostalgic villages, North Pole maximalism, coastal winter scenes, and block-built setups the kids are allowed to rearrange. And stay until the end — we break down the most common mistakes that can ruin these looks.
Village displays are trending hard in 2026 because collectors are treating them as styled vignettes on mantels and counters rather than one December tabletop, and Pinterest is full of it.
Heads up: this post contains affiliate links, and if you buy through them we may earn a small commission at no extra cost to you.
📌 Save this to Pinterest for later — you’ll want to revisit these ideas.
1. Miniature Christmas Village With a Train Running Through Fresh Snow
Give the train room to breathe before you place a single house. Track needs a minimum six-inch setback from the front edge, and every curve should sit behind the buildings, never in front — that way the locomotive reads as passing through town instead of circling a parking lot. Run the loop once with the power off, mark the path with painter’s tape, then build the village around that line. Twenty minutes now saves you an hour of rebuilding later.
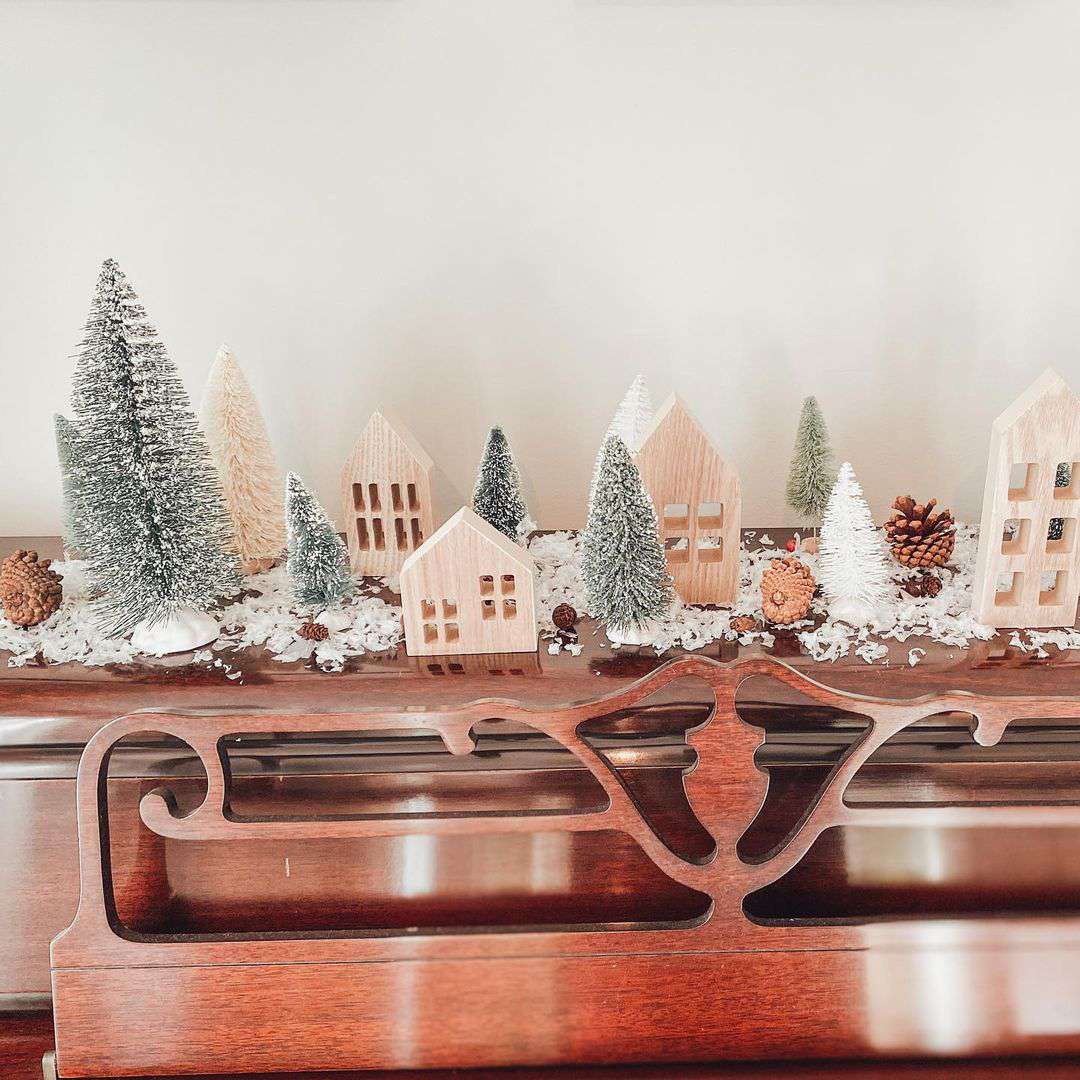
Three things hold this layout together. The snow is banked higher at the back and thinner at the front, which creates real depth on a completely flat surface. Light and dark roofs alternate so your eye keeps traveling instead of parking on one house. And the tiny lamp posts sit roughly an inch apart in the foreground — that rhythm is what your brain reads as distance. Same trick stage designers use with painted backdrops.
2. A Sprawling Tabletop Village Lit by Warm Fairy Lights
- Ceramic buildings, 6 to 8 pieces: $90–$260
- Train set with track: $45–$120
- Faux snow batting and base: $18–$40
- Trees, frosted and green, 15 to 20: $30–$75
- Warm white fairy lights: $12–$28
- Figurines and street lamps: $25–$60
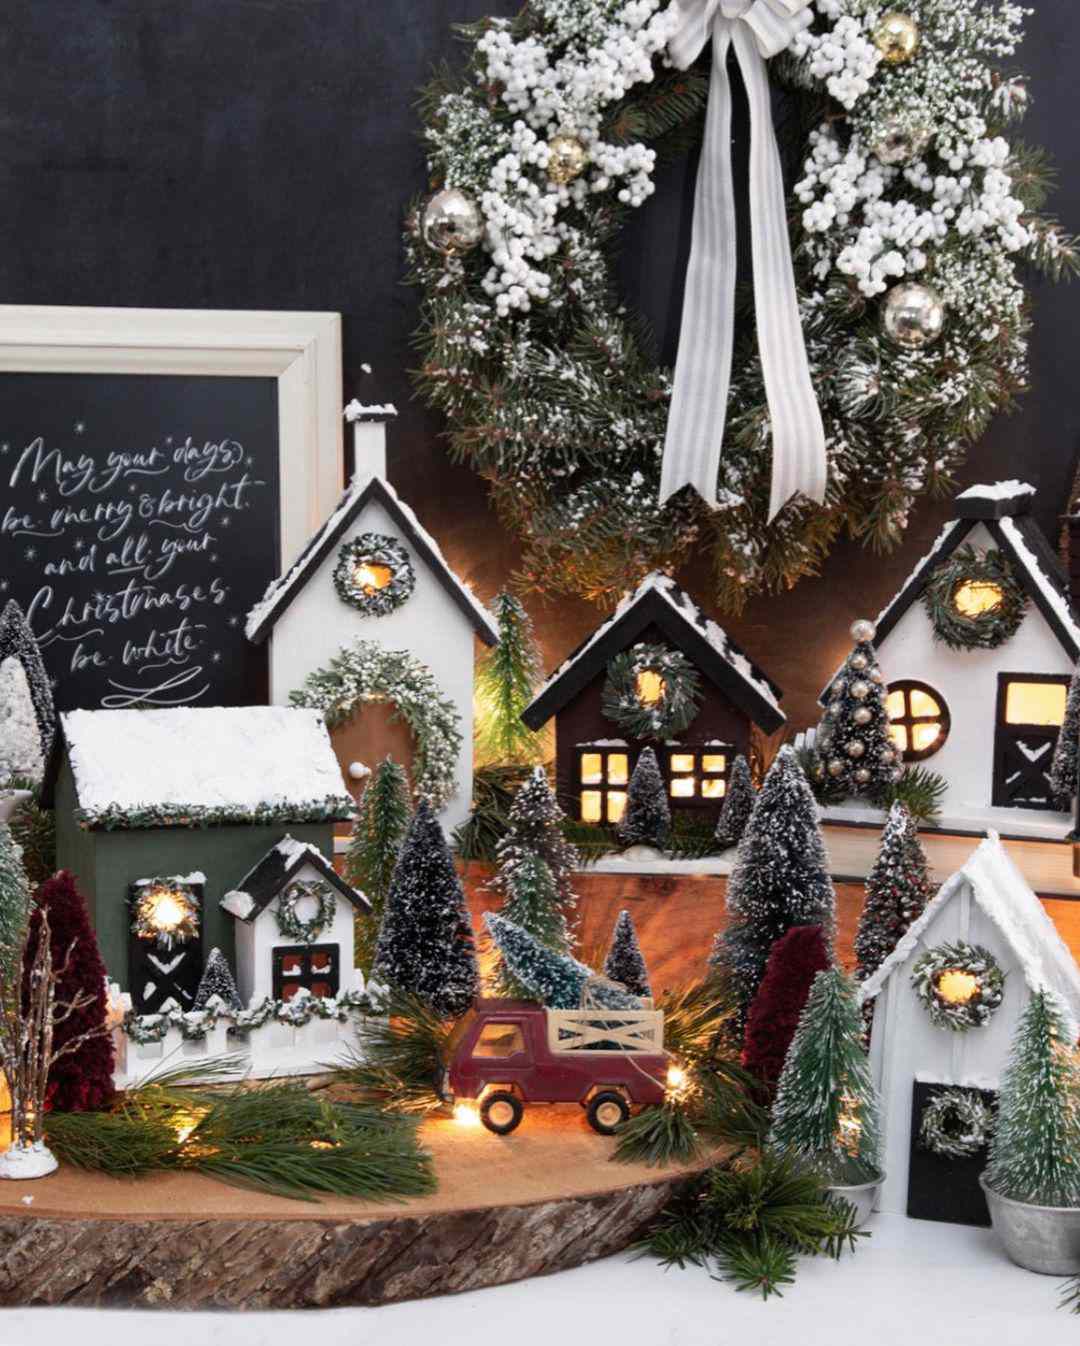
Total: roughly $220 to $583. Budget alternative: buy two new buildings and fill the rest from Facebook Marketplace lots — collectors sell mixed boxes of eight to twelve pieces for $30 to $60, and once they’re under snow nobody can tell which ones are from 1998.
that makes this sprawl feel alive is that the fairy lights are buried under the snow base rather than draped on top. Light leaks up through the batting in soft pools instead of firing straight into your eyes, and every house looks lit from the ground up. Swap those bulbs for cool white and the whole thing turns clinical in about ten seconds. Keep them warm.
3. A Snowy Village Street Glowing at Night, Dog and All
Dark-background scenes only work in a room that can actually get dark. Put this table beside a bright window or under a ceiling fan light and the glow from those buildings flattens out, the street lamps read as shiny plastic, and the figures stop feeling like people. Pull it away from direct light, dim the room, and back the scene with black foam board to fake a night sky. If daylight is your only option, Idea #18 solves the same problem with a painted wall instead.
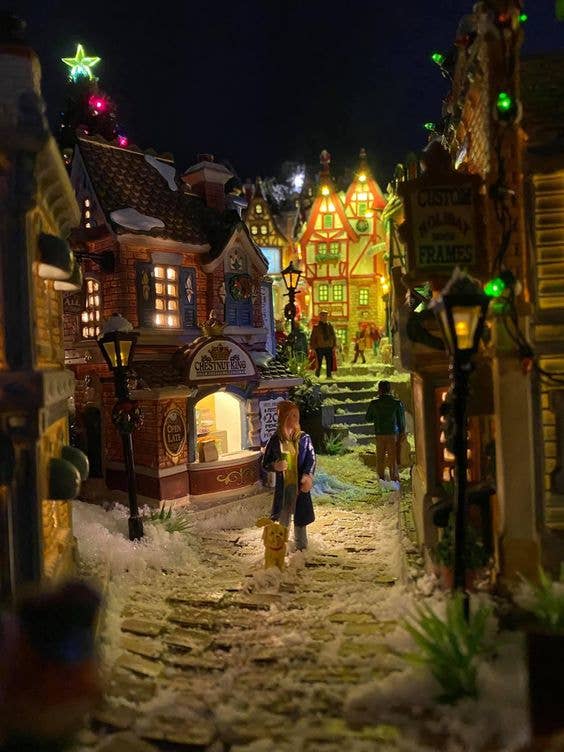
about 60% snow-covered ground and road, 25% illuminated architecture, 10% figures and lamps, 5% dark sky. The percentages matter more than the specific pieces. Swap the brick-red buildings for cream ones and the formula still holds. Swap the multi-colored string lights for all warm white and you keep the mood but lose the carnival energy — that’s a real trade, not a small one.
4. A White Village Densely Packed Along the Mantel
A standard 60-inch mantel holds 8 to 12 small ceramic buildings in two staggered rows, with the tallest piece anchoring one end. You need at least 14 inches of mantel depth to run a train loop — less than that and the track hugs the edge, which looks precarious and reads as cramped. Mantel height matters too: below 48 inches the village sits at knee level and you lose the up-glow entirely.
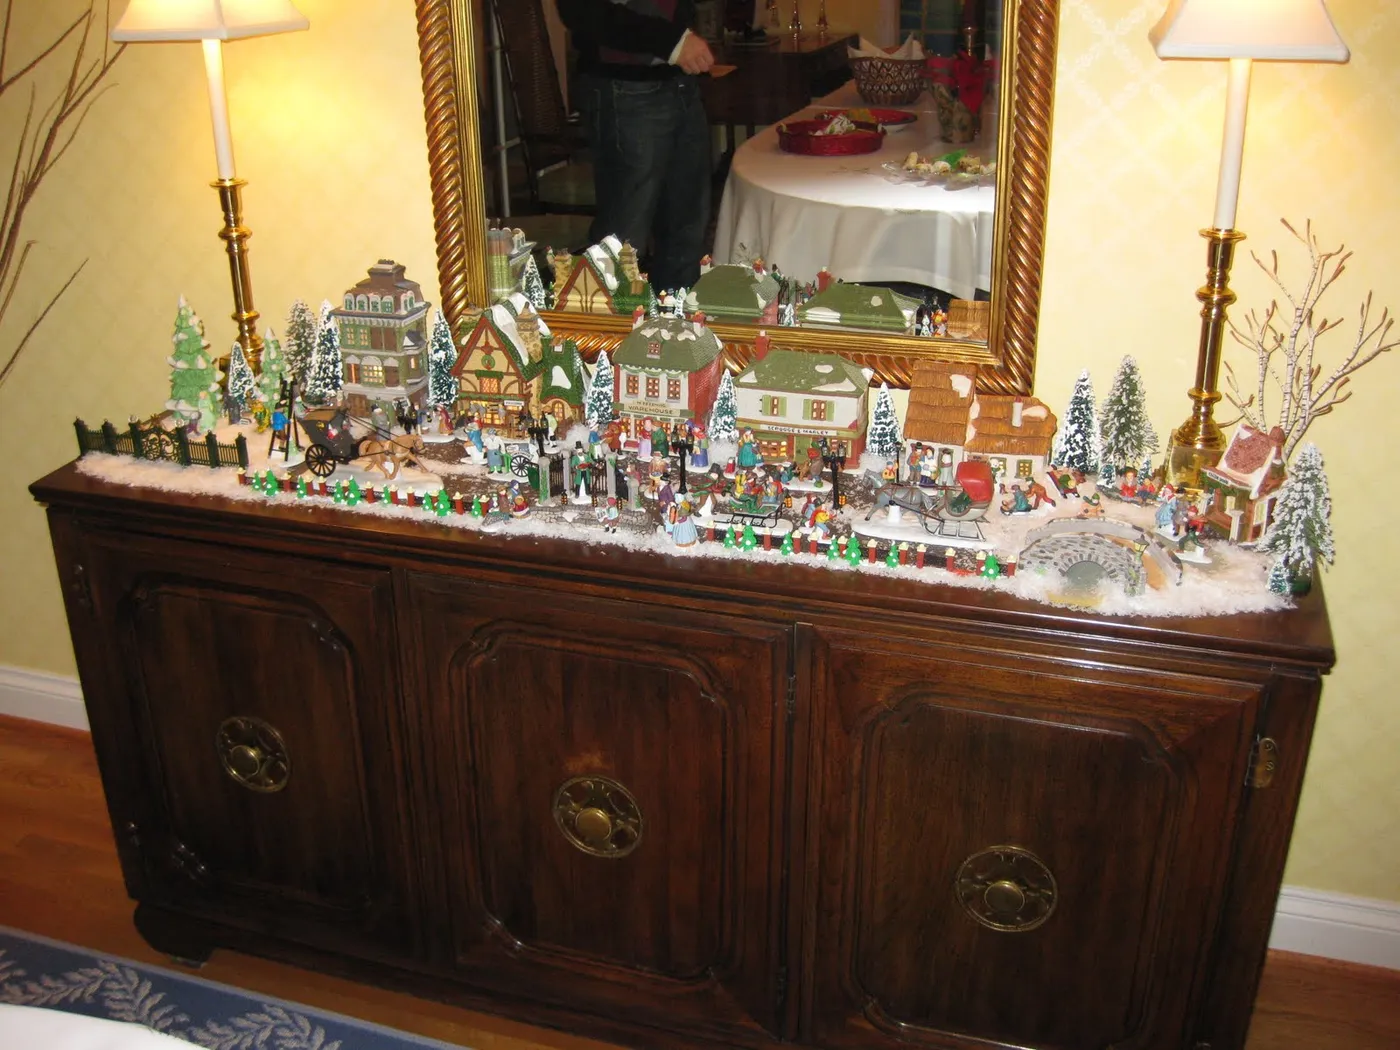
Lit ceramics run warm, and a warm surface is a dust magnet. Plan on a soft dry brush every two weeks during the season and a full wipe-down before storage. Faux snow batting yellows if it sits in direct sun, and the flocking on cheap trees sheds onto carpet every time you move them. Store everything in labeled bins with a dryer sheet, and never stack houses on each other — roofs chip.
5. Snow-Dusted Houses With a Red and Blue Train Winding Through
You can get this exact snow-dusted look for a fraction of the price. IKEA’s winter village sets run $15 to $30 and mix fine with pricier ceramics once they’re frosted. Target’s dollar section carries miniature pines at $3 each and bagged faux snow for $5. Walmart sells battery fairy lights at $6 for a two-pack, and thrift stores are goldmines for pre-lit houses in January when nobody’s bidding. A four-building vignette with a small train comes in under $80 total.
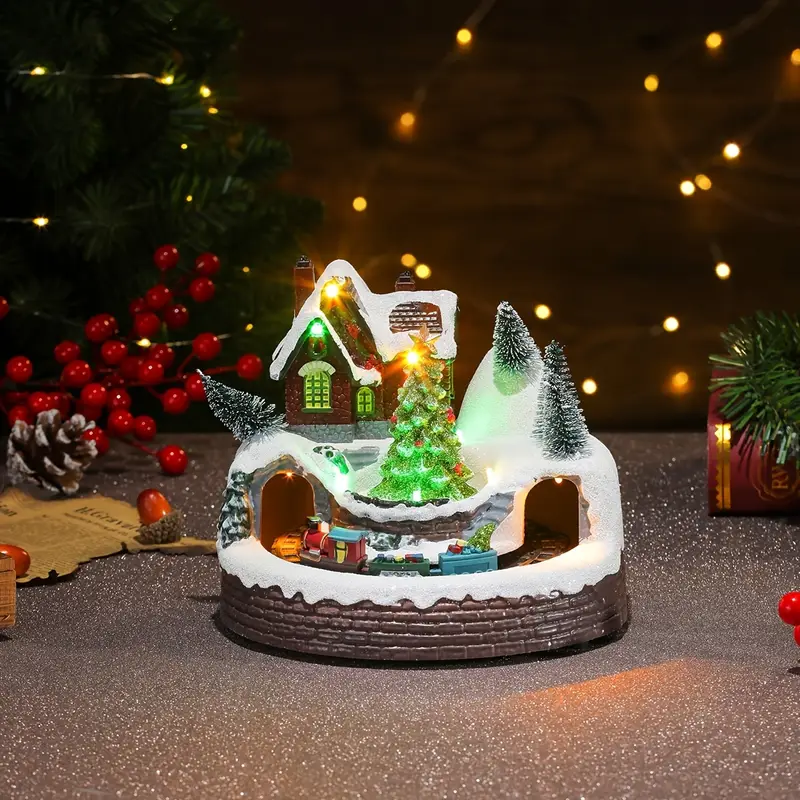
What makes a small layout like this work is restraint. Instead of a whole downtown, you get one glowing house, one winding track, and a snow bank rising toward the back. The track does the storytelling — you follow it with your eye and imagine the rest of the town somewhere off the table. Big displays impress. Tight displays invite you in.
6. A Multi-Level Village Wrapped in Candy Cane Fencing
Build the tiers first, decorate second.
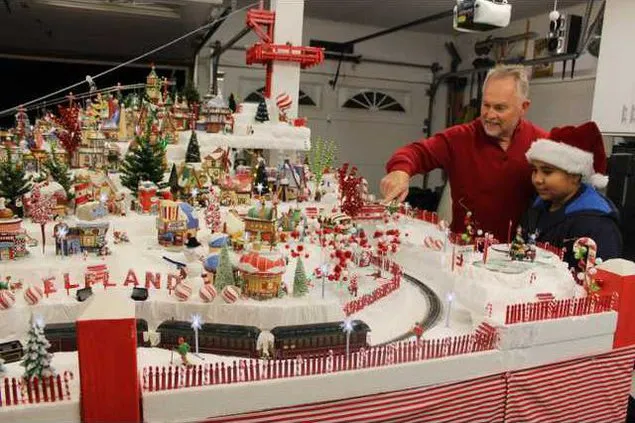
- Cut 1-inch rigid foam insulation board into three rectangles, each 10 inches deep and stepping down in width.
- Stack and glue them with foam-safe adhesive, offsetting each layer by 4 inches so you get staggered ledges.
- Wrap the whole staircase in white felt, pulling it tight around the edges and hot-gluing underneath.
- Dust with faux snow and press it into the felt so it doesn’t slide.
- Run the train track along the lowest tier only — inclines on miniature track are a derailment waiting to happen.
- Place buildings tallest in back, smallest in front.
Roughly two hours and about $25 in materials for a 30-inch-wide display.
Candy cane fencing is the tell that this is a 2026-era village rather than a 1998 one. The broader shift is toward displays that look styled rather than collected — coordinated palettes, deliberate repetition, one bold motif carried all the way through. Striped fencing does that in a single stroke, and because it’s plastic it survives storage year after year.
7. A Model Train Village Watched Over by a Carved Wooden Gnome
Scale is where most villages quietly fall apart. Miniature train sets run at 1:87 (HO) or 1:64 (S), and most ceramic houses sit somewhere around 1:100. A single deliberately oversized figure — like that big carved gnome standing guard — actually helps, because it gives the eye a reference point and makes everything else read as properly tiny. Put the oversized piece at the back, never the front, or it swallows the scene.
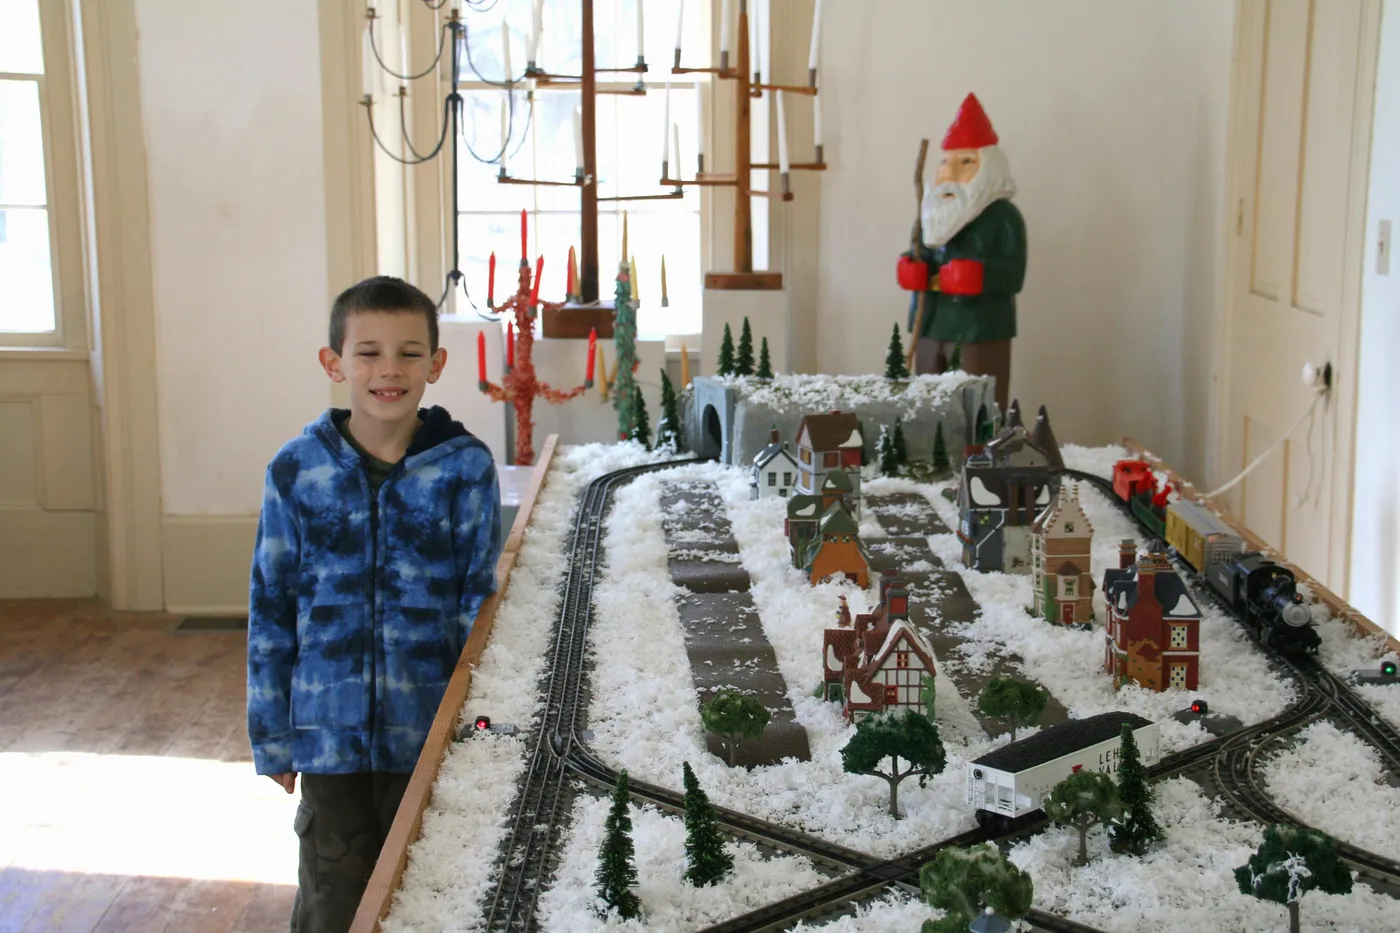
Before you commit to a layout:
- Measure your surface and subtract 6 inches on every side for breathing room.
- Check how many outlets are within cord distance — one strip per 8 buildings is a safe rule.
- Photograph the empty table from where you’ll actually view it, standing up.
- Confirm the train loop closes without a kink before you glue anything.
- Decide in advance where the tallest piece goes.
8. Main Street Pharmacy, Green Awnings, and a Reindeer Sleigh
The single element that lifts this from nice to memorable is the signage. A storefront that actually says something — Main Street Pharmacy under a green awning — turns a row of anonymous buildings into a place you can imagine walking down. Everything else here is standard village vocabulary: brick, cream trim, garland, snow. Remove the sign and you lose the story.
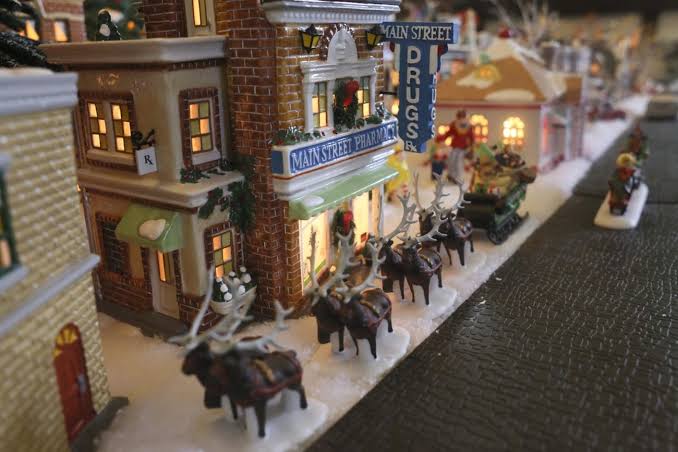
You can fake custom signage for around $5. Print store names in a serif font, trim them tight, and attach with double-sided tape or a thin bead of craft glue. Local print shops do vinyl lettering for $8 to $15 if you want it crisp. The reindeer and sleigh came as a set for about $20 at a craft store; a single reindeer figure alone runs about $6. Skip the sleigh if budget is tight — three reindeer in a line still reads as a parade.
9. A City-Scale Village With Its Own Skyscraper Skyline
City-scale layouts need real estate. Count on a minimum of 30 square feet — a full 4×8 sheet of plywood on sawhorses is the classic answer, giving you room for a downtown grid, a train loop, and a skyline without anything feeling stacked. If your room can only give you a 6-foot table, cut the skyline and keep the streets. One oversized landmark building can carry the whole impression of a city.
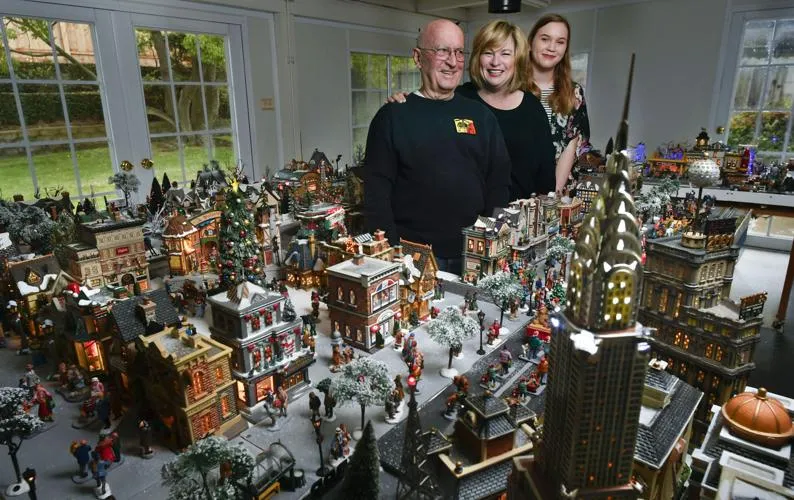
Two principles make this kind of spread feel like a real place. First, vertical contrast: a single tall tower against rows of low storefronts gives your eye something to climb. Second, repetition with variation — the same street lamps every 8 inches, the same brick, the same tree style, but different heights and rooflines. Repetition tells your brain it’s a city; variation tells your brain it’s a real one.
10. A Village With a Moving Carousel and Snowflake Backdrop
The formula here is roughly 50% white snow base, 25% illuminated buildings, 15% motion, 10% colored light. Motion is the swing factor — the train and the carousel are what keep people standing there longer than they planned to. For a calmer version, drop motion to 5% and push that difference into the snow base with extra trees and banks. Same palette, entirely different energy. Compare with Idea #28, which pushes motion all the way up.
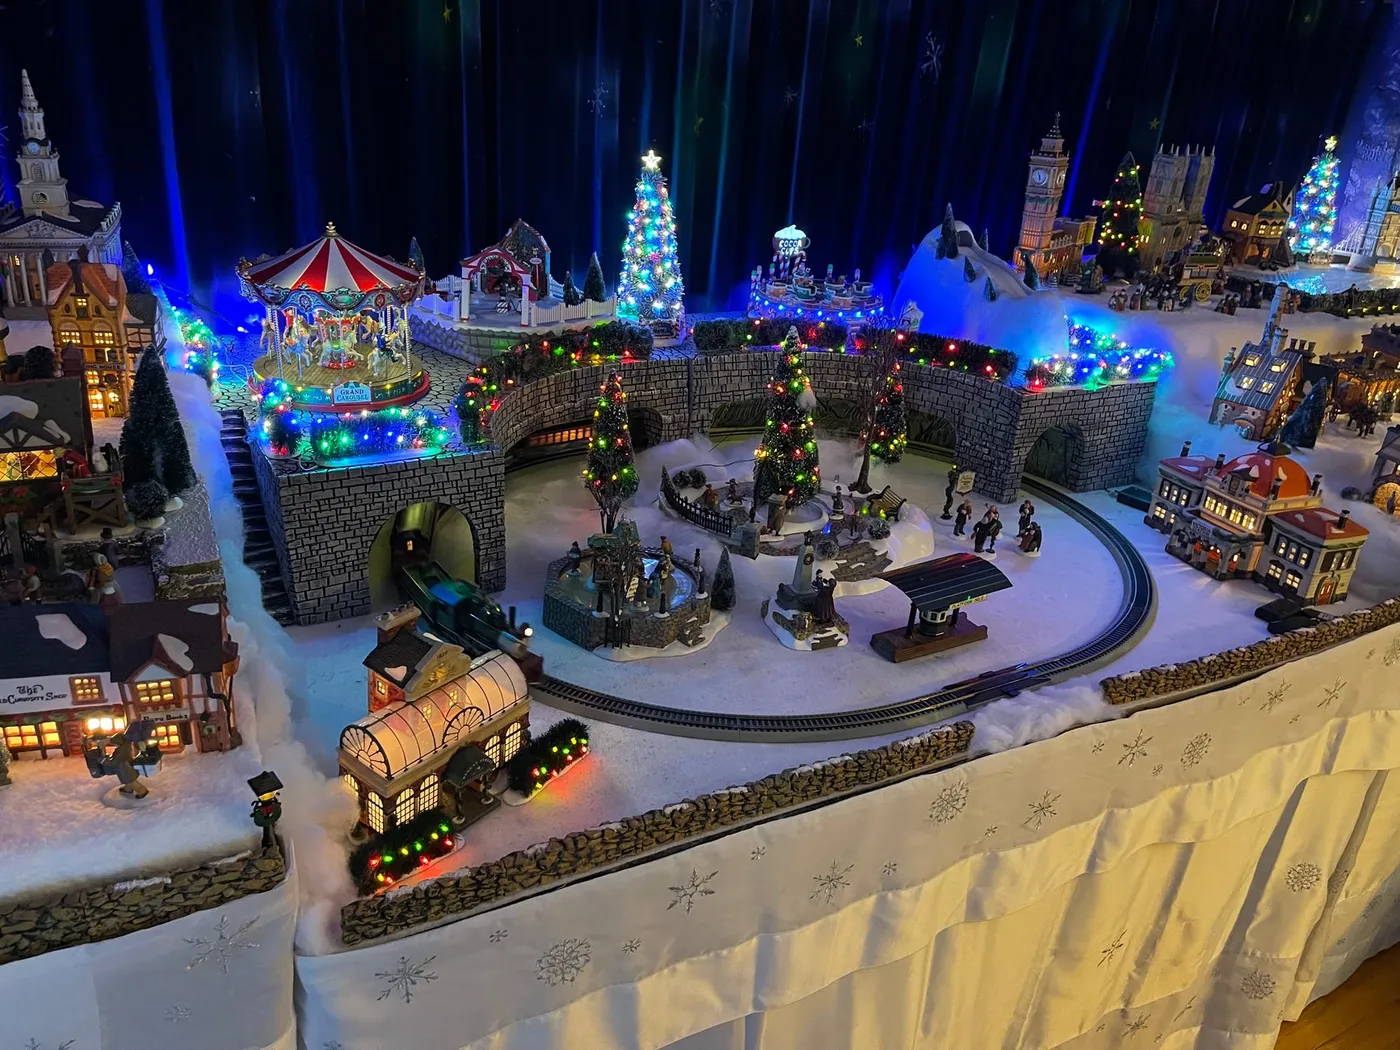
- Lit buildings and church: $120–$320
- Moving train with tunnel: $70–$180
- Carousel figure: $35–$90
- Multi-level platforms and snow: $40–$95
- Colored LED string lights: $15–$40
- Snowflake-embroidered tablecloth: $20–$45
Total: about $300 to $770. Budget alternative: skip the carousel and put that money into a second set of train cars — motion still reads, and you save $60 or more.
11. When Your Village Becomes a Whole-House Light Show
When a village becomes a whole light-scape, the failure point stops being decoration and becomes electricity. Every run of lights should be on a grounded, outdoor-rated circuit, and you want a GFCI on anything near moisture. Add up wattage before you daisy-chain — many cheap string lights draw about 0.5 watts per bulb, which adds up faster than people expect. Check your breaker panel before you plug in the eleventh extension cord.
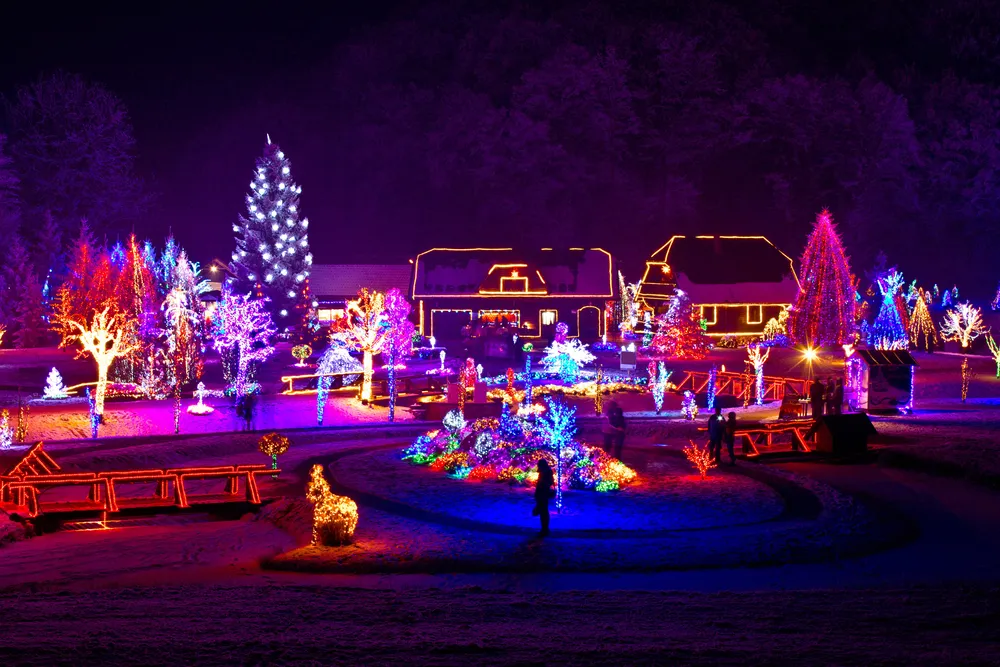
Choose three colors and repeat them in threes: blue, warm white, and red, hitting trees, railings, and rooflines in that order. Random multicolor reads as noisy from a distance; a limited palette reads as intentional even from the curb. Keep the brightest, most saturated light at the focal point and let everything else step down. Light is just contrast management with a plug on the end.
12. A Miniature Town With Real Painted Roads
Making a town grid that looks like roads, not fabric:
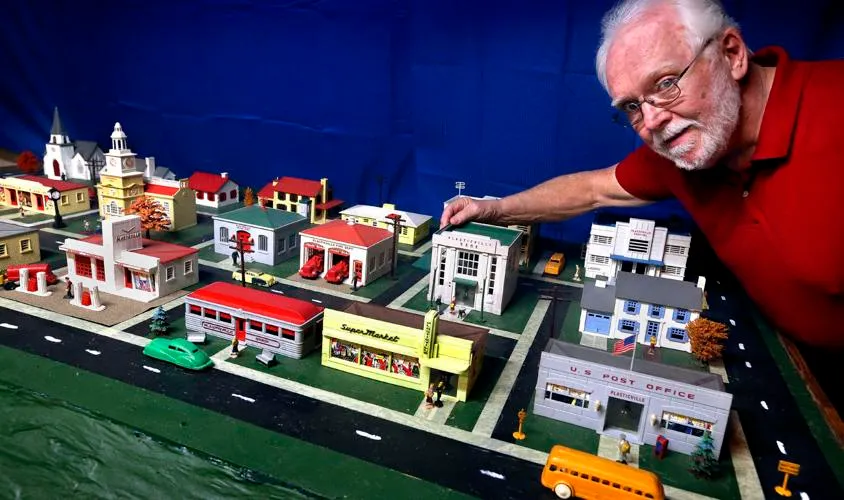
- Lay a green felt or fleece base and smooth every wrinkle with your hands — wrinkles show under buildings.
- Cut 2-inch-wide strips of black felt for main roads and pin them down temporarily.
- Add a second layer of black felt at intersections so the crossing reads as asphalt, not a seam.
- Draw dashed lane markings with a white gel pen and a straightedge, about ¾ inch apart.
- Press the markings with a warm iron over parchment paper to set them.
- Lift the pins and glue the roads down permanently.
About 90 minutes and $15 in felt and pens.
The one detail doing all the heavy lifting is those white dashed lane markings. Without them you have a flat green surface with black rectangles on it. With them, your brain instantly reads traffic, direction, and scale — and the tiny cars suddenly have somewhere to be going. It’s a $3 detail that changes how the whole display reads from across the room.
13. A Village Built Up the Levels of a Carved Wooden Table
When you’re building on real wood, the table becomes part of the design and you want to feature it, not bury it. Keep the front edge of the display 4 to 6 inches back so a strip of tabletop stays visible. Use a bridge or overpass as your level change instead of stacking foam — an arch reads as intentional architecture, and the train disappearing underneath gives you actual movement. A silver bridge against white snow keeps the metal from vanishing.
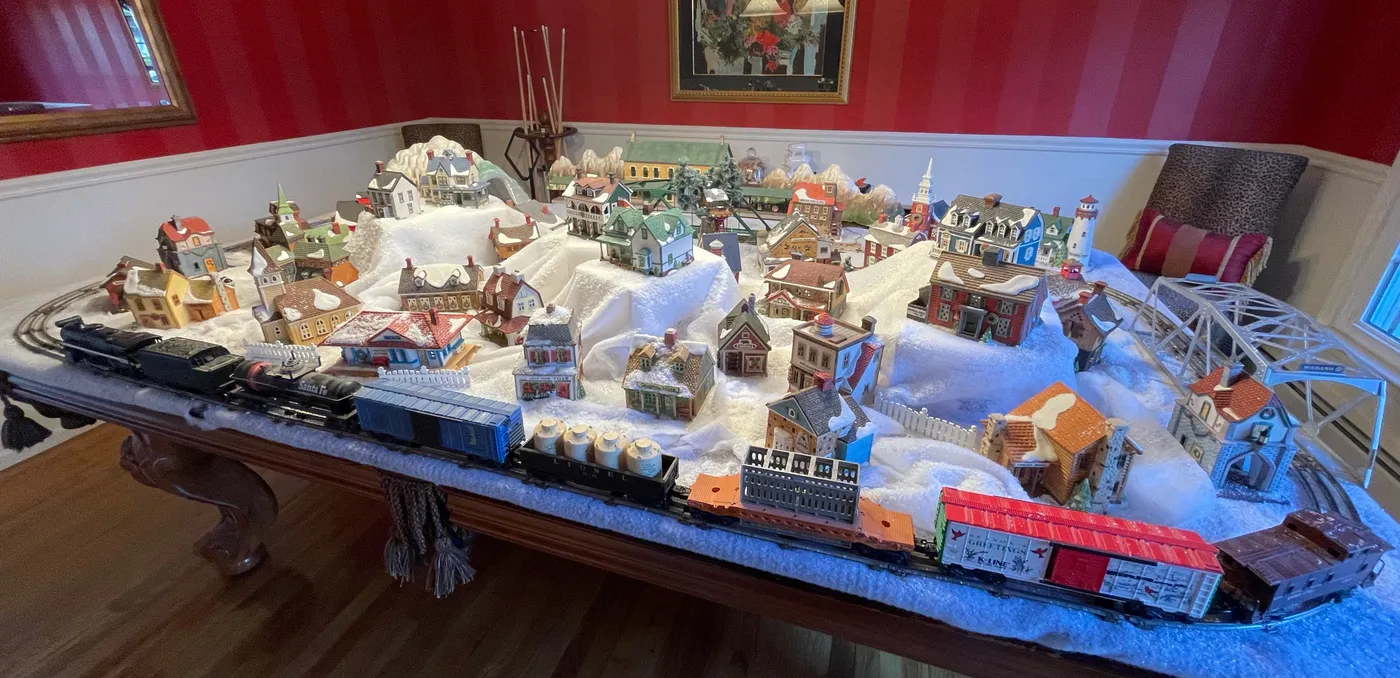
This layout wants a heavy wooden table at least 72 inches long and 36 inches deep, because the train needs a continuous loop with no hidden hairpins. If your table is 48 inches, drop the bridge and run the track in a simple oval around the base — same charm, half the footprint. Ceiling height is irrelevant; what matters is whether you can walk all the way around it.
14. A Chocolate Factory, the Polar Express, and One Very Decorated Tree
The oversized decorated tree behind the village is the whole reason this reads as a moment rather than a shelf. It establishes scale — suddenly those little houses are tiny in a way they weren’t before. It also gives the display a natural ceiling and a source of light that isn’t coming from a plug. Take the tree away and you’re left with a nice village on a white cloth. Put it back and you have a scene someone photographs.
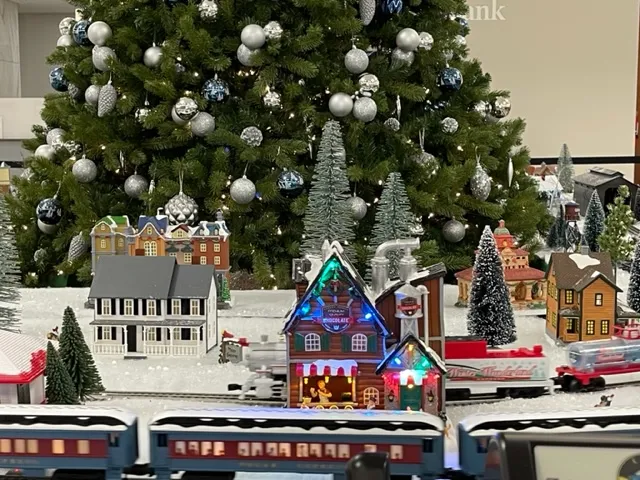
45% forest green, 30% white snow, 15% silver and light blue accents, 10% warm interior glow. That’s a cool palette with a warm center, which is exactly why it doesn’t feel frigid. To swap it, keep the same split but switch the green to deep burgundy and the silver to copper. The formula survives because the ratio of cool to warm is what your eye responds to.
15. Tiny Windmills, Frosted Roofs, and a Backdrop You Already Own
This is the display where shopping your own house pays off. Those large decorative windmills in the back? Any tall object you already own works — a ceramic vase, a stack of books, a framed print, whatever gives the village a backdrop. Thrift stores sell windmill and lighthouse figurines for $4 to $12. Big-box craft stores run frosted houses at $8 to $15 each, and Marketplace lots of ten houses regularly go for $40. Compare with Idea #16, where the pieces already match.
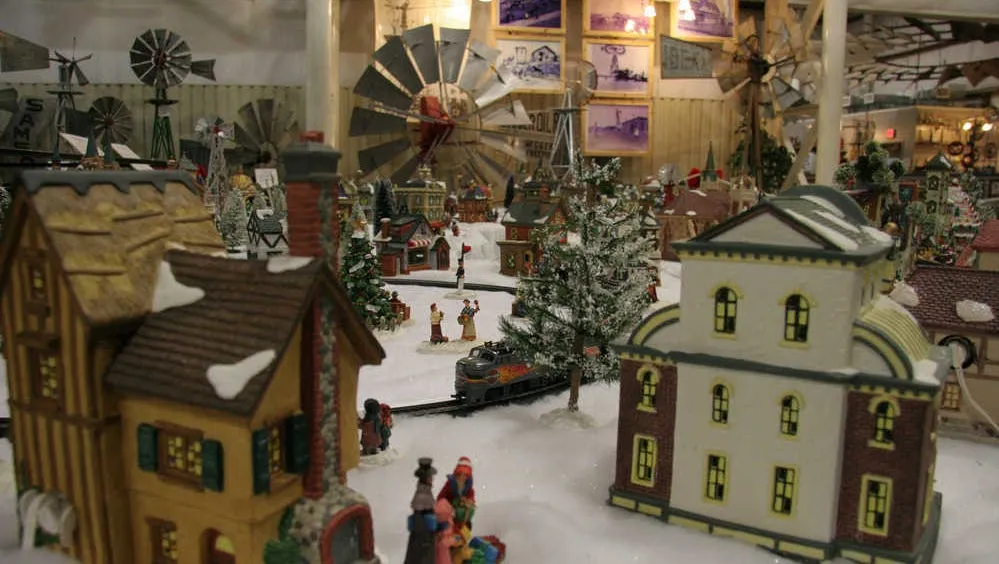
mixing pieces from different decades is where a village starts looking like a yard sale. Pick one thing to unify them — all the same snow treatment, all the same light temperature, or all the same scale. A can of matte white spray paint and a bag of faux snow will bring mismatched ceramic, resin, and plastic pieces into the same family for about $15.
16. A Mantel Village With Its Own Ice-Skating Rink
Putting a village on a working fireplace mantel is beautiful and slightly risky. Heat rises, and ceramic houses with internal bulbs already run warm — the combination dries out faux snow until it cracks and curls. If you actually burn fires, keep at least 12 inches of clearance from the firebox opening, use battery LED houses instead of plug-ins, and never let batting or garland drape below the mantel lip. An unused mantel has none of these problems.
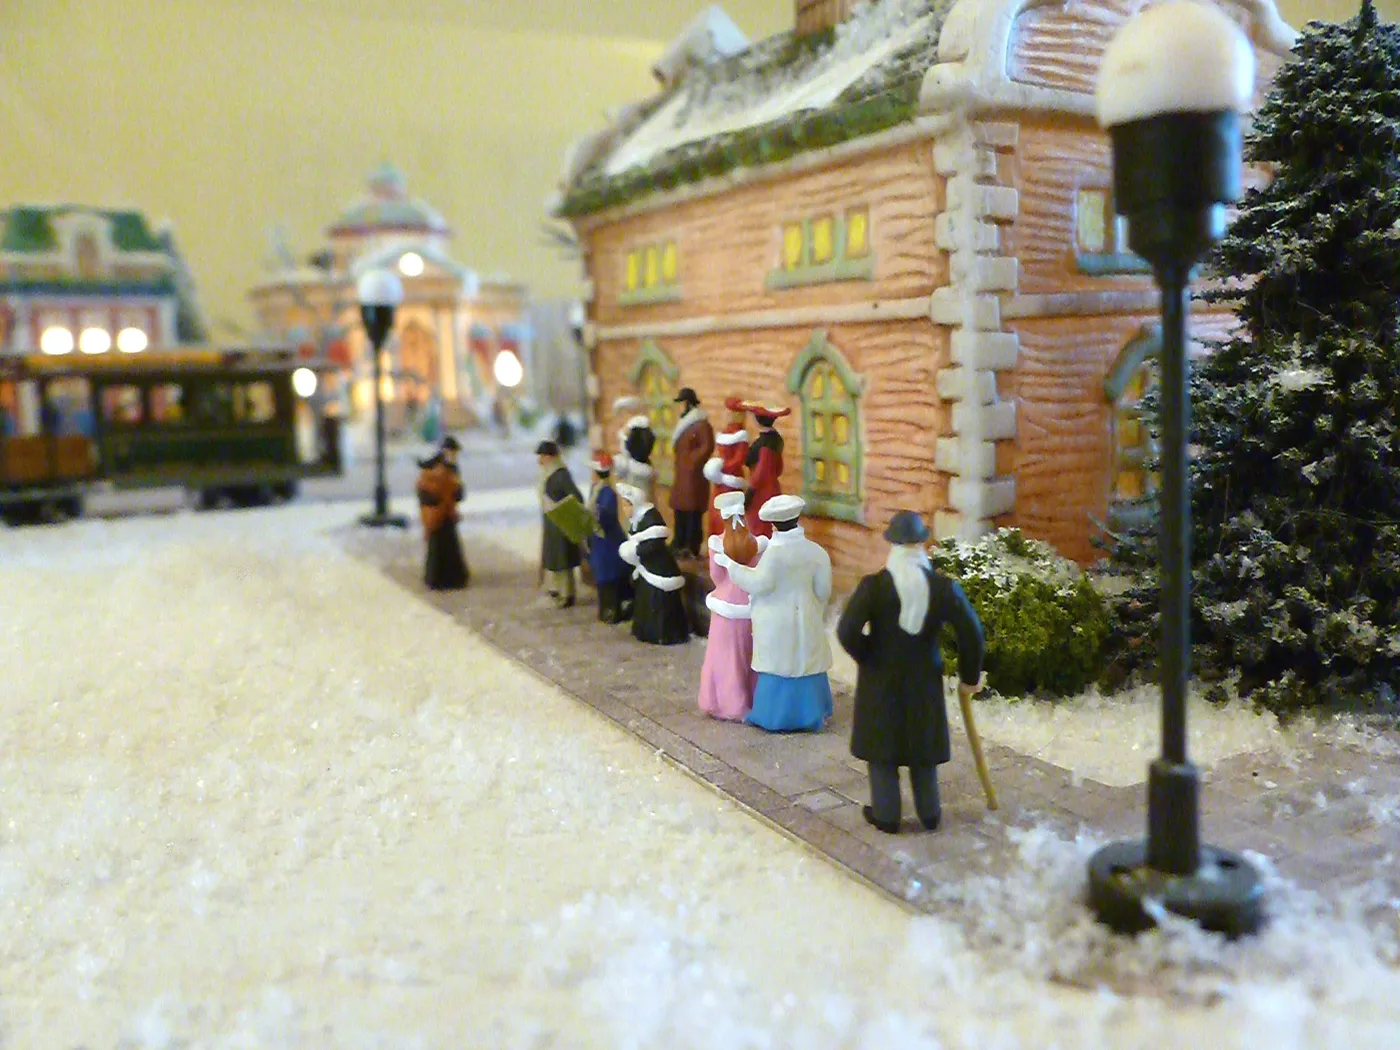
For the ice-skating rink, cut a piece of thin mirrored acrylic to size and brush the edges with white paint so it reads as a frozen pond rather than a mirror. Set the figures at slight angles, never in a tidy row. Give the mantel two zones: a dense cluster of houses on one side, an open snow field with the rink on the other. Contrast beats even distribution every time.
17. Map the Footprint Before You Buy a Single House
Before you buy anything, map the footprint. Most people buy houses first and then discover their table is 8 inches too short, which is how a village ends up on the floor.
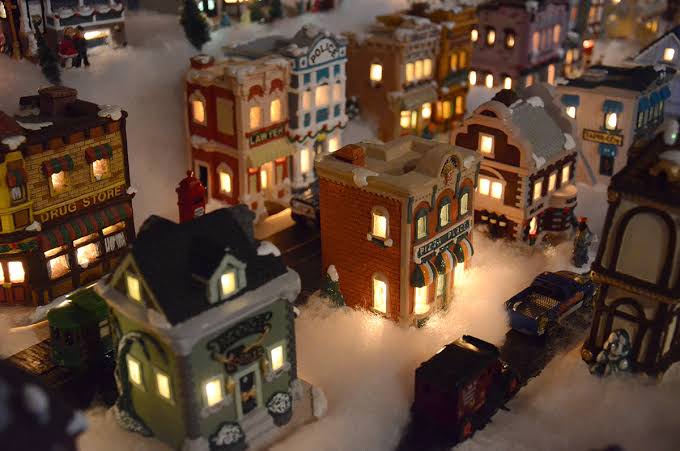
- Measure the length, depth, and height of your chosen surface in inches.
- Mark where the train loop would need to turn — curves take more room than straight track.
- Note every outlet within cord reach and count them.
- Decide your viewing angle: standing, seated, or seen from across the room.
- Set a hard budget ceiling before you open a single shopping app.
Then translate that map into a purchase order:
- Pick a base footprint — two or three 2×4 foam panels work for most tables.
- Choose your hero building first; it sets the scale for everything else.
- Add supporting buildings at least 25% shorter than the hero.
- Budget for trees last, since they’re the easiest thing to make yourself.
- Buy the train only after the loop test-passes on paper.
18. A Village Glowing Against a Dark Painted Wall
Formula for a dark-wall village: 55% dark backdrop, 25% illuminated buildings, 15% white snow and trees, 5% warm light spill. The wall is doing more than you think — it absorbs the ambient light your room is throwing around and makes those tiny windows look genuinely bright. Swap the dark wall for cream and the same houses read as pastel toys instead of a night scene.
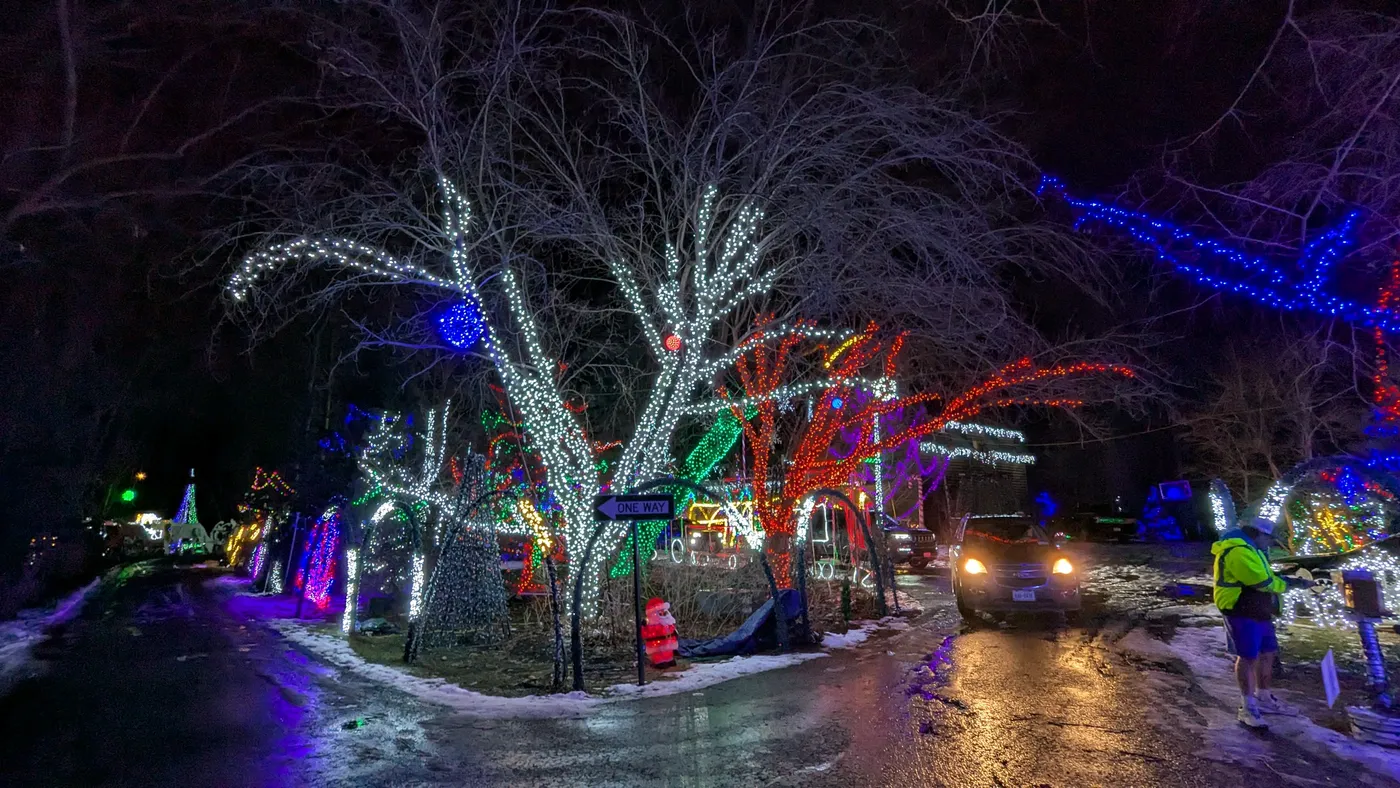
- Illuminated houses and church: $110–$280
- Faux snow and base: $20–$45
- Miniature evergreen trees: $25–$60
- Train with track: $50–$130
- Dark backdrop board or paint: $15–$40
Total: about $220 to $555. Budget alternative: a black twin flat sheet pinned to the wall does 80% of what a painted feature wall does, for about $8.
19. Red Lights Buried in the Snow Along the Train Tracks
Bury your lights instead of draping them. Lay a strand of warm LEDs flat on the table, cover it with a half-inch of snow batting, and press the batting down along both sides. Light glows up through the fibers instead of shining into your eyes, and every building suddenly looks lit from the ground. Space bulbs about 4 inches apart and keep the strand out from under anything heavy — no house, no track, no transformer on top of it.
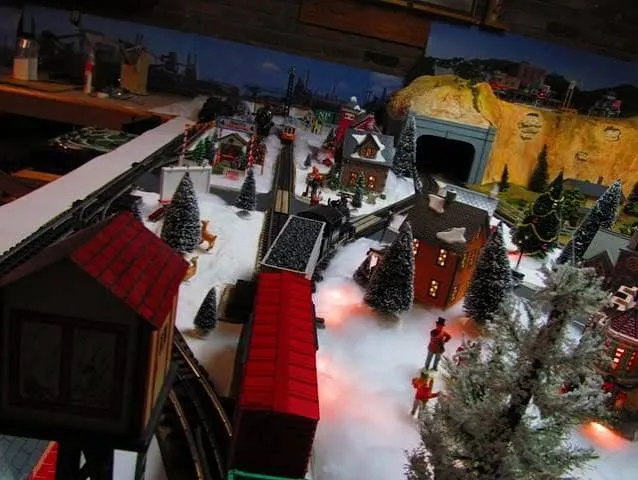
LEDs run cooler than incandescent, but they still put out heat. Don’t lay batting directly against a transformer or plug, and unplug the whole display before you leave the house. If you have cats, know that snow batting and dangling track are irresistible — run the track along the back edge, or build the whole thing inside a glass case. Tinsel is the one material you should never bury.
20. A Brick-by-Brick Village Under Purple Tree Lights
Block-built villages have quietly become one of the most-shared display formats, and 2026 is the year mainstream decorators caught on. The appeal is that it’s a display you can rebuild — kids rearrange it, adults add to it, and nothing breaks if someone gets enthusiastic. It’s the same cultural pull that made vintage toy collections and play-forward decor so popular. Unlike ceramic, a brick village survives storage, moves, and grandchildren.
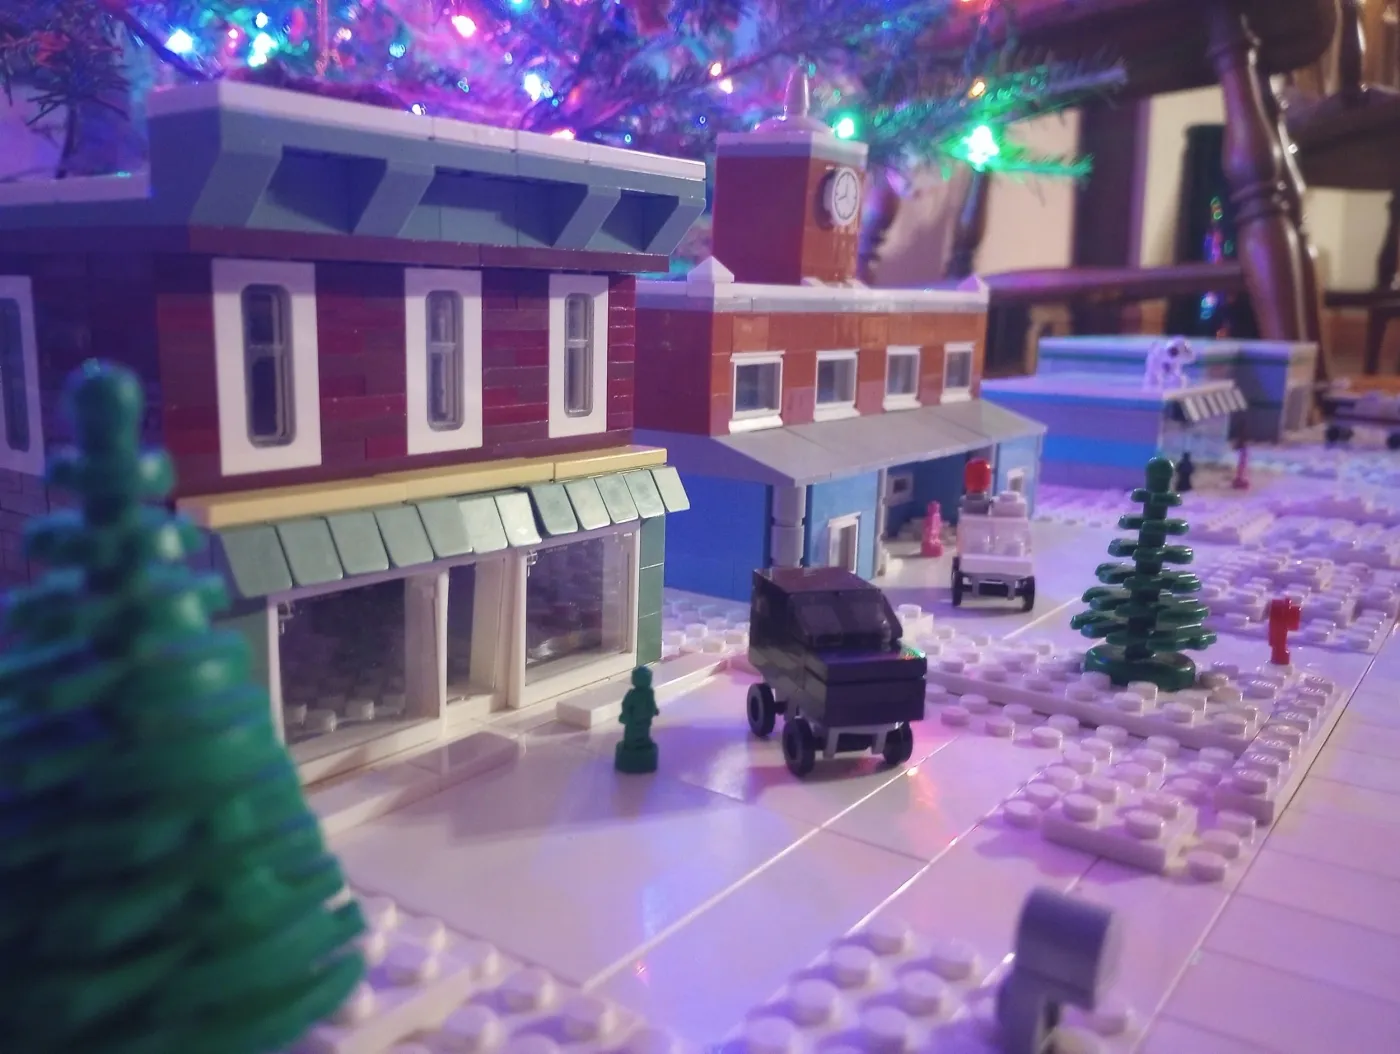
Budget version: off-brand brick sets run $15 to $40 for a full winter village assortment and connect with the name brand, so you can mix. A bulk pack of 32×32 baseplates costs about $20 and gives you a snow field for less than one licensed building. Skip the branded holiday set at $100 and buy three generic buildings plus a baseplate. Store bricks sorted by color in zip bags.
21. Ceramic Village Scenes Styled on a Dark Kitchen Counter
A dark counter is a genuinely smart backdrop and most people waste it. The contrast between black or charcoal and snow-covered ceramics is what makes the pieces pop. Protect the counter with a felt or cork runner so ceramics don’t scratch, then light from above and slightly behind the pieces rather than the front — backlighting throws a soft halo and hides the seams. Keep pieces off the tile backsplash line, where grout reads as visual noise. See Idea #23 for the single-piece version.
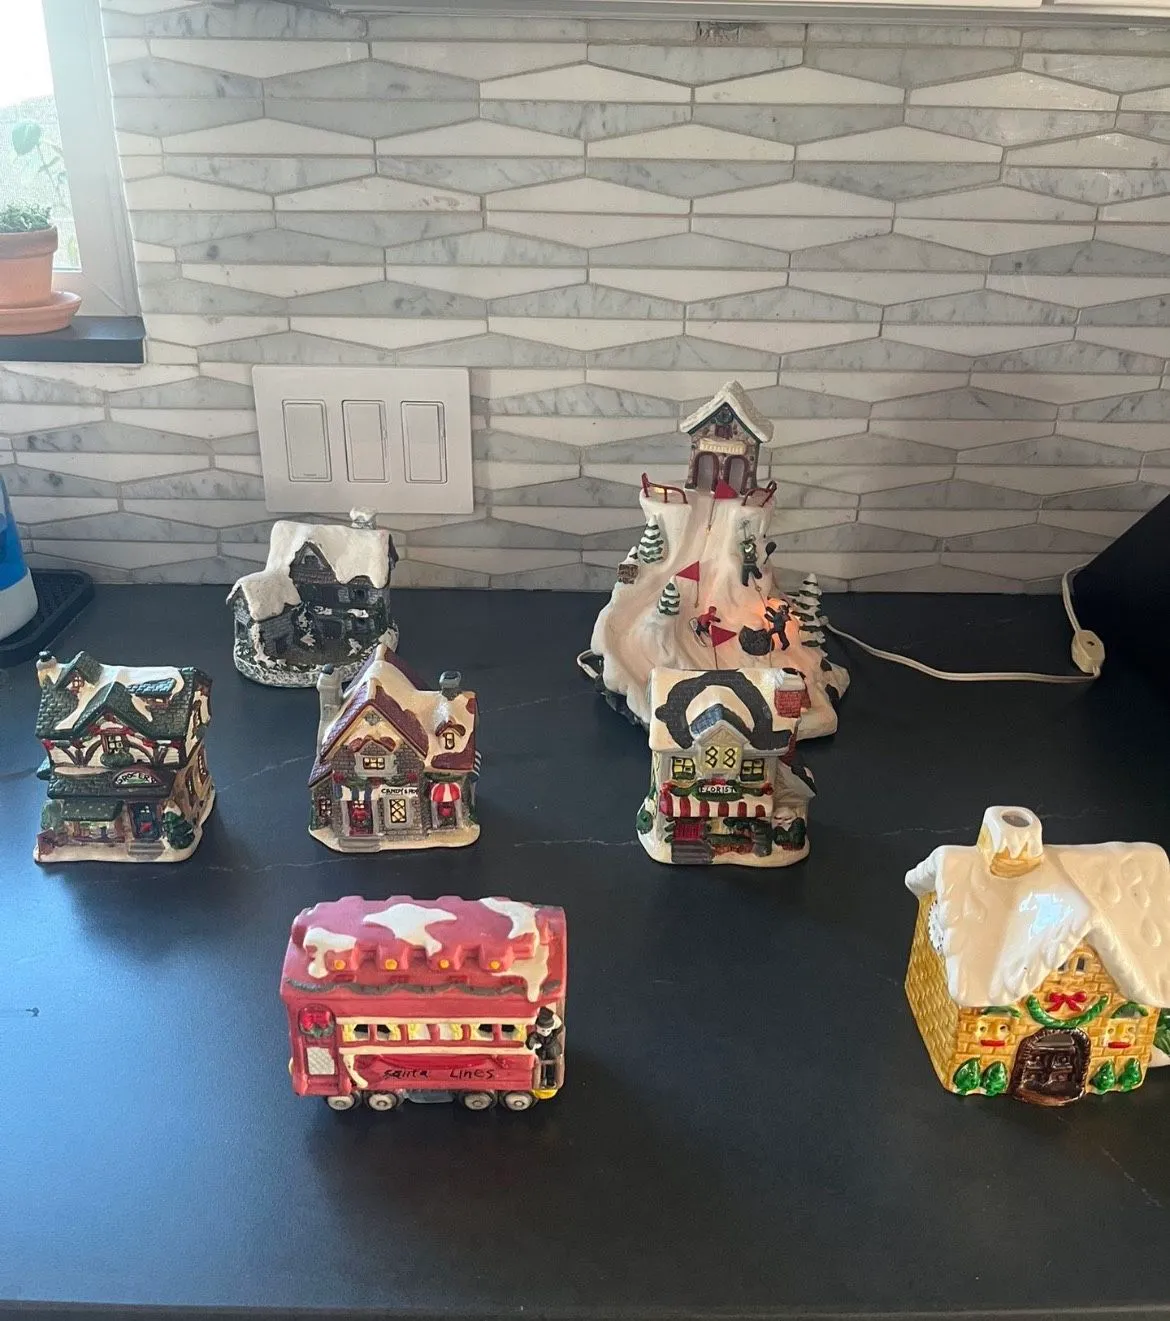
What makes this collection sing is that it isn’t a village at all — it’s a set of scenes. A ski slope piece, a bus labeled Santa Lines, snow-dusted storefronts. Grouped on a counter, they tell separate small stories instead of one long street. The one thing to protect is that variety. Swap in three matching buildings and you get a tidy display nobody stops to look at.
22. A Snowy Christmas Market Stall Full of Tiny Shoppers
Two principles are doing the work here. First, clustering: when figures stand in a loose group of three or four around a stall, your eye reads conversation and commerce. Space them evenly and you get a diorama line-up instead. Second, foreground blur — the tiered candle holder and frosted tree sitting slightly out of focus behind the scene give it a camera-like depth it wouldn’t otherwise have.
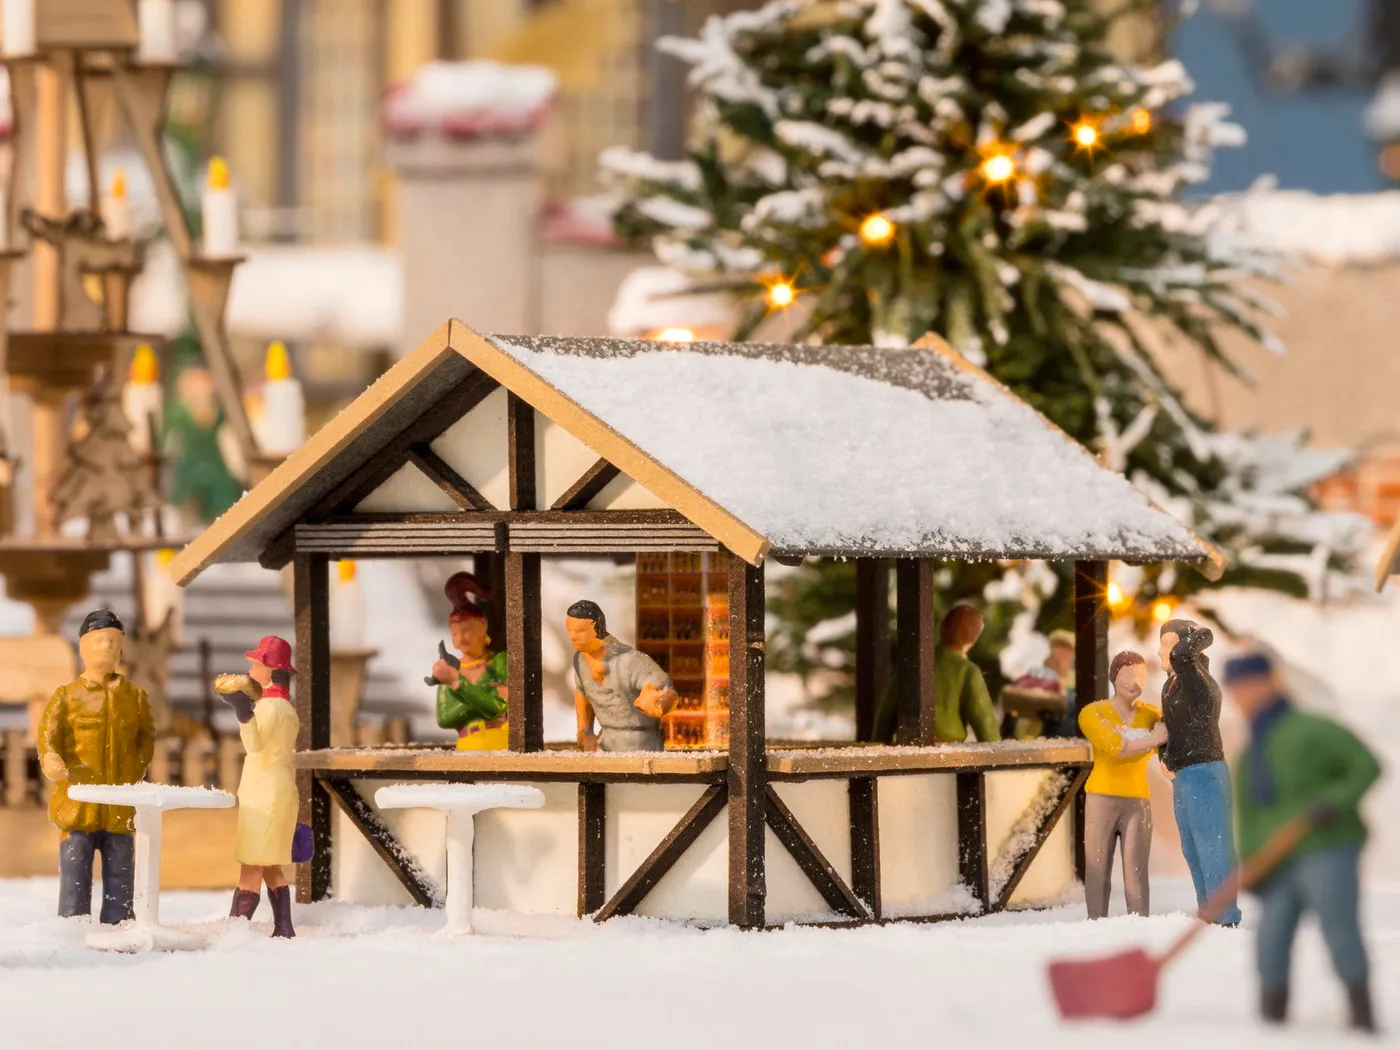
Build the market stall in an afternoon:
- Cut four 2-inch balsa or foam posts and one 3×4-inch roof panel.
- Paint the posts dark brown and the roof a muted red or green.
- Glue the posts to a small base and rest the roof on top.
- Sprinkle fine faux snow over the roof and tap off the excess.
- Add two tiny tables underneath and three figures around the front.
Materials run about $10 and it takes roughly an hour.
23. One Lit Tin House and a Burlap-Wrapped Tree
- Lighted metal house lantern: $18–$45
- Mini frosted tree in burlap pot: $8–$20
- Brown kraft paper and green twine: $6–$12
- Warm fairy lights: $8–$18
- Rustic wooden tray or styling surface: $15–$40
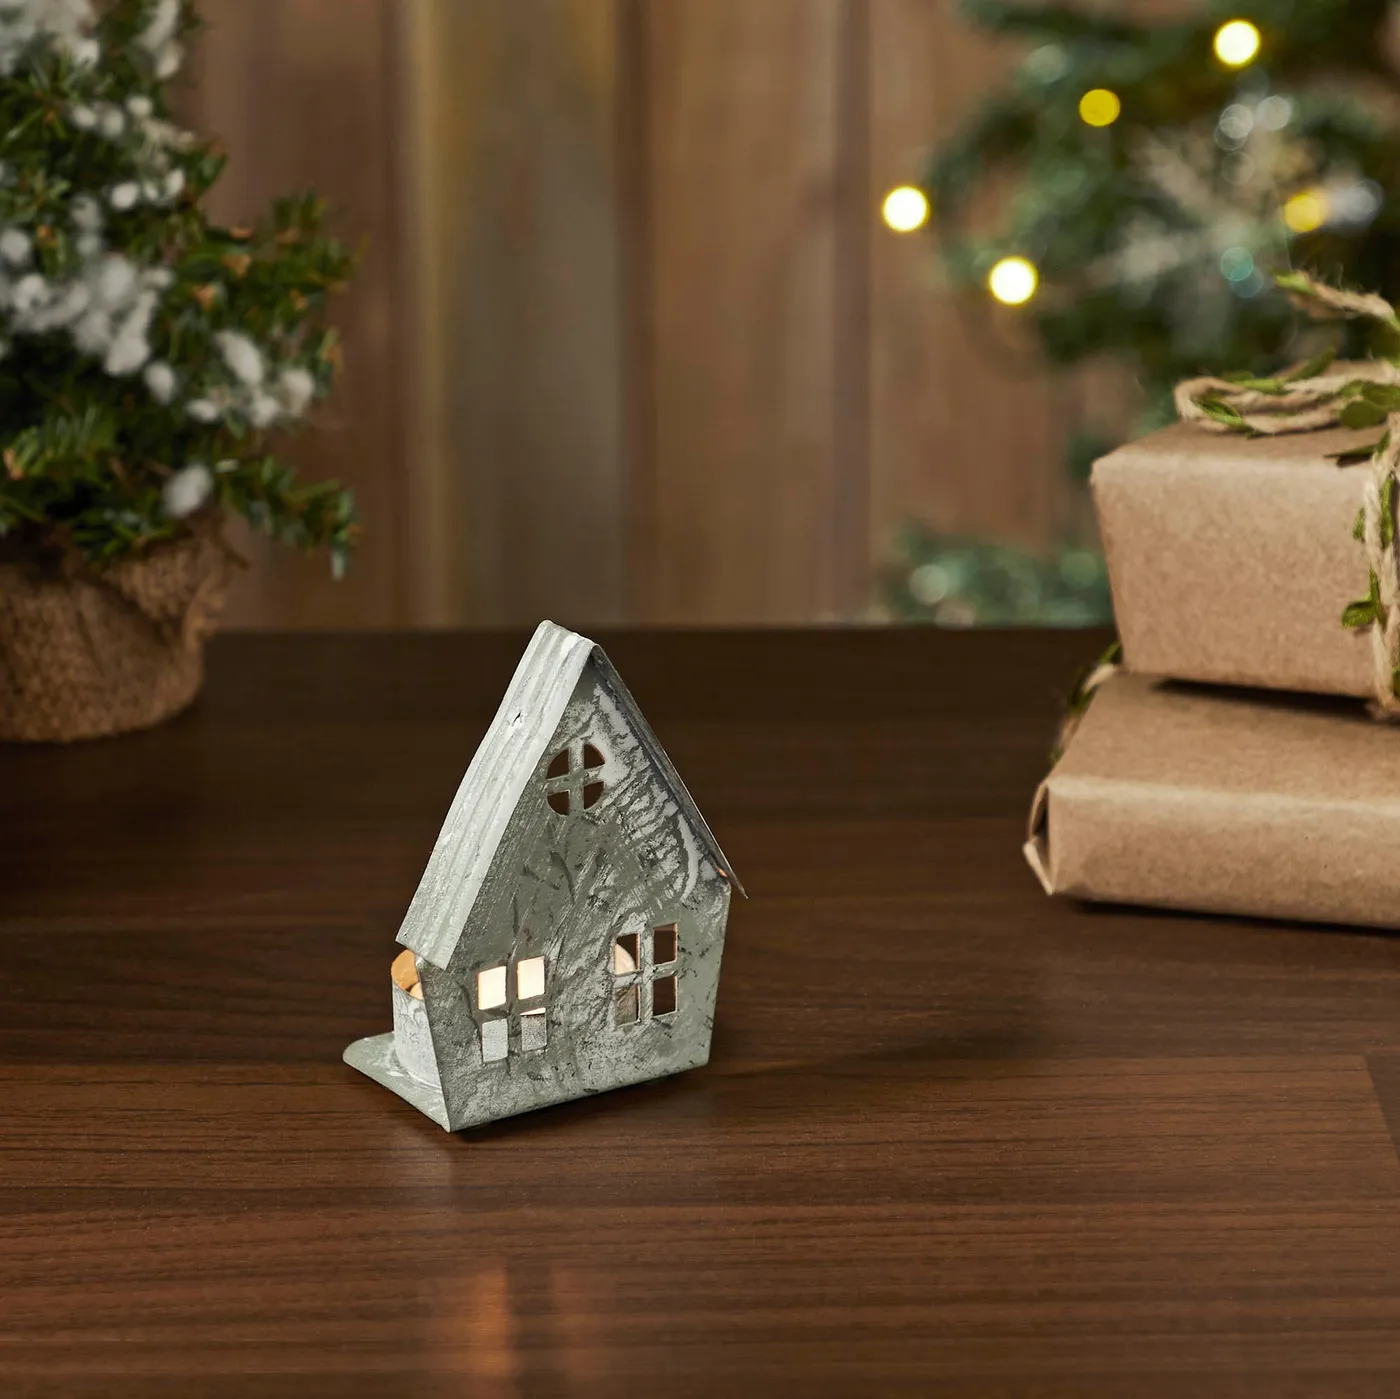
Total: roughly $55 to $135. Budget alternative: a plain white paper lantern with a battery tea light inside and a window cut out with a craft knife gets you the same glow for about $6.
Metal lanterns get hot with incandescent bulbs, so use LED or battery candles inside and check the housing after an hour the first time you run it. Kraft paper and twine look beautiful and are extremely flammable, so keep gifts at least 6 inches from the lantern’s openings. And if you have dogs, know that a burlap pot and a paper package are the two most chewable objects in your entire holiday setup.
24. Glittered Pastel Houses With White Bottle Brush Trees
Formula: 50% white snow base, 30% pastel ceramics in pink, light blue, and cream, 15% white bottle brush trees, 5% glitter. The trick is that the pastels are never the brightest thing in the scene — the white base and the glitter are. That’s what keeps it from tipping into candy-shop territory. Swap pink for mint and light blue for butter yellow and the formula still holds; the ratio of pastel to pure white is what makes it feel frosty.
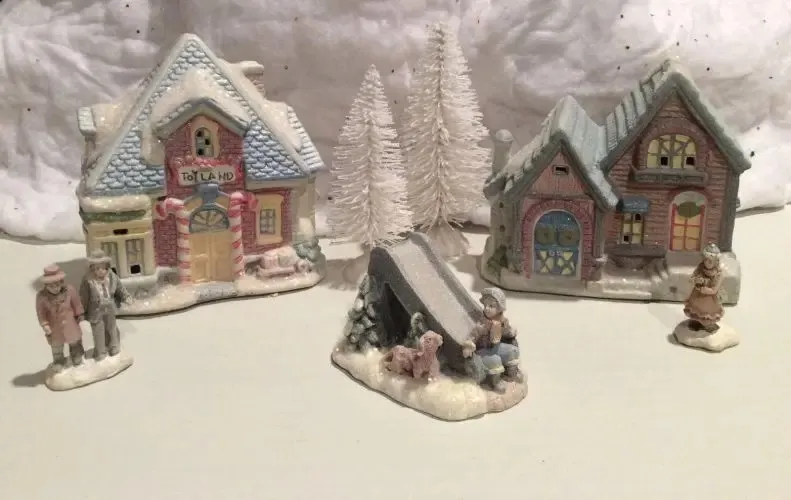
Glitter sheds. It gets into carpet, it sticks to socks, and it will absolutely find its way into your tea. Set glittered pieces on a felt mat rather than directly on wood or glass, and vacuum with a brush attachment instead of a beater bar. Bottle brush trees flatten over time — reshape them with your fingers before storing, and stand them upright in a bin with tissue between layers.
25. A Coastal Village With a Steamboat and Crushed Seashell Snow
Coastal Christmas has been climbing for a few seasons, and 2026 is the year it stopped being niche. Part of it is climate — plenty of people live where the only snow they’ll see is the artificial kind — and part of it is that blue and white has always photographed beautifully. The genius of a coastal village is that it gives your ceramic buildings a reason to exist somewhere other than a snowy street.
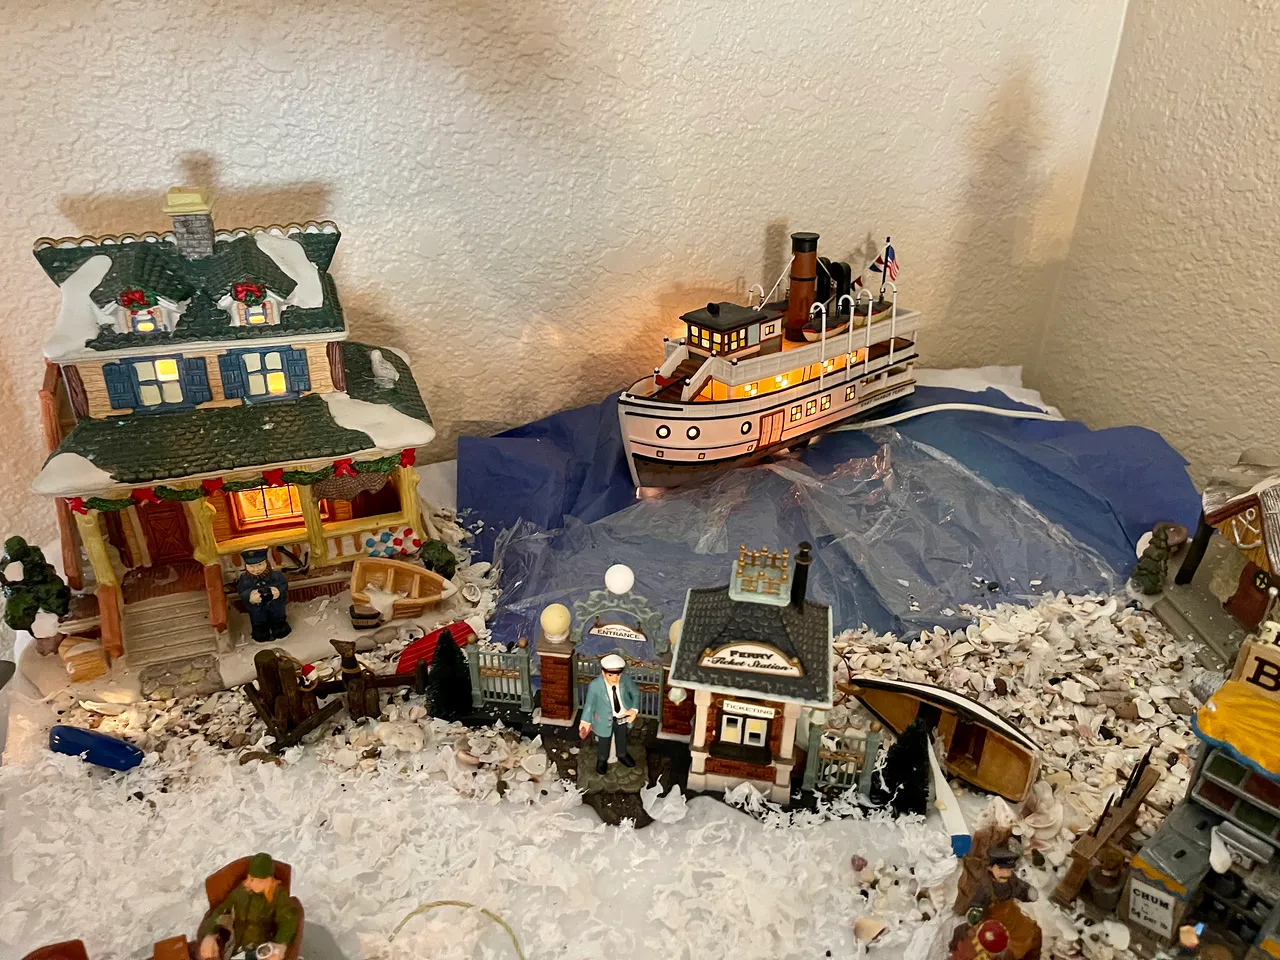
Technique: crushed seashells give texture that faux snow can’t, but they’re too heavy to sprinkle over eaves. Use shells only on the ground layer and stick to fine white batting for rooftops. A sheet of glossy blue fabric or acrylic under the harbor reads as water instantly if you keep the edges irregular rather than cutting a perfect rectangle. Anchor the steamboat slightly off-center — a boat dead in the middle of the water looks parked.
26. A Gingerbread Village With Icing Roofs and Miniature Trains
Gingerbread that survives the season:
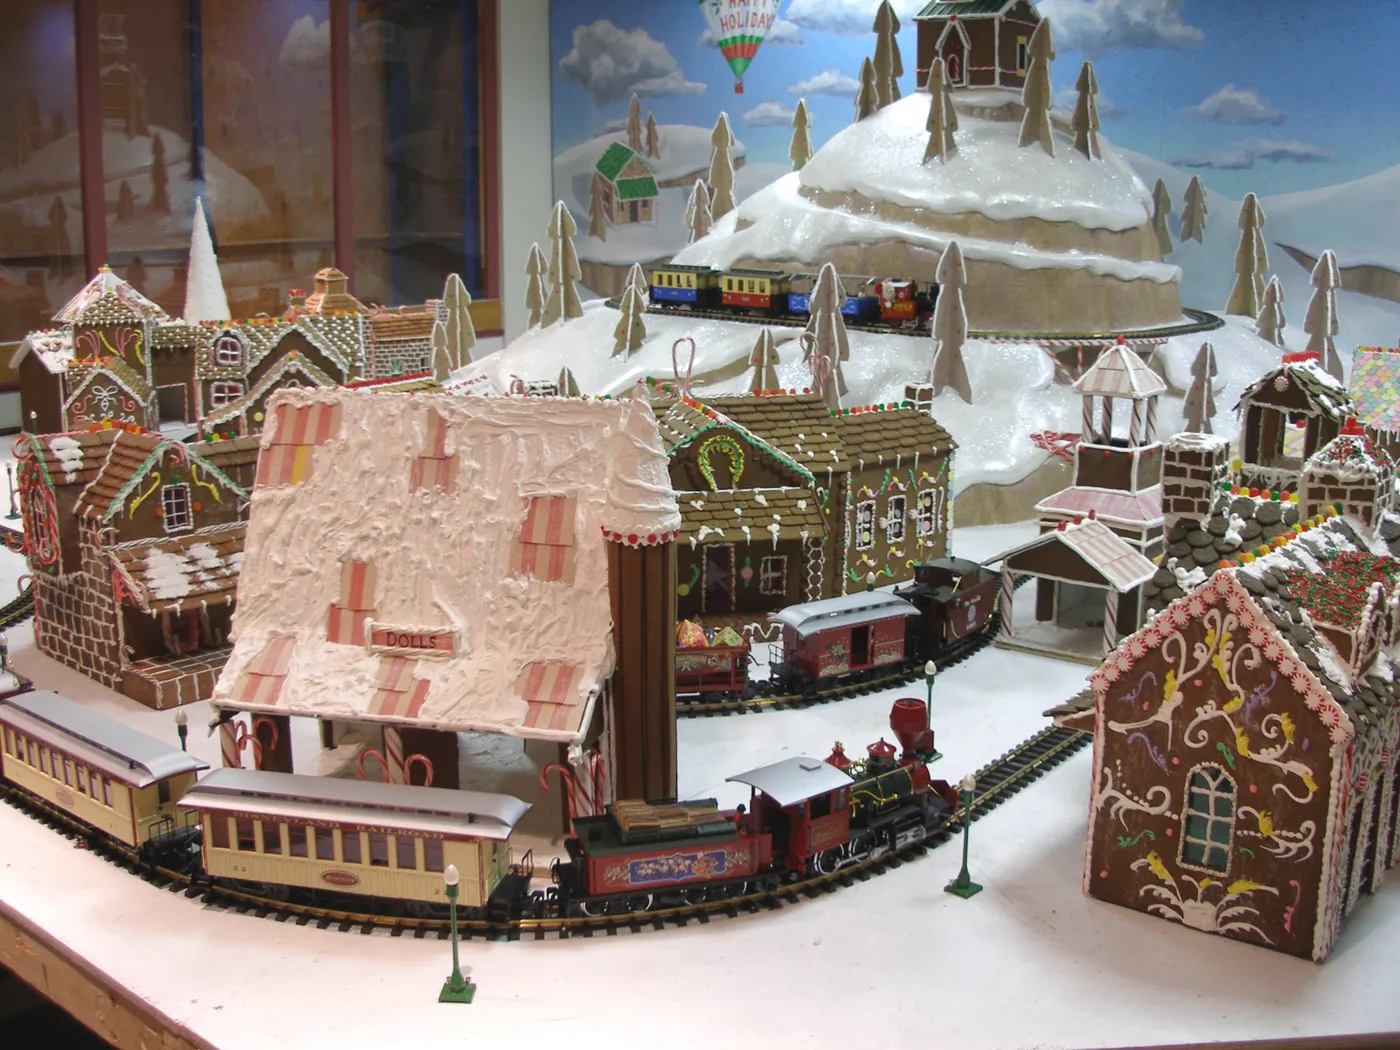
- Bake walls a day ahead and let them dry flat — soft panels sag.
- Use royal icing at stiff peak consistency as mortar, piping a thick line and holding each wall 20 seconds.
- Let the shell cure four hours before adding the roof.
- Attach candy with fresh icing, not leftovers from the walls.
- Dust powdered sugar through a fine sieve for snow, holding it 10 inches above.
Plan two evenings and about $35 in ingredients and candy.
The tiered snow landscape is what separates a gingerbread village from six houses on a tray. Cardboard cutout hills covered in icing and powdered sugar give the trains somewhere to climb, and the blue sky mural behind keeps the whole thing from floating in your kitchen’s glare. Remove the landscape and you have dessert. Keep it and you have a village.
27. Building It Live on a White Cloth Base
Laying everything out on a white cloth first is the single best habit in village building. It lets you slide pieces around without scratching a table, it photographs clean, and it covers whatever surface you’re working on.
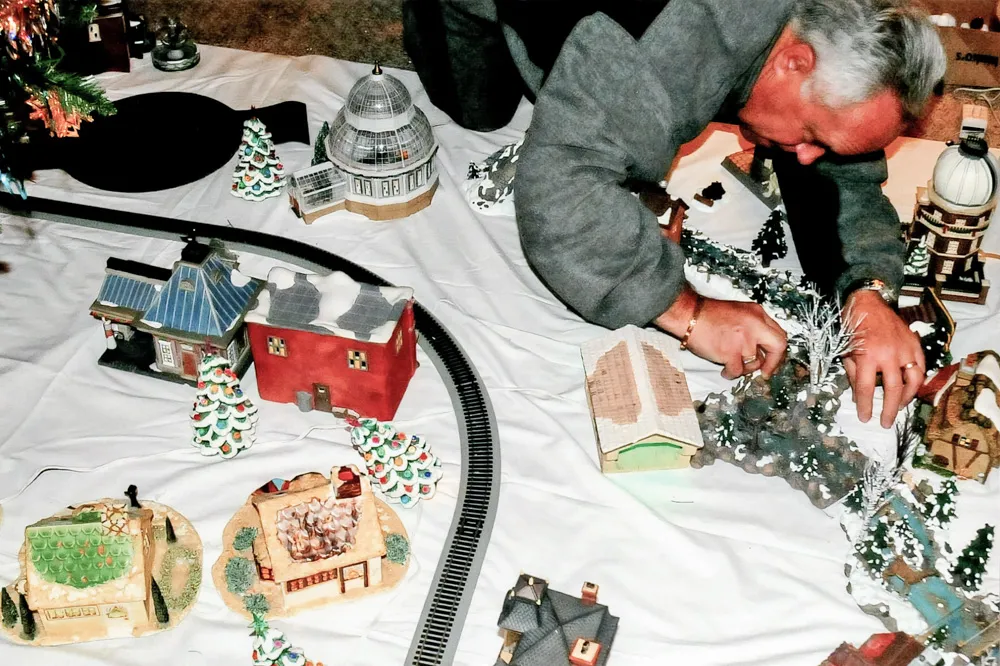
- Tape the cloth flat so there’s no ridge under the buildings.
- Lay out the train track and confirm the loop before anything else.
- Position the tallest buildings at the back corners.
- Leave a 3-inch unbroken gap along the front for viewing.
- Photograph the layout before you glue, wire, or snow anything.
Budget version: a queen flat sheet from a thrift store costs $3 and reads exactly like snow under lights. Marketplace lots of 8 to 12 houses sell for $40 to $60, dollar stores carry bottle brush trees at 4 for $5, and glass dome pieces like that greenhouse show up in thrift shops for under $10. A full display built this way lands around $120 instead of $400.
28. A Working Carousel and Ice Rink in the Center of Town
Moving pieces need elbow room. A carousel and an active skating rink together want at least a 24-inch circle of clear space at the center of the layout, plus 6 inches of margin on every side for the buildings that frame them. On a 48-inch table you can do one or the other, not both — the rink reads better in a tight space because the figures are smaller than a spinning carousel. For a tighter setup, see Idea #2.
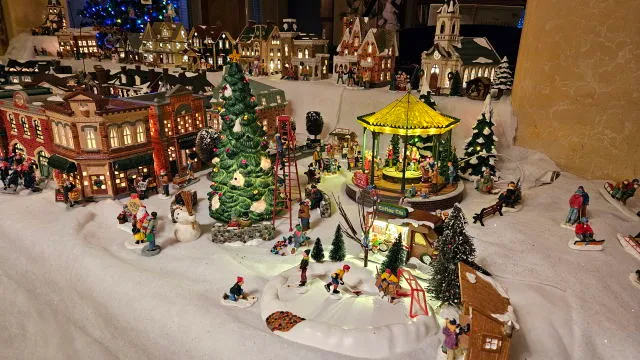
Motion at the center is a genuinely smart layout decision. It gives your eye a destination, and because people are drawn to movement, it pulls attention inward instead of letting it drift off the edges. Surround it with taller buildings so the carousel sits in a bowl, and keep the skating figures angled slightly toward each other. Stillness around motion is what makes both of them look better.
29. A Busy Downtown Village With a Fountain and a Red Bus
- Illuminated commercial buildings, 8 to 10: $140–$360
- Fountain and plaza pieces: $25–$70
- Vehicles including the red bus and police car: $20–$55
- Faux snow and streetscape base: $25–$55
- Trees, lampposts, and street furniture: $40–$95
- Multi-colored string lights: $12–$30
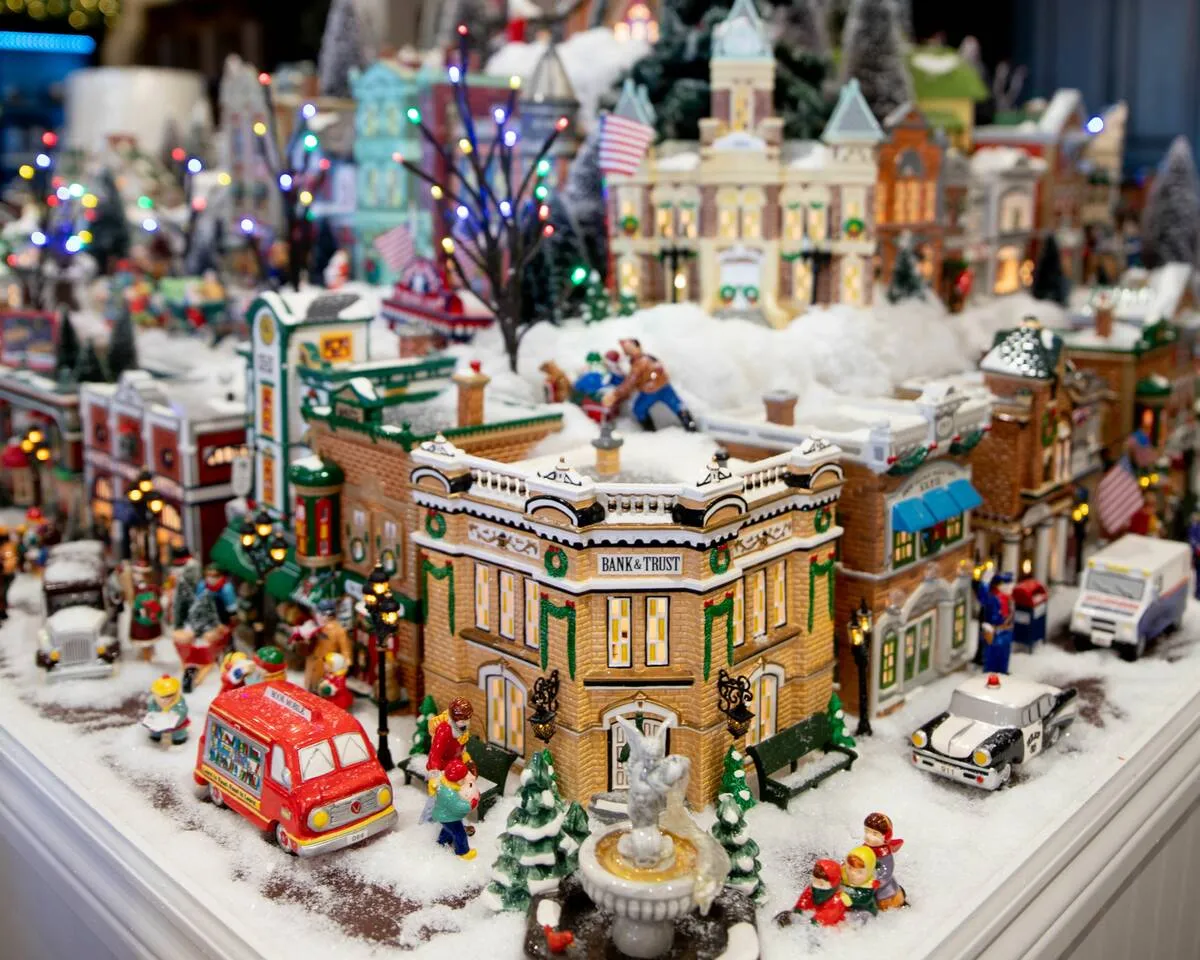
Total: about $262 to $665. Budget alternative: buy the commercial district pieces one at a time over three seasons — nobody notices a display that grows, and January sales cut prices by 50% or more.
A downtown this dense needs real dusting. Tiny figures, lampposts, and vehicle wheels collect lint that a vacuum will happily eat. Use a soft makeup brush weekly and a can of compressed air for crevices, holding it 6 inches back so you don’t blast someone’s hat across the room. Store vehicles separately in a divided box — loose cars in a bin lose mirrors and bumpers fast.
30. A Vintage Village Ringed by a Green Picket Fence
If your collection spans three decades and it shows, unify with one coordinated element instead of buying new. A single-color picket fence painted a bright, saturated green instantly frames mismatched houses and gives the whole display a shared edge. Two cans of glossy spray paint and a $12 picket fence kit comes in under $30 and makes a mixed collection look curated.
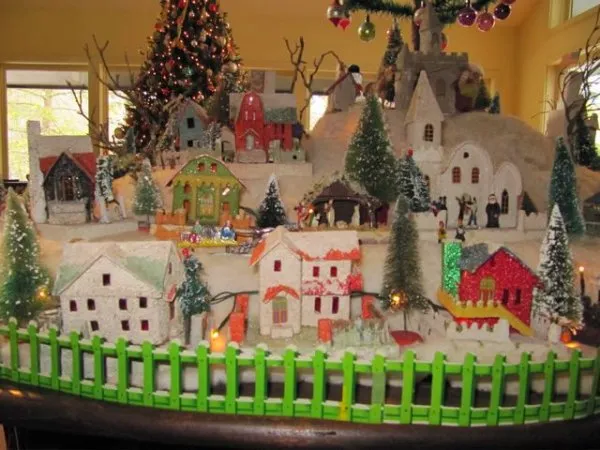
Formula: 40% white snow and houses, 30% mixed vintage buildings, 20% bottle brush trees, 10% one saturated accent — here, green. The accent is the point. Keep everything else in soft neutrals and let the fence and lights carry the color. Want a different mood? Swap the green for red and you get a candy-shop village. Swap it for navy and the same houses read as a storybook town.
31. A Single Green-Roofed House With Santa on the Porch
The corrugated grey fence is the detail that makes this little house look real. It sits low, it has texture, and it gives Santa a yard to stand in. Without a boundary, a miniature house floats on snow with no sense of property or scale. A fence, a hedge, or even a low wall does the same job — it tells your eye how big the house is supposed to be. It’s a $4 accessory doing architecture work.
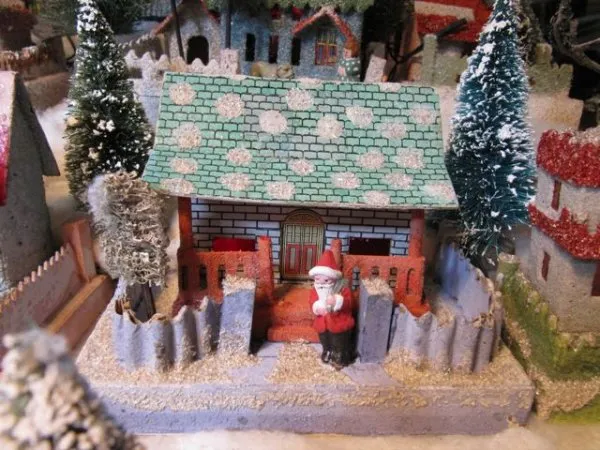
about glitter: it’s what makes handmade pieces look magical in a photo and it’s also what gets on everything you own. If you’re displaying this on a bookshelf, put a piece of felt or a wooden tray underneath to catch the fallout. And watch the light — glitter only sparkles when it’s lit from the front, so if your village sits under a shelf, the sparkle disappears entirely.
32. A Block-Built Village on a Bright Red Table
Two things make this setup land. First, the red table: placing a green-and-white village on a saturated red surface gives you a complementary pairing that’s almost impossible to get wrong, and it makes the white snow glow. Second, the dark carved wood behind it — ornate paneling adds texture without competing, because it’s dark enough to recede. Busy backdrop plus busy village would be chaos. Busy backdrop plus quiet village is a photograph.
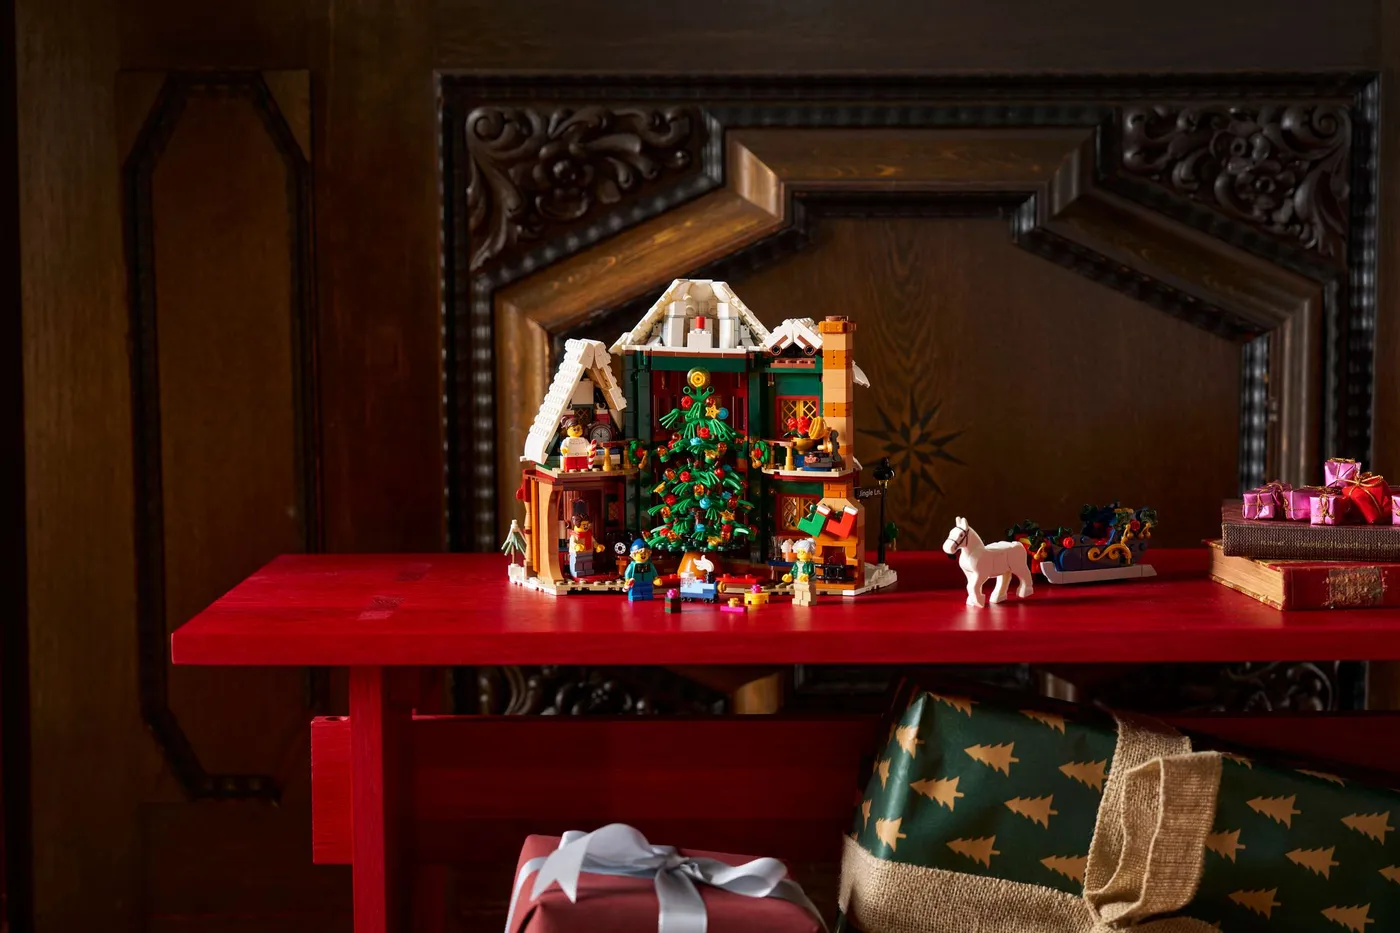
Budget version: a thrifted red-painted side table runs $20 to $40, and most of these pieces come from bulk brick lots. If you don’t want to pay premium set prices, buy a 500-piece mixed brick bag for $25 and build your own house shapes. Wrapped presents are just empty boxes with paper and ribbon — reuse the same four boxes every year. Old books came from a library sale at $2 each.
33. A Glass Display Box Holding One Glowing White House
Boxed displays solve the two biggest village problems: dust and pets. A glass-front box roughly 12 inches wide, 8 inches deep, and 9 inches tall holds one ceramic house, two bottle brush trees, and a snow base comfortably. That’s the right scale for a console table, a bathroom shelf, or a narrow sideboard. For a table-length arrangement instead, look at Idea #4 — same idea, way more square footage.
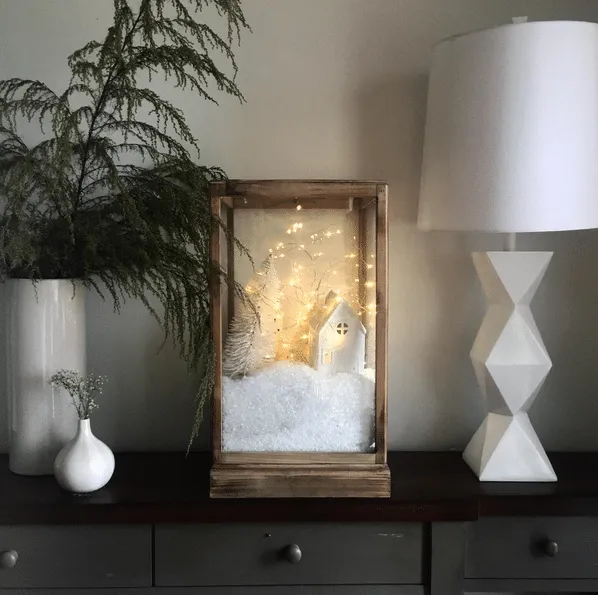
Run one strand of warm fairy lights through the back of the box and hide the battery pack behind a book or a plant. Better yet, put it on a plug-in timer — ten minutes of setup and the display turns itself on every evening at 5pm and off at 11. Keep the cord slack enough that you can lift the box without yanking, and never place a lit boxed display under a shelf shorter than 6 inches above it.
One House, One Track, One Very Good Evening
You don’t need thirty buildings and a train that loops the whole living room. Start with one glowing house, one bag of snow, and a surface that makes you happy to walk past it in the dark. Villages are supposed to grow — build the rest next weekend, or next year, or whenever the next box shows up at a thrift store.
📌 Pin your favorite version now so you can find it when the boxes come back out of the attic.