33 Jaw-Dropping Cardboard Christmas Decorations You Need to Craft for 2026
You know the feeling: your Pinterest board is bursting with cardboard Christmas decorations 2026 photos, your dining table is covered in kraft paper scraps, and you still haven’t committed to a single idea. Deep breath. We spent serious time browsing Etsy, Michaels, Amazon, Target, and IKEA, and narrowed hundreds of options down to 33 ideas that actually deliver — from $3 tabletop houses to $180 statement displays.
Inside you’ll find rustic Scandinavian villages, glitter-dusted miniatures, vintage book-page crafts, and warm minimal silhouettes, with budget and luxury versions compared side by side. This is the year handmade won: Pinterest searches for cardboard and paper ornaments keep climbing as people push back on identical store-bought trees.
And stay until the end — we break down the most common mistakes that can ruin these looks. Some links here are affiliate links, which means we may earn a small commission at no cost to you. 📌 Save this to Pinterest for later — you’ll want to revisit these ideas.
1. Miniature Cardboard House With a Glowing Red Door
The house itself is simple — kraft board, a peaked roof, a stubby chimney, an arched red door. What makes it feel like a real home on a cold night is the light inside, glowing out through the cut-out windows with their diagonal grilles. Take the light away and you’re left with a brown box. One small warm bulb does more for this decoration than any amount of detail work. Build the shell in an afternoon, then spend your energy on the glow.
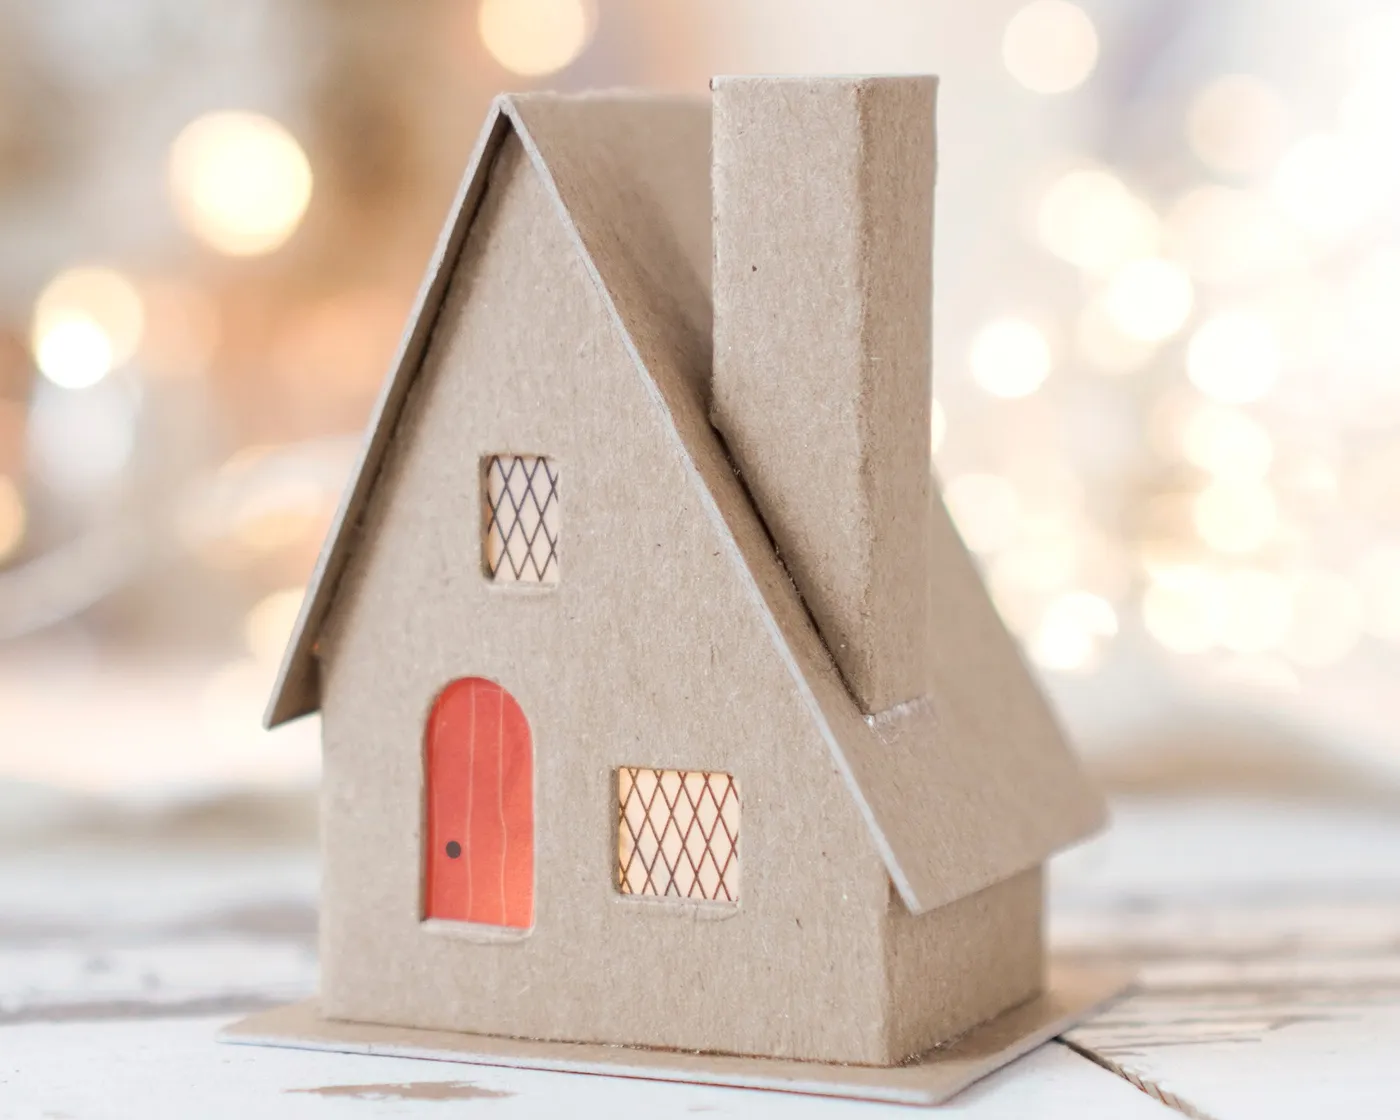
Keep the light source safe and steady: a battery LED tea light or a small puck light, never a real candle. Set it on a square of foil so the cardboard base doesn’t scorch, and leave at least 2 inches between the bulb and any interior wall. Cut the windows about 1 inch wide with 1/4-inch strips for the diagonal grilles — that’s the ratio that reads as a window from three feet away rather than a hole.
2. Corrugated Glitter Stars Tucked Into Evergreen
Two contrasts do the work here. The gold and iridescent glitter throws light back at you, while the raw corrugated edges stay matte and a little rough — sparkle against cardboard, not sparkle against more sparkle. Then there’s the color story: dark green needles, frosted tips, and those unexpected teal pinecones keeping the whole thing from sliding into standard red-and-green. Swap the teal for berry pink and the formula still holds.
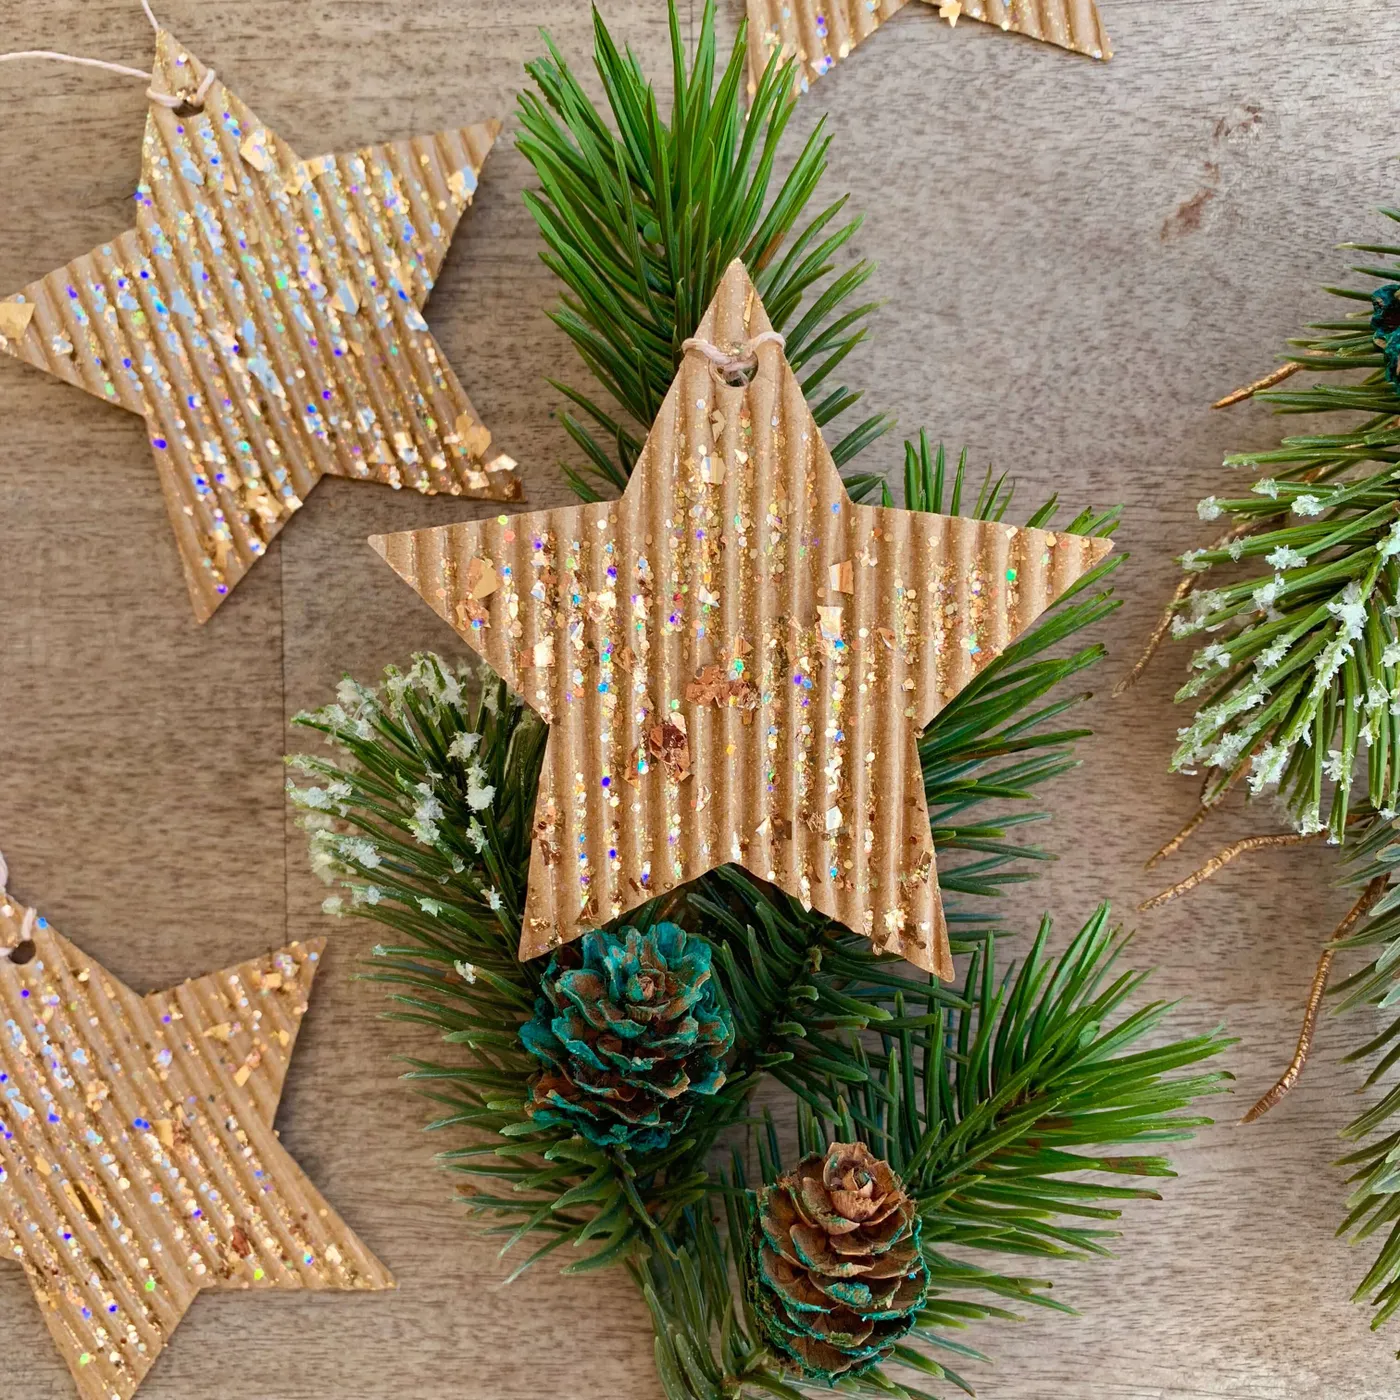
Loose glitter is the price of admission. Unsealed glitter migrates to your tablecloth, your fingers, and eventually your coffee. Spray the finished stars with two light coats of clear matte sealer, letting each coat dry fully, and you’ll lose maybe 10% of the shine and almost all of the mess. Keep them off surfaces that get wiped down daily, too — glitter and cleaning spray are not friends.
3. Kraft Gift Bags With Black Tree Silhouettes and Red Berries
- Corrugated kraft gift bags: $3–$7 each
- Red ribbon with pine cone charm: $4–$9
- Shredded brown paper filler: $6–$12
- Sparkly red berry stems (3–4): $5–$10
- Plain brown boxes for stacking: $1–$3 each
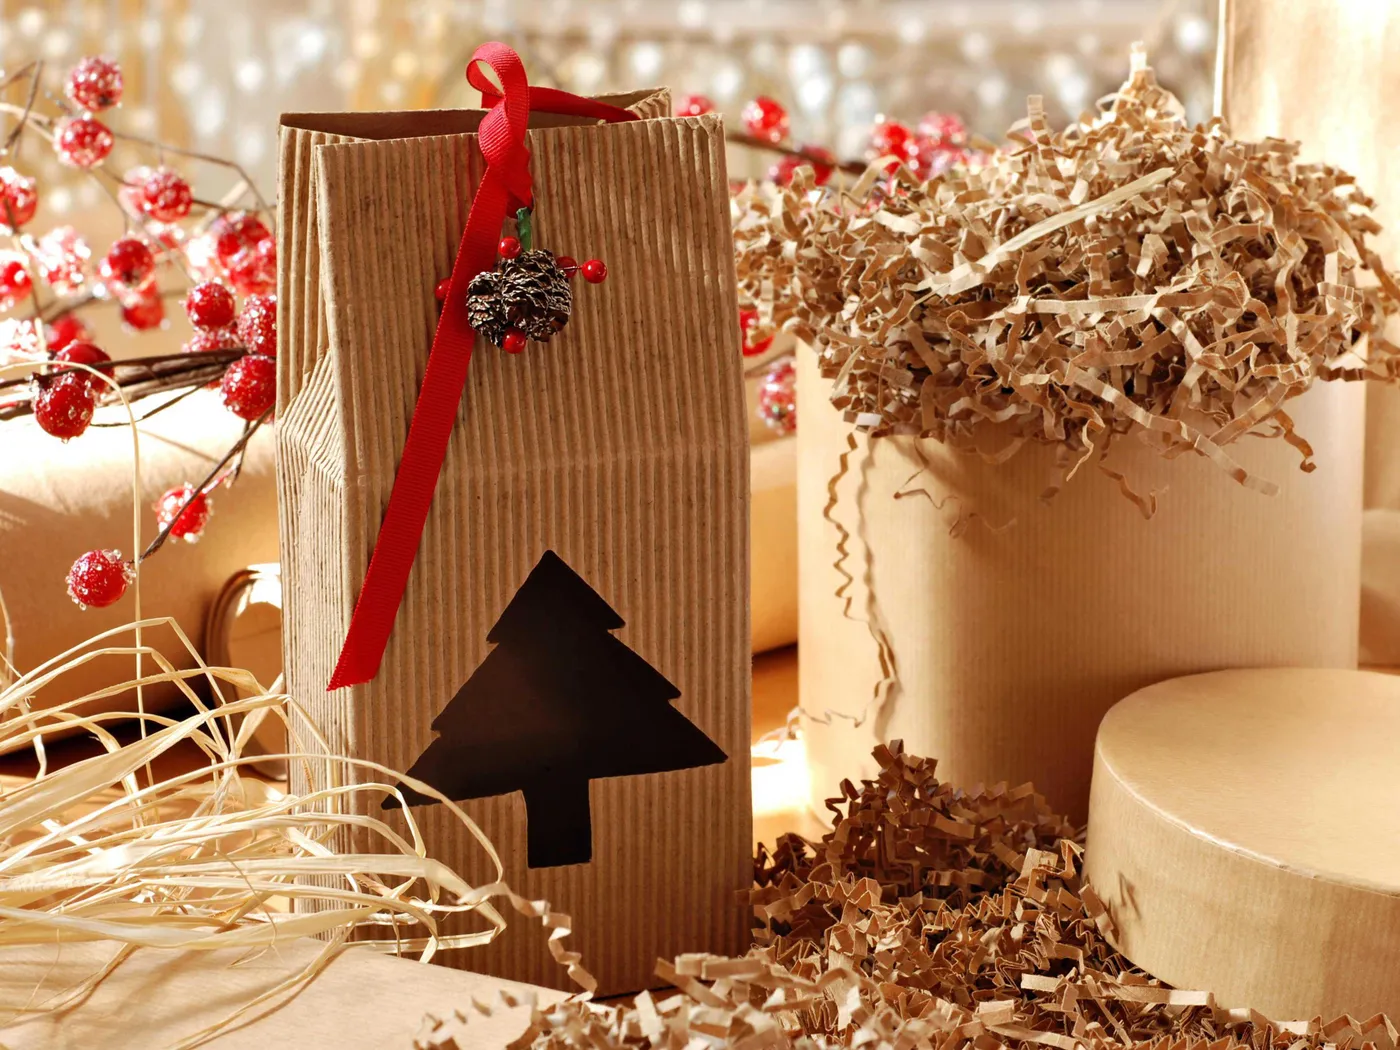
Total for a three-gift arrangement: $30–$55. A cheaper route: skip the filler and use torn newspaper strips topped with a few real pine sprigs. It reads just as lush and costs nothing.
The ratio is 70% kraft brown, 20% red, 10% black. Brown does the heavy lifting as the neutral — bags, boxes, filler — red shows up only in the ribbon and berries, and black is a single silhouette on the front of the bag. Swap red for forest green or deep plum and the math still works; just keep that vivid color under a quarter of what your eye sees.
4. A Layered Cardboard Tree Built for the Yard
This is outdoor cardboard, which means weather is the entire conversation. One rainy night and the layers turn to mush, so seal every panel front, back, and edge with two coats of exterior polyurethane, and weight the base with sandbags. Even then, bring it in overnight. Cardboard lasts a season or two at best, and that’s fine — it’s compostable, cheap, and nobody expects an heirloom.
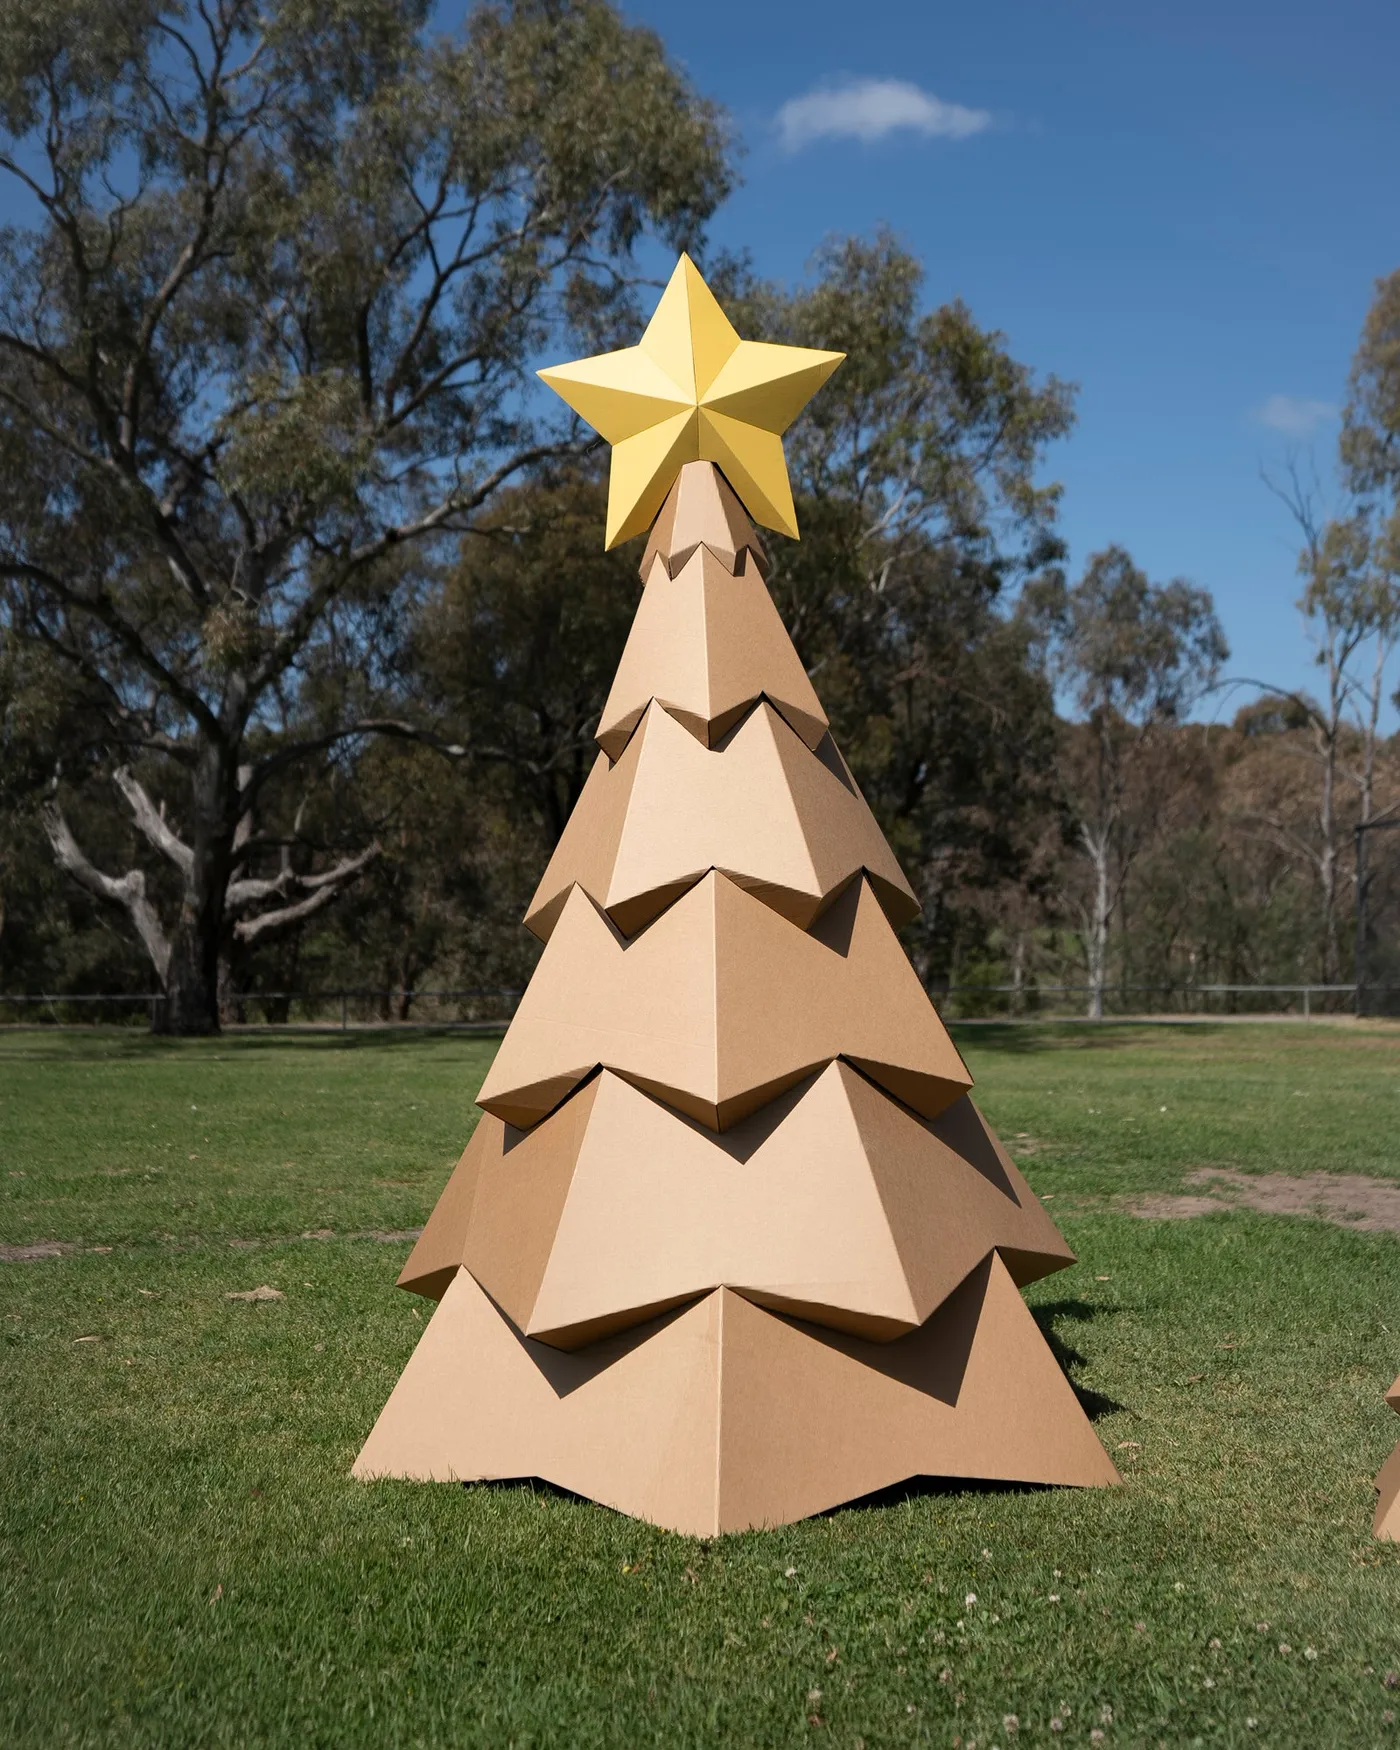
- Cut five to seven triangular panels in graduated sizes from double-wall cardboard.
- Seal each panel with exterior polyurethane and dry for 24 hours.
- Stack the panels on a center stake, largest to smallest, spaced 3 inches apart.
- Glue and screw each layer to the stake so nothing shifts in wind.
- Top with a faceted yellow star and anchor the base in sandbags.
About three hours of work and $20–$35 in materials, star included.
5. Floating Cardboard Stars Against a Dark Wall
Best in a narrow slot: an entry wall, the space between two windows, a stairwell. You need roughly 4 feet of width and 6 feet of hanging height for a cluster of five to read as a group instead of clutter. With 8-foot ceilings, hang the lowest star at eye level — about 60 inches — and work upward in 8-inch increments. Bigger room, bigger stars; a 12-inch star vanishes on a 12-foot wall.
Hang in odd numbers and vary the heights by hand, not by ruler — three distinct heights for five stars, never a straight line. Use one continuous thread per star tied to a small clear cup hook so you can adjust without re-drilling. Then check them from the doorway you actually walk through; the view that matters is the one you get twelve times a day, not the one from the middle of the room.
6. Black Diamond Grilles and a Red Knob Door
The diamond-patterned window grilles, drawn in black, are the detail that lifts this little house out of generic gingerbread territory. They’re just cardstock strips glued into a diagonal grid, but they give the facade a graphic rhythm plain cut-outs can’t match. Add the red door with its tiny black knob and you have a focal point you can spot across a room — even against a background of blurred, glowing lights.
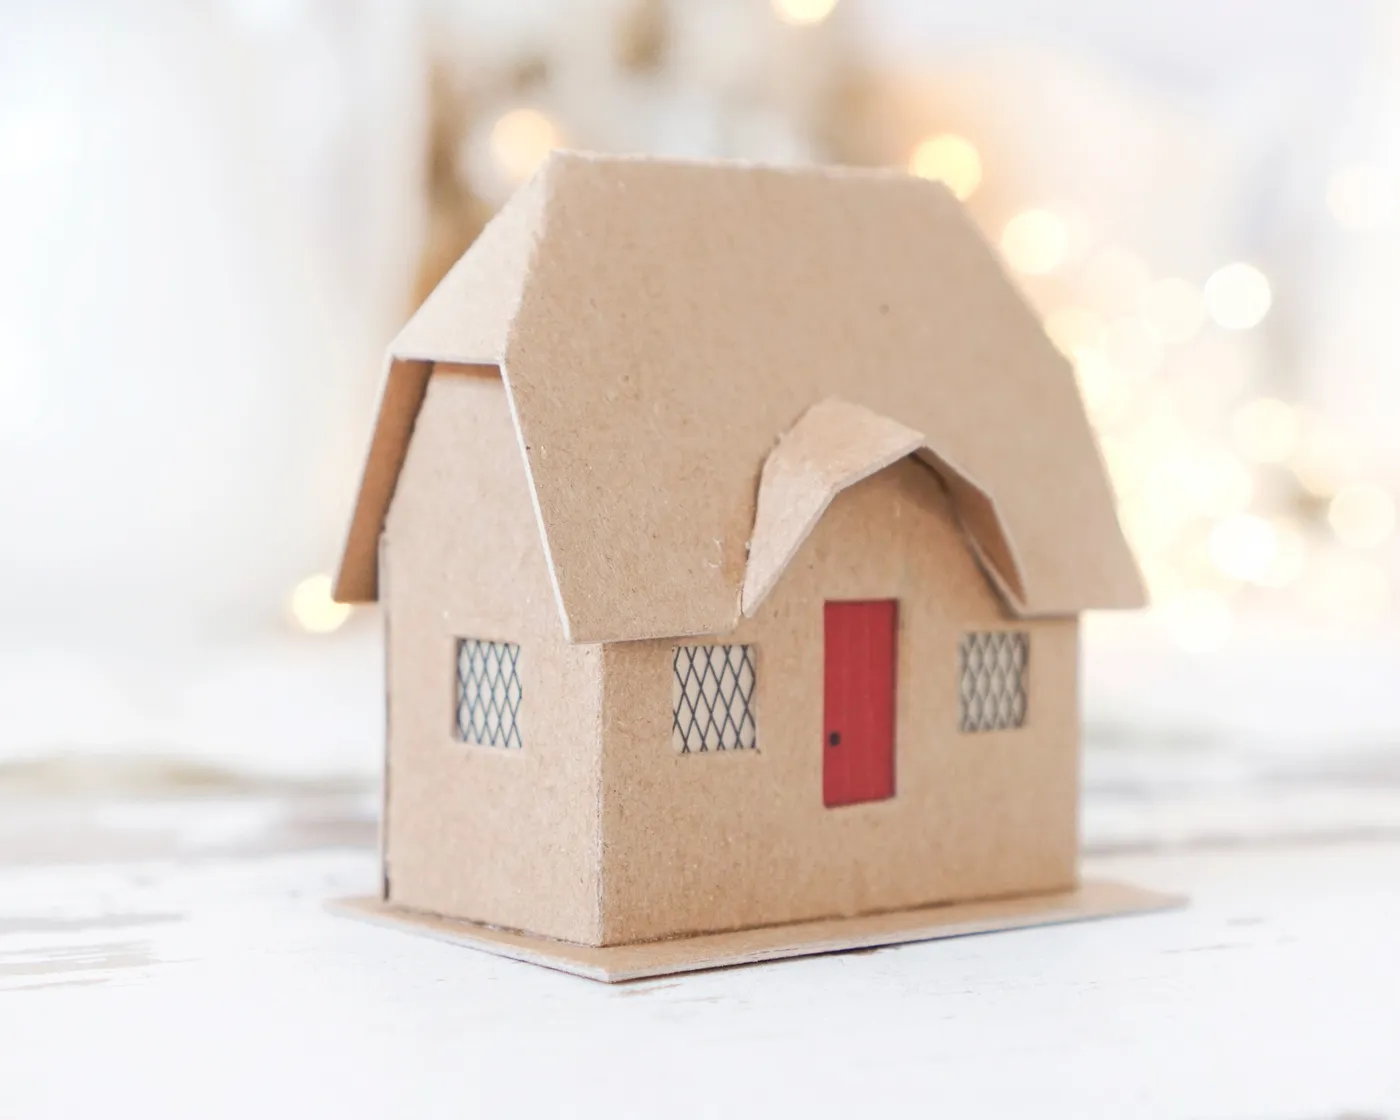
Start with a shipping box, not a craft-store blank. One medium box yields a house, a chimney, and enough scrap for grilles, and the cost is zero. Black cardstock strips or painted masking tape handle the window pattern; a red paint pen covers the door. Total spend: under $8 for paint and glue. Idea #1 shares this silhouette but lives or dies on the glow inside — this one is all about the facade.
7. Laser-Cut Cardboard Snowflakes on a Lit Tree
- Match your lights first: warm white keeps cardboard golden, cool white makes it look like packing material.
- Weigh one ornament — anything over 2 ounces needs a wire hook, not string.
- Count branch tips: roughly one ornament per 4 inches of branch reads full.
- Sand any charred laser-cut edges so soot doesn’t transfer to your fingers.
Ten minutes of prep saves an evening of re-hanging.
White snowflakes and brown cardboard share one quality — they’re both matte. That’s why this mix looks calm instead of busy even with a couple dozen pieces on the tree. The white bounces the string lights, the cardboard absorbs them, and the small silver baubles add the only true shine. Three textures, no competition.
8. Glitter-Dusted Cabin With Golden Windows
Glitter coverage is a two-step job, and the order matters: brush on a thin layer of craft glue, then press fine glitter into it over a tray so you can pour the excess back. Do the roof separately from the walls so the snow line stays crisp. Seal with matte acrylic spray — gloss turns a snowy roof into wet plastic. Buy twice the glitter you think you need; the first coat always eats more than expected.
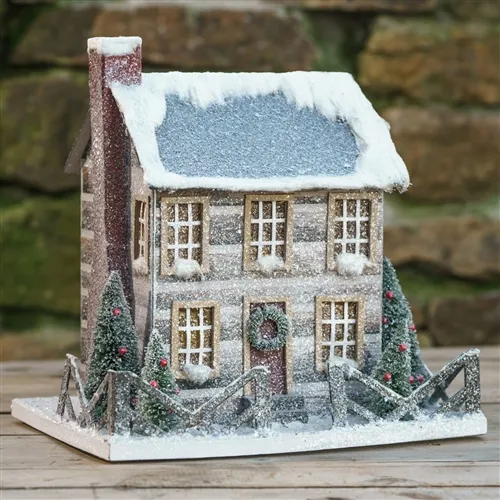
Plan on a yearly refresh. Glitter dulls, white turns cream, and the faux snow on the base compacts. Store the cabin in a rigid box with tissue, never a plastic bag — trapped moisture fogs glitter faster than dust does. If the finish looks tired, a light coat of matte sealer brings back most of the sparkle for around $8, which beats replacing a $40 decoration every other year.
9. Snow-Capped Cottage With Warm Lit Windows
The mix here is 60% weathered gray, 30% textured white, 10% warm glow. Gray siding is the base, snow is the accent — it covers the roof, chimney, and base but stops short of the walls — and the warm yellow windows are the final 10%, doing all the emotional work. Change the siding to deep green or barn red and the proportion still holds. Just never let the snow creep past 30% or the whole thing reads as a white blob.
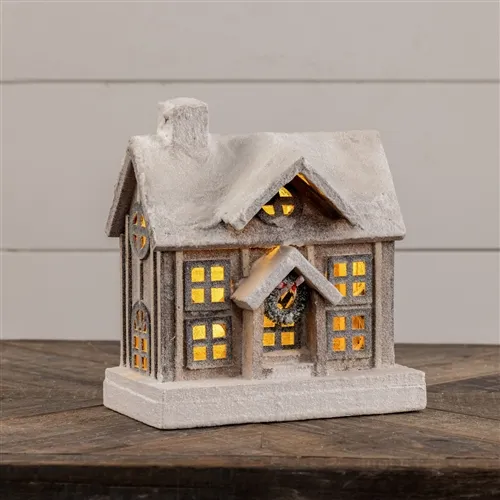
The texture of that snow is the thing. It’s not painted on and it’s not a dusting of glitter — it sits on the roof in visible ridges, so the cottage looks like it survived a real storm. Remove it and you have a very nice gray house. Keep it and you have a story. Flat, ordinary walls plus one element with actual physical texture: that’s the hierarchy worth stealing.
10. Pink-Windowed A-Frame With Bottle Brush Pines
Gold and silver bottle brush trees are everywhere right now, and the small ones run $2–$4 each at craft stores and dollar stores. The A-frame is the easy part: a cardstock template, a craft knife, a glue stick. Skip specialty glitter and use what’s already in your drawer. You can build this entire vignette for under $20, with colored vellum taped behind the cut-outs standing in for pink window panes.
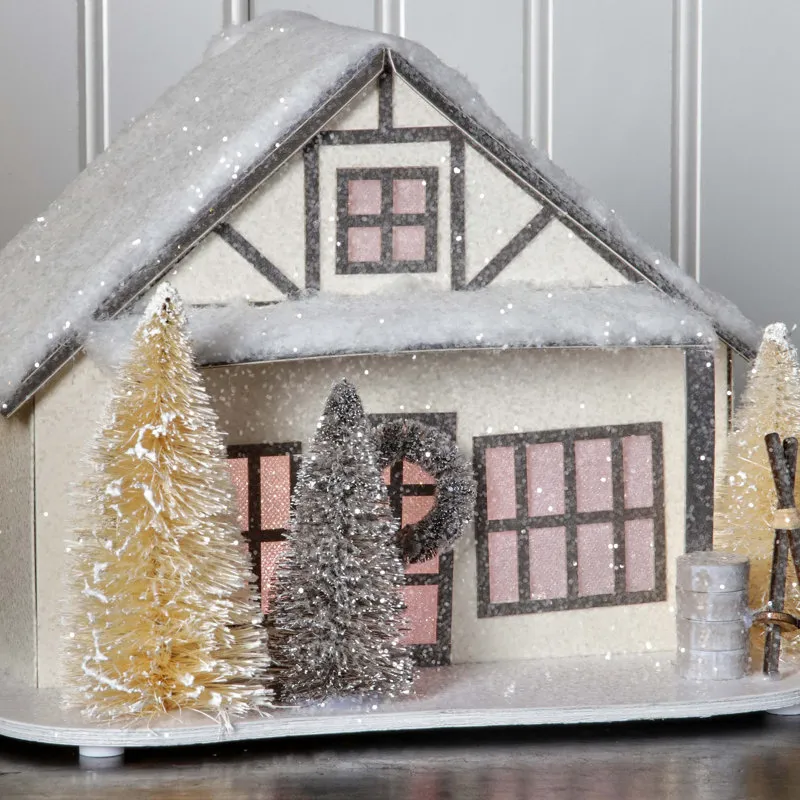
Pastel glitter is a lighting trap. Under a warm bulb it goes peachy and muddy; under cool light it snaps back to pink. Before you commit, hold the house under the actual lamp it will live near — this saves a lot of disappointment. Also, pale pink windows are lovely and completely invisible from across the room. Put this piece where people walk past it, not where they have to squint.
11. Marker-and-Glitter Cardboard Tree With a Gnome
- Paint the corrugated tree with two coats of matte white acrylic for a crisp writing surface.
- Let it cure overnight — paint pens skip and clog on fresh paint.
- Write your message slowly with a white oil-based paint pen, pressing firmly.
- Seal with matte spray so the lettering doesn’t smudge when it’s handled.
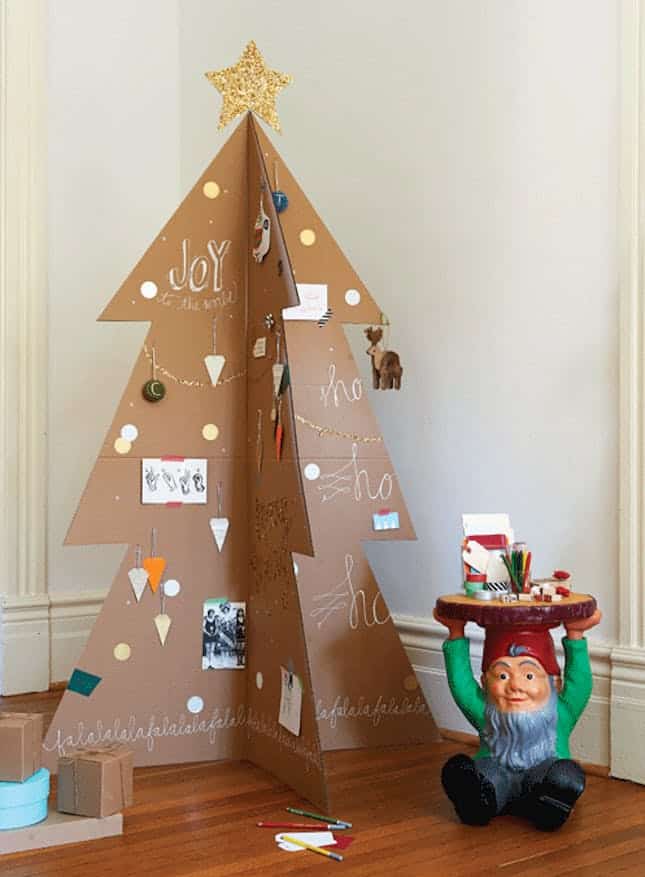
About 90 minutes plus drying time, and $12–$20 in supplies if you already have the cardboard.
2026 is the year the craft aisle won. Pinterest searches for handmade Christmas decorations keep climbing as people push back on identical store-bought trees, and the deliberately imperfect look — handwriting, visible corrugated edges, hot glue — has become a style in its own right. It’s the same energy as Idea #4, just scaled for a living room. Handmade doesn’t really go out of fashion.
12. Honeycomb Paper Ornaments in Jewel Tones
The folded honeycomb surface changes as you move, which is exactly what a tree full of flat baubles lacks. Deep blue, rose, and burgundy hold their own against dark green needles in a way pale pastels can’t, and the warm string lights pull the color forward. The texture is doing the work; the shapes stay traditional on purpose so the material gets to be the surprise.
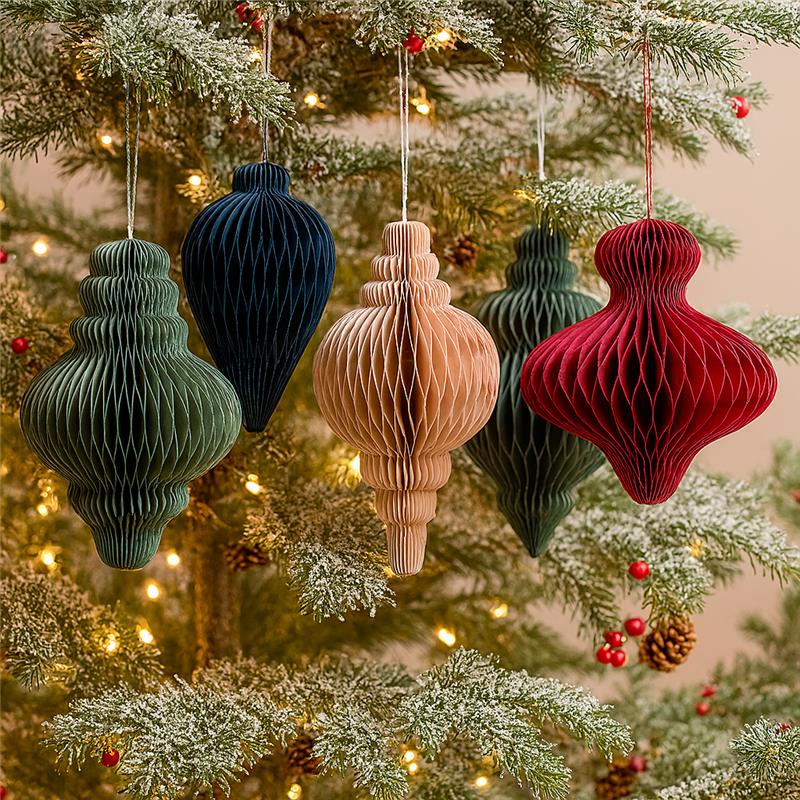
Honeycomb ornaments want to be big — 4 to 6 inches across on a standard 7.5-foot tree, or they disappear among the needles. On a tabletop tree under 4 feet, drop to 3-inch pieces. Space them at least 12 inches apart so the folds read individually, and use smaller rolled-paper pieces like Idea #29 as fillers between them.
13. Kraft Advent Bags Pegged in a Row
- 25 kraft paper bags, 5×7 inch: $9–$15
- Black markers or number stamps: $6–$14
- Gold glitter washi tape: $5–$8
- Jute twine and mini pegs: $6–$10
- Fir sprigs and small tags: $0–$6
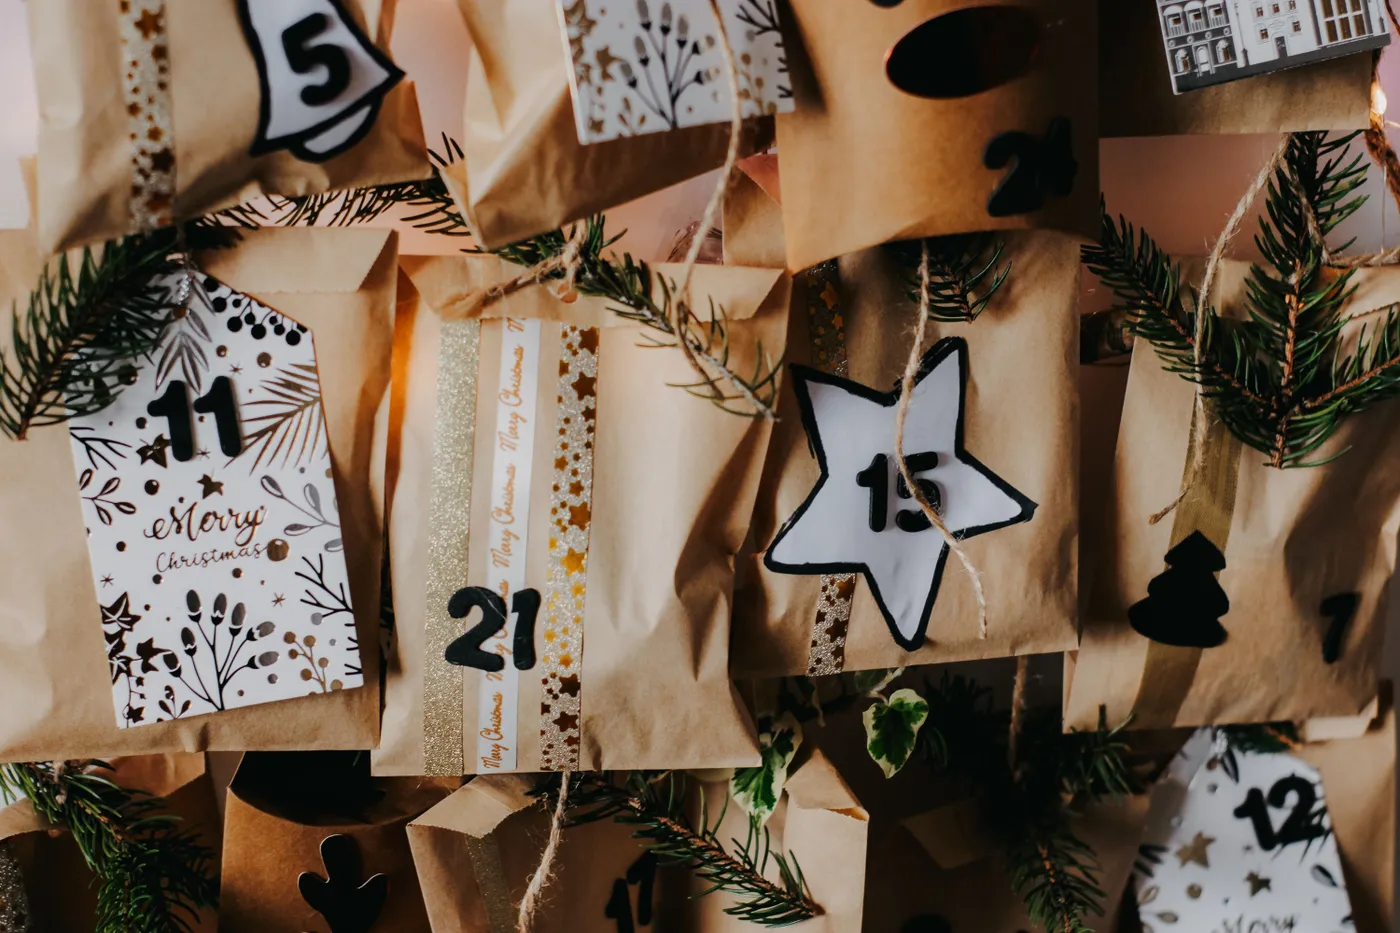
Total: about $30–$50 for the whole calendar. A cheaper route is cutting tags from last year’s cards and skipping the stamps entirely — a steady hand and a fine-tip marker look just as good.
Uniformity is what makes a bag grid look intentional. Fold the top of each bag down exactly 1 inch, punch the peg hole 1/2 inch below the fold and dead center, then hang on 6-inch centers. Number them with a stencil rather than freehand, and tuck the fir sprig into the fold instead of gluing it so you can swap wilted greens mid-month.
14. Two Cardboard Figures Exchanging a Glitter Gift
The red glitter gift with the gold ribbon is the entire story. Take it away and you have two boxy figures on a table; keep it and you have a small scene about giving. Notice the gesture too — the larger figure leans in, arm extended, while the smaller one waits. That’s blocking, and it’s what separates a decoration from a diorama. Build the figures simply and spend your detail budget on the object passing between them.

Scale decides whether this reads as charming or unsettling. Under about 8 inches tall, boxy figures start looking like something from a horror film; at 10–14 inches, with simple features, they read as characters. Keep them at eye level or slightly below, never looming down from a high shelf, and light them from the front. Backlighting a cardboard silhouette is a bad idea at any size.
15. Two-Story Log Cabin Glowing Orange
- Measure shelf depth — allow 2 inches behind the cabin for a cord or battery pack.
- Confirm the light source; battery-operated means no outlet and total placement freedom.
- Check bulb temperature. Warm orange flatters faux snow, cool white turns it gray.
- Leave room for the bottle brush trees — a 12-inch vignette needs 20 inches of shelf.
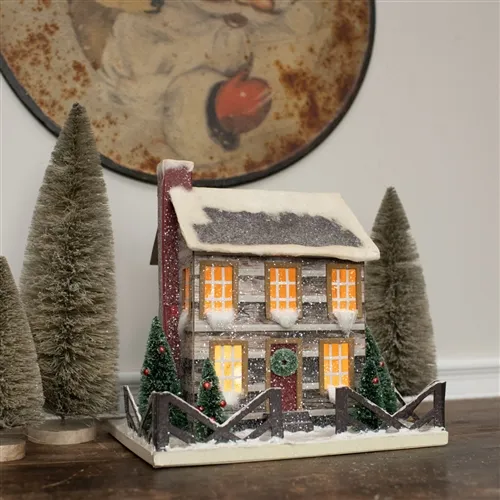
This is a console piece, not a mantel piece. Give it 20–24 inches of width and 14 inches of depth, and keep the base about 30 inches off the floor so the lit windows land near seated eye level. In a narrow entry, use the cabin alone without the flanking trees. Compare with Idea #9 — same cottage idea, single story, built for a much smaller shelf.
16. Buffalo Check Bow on a Corrugated Ornament
The frame is the trick: 3/8-inch braided cotton rope, coiled and glued edge to edge around a cardboard disc, gives you a soft white ring that looks far more expensive than it is. Glue the rope in one continuous spiral rather than separate loops so there are no visible seams. Then build inward — pine, pinecone, berries, paper cutout — each layer smaller than the last. About 20 minutes per ornament once you find the rhythm.
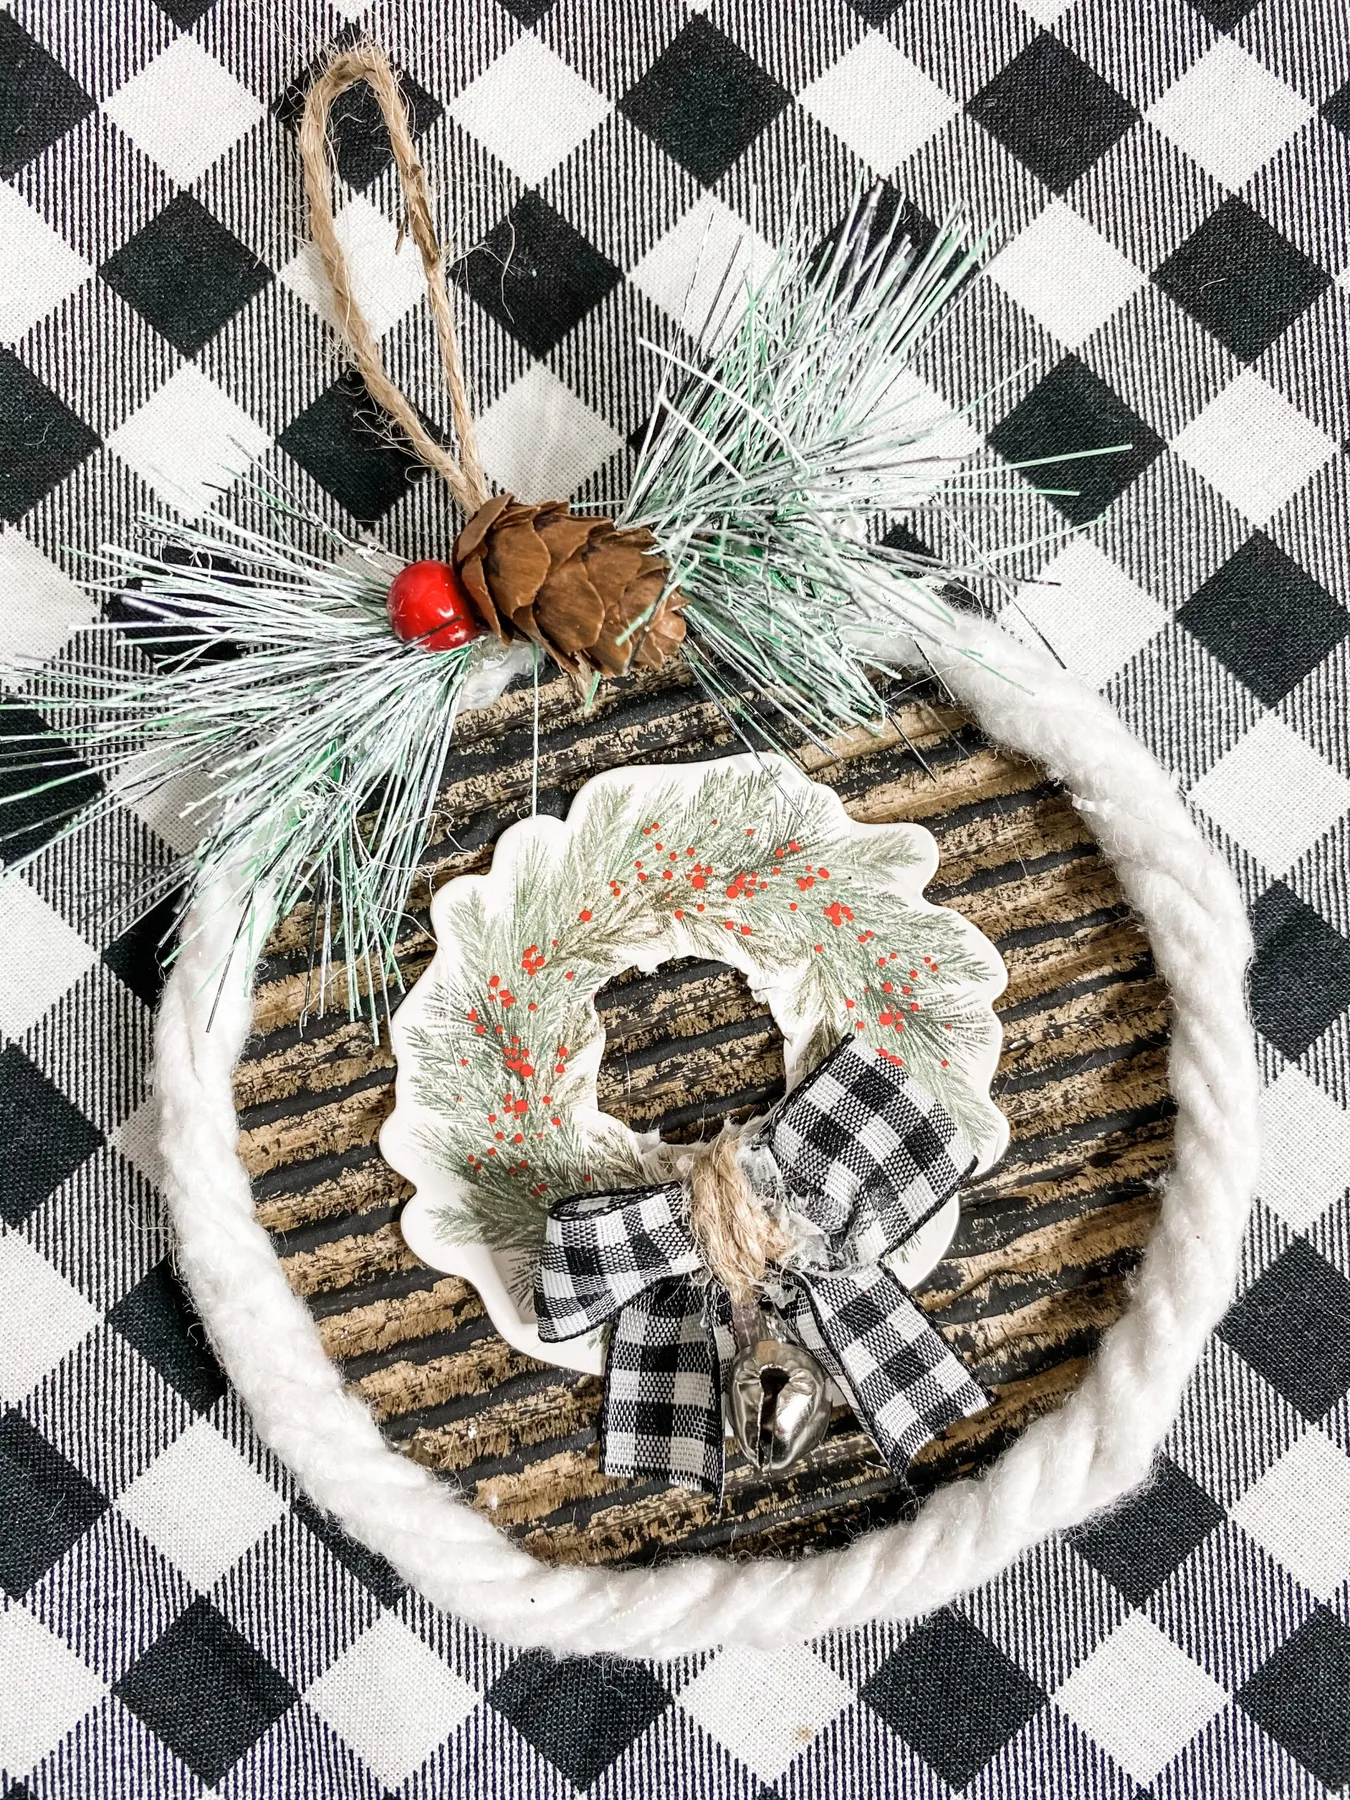
Faux pine needles shed for the first week and then mostly stop, so give each ornament a shake over the trash before it goes on the tree. Dust settles into corrugated flutes and rope braid, so plan on a soft brush or a hair dryer on cool about once a season. Store in a divided box rather than a bin — the rope frame crushes and the berries dent under anything heavy.
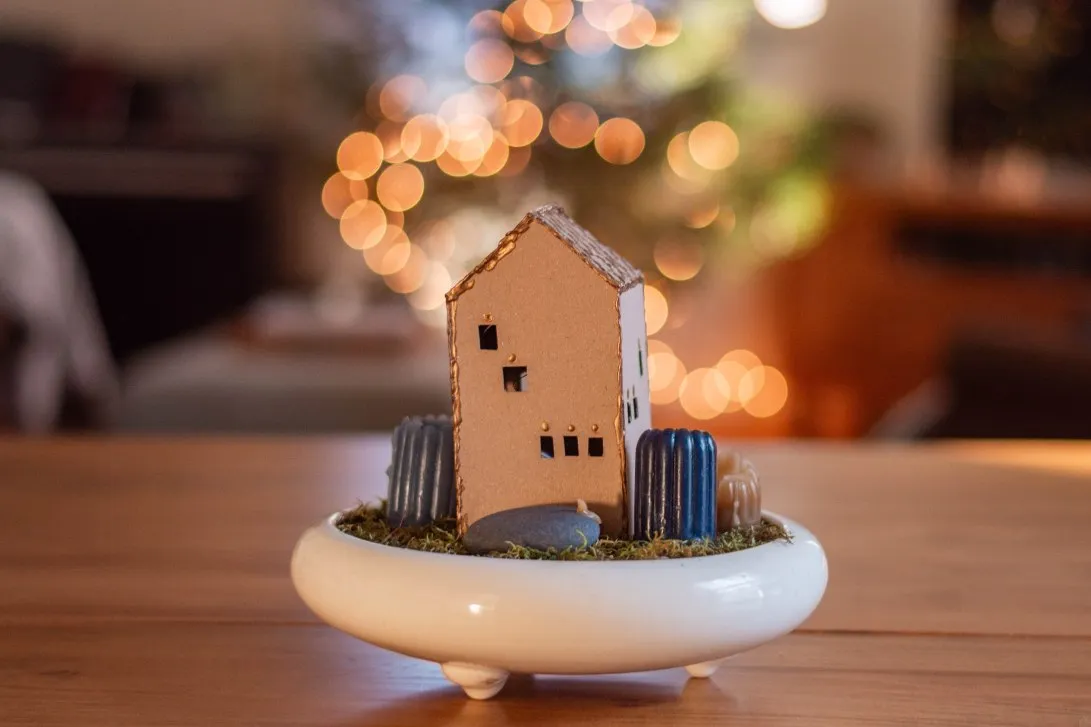
17. Glitter Blue House Perched on a Book
Thrift stores sell hardcovers for a dollar, and a stack of three makes an instant pedestal with zero craft skills required. For the house, dollar-store village blanks and last year’s clearance miniatures both take glitter beautifully over a coat of white glue. Total for the whole vignette: $15–$25. If the blue feels too specific, paint the roof red and the walls cream and you land on Idea #8‘s palette for the same money.
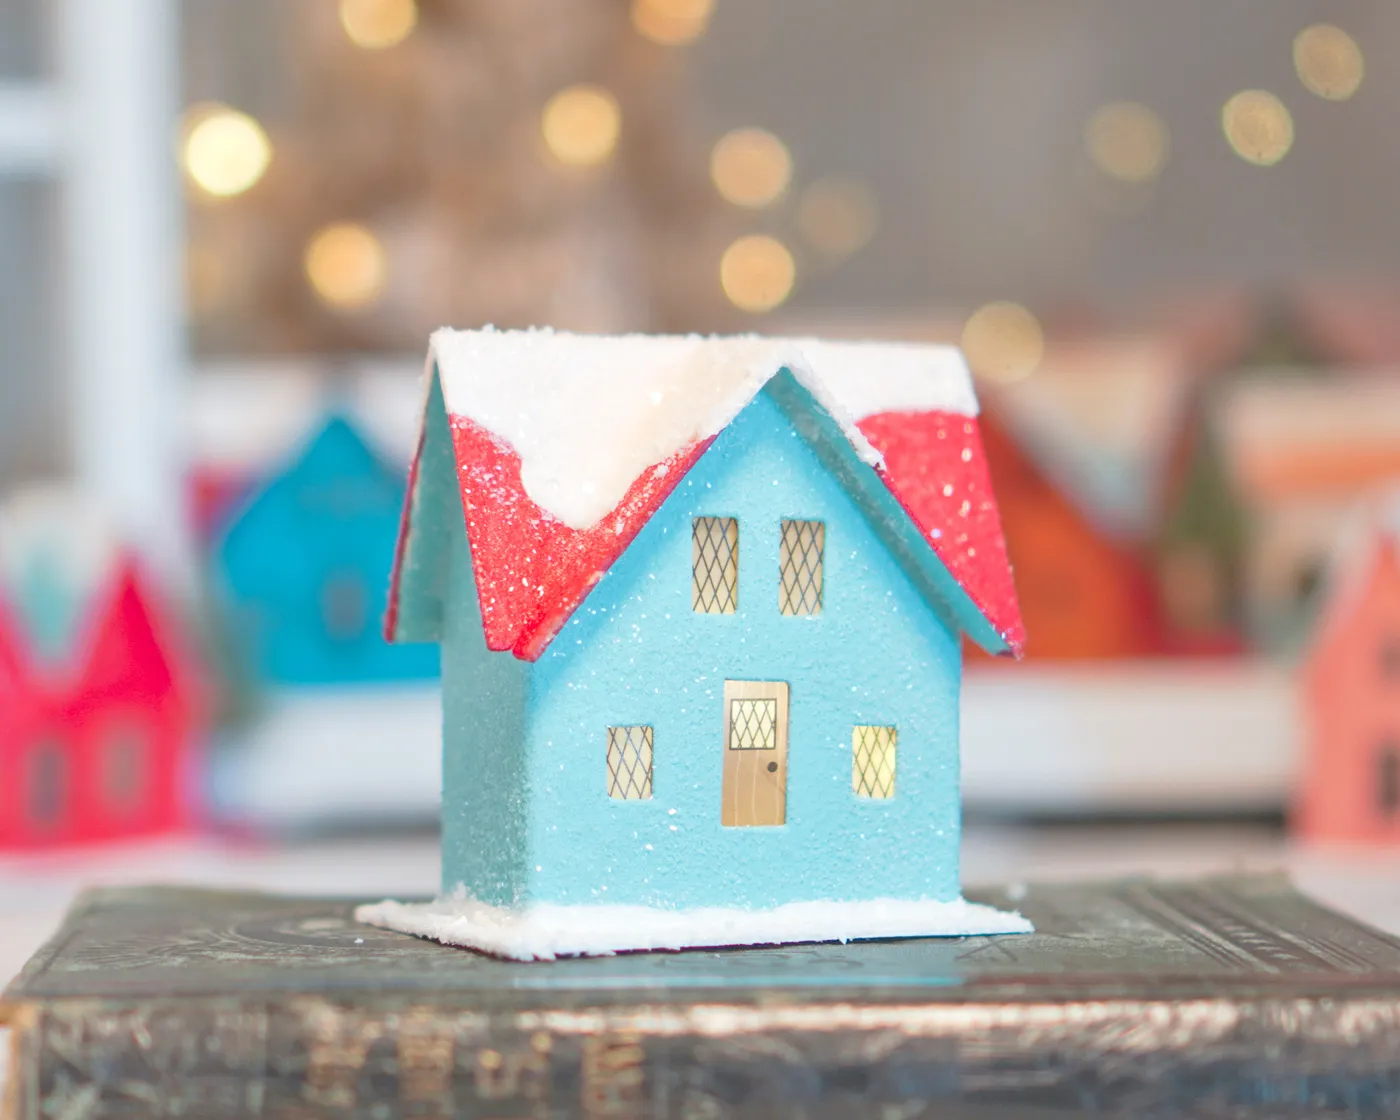
- Choose three hardcovers in descending size and remove the dust jackets.
- Stack them, offsetting each by an inch for a stepped silhouette.
- Glue the stack together and let it cure for two hours.
- Set the house on top, centered, over a small square of felt.
Roughly 25 minutes of hands-on work and no power tools.
18. Accordion-Folded Red Tree You Can Hold
This shape works at three sizes and each one has a job. At 4–6 inches it’s a place card or a gift topper. At 10–12 inches it’s a shelf piece. At 3 feet and up it becomes a wall display that beats garland. Whatever the size, keep the fold count proportional — roughly one fold per half inch of width, or the tiers go chunky and you lose that scalloped edge.
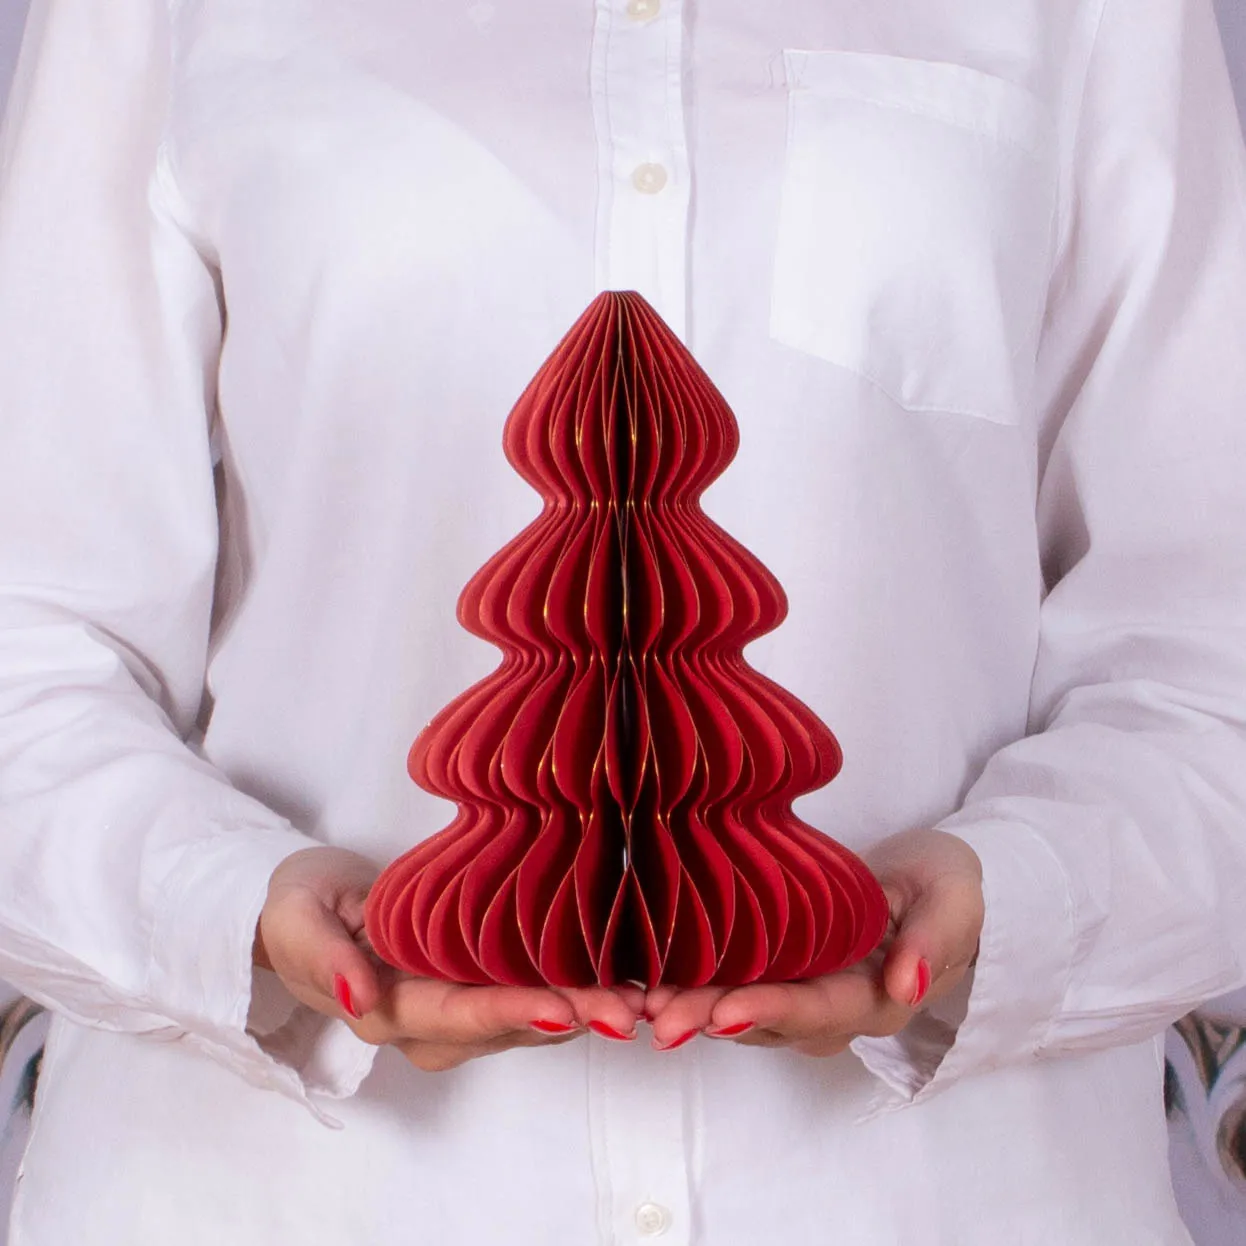
- Deep red cardstock or heavy wrapping paper: $8–$14
- Bone folder or scoring tool: $6–$10, once and forever
- Glue stick and double-sided tape: $5–$8
- Gold-edged paper for interior accents: $4–$8
Total: $23–$40, enough material for a dozen. Score first, fold second — skip the scoring and the creases crack. The same accordion method builds the patterned spheres in Idea #33.
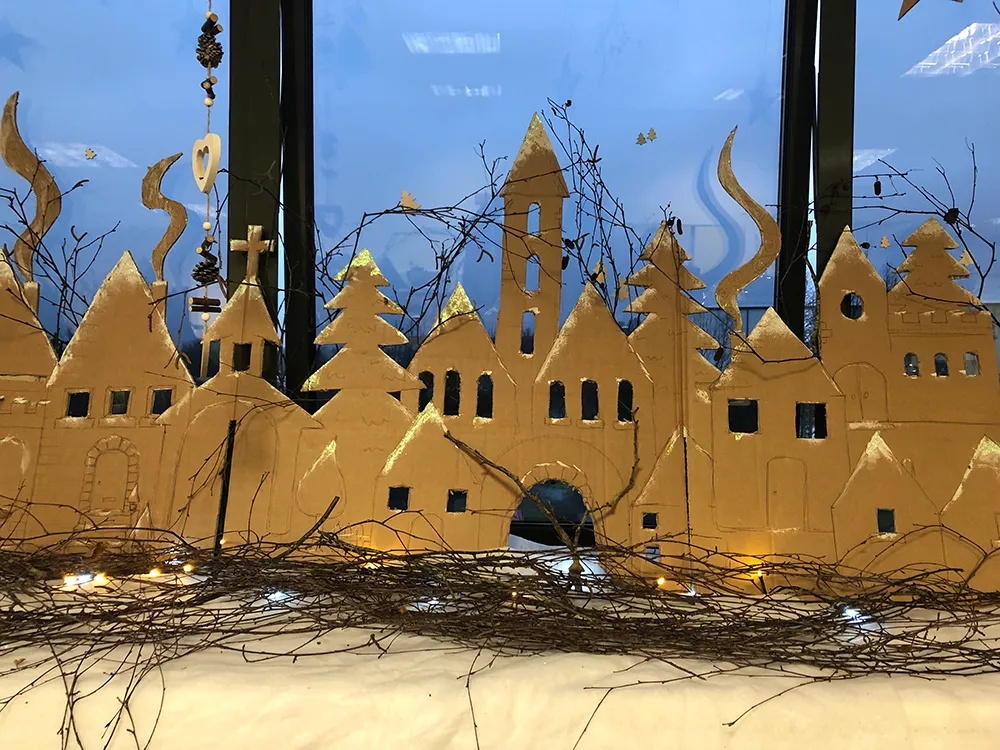
19. Cardboard Village Under an Industrial Sconce
Cardboard is a texture, not just a material, and this display proves it. The brass-necked sconce throws light sideways across the village, so every cut edge and raw flute casts a small shadow — the buildings look carved rather than cut. Grouping them at three different heights on the distressed dresser keeps the eye moving. Swap in flat overhead light and the same buildings go dead.
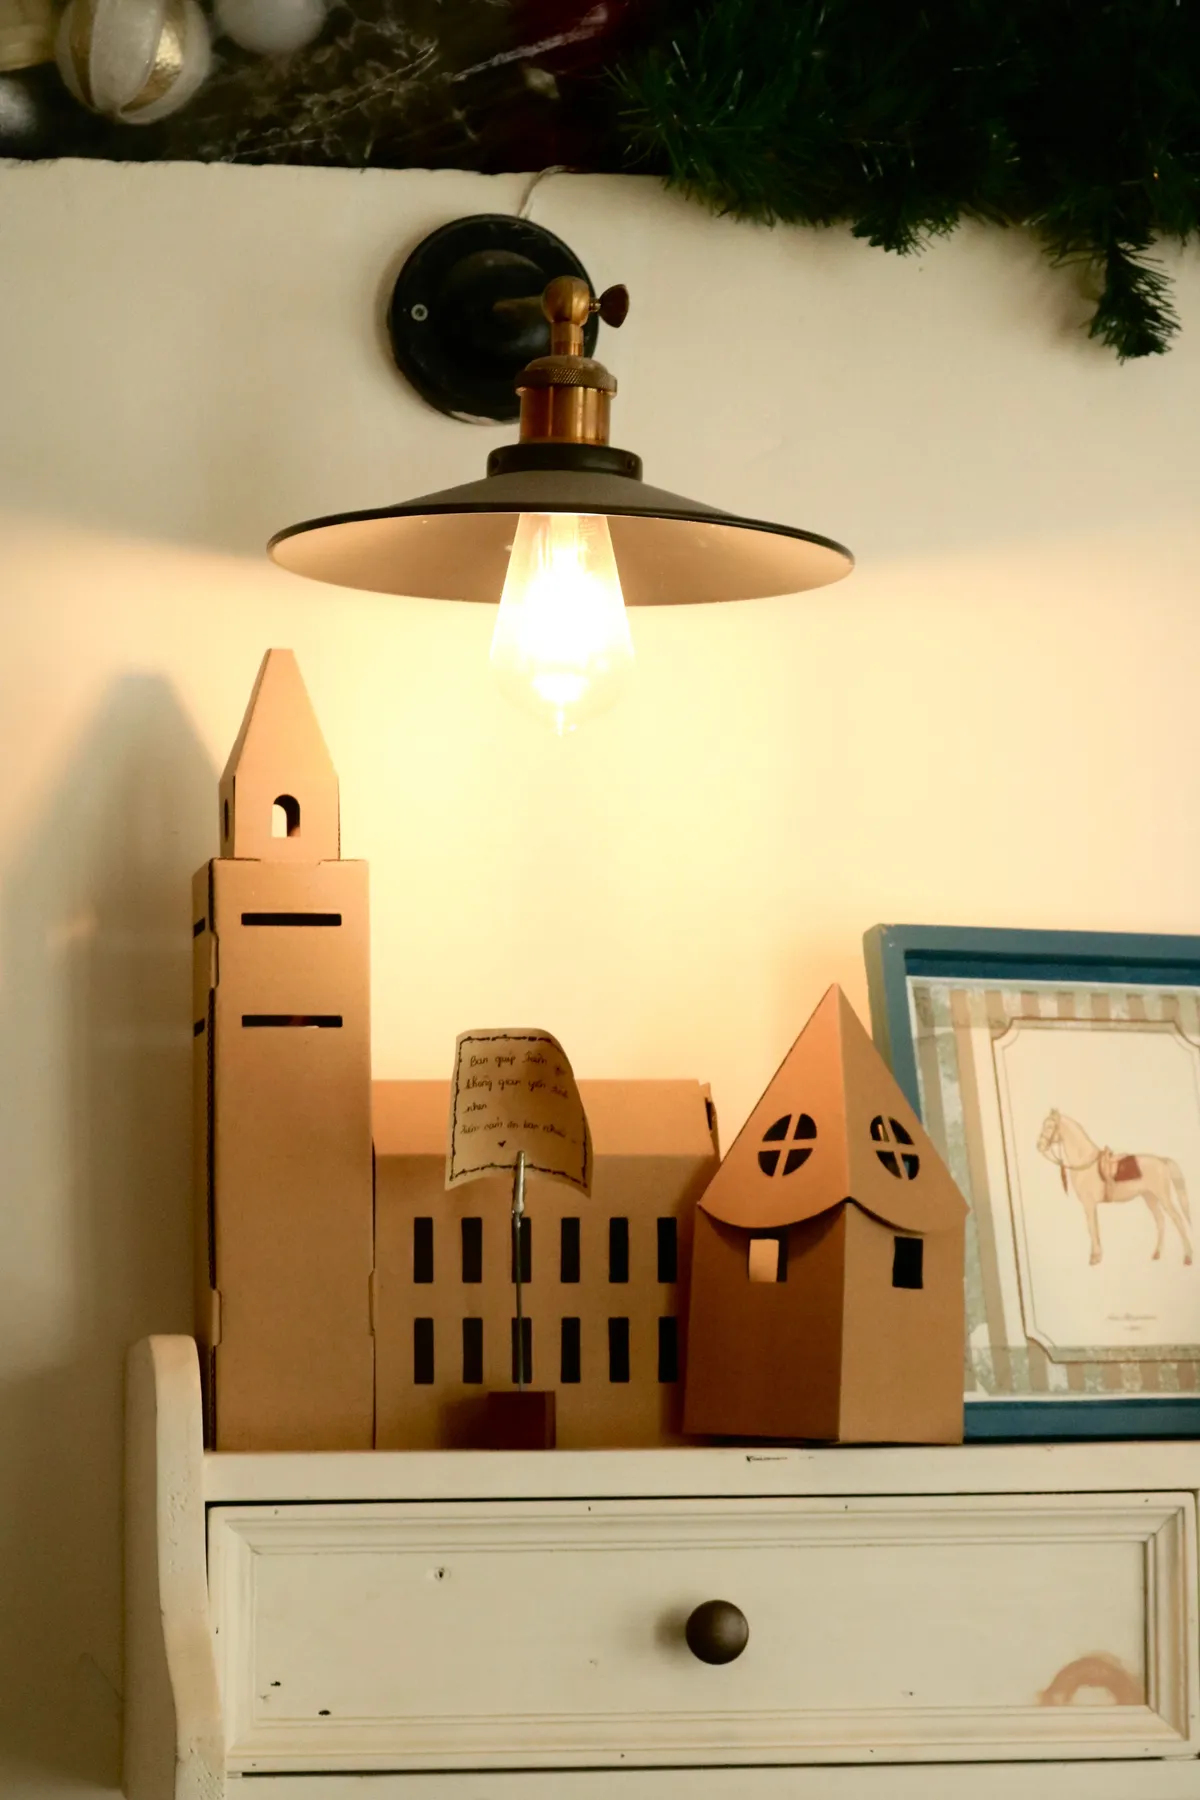
The sconce is the whole effect. Without it, this is a row of brown boxes on a white dresser. With it, the village has a sky. If you can’t hardwire a wall light, a plug-in sconce with a warm Edison bulb gets you 90% of the way for around $40, and a clip-on picture light will do in a pinch. Aim the bulb slightly down and to the side, never straight at the buildings.
20. Red Paper Ornaments on Bare Branches Above Firewood
Branches plus a fireplace is a fire-safety conversation, not a styling one. Keep any arrangement of dry branches at least 3 feet from an open flame or a working wood stove, and further if the chimney drafts hard. If your fireplace is decorative only, carry on. If it’s functional, move the branches to the far end of the room and let the stacked firewood carry the cozy work alone — the look in Idea #19 gets you that warmth with no tinder involved.
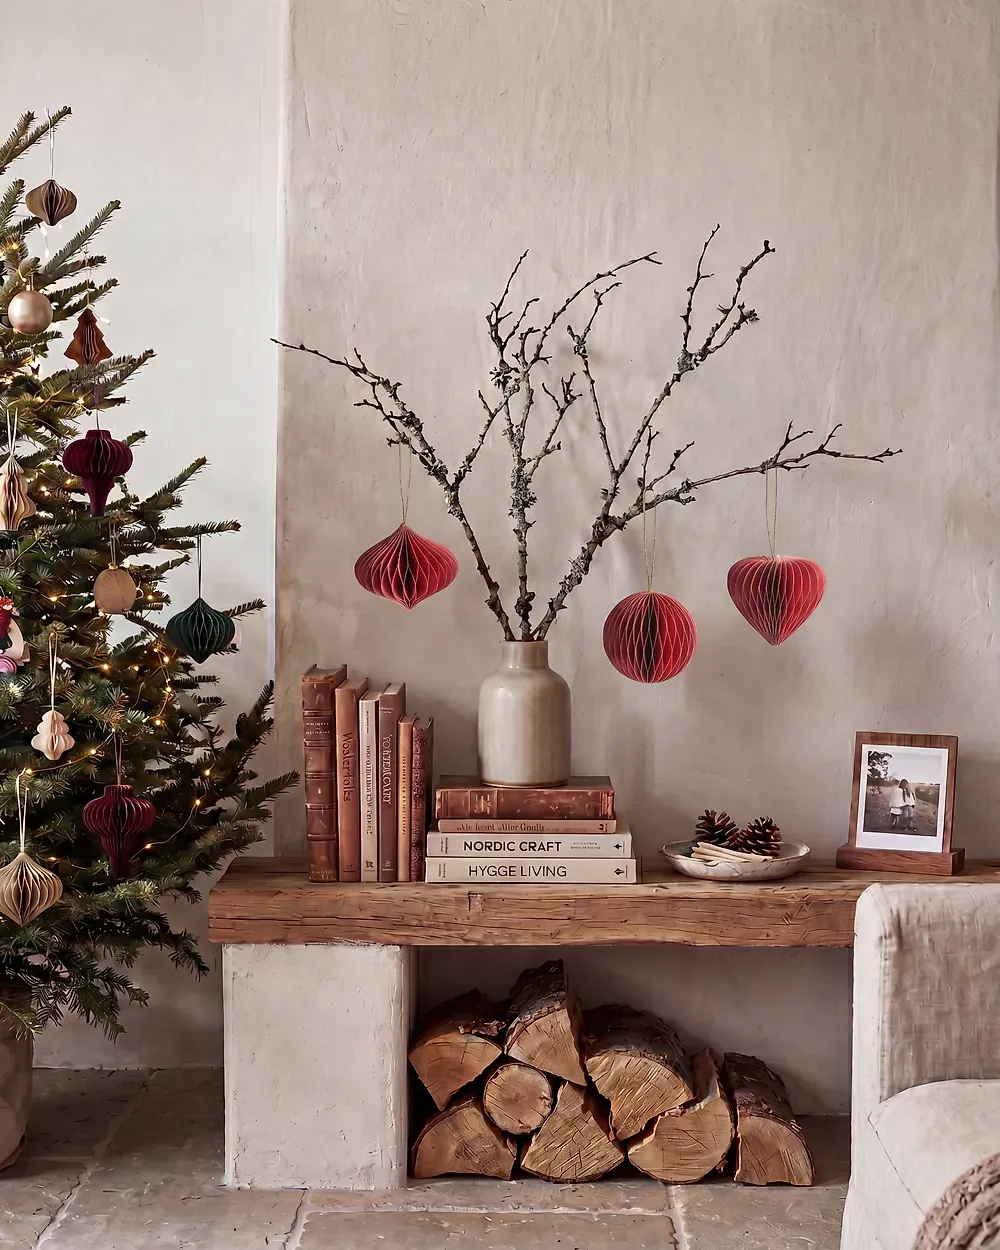
Everything here is either free or thrifted. Bare branches come from the yard after a windstorm — spray them with matte sealer so they don’t drop bark indoors. The deep red ornaments are folded paper at about 15 cents apiece, and vintage books run $1–$3 at library sales. Realistic total: $10.
21. Felted Snowmen on a Bare White Branch Tree
- Find a straight branch with good side twigs and trim it to 30 inches.
- Scrub with a damp cloth, dry fully, then spray two coats of matte white.
- Set the branch in plaster of Paris inside a weighted pot and cure one hour.
- Hang the snowmen from the thinnest twigs using striped string.
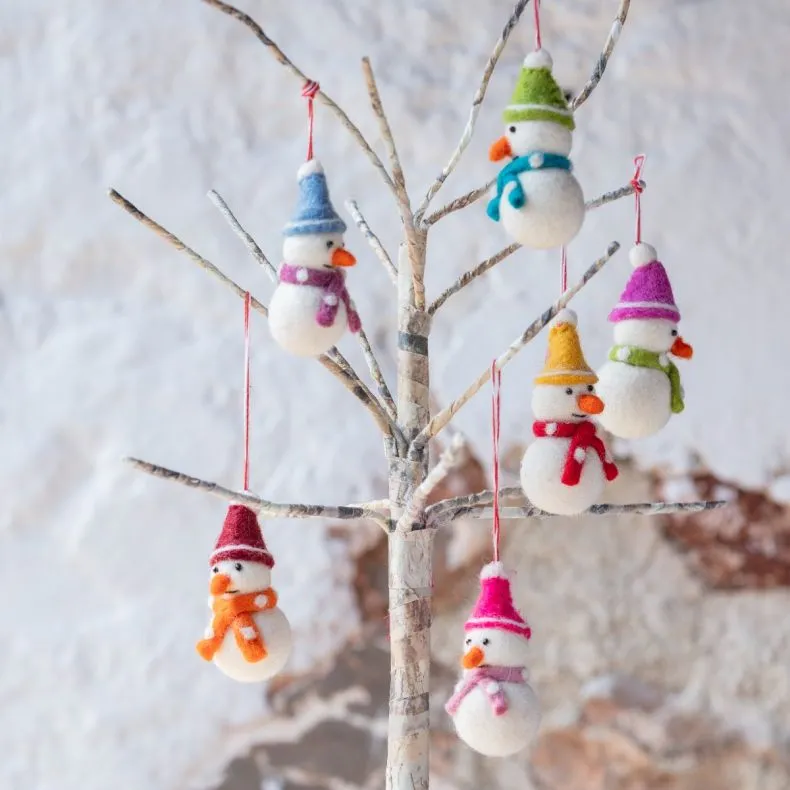
About two hours and $15, mostly paint and plaster. Keep the ornaments under an ounce or the twigs droop by New Year’s.
Soft, tactile ornaments are having a moment as people tire of plastic baubles. Felted snowmen fit that shift perfectly: quiet, non-reflective, and handmade-looking even when they aren’t. Pairing them with a bare white branch tree — no needles, no lights, no tinsel — is the 2026 take on a minimalist tree, and it has staying power because it stores flat and sets up in ten minutes.
22. Candy Cane Stripes on a Golden Cord
One motif, repeated, beats five motifs fighting each other. If you commit to stripes, commit — every ornament in the same red-and-white, in three sizes (2, 3, and 4 inches), hung on the same gold cord. Odd counts and varied sizes keep it from looking like a store display. Twelve striped ornaments on a 6-foot tree, clustered in threes, will out-style sixty random baubles.
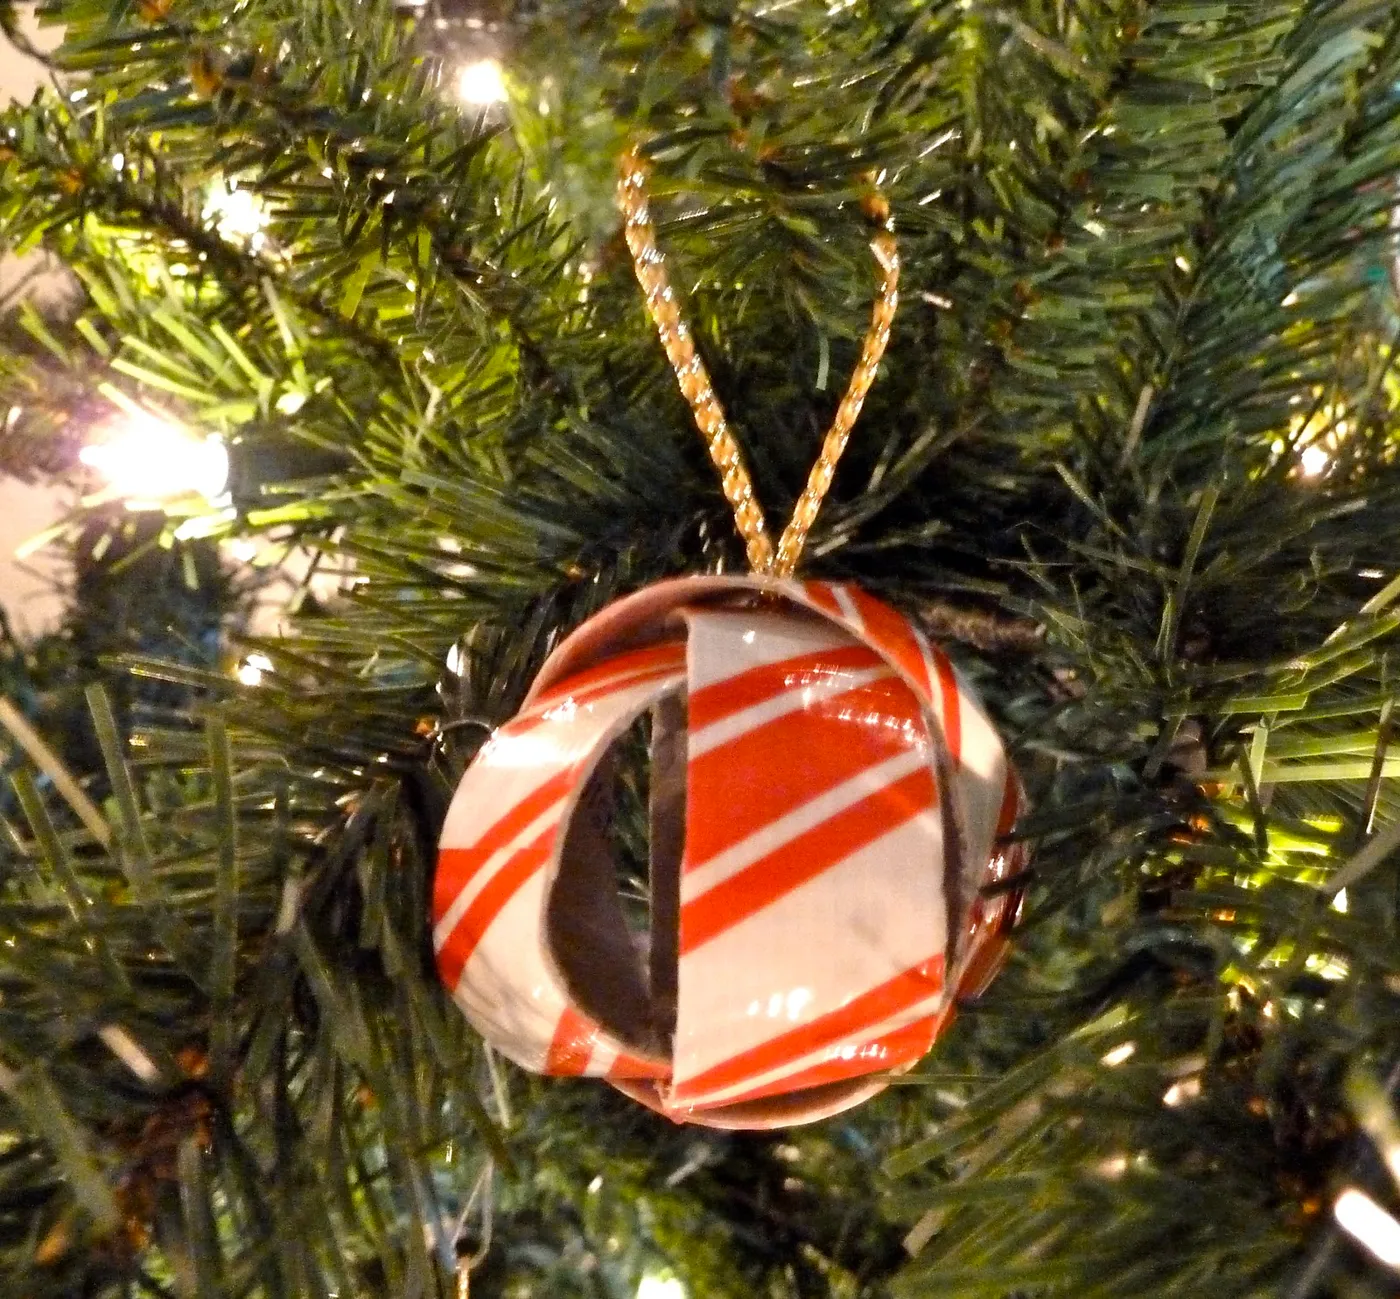
Here’s the ratio: 80% green tree, 15% red and white, 5% gold. The tree does most of the visual work by default, so the ornament color only needs a sliver of your attention — which is why one strong pattern reads as elegant rather than sparse. Swap the gold cord for silver and the stripes for deep green and the math still holds. Change the 80% and everything falls apart.
23. Kraft Gingerbread House Boxes With Icing Details
- If these will hold food, use food-safe boxes and food-safe icing, or skip the piping entirely.
- Test your icing pen on scrap cardboard — thin lines bleed into the flutes.
- Give piped designs a full 24 hours to set before stacking or wrapping.
- Keep ribbons and twine clear of the icing line so nothing smears in transit.
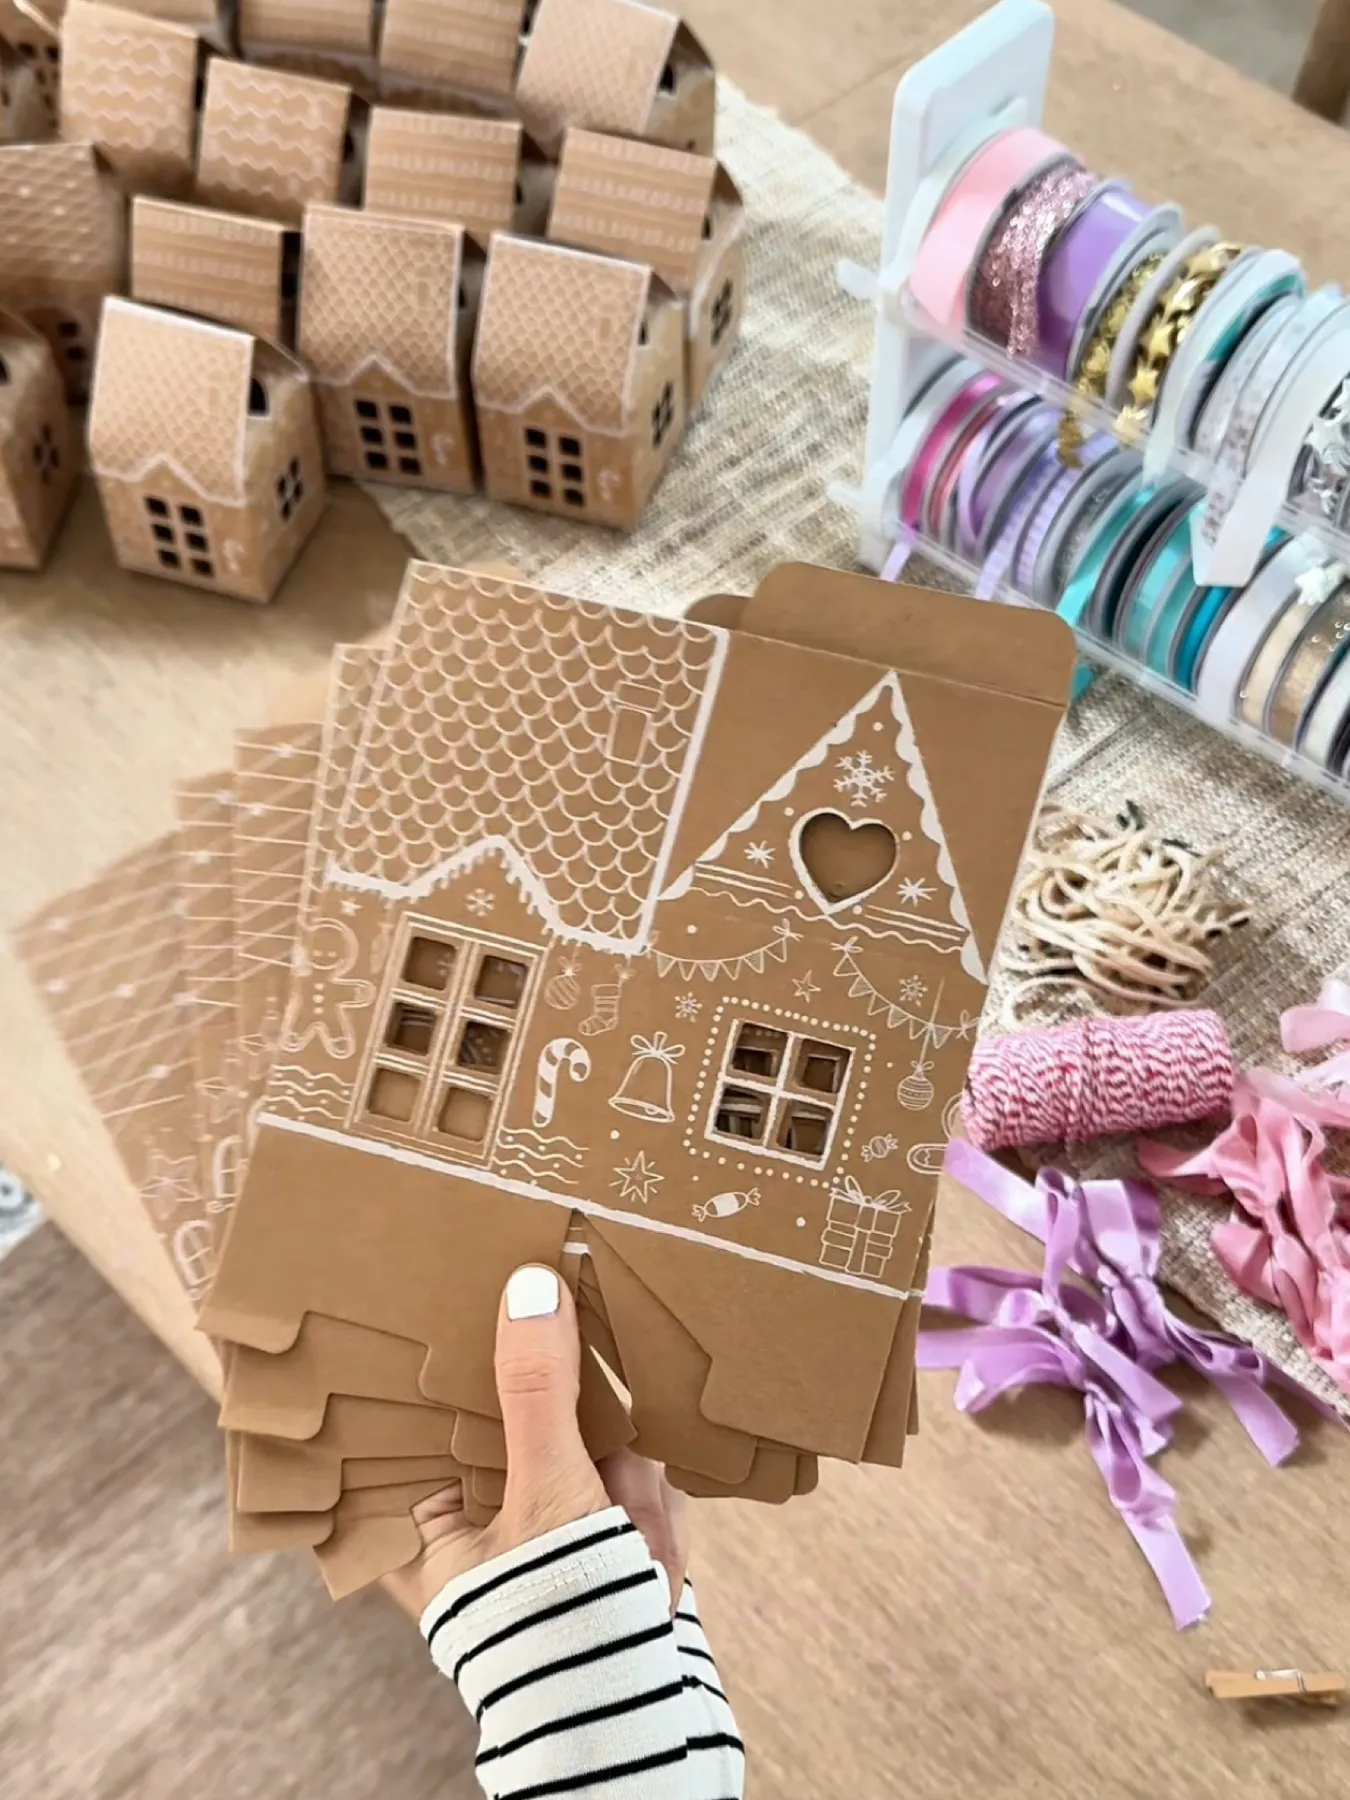
- Assemble the kraft house boxes and let the seams set flat.
- Fill a squeeze bottle with thick white icing or dimensional paint.
- Outline the roofline first, then add scallops, dots, and window frames.
- Add a single ribbon and tag — resist the urge to add more.
Roughly 10 minutes per box once the icing is loaded, and about $2 in supplies each.
24. Cardboard Angels and Snowflakes on a Green Tree
Shape variety carries this tree. Stars, snowflakes, and layered angels all read as silhouettes first and details second, so a mix of them feels curated rather than random. Natural brown against green is a pairing that shouldn’t work and does — same logic as kraft paper under a green ribbon. Small hits of glitter on a few pieces give the eye somewhere to land without committing to a theme.
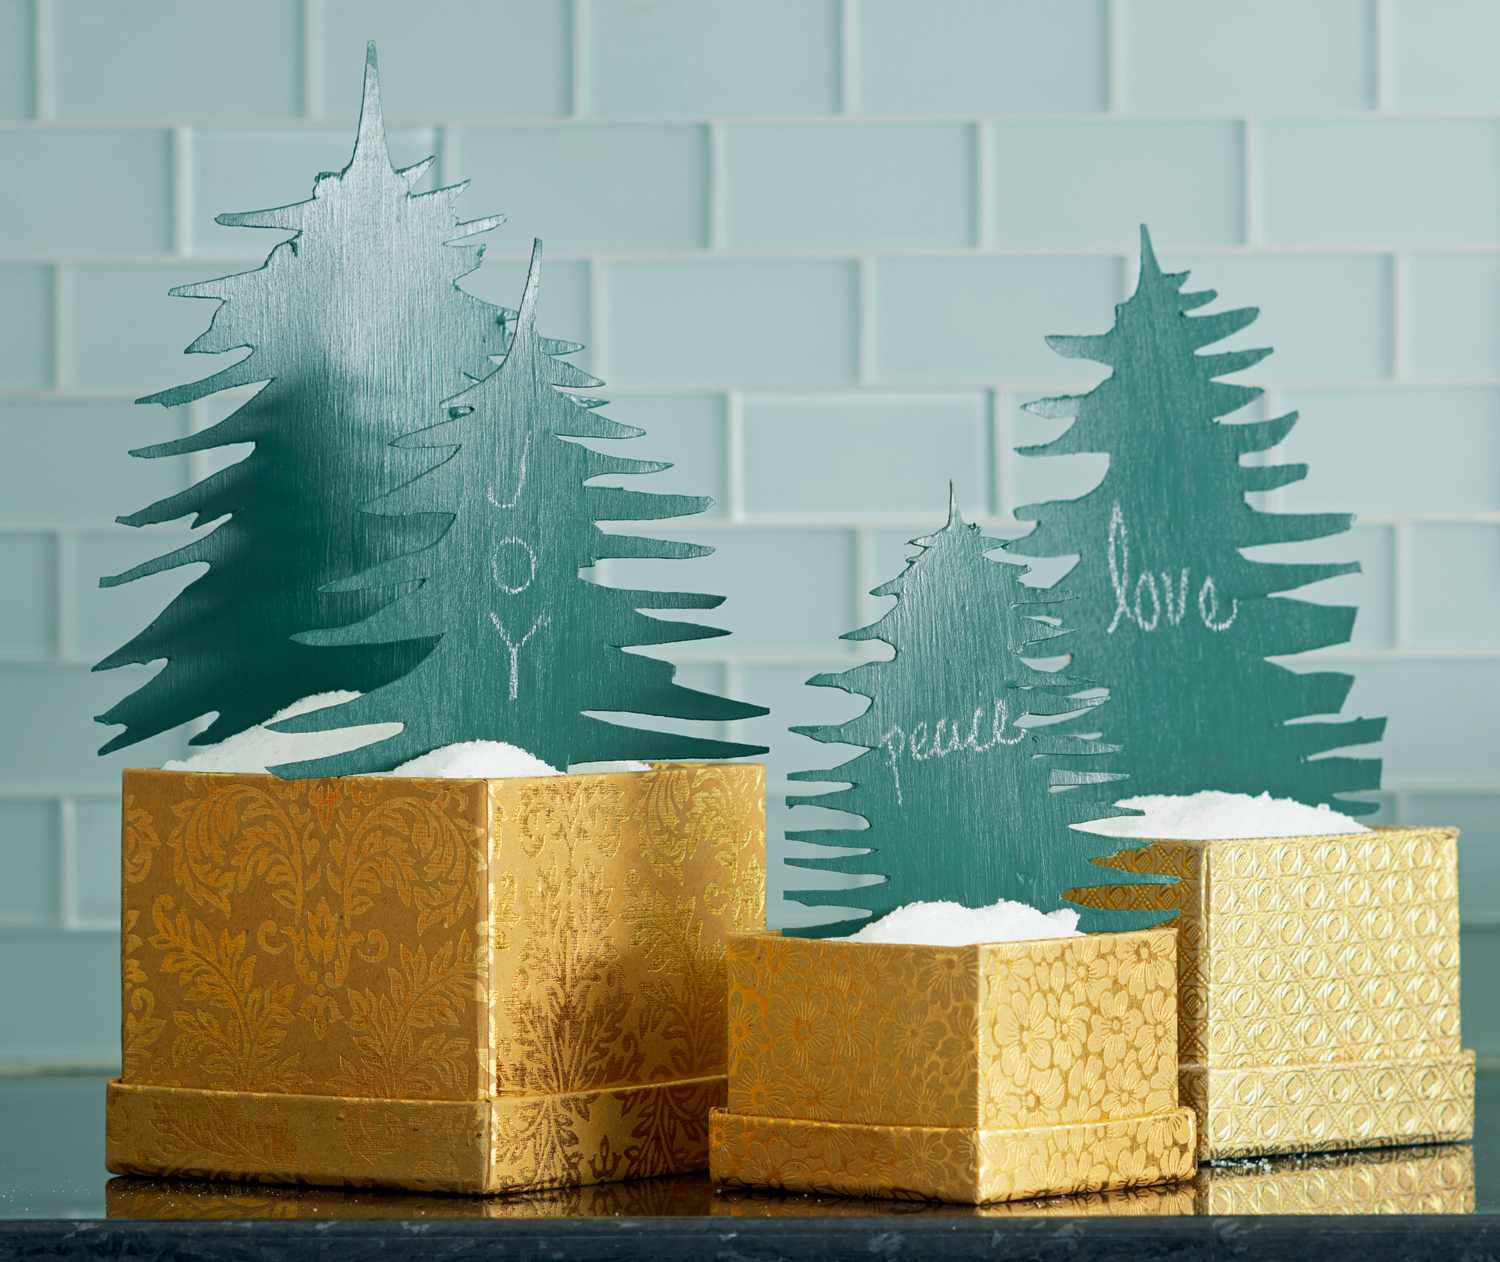
On a 7.5-foot tree, budget 60 to 80 ornaments and make a third of them the big shapes — 5 to 7 inches for the angels and stars. Snowflakes at 3 to 4 inches fill the gaps. On a 4-foot tabletop tree, halve everything and cut the count to 25. Too many large pieces and the branches sag; too many small ones and it looks bare from across the room.
25. Twine Clothesline of Red Hearts and Wooden Cutouts
This display is easy to live with until it isn’t. Jute twine stretches over a season, so plan on re-tensioning once in December. Fabric hearts hold dust and fade in direct sun — keep them off a south-facing wall. Wooden cutouts are nearly indestructible, which makes them the smart base layer. Store the whole line in a shoebox with the hearts laid flat so they don’t crease.
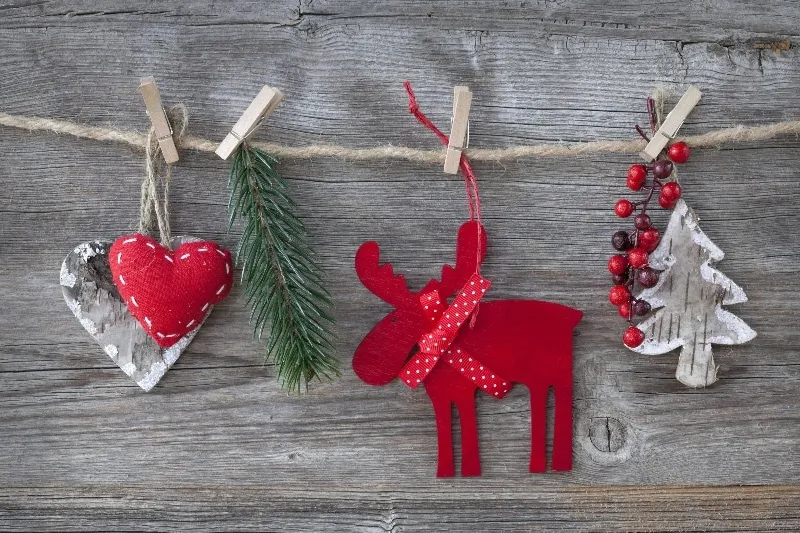
Thrift stores and craft-store clearance bins are full of wooden cutouts for under a dollar each, and red felt squares cost pennies. Clothespins from the junk drawer, twine from the garage, a branch from the yard. If you want that weathered-wood backdrop, a $12 chalk-paint sample pot on scrap plywood gets close. Realistically the whole wall comes together for $15–$20 and an afternoon.
26. Egg Carton Tree With Gold Bows
The stacked carton texture is the entire trick — hundreds of small green cups catching light and shadow, reading as foliage from six feet away and as painted egg cartons up close. Gold glitter bows are the punctuation, and the patterned topper finishes the silhouette. Without that topper, the cone has no endpoint and the eye slides right off the top. One sphere is what makes it a tree instead of a pile.
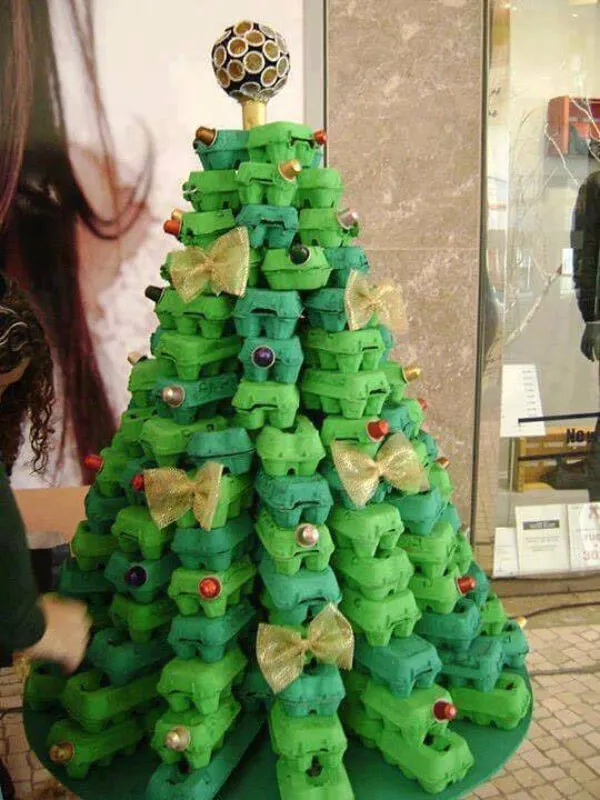
This one needs an internal structure. Stacked cartons are surprisingly heavy, and a freestanding cone will lean by week two — build around a foam or chicken-wire cone and glue each layer. Painted cardboard near heat is a genuine concern, so keep it away from radiators and real candles. It’s dusty by nature, too; a canned-air pass once a season keeps it from looking fuzzy.
27. Craft Stick Tree Wrapped in Chunky Yarn
- Jumbo craft sticks: $3–$5
- Chunky variegated green yarn: $6–$10
- Red and white baker’s twine: $4–$6
- Assorted buttons: $3–$6
- Silver tinsel topper and glue: $4–$7
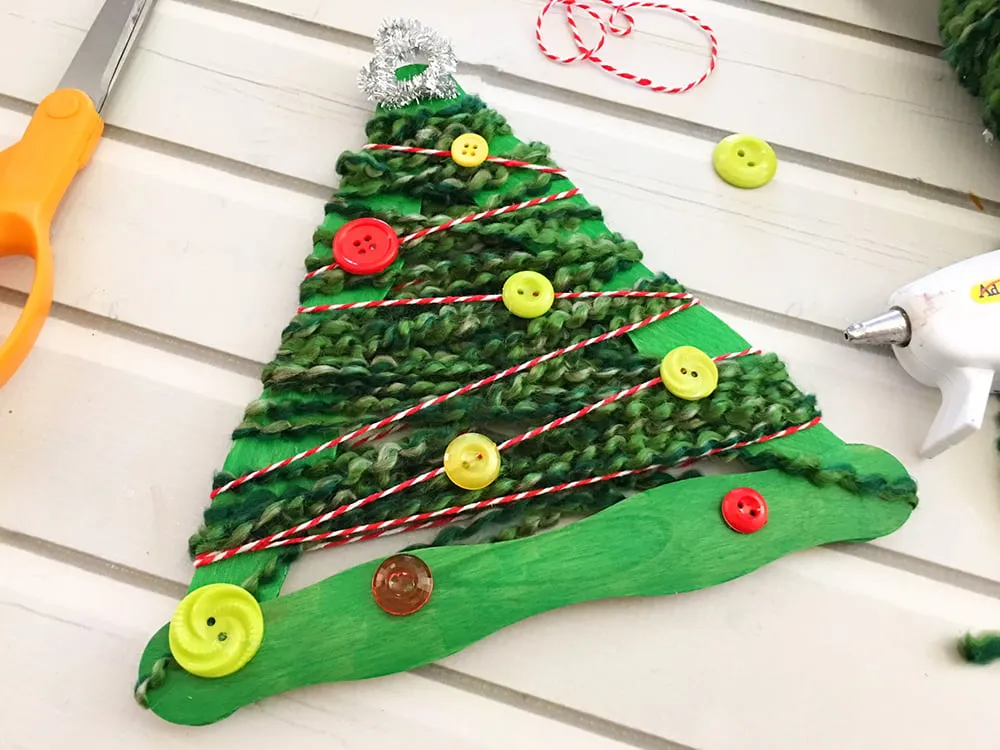
Total: $20–$34 for a whole set. Buy the yarn in one dye lot or the greens will drift apart. It’s the cheapest version of the handmade-tree idea on this list — see Idea #24 for the full-size version.
Wrap in one direction only, pulling each pass snug against the last, and let the yarn cross the sticks at slightly different angles — a perfectly parallel wrap looks machine-made. Leave the bottom third of the sticks bare so the green paint shows through as a second texture. Glue the buttons last, using a toothpick so no glue squishes out around the edges.
28. Book-Page Tree on a Wood Slice
- Remove the covers and cut the pages into graduated strips, from about 8 inches down to 3.
- Roll each strip around a pencil and pinch one end into a cone.
- Glue the layers onto a cardstock cone, largest at the bottom.
- Finish with a small paper star and mount on a wood slice.
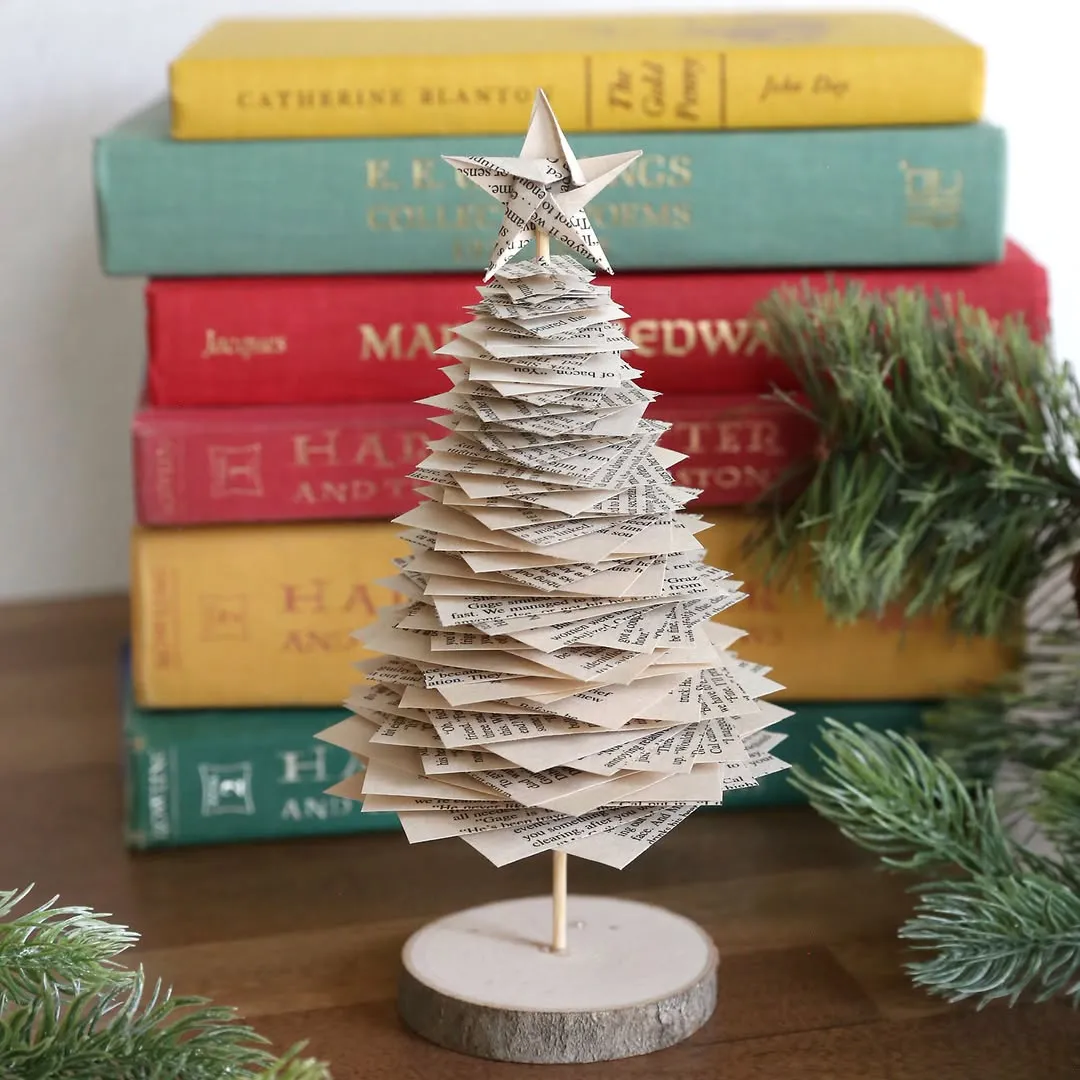
About two hours of rolling — good TV work — and under $10 if the book came from a thrift store.
Book-page crafts have moved from library-fundraiser tables to design blogs, and in 2026 they’re paired with vintage hardcovers as styling props rather than hidden inside the craft. The appeal is obvious: aged paper is a warm neutral that flatters string lights, and it’s a quiet reaction against glitter. If you want the folded-paper look without gutting a book, Idea #18 uses cardstock for a sharper result.
29. Rolled Paper Star in Multicolor
Multicolor works here because the pattern is radial and the scale is tiny — 60% of what you see is the star’s silhouette, 30% is green needles, and only 10% is the actual color mix. That’s the rule for busy palettes: the smaller the color area, the more colors you can get away with. Swap the paper for a two-color scheme and the same star reads completely differently.
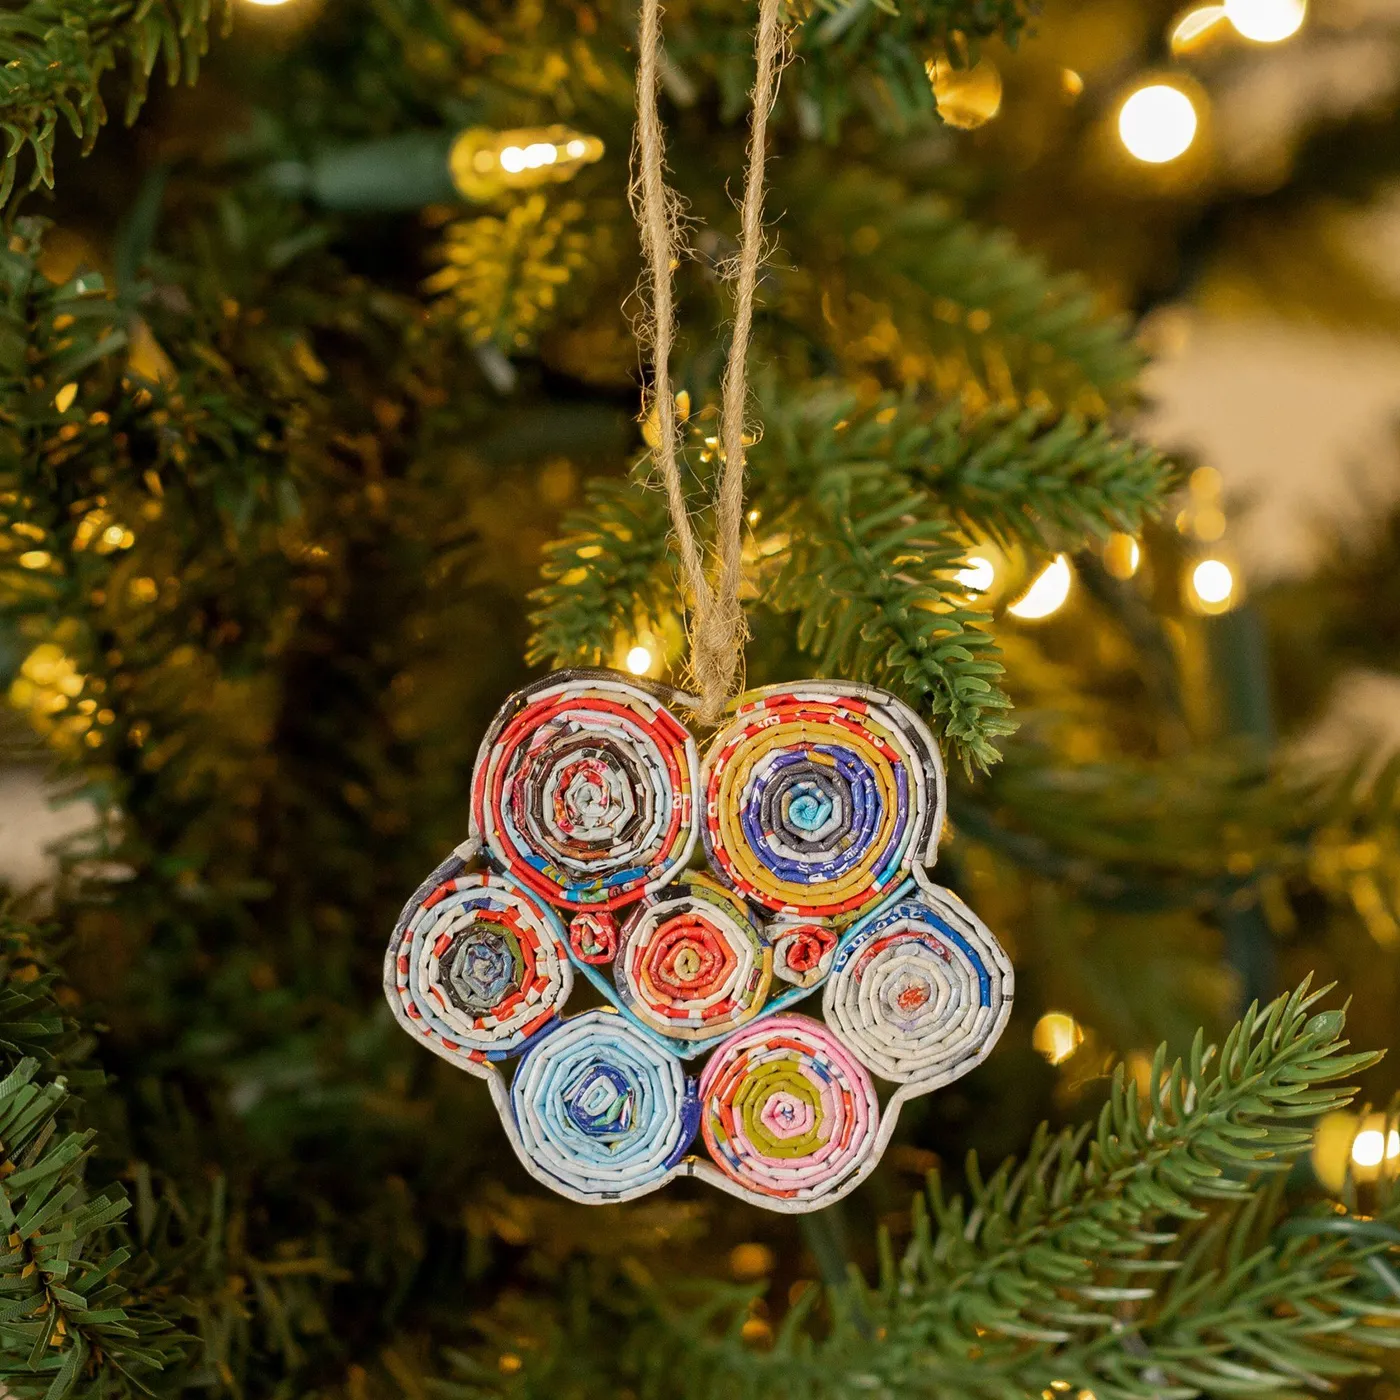
Radial symmetry is a cheat code. Every roll is identical and points at the center, so the eye reads it as one object instead of a dozen separate colors. The natural fiber string keeps it from feeling too crisp, and the warm yellow lights behind it soften the paper edges. Hang it in front of the lights, not a dark window, or those rolls go flat.
30. Pink and Red Glitter House on a Wood Slice
Keep the vignette to a 12-inch circle. A 6-to-8-inch wood slice, one house no taller than 8 inches, two small trees, and a single loop of LED wire lights is the whole recipe. Anything larger and the details get lost. This lives comfortably on a nightstand, a bar cart, or a bathroom shelf — anywhere a bigger display would crowd. Idea #17 uses the same sizing logic with a book stack instead of a wood slice.
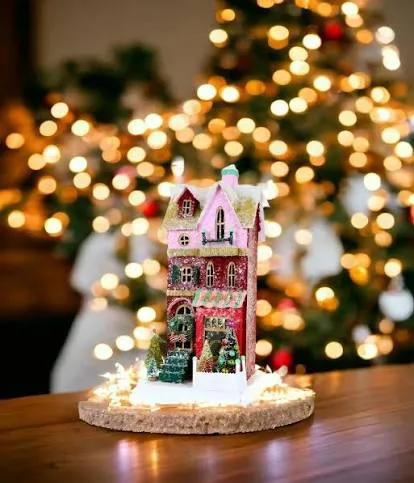
Battery LED wire lights are the low-maintenance hero here: no cord, no outlet, no heat. Expect to swap two AA batteries per season if you leave them on evenings. Glitter dulls with handling, so lift the house by the base, never the roof. Store the slice and house separately — moisture trapped between them warps the wood and lifts the glitter right off.
31. Numbered Kraft Tags and Red Baker’s Twine
You don’t need tag blanks. Cereal-box cardboard, the back of a notebook, or last year’s gift bags all cut into 2-inch squares, and a coat of kraft-colored paint gives you a matching set for pennies. A spool of red-and-white baker’s twine runs about $3 and covers 40 tags. The dark blue display board can be a painted piece of foam core. Realistic total for 24 tags: under $12.
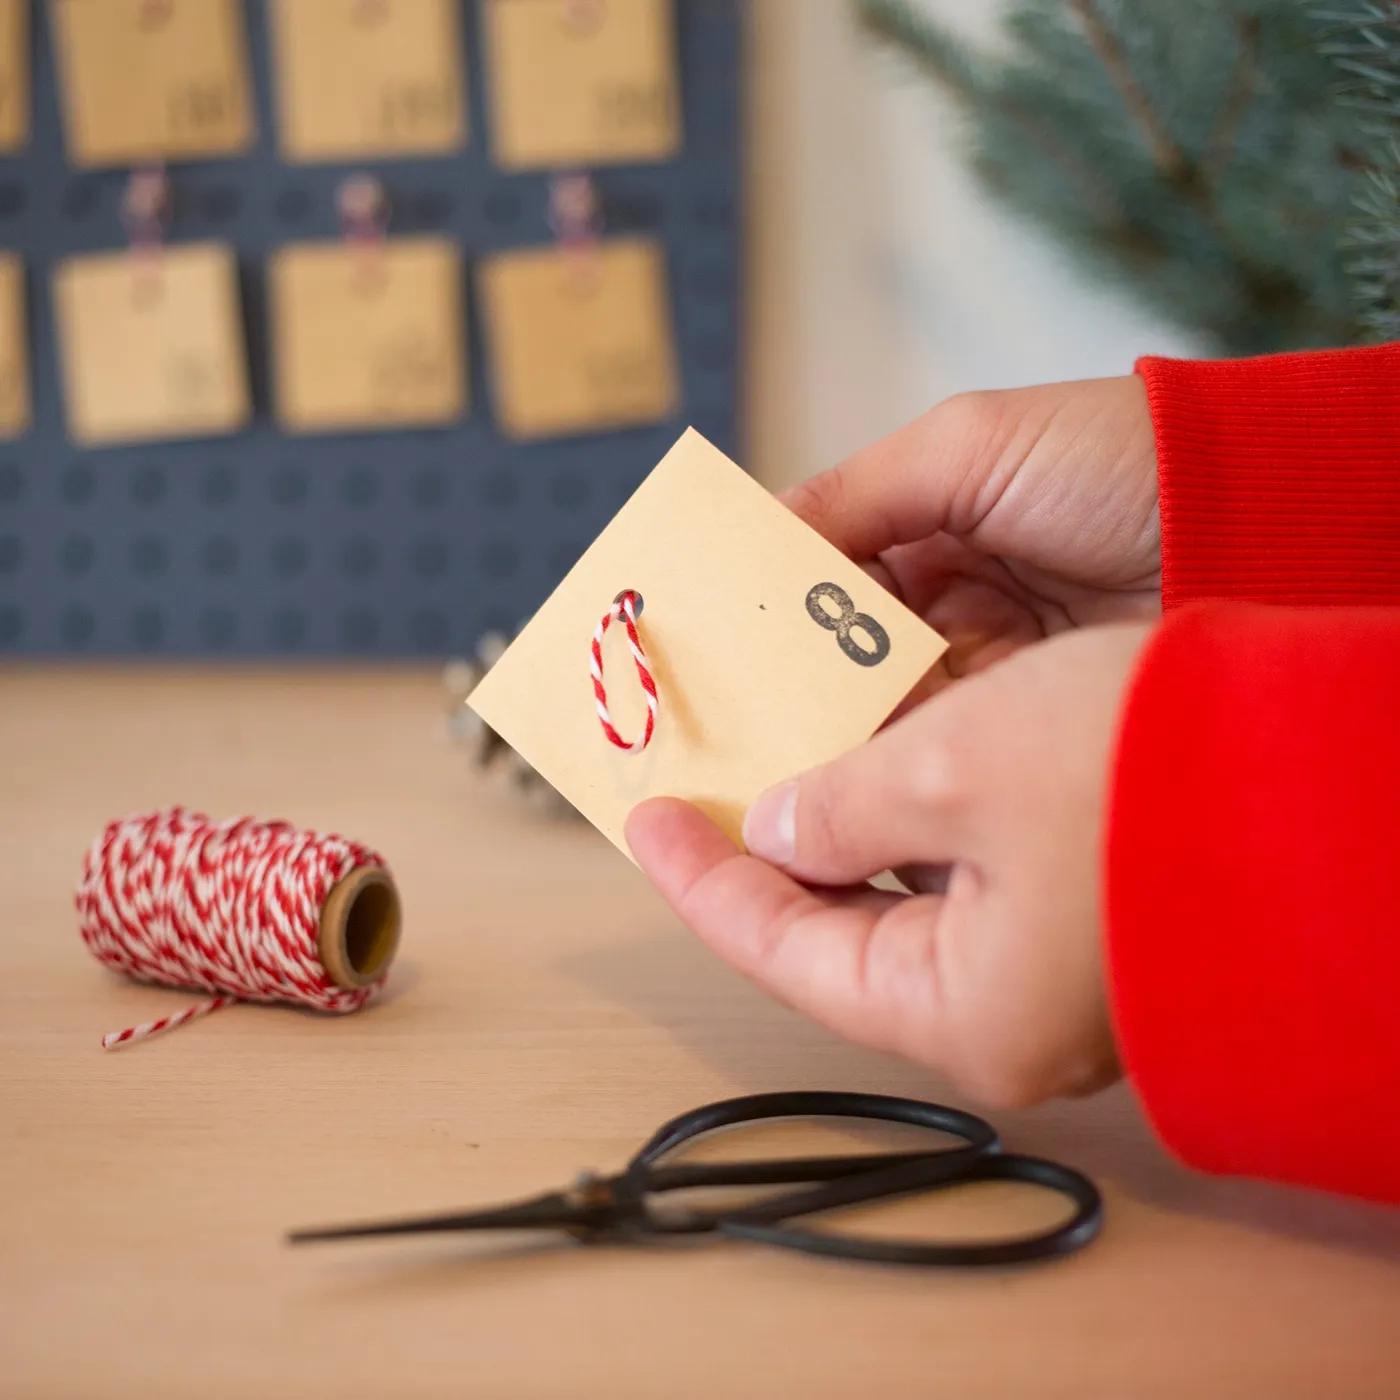
Consistency comes from two measurements: the hole goes 1/2 inch from the top edge, dead center, and every tag gets cut to the same 2-inch square. Stack them and trim together so the edges match. Use a 1/8-inch punch — anything bigger tears thin cardstock once the tag is hanging from a branch.
32. Segmented Kraft Ornament on a Gold String
The segmented construction is the point. Instead of one folded shape, this ornament stacks several curved kraft pieces into a rounded, almost teardrop silhouette, so it reads as carved rather than cut. That silhouette — soft, tapered, slightly irregular — is what makes a plain brown ornament look considered. Swap in a flat star and you lose the entire effect.
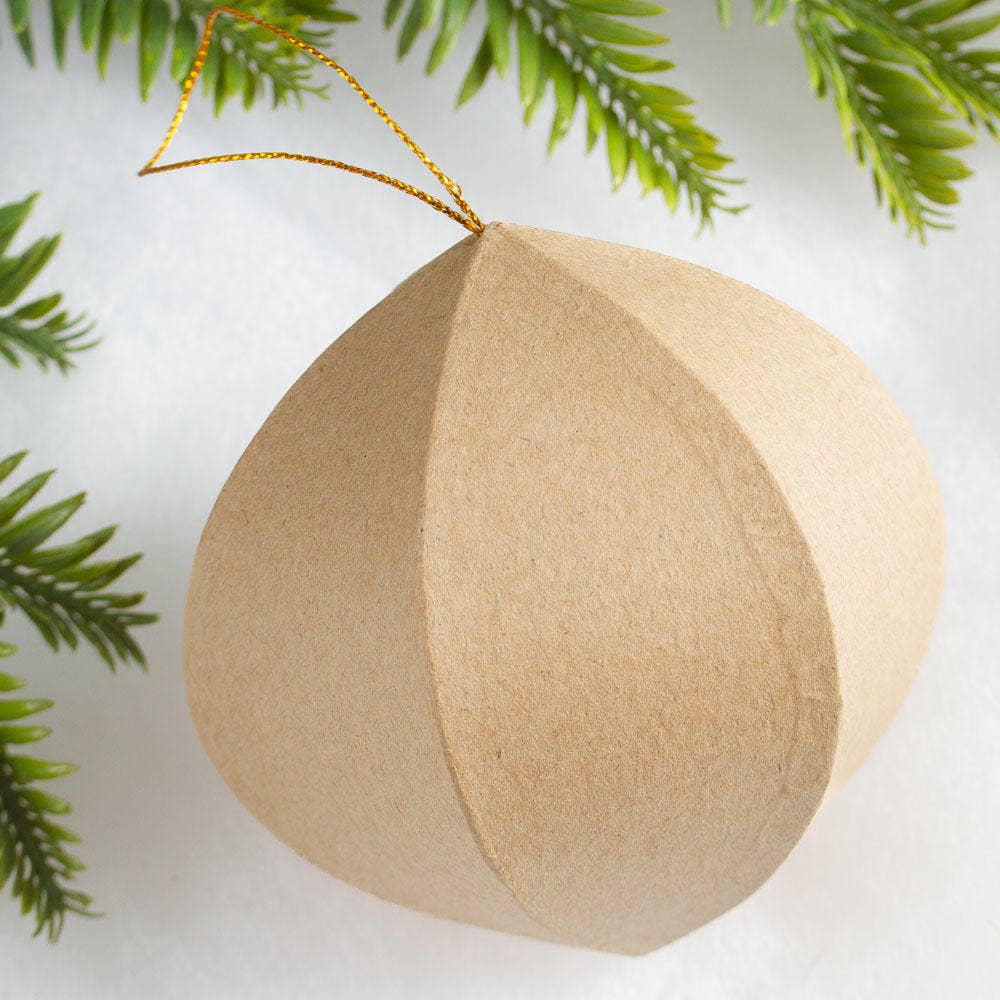
- Cut six identical curved segments from light kraft cardstock.
- Score each segment down the center and fold it slightly.
- Glue the segments edge to edge along the fold lines, fanning outward.
- Thread a thin gold cord through the top before the last seam sets.
About 25 minutes per ornament and roughly $6 in materials for a dozen.
33. Two Accordion Paper Spheres in Blue and Yellow
Accordion spheres are gorgeous and fragile. Folded paper crushes if anything heavy lands on it, and the fan slowly opens when humidity swings — so hang them rather than setting them on a shelf where they’ll get knocked. Store in a rigid box with the folds collapsed and wrapped in tissue. If you want the look with fewer tears, Idea #18 uses the same fold on sturdier cardstock with a simpler shape.
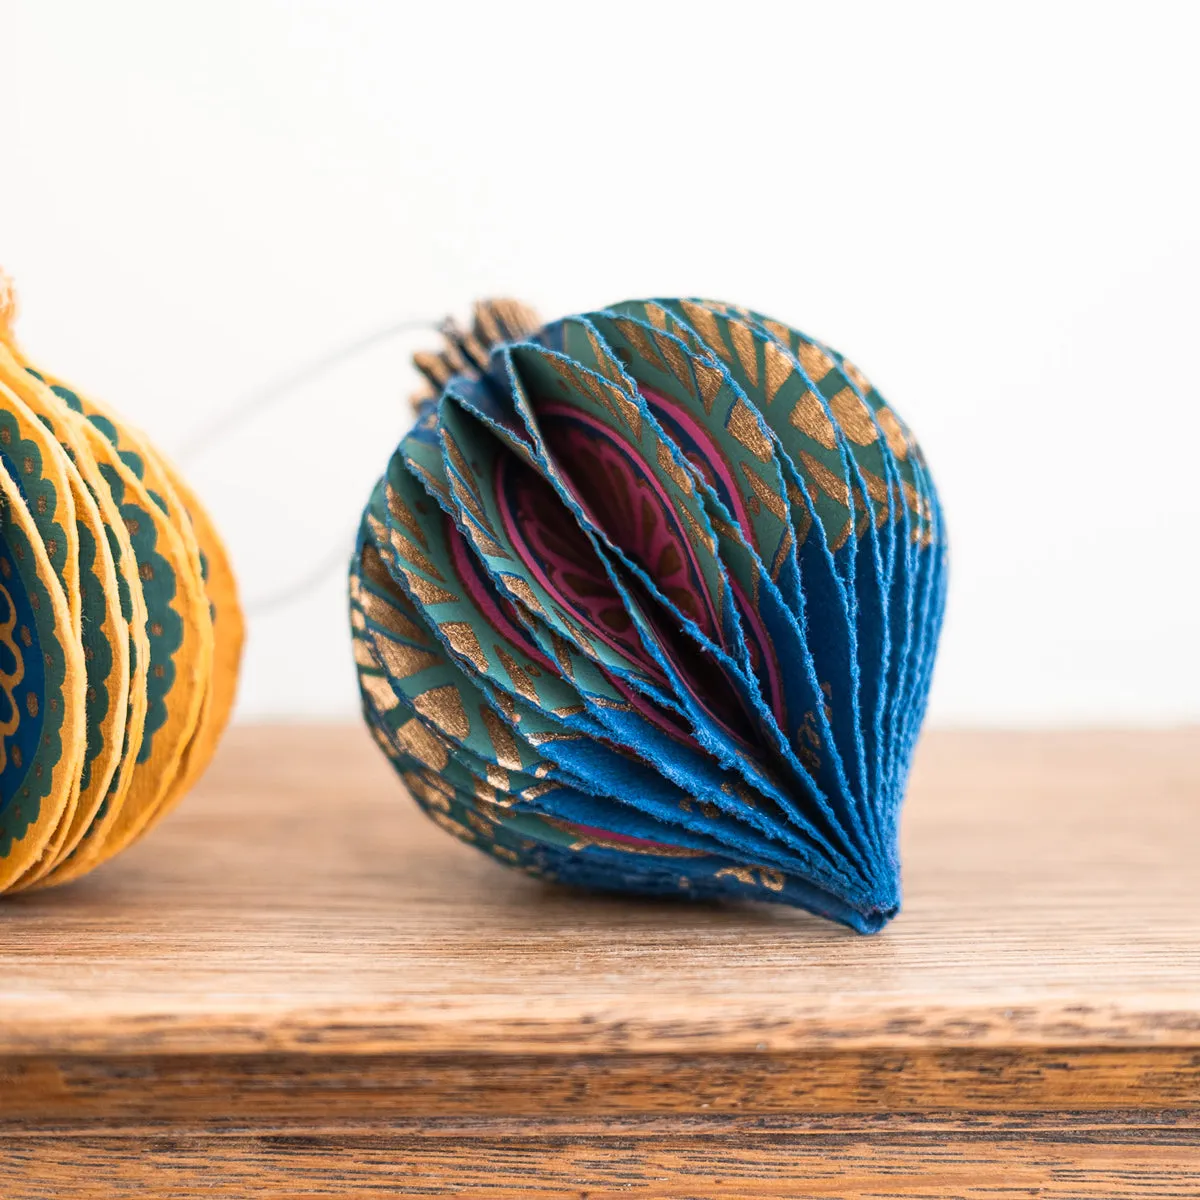
- Double-sided patterned paper pad, 12×12: $10–$18
- Gold cord or thread: $3–$5
- Bone folder: $6–$10
- Double-sided tape: $4–$7
Total: $23–$40 for a dozen spheres. The gold accents are what make the blue and yellow pop — a solid-color pad is cheaper but flatter. Buy one patterned pad rather than single sheets; you’ll want the variety.
One Flattened Box Is a Whole Christmas
Every idea here started life as something headed for the recycling bin — a shipping box, a cereal carton, a stack of thrifted paperbacks. That’s the honest appeal of cardboard Christmas decorations: they cost close to nothing, they forgive mistakes, and nobody else on your street has one.
Pick a single idea, give yourself an afternoon, and don’t wait for permission to make a mess. 📌 Pin your favorite so you can find it again when the glue gun comes out.