31 Stunning Cardboard Christmas Tree Ideas You Need to Try for a Festive 2026 Season
Cardboard Christmas trees are quietly taking over Pinterest right now — and once you see what people are building from a couple of shipping boxes and a strand of warm LEDs, you’ll get it. We dug through Etsy, IKEA, Target, Michaels, and Amazon to pull the 31 ideas actually worth your December, spanning everything from a $12 paper ornament to a $250 styled corner. You’ll find minimalist Nordic silhouettes, handmade craft builds, mid-century geometric lattice, and warm neutral palettes — plus budget and luxury versions of the same concept side by side, so you can see exactly where the money goes. And stay until the end — we break down the most common mistakes that can ruin these looks.
2026 is the year cardboard stopped being a compromise. Craft-forward decor and recycled-material design have moved from niche to mainstream, and the trees people are saving this season look intentional, sculptural, and almost nothing like a school project. A few links below are affiliate links, which means we may earn a small commission at no cost to you.
📌 Save this to Pinterest for later — you’ll want to revisit these ideas.
1. A Warm-Lit Cardboard Tree That Glows Through Its Cutouts
Strip away the wood surface, the tiered silhouette, the soft shadow on the table — and this tree still works because of the circular cutouts. They turn a solid slab of kraft board into something that reads as light passing through branches. Punch them slightly off-grid, in three different sizes, and the tree stops looking like a craft project and starts looking like a lamp. Skip them and you have a brown cone. That’s the entire difference.
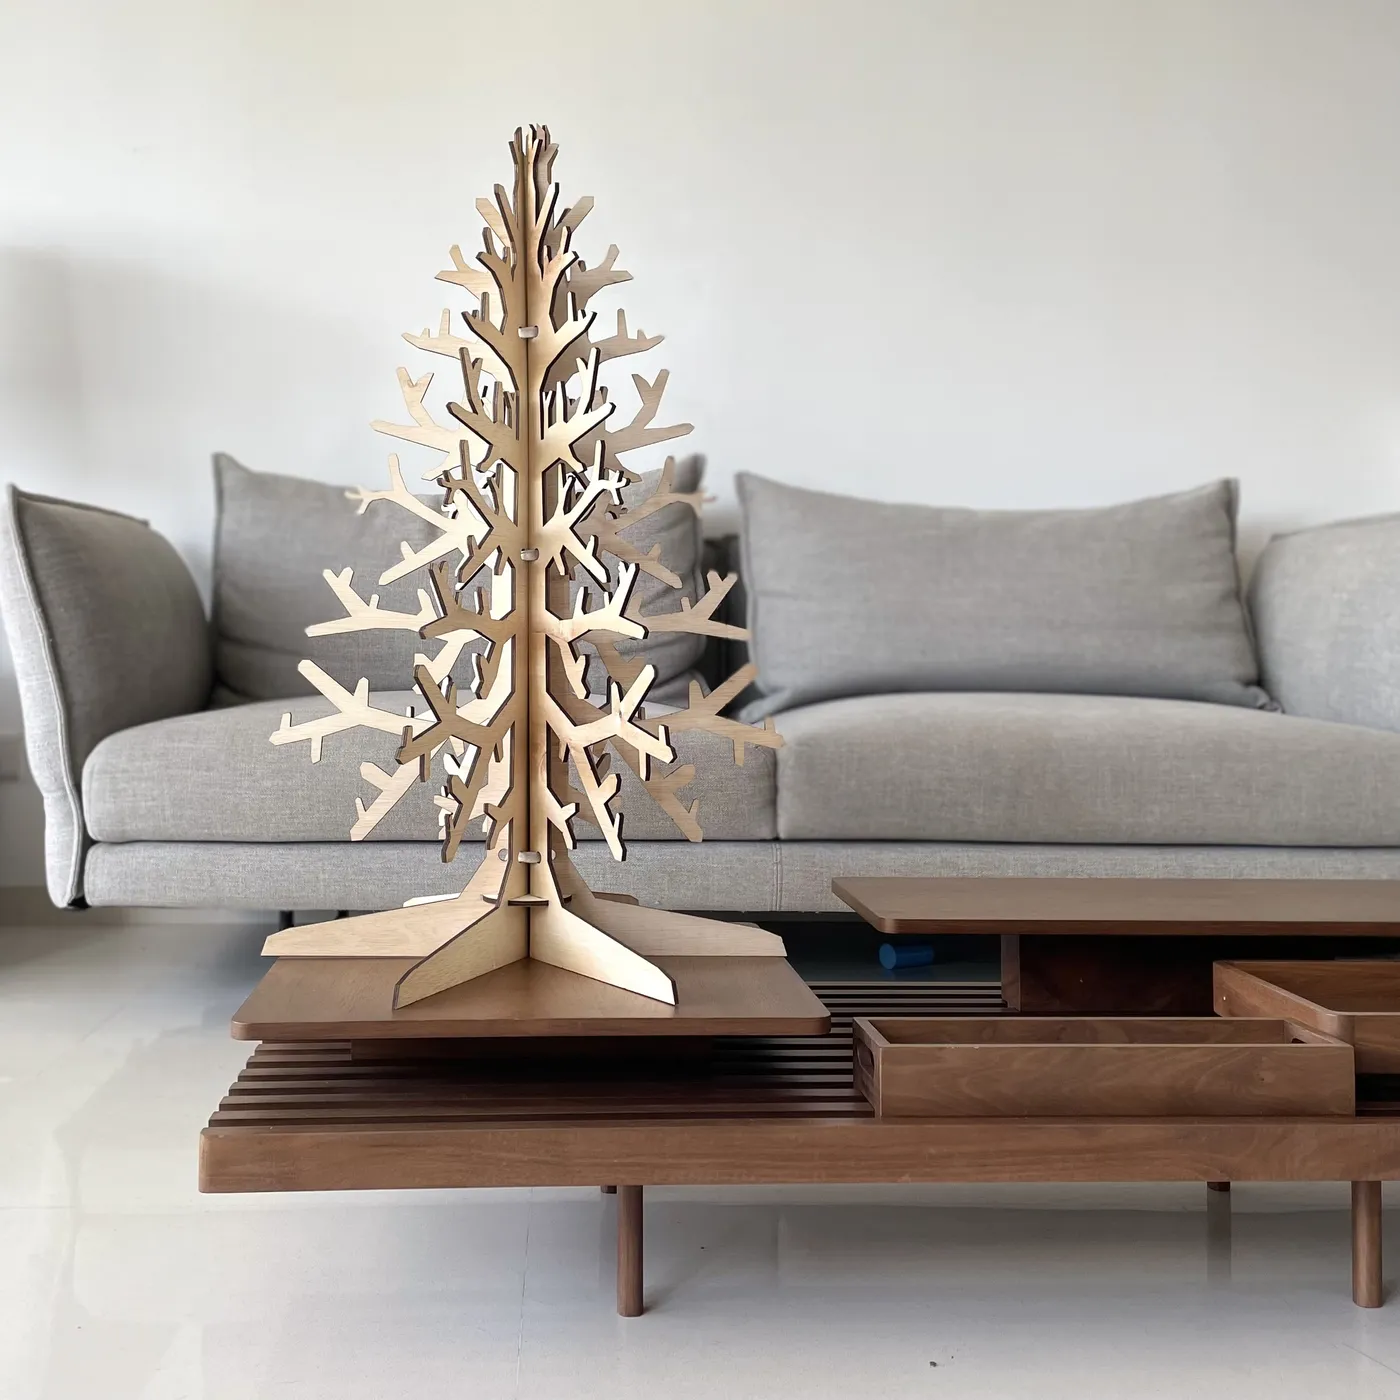
Run your LED strand on the inside of the tree, not wrapped around the outside. Use a 10-foot copper-wire micro strand — roughly 100 lights — and thread it in a loose spiral up the interior, taping every third light to the back of the board with a small piece of double-sided tape. Because the glow only escapes through the cutouts, it reads as internal, the same trick a paper lantern pulls off. Keep the strand on a 6-hour timer and you’ll never think about it again.
2. A Layered Star Ornament Threaded on Natural Wood Beads
Five layers of corrugated board, separated by wood beads and hung on twine — it takes an afternoon and costs almost nothing.
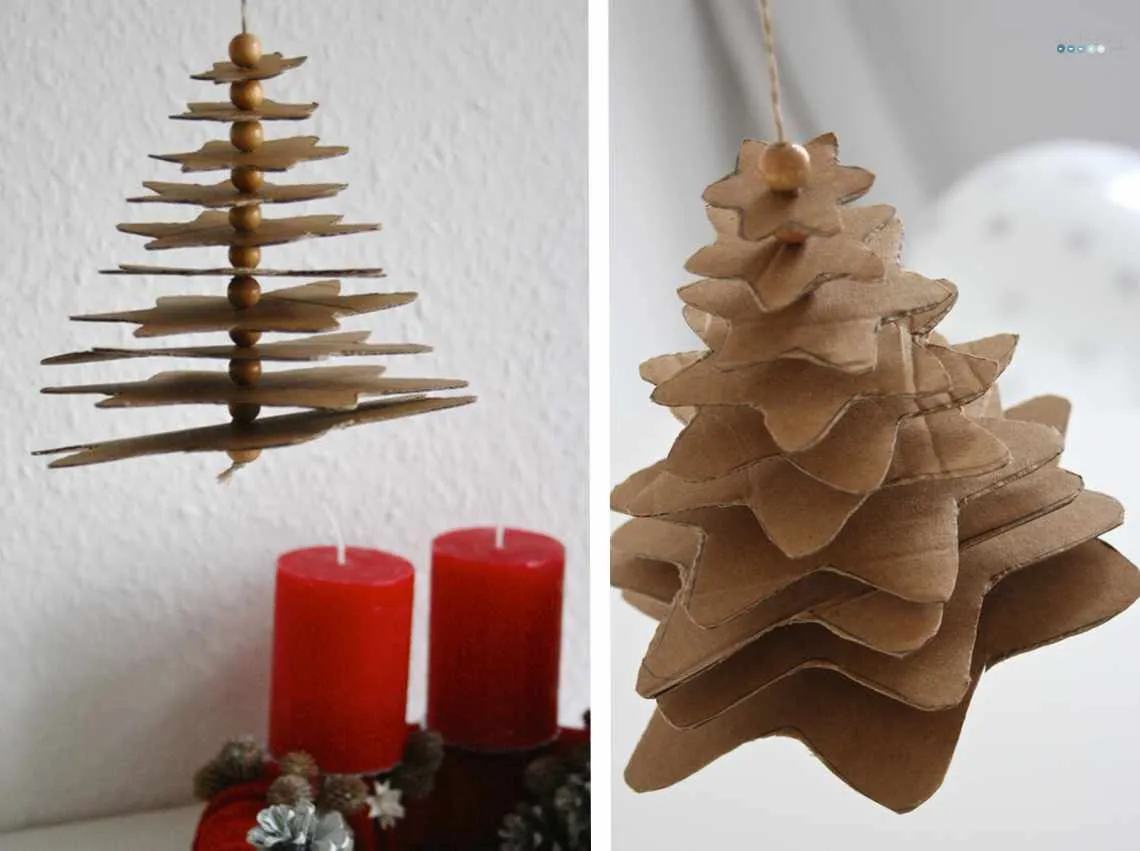
- Cut five stars from single-wall corrugated cardboard, stepping down about 1/2 inch in size each time.
- Punch a centered hole through all five with a 3/16-inch awl.
- Thread 24 inches of twine on a tapestry needle and pull it through the smallest star first.
- Add two natural wood beads between each layer so the stars float apart.
- Knot the twine at the top into a hanging loop, then trim the ends close.
Time: about 40 minutes. Materials: under $12 if you already have delivery boxes stacked in the garage.
You can build a whole set of these for the price of one store-bought ornament. Corrugated shipping boxes are free behind most grocery stores, and a 100-count bag of 8mm natural wood beads runs about $6 in the craft aisle. Jute twine is $3 for 400 feet at a hardware store — enough for two dozen ornaments.
- Free corrugated boxes from a grocery store
- $6 natural wood beads, 100 count
- $3 jute twine, 400 feet
- $4 red pillar candles for styling
Compare with Idea #23, which uses the same stacked-layer logic at full tabletop scale.
3. Burgundy and Cream Honeycomb Trees With a Bow-Held Taper
The formula here is roughly 50% cream, 40% burgundy, 10% brass. Two cream trees and two burgundy, staggered in height, then a single brass element — the bow-shaped candle holder — doing all the metallic lifting. Swap burgundy for forest green and you have the same composition in a completely different mood. Swap cream for pale grey and it turns cool and architectural. The ratio matters more than the specific colors you pick.
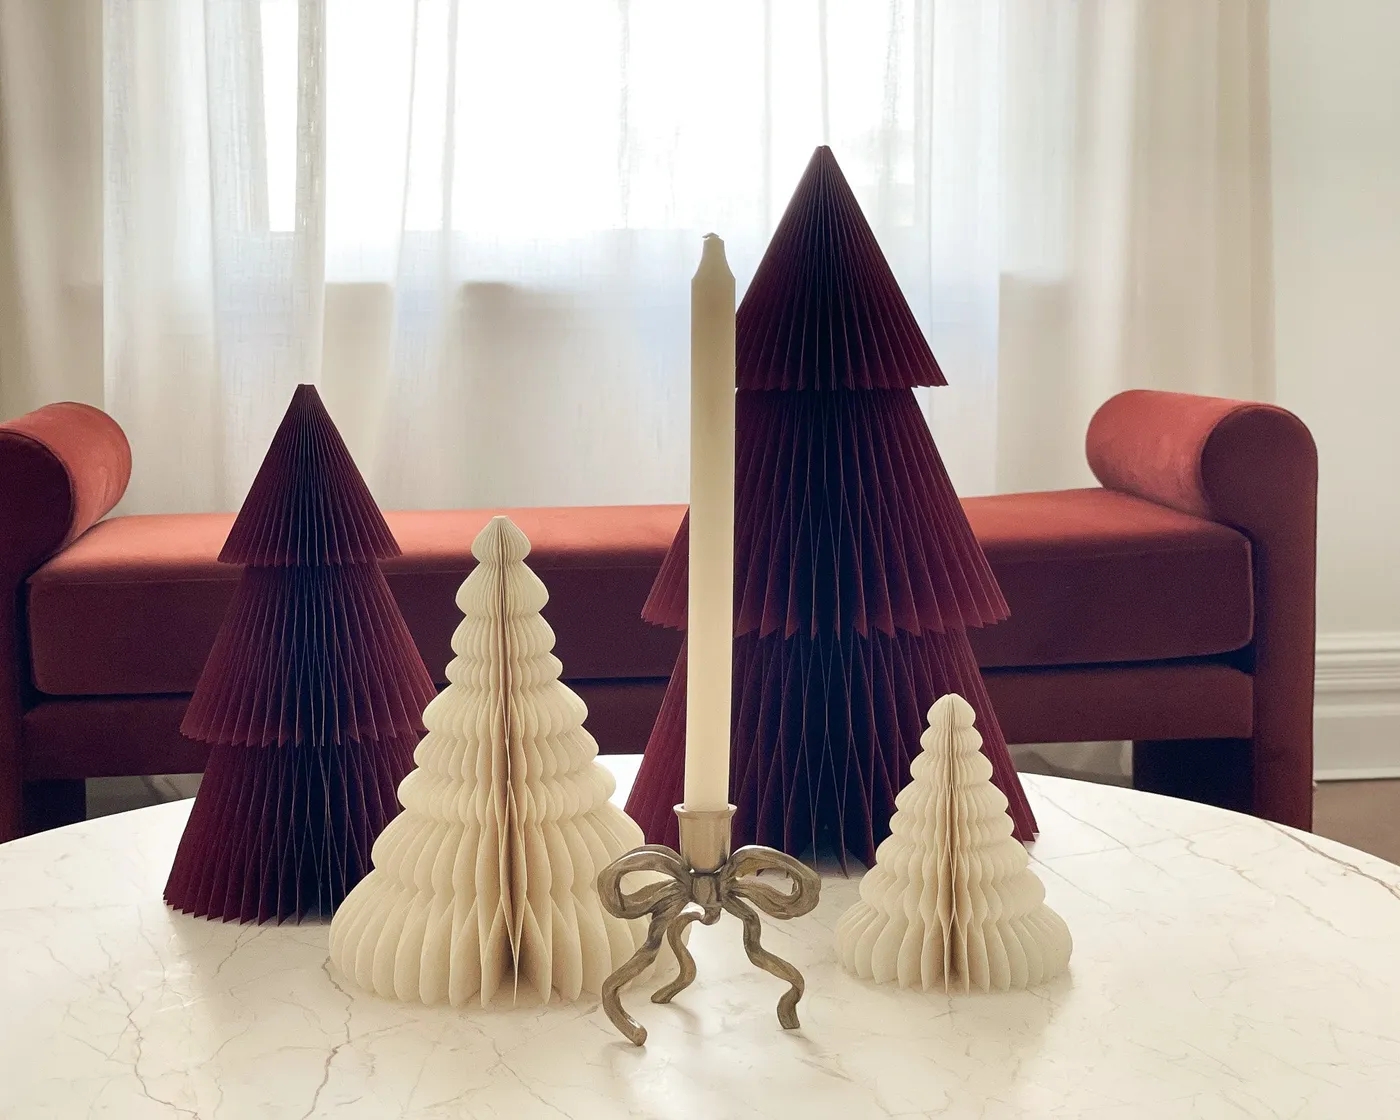
Two things are doing the heavy lifting. First, an even number of objects in only two colors keeps the arrangement from looking like a matched set. Second, the taper candle stands roughly three times the height of the tallest tree, and that vertical break stops the cluster from reading as a flat row on a shelf. Take the candle away and the whole thing collapses into a display.
Honeycomb paper trees are the rare decor item that’s genuinely affordable at full price — but you can go lower. IKEA’s paper decorations run $5 to $9 for a set of three in cream, and a light coat of spray dye turns a white set burgundy. A brass-toned bow holder from a thrift store is usually $3 to $6, and a box of cream tapers is about $8 for twelve. The whole arrangement lands under $30.
4. A Dark Teal Ribbed Tree With Glitter Along Every Edge
Glitter edges look incredible under warm light and completely different under cool white LEDs — they’ll read silver-grey instead of gold. Test your bulb temperature before you commit. This piece also shows every fingerprint and every dust mote. If it lives near a kitchen or a busy doorway, plan on a weekly pass with a soft makeup brush. And if you have toddlers in the house, know that the glitter is not glued down as firmly as you’d hope.
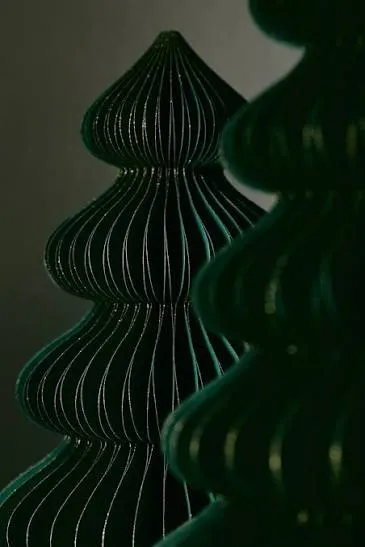
If you want glitter that stays put, seal it. After the glue dries, mist the whole piece with two light coats of matte acrylic sealer from about 10 inches away, letting it cure 30 minutes between coats. It kills maybe 20% of the sparkle up close but keeps the edges clean all season. One more thing: photograph it against a dark surface. That teal only reads as teal when it isn’t competing with a light wall behind it.
5. Stacked Corrugated Layers Topped With a Black Bird
- Corrugated cardboard sheets, 3mm, 5-pack: $14–$22
- Utility knife plus a box of fresh blades: $8–$12
- Matte black spray primer: $7–$10
- 8-inch round wood disc for the base: $6–$12
- Bird silhouette topper, or cut your own: $5–$18
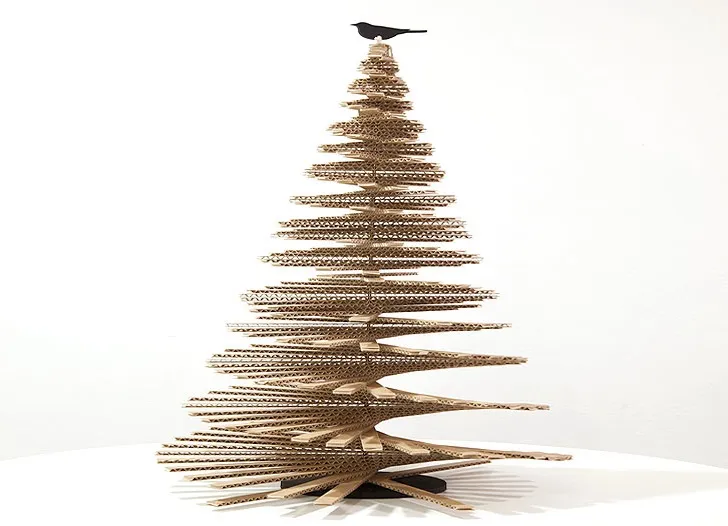
Total: $40–$74 for the full centerpiece.
Budget version: cut the horizontal strips from free shipping boxes and paint the bird with craft acrylic instead of primer. That lands the build around $18, most of it in blades and glue.
The bird. Every other decision here — the stacked horizontal strips, the dark base, the raw kraft color — is a texture choice. The bird is the only element with a personality. It gives the eye somewhere to land and it signals that this is a sculpture rather than a craft experiment. A star would have been perfectly fine. A bird makes it memorable.
6. Two Interlocking Pine Trees That Slot Together Without Glue
- Measure your surface depth — these need 10 to 12 inches of footprint to look intentional.
- Check the wall behind. Light grey or white makes the kraft tone pop; dark walls swallow it whole.
- Confirm the board is single-wall, not double. Double-wall is too thick to slot cleanly.
- Have a 3mm craft knife ready. Scissors will crush the flutes and wreck the edge.
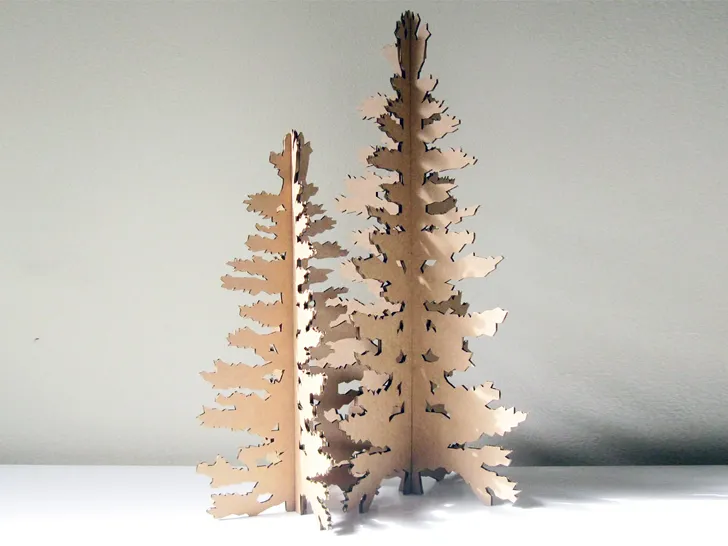
Slot-together construction gives you real structure with zero adhesive, which means the tree stores flat and reassembles in about 30 seconds next December. Visually, the cutout pattern does something smart: it lets you see straight through the tree to the wall behind, so a 20-inch object never feels like it’s blocking the room. The negative space is doing more work here than the material itself.
7. A Tall Kraft Tree Dressed in Pastel Pom-Poms
This tree needs room to breathe. It reads best in a space at least 10 by 10 feet with 8-foot ceilings or higher — the pom-poms are small and they vanish if your viewing distance stretches past 8 feet. In a tighter room, scale down to the layered tabletop build in Idea #12. Ceiling height matters less than footprint here; give it 24 inches of clearance on at least two sides or it looks wedged into a corner.
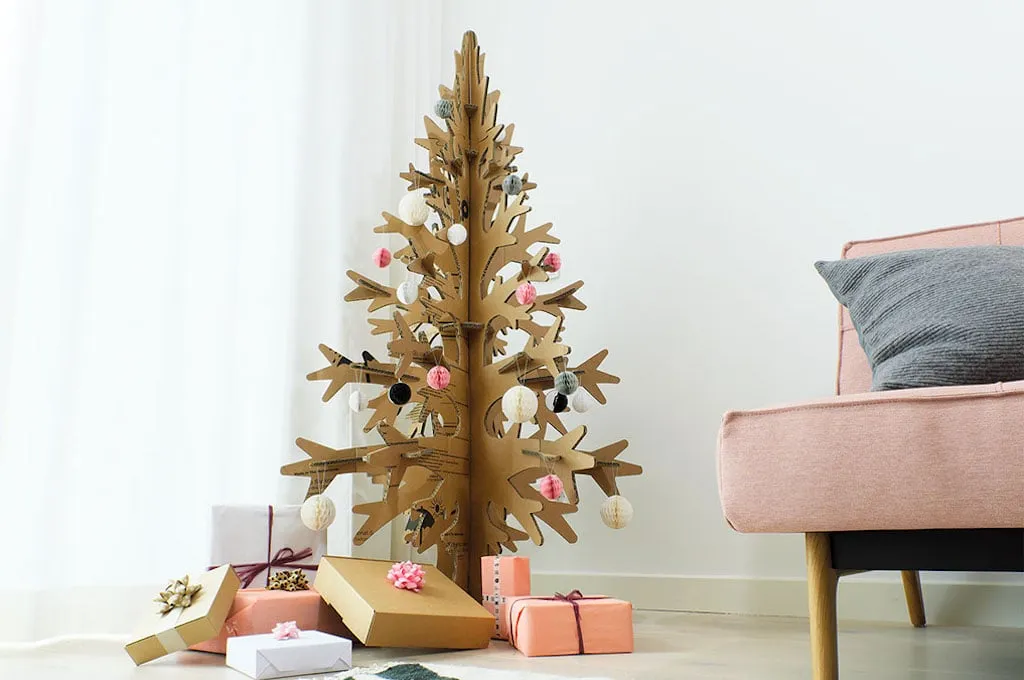
The tree itself is the cheap part. Pom-poms run about $4 per 100-count bag, and a mixed bag of white, blush, and grey covers a 4-foot tree easily. Use a low-temp glue gun — full-temp hot glue melts the pom fibers into sad little knots. The gifts at the base can be real, or you can wrap empty boxes in brown kraft paper at roughly $0.30 each. Most people already own the armchair.
8. Flat-Pack Slotted Trees, One White and One Kraft
Paint only one side. A white tree with a raw kraft back reads as intentional and slightly sculptural; a fully painted white tree reads as plastic. Use a foam roller with two thin coats of flat latex, letting the first coat dry completely — corrugated board warps if you flood it. On the kraft tree, leave it bare and sand the cut edges lightly with 220-grit so there’s no fuzz catching the light.
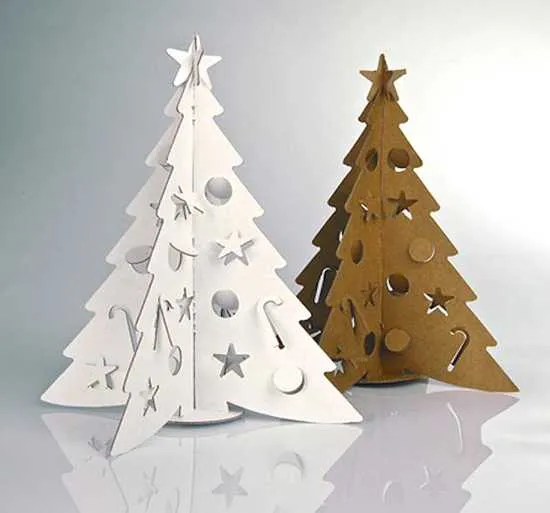
The pair works on 70% kraft, 20% white, 10% reflection. That last 10% is the reflective surface underneath, which doubles the visual footprint without adding a single inch of height. Change the recipe by swapping the white tree for pale grey and the surface for matte black — same structure, moodier result. Add a third tree in cream and you’ll tip the balance; three is one too many for this silhouette.
These look best empty. Every time someone starts hanging ornaments on a cutout tree, the pattern crowds and the whole thing reads as a mess from across the room. If you want ornaments, set them on the surface around the base instead. The slot joints also loosen with repeated assembly — if you plan to store and rebuild annually, add a dot of museum putty at each joint.
9. Open-Lattice Trees Standing Against White Painted Brick
The open-lattice silhouette is the 2026 version of the cardboard tree. It borrows directly from mid-century architectural screens and the quiet-maximalism shift that’s been building on Pinterest for two years — the idea that a statement piece can be graphic without being colorful. It photographs beautifully against painted brick, which is exactly why it keeps showing up in saved pins. Staying power: high. The geometry is timeless; only the material is having a moment.
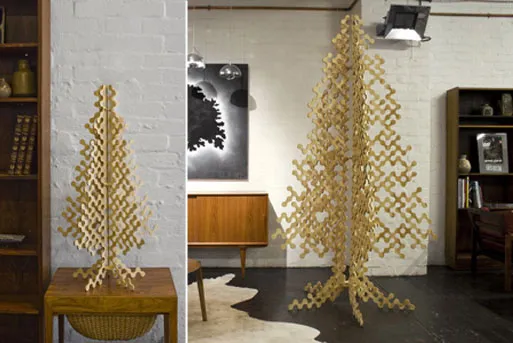
- Cardboard sheets, 4mm, 6-pack: $18–$28
- Interlocking pattern template or digital file: $0–$12
- Craft knife plus 50 replacement blades: $12–$18
- A2 cutting mat: $15–$25
- Sanding block and 220-grit paper: $6–$9
Total: $51–$92. A comparable wood version would run $180–$400, and you’d need a jigsaw.
10. Three Lighted Trees Beside a Gold-Base Dining Table
Getting the glow right is 90% of this look, and it’s a 20-minute job per tree.
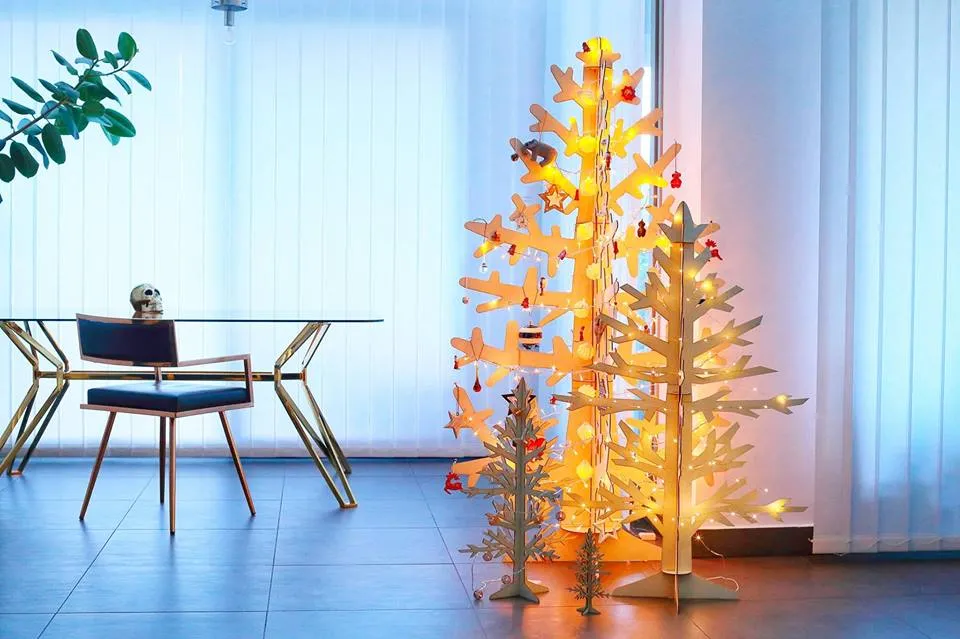
- Run a 100-light warm-white micro strand up the interior back of the tree, taping with painter’s tape every 6 inches.
- Leave the plug at the bottom and tuck it behind the widest layer.
- Group all three plugs into a single 6-outlet power strip with a timer.
- Test at night with the room lights off — if you can see bare bulbs through the cutouts, add one more loop.
Cost: about $22 for three strands. Time: roughly an hour for the set.
Three lit trees on dark tile will show every scuff and every dust bunny, and dark flooring does nobody any favors under warm light. If your floor is dark, add a pale rug under the group or the whole arrangement sinks into it. Also check your outlet placement before you commit to a layout — you’ll want the trees clustered near one outlet, because 12 feet of visible extension cord is nobody’s idea of chic.
LED strands are the low-maintenance part here; the cardboard is not. Corrugated board absorbs humidity and softens at the edges in a damp room, so keep these at least 4 feet from a kitchen, bathroom, or humidifier. Wipe monthly with a dry microfiber cloth — never damp. Expect a strand to last 3 to 5 seasons, so budget roughly $8 a year to replace one when it starts flickering.
11. A Desk-Scale Cardboard Tree in Blush and Grey
This is the entry-level version of almost everything else in this article, and that’s the point. A small kraft tree runs $12 to $20 at a craft store, or you can score and fold one from a single shipping box in an afternoon. Blush and grey ornaments come in 50-count bags for around $5. The gift boxes are $1.50 each at a dollar store. Total: under $35, including the sheer curtain panel that sets the tone behind it.
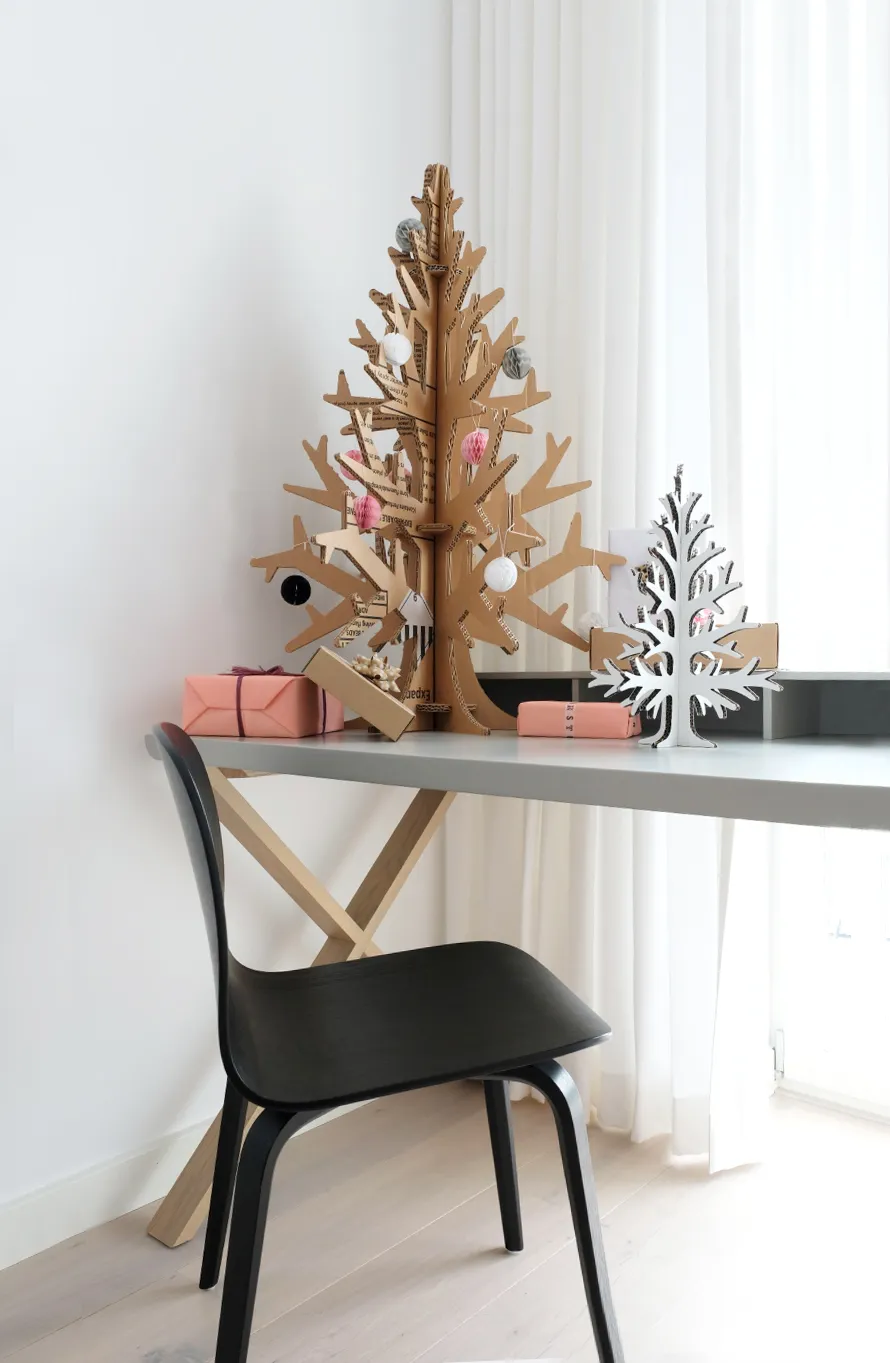
It’s the black molded chair. Without it, this is a pleasant desk vignette. With it, the scene has a deliberate palette — warm kraft, cool grey, pale pink, and one hard black line cutting through all of it. That contrast is what makes your eye read the whole setup as designed rather than decorated. The chair costs more than everything else on the desk combined, and it earns it.
12. A Conical Kraft Tree Tipped With a Single Star
The restraint is the design. Red and white stars only — no metallics, no ribbon, nothing shiny anywhere. That limitation forces the eye onto the layered edge of the cardboard, which is where the actual texture lives. Because the ornaments share two colors and roughly one size, they read as a pattern rather than as decoration. Add a single gold ornament and you’ll break the entire effect without knowing why.
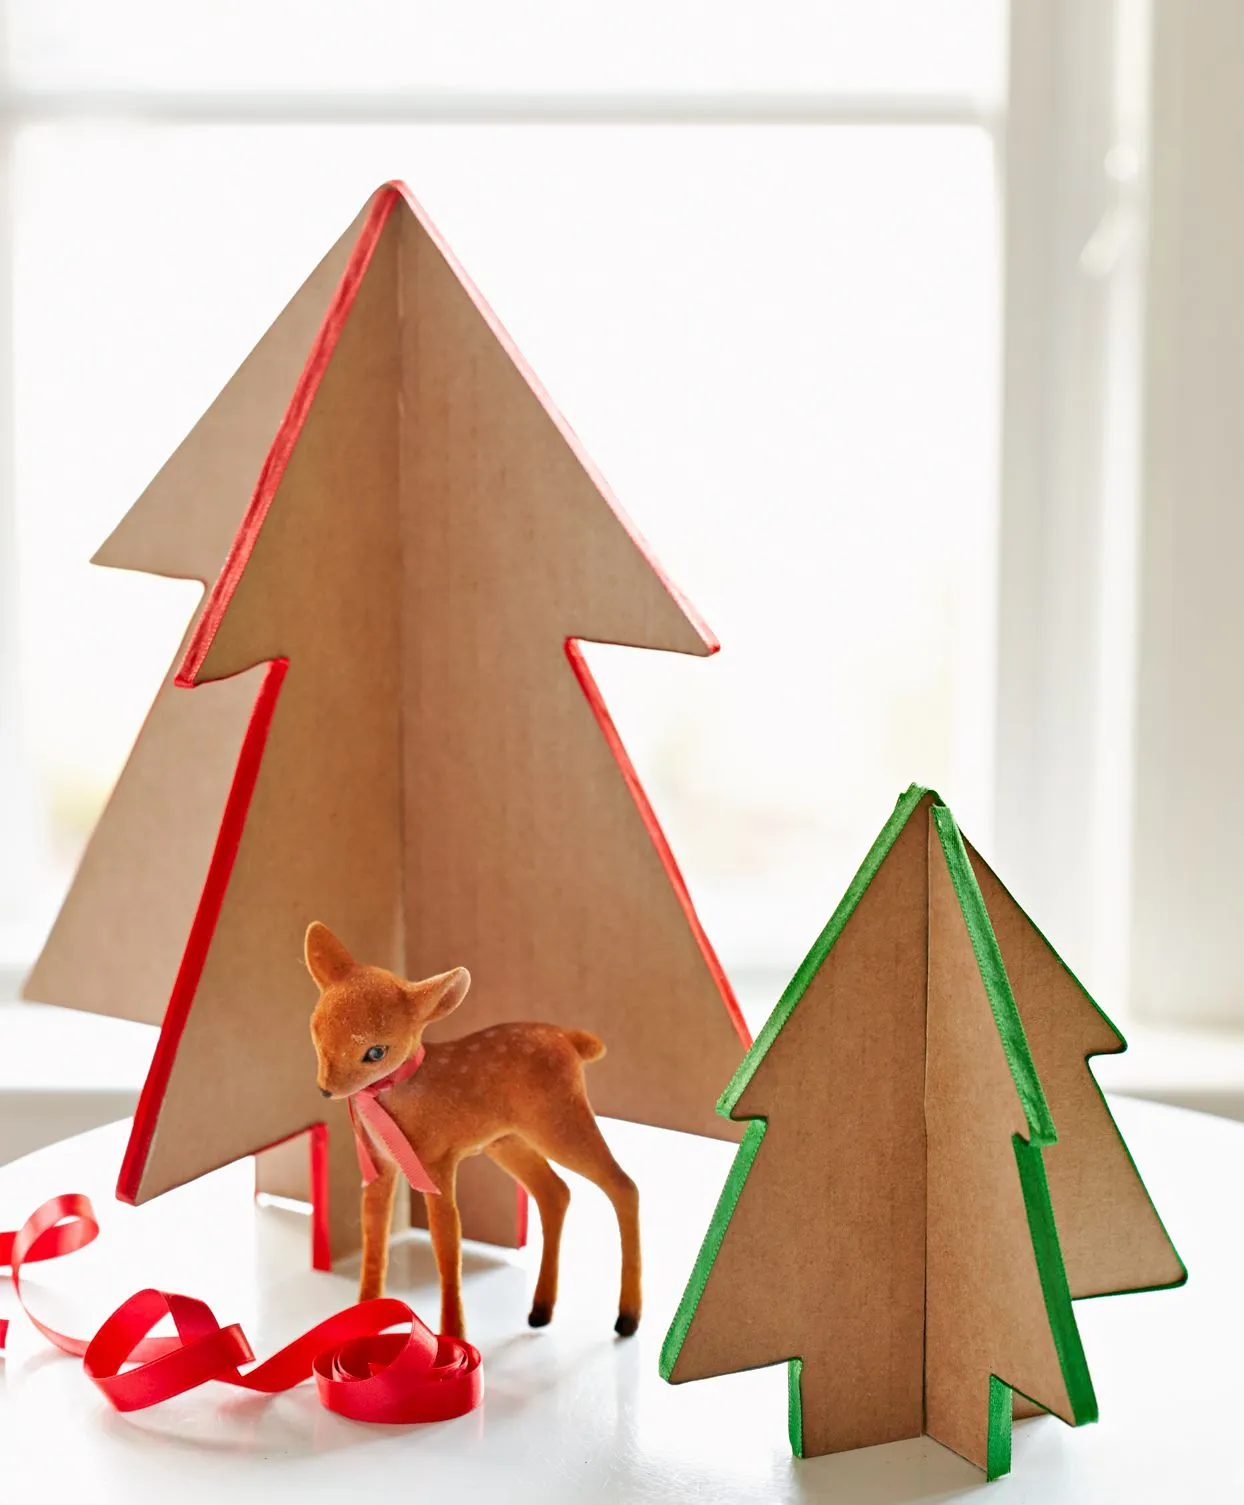
Cut your interlocking layers so each one steps in about 1.25 inches from the one below. That’s the ratio that reads as a taper rather than a stack. Under 1 inch and it looks like a cylinder; over 1.5 and it looks like a beehive. For a 24-inch finished tree, that’s roughly 9 layers. Also cut the center notch 1/8 inch wider than the board thickness so assembly doesn’t require a rubber mallet and a prayer.
13. Pleated Green and Beige Trees Backlit by Warm Bokeh
Pleated paper trees are fragile in a way that surprises people. Accordion folds crush if they’re stored loose, so keep the original box or wrap each in tissue. The gold edge on the green tree is a foil application, not real glitter, and it dulls if you wipe it with anything damp. One more honest note: the bokeh string lights in the background are the reason this scene sings, not the trees themselves. Without warm light behind them, pleated trees look flat and a little sad.
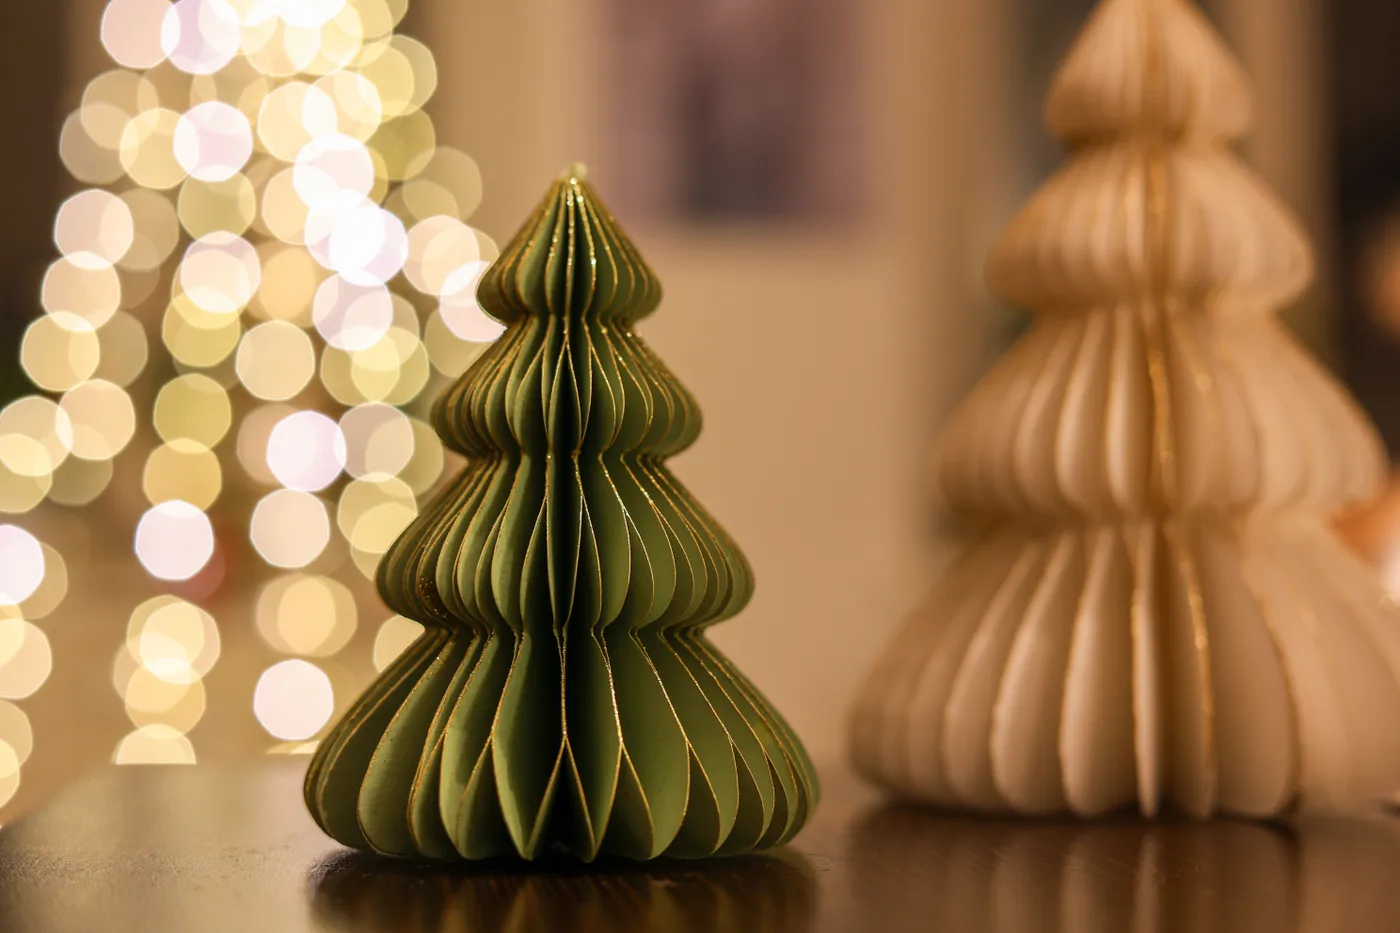
It’s roughly 60% deep green, 30% warm beige, 10% gold edge. The dark reflective surface underneath is essentially a free fourth element — it doubles the glow without adding objects.
- One dark green pleated tree, 12 inches
- One beige pleated tree, 9 inches
- Warm white string lights placed behind the trees, not above
- A dark tray or mirror-finish surface for the base
The beige is the anchor. Change the green first, always.
14. A White Slotted Tree, Photographed Mid-Build
- Draw your cutout pattern on the flat board with a light pencil line you can erase.
- Cut the outer silhouette first with a craft knife, then work inward on the stars and candy canes.
- Slot the sections together without glue, testing fit as you go.
- Touch up any torn flute edges with a white paint pen.
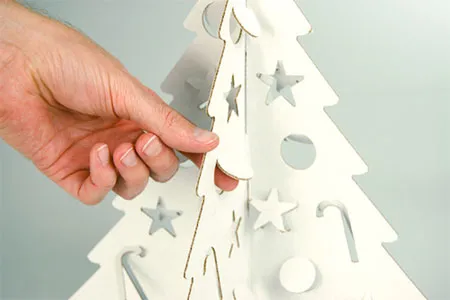
Time: about 2 hours for a 20-inch tree. Material cost: roughly $9 in board.
At 20 to 24 inches, this size works on a console, a windowsill, or a bookshelf. Give it 6 inches of clearance on each side so the cutouts can cast readable shadows — closer than 4 inches and the shadow pattern turns to mush. If your ceiling is under 8 feet, stay at this scale rather than going floor-standing. Larger rooms can handle a 36-inch version on a low platform without it looking sparse.
White cardboard is the least forgiving finish in this entire article. It shows dust within a week and it yellows if it sits in direct sun. Keep it out of window light, dust it with a dry duster every 10 days, and never use a wet cloth — water raises the paper surface permanently. If it does yellow, a single thin coat of white matte spray resets it, roughly once every two years.
15. A Cardboard Gingerbread Village With Icing Drawn in White
- Corrugated board, three 12×18 sheets: $8–$14
- White puff paint or dimensional fabric paint: $5–$9
- Kraft paper templates, or freehand it: $0–$6
- Craft knife and cutting mat: $18–$30
- Battery-operated warm white fairy lights: $7–$12
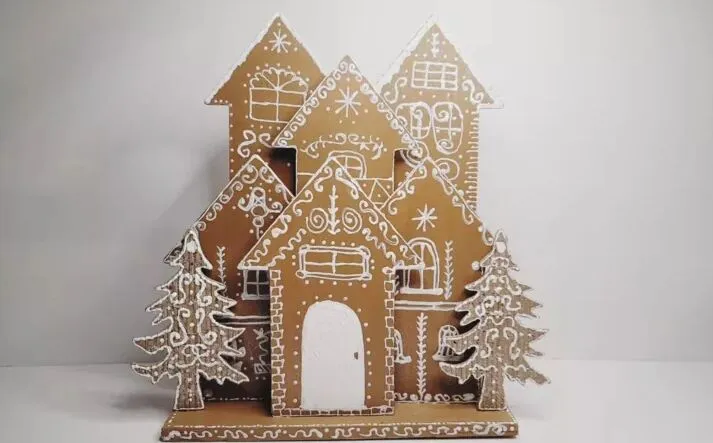
Total: $38–$71, and the board and knife get reused all season.
This is the stripped-down cousin of Idea #29, which adds an illuminated house and draped string lights for a fuller scene.
Gingerbread decor in non-edible materials has been climbing on Pinterest since 2023, and cardboard is the 2026 answer to it. You get the nostalgia, the hand-drawn icing, and the made-it-myself point of view without a cookie that goes stale by December 20th. It also fits the broader move toward craft-forward holiday decorating — people want their December table to look like someone’s hands actually touched it.
16. A Silver Glitter Tree Against a Toile Red Backdrop
Match the backdrop to the object, not to the season. The red toile here is busy, dense, and traditional — which is exactly why a plain silver tree holds its own in front of it. A patterned backdrop needs a quiet object; a plain backdrop needs a busy one. Also put the tree on a distressed or raw wood surface. Silver against a glossy finish doubles the sparkle to the point where it starts looking cheap instead of festive.
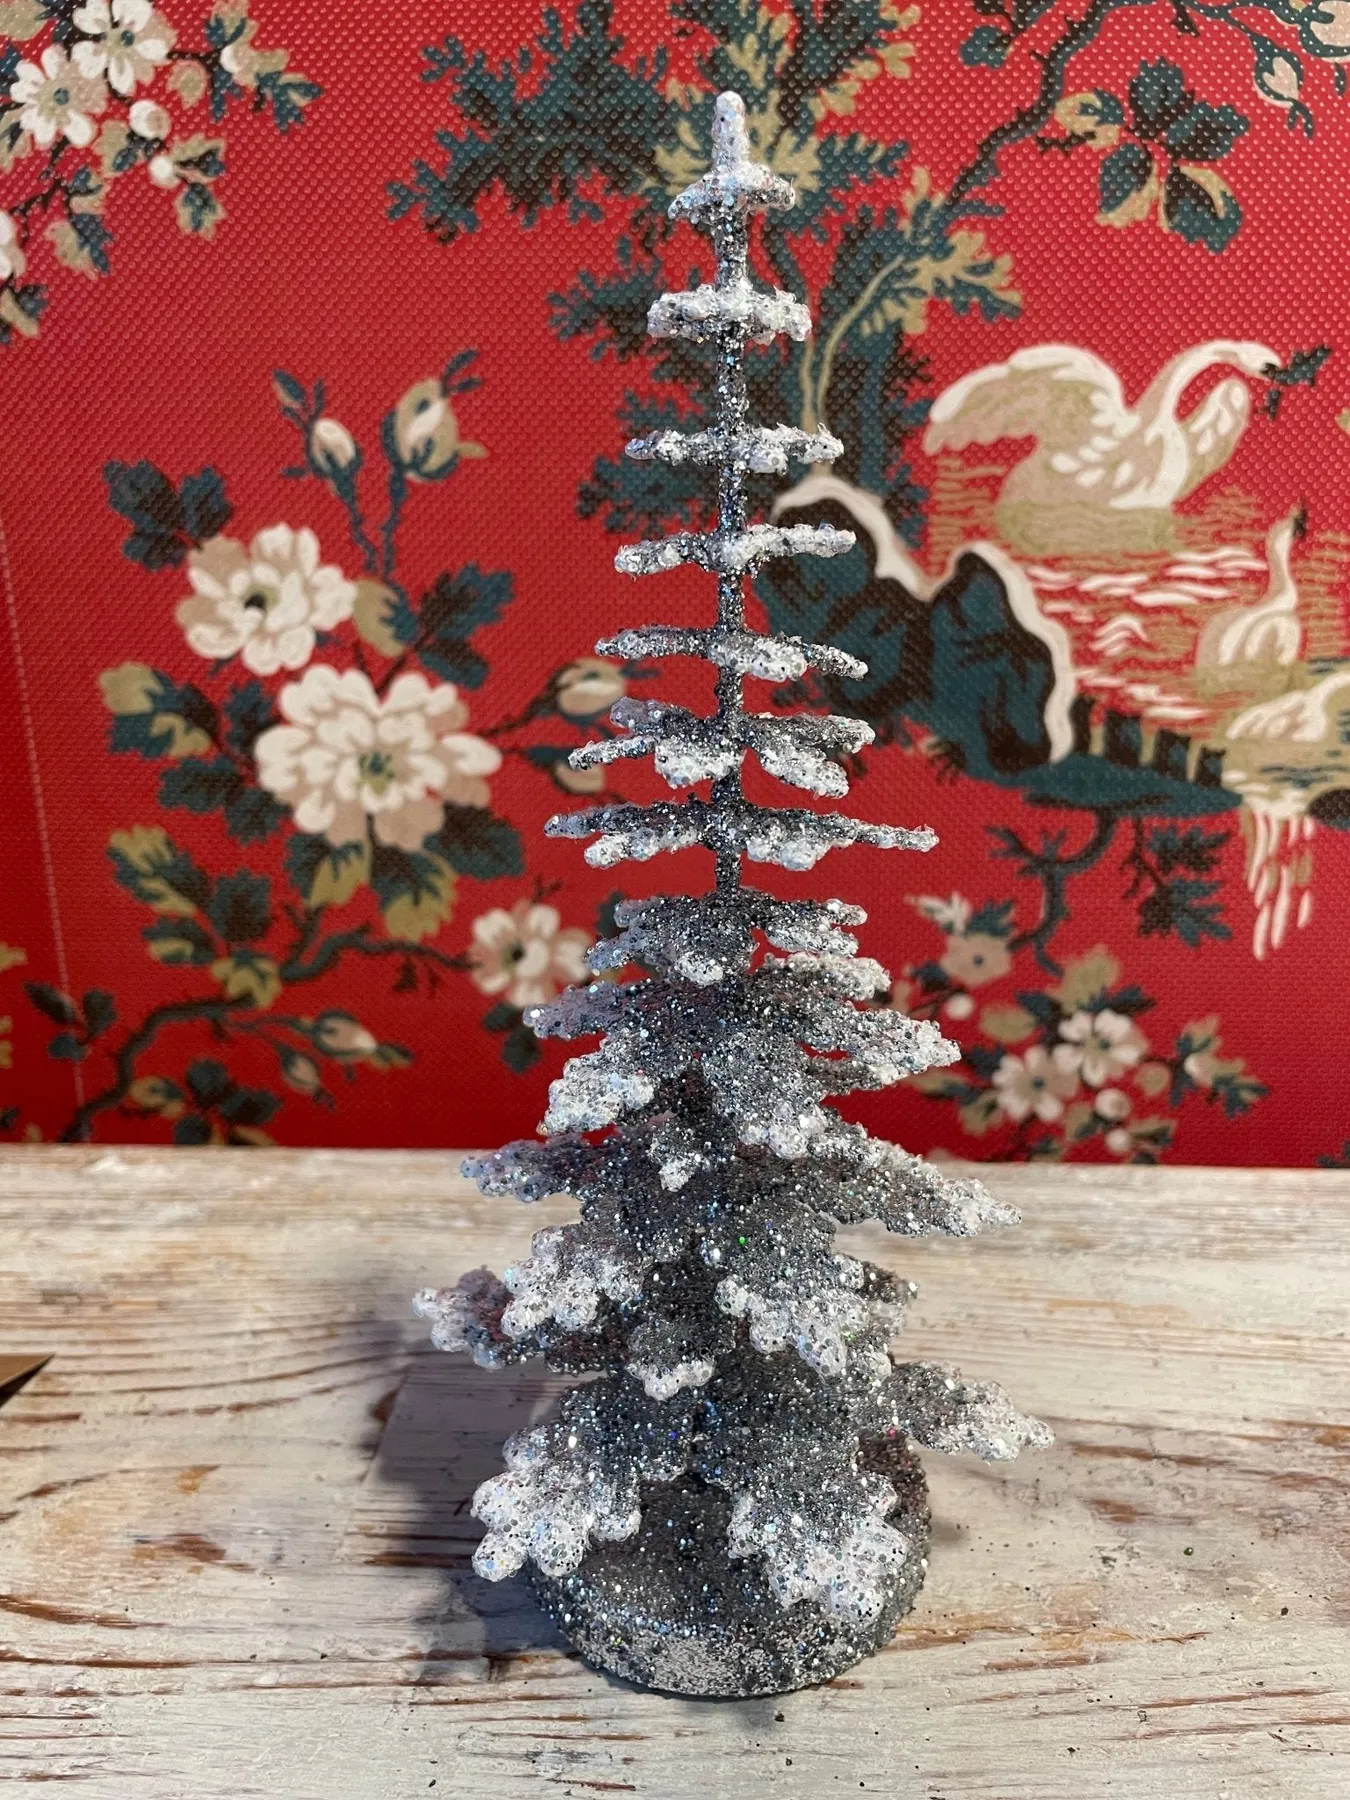
It’s the pairing of toile and glitter that makes this memorable — a heritage textile sitting next to a dollar-store texture. Remove the toile and this is a generic mini tree on a board. Remove the glitter and it’s just a red-and-cream still life. Together they read as a collected shelf, which is a far harder thing to fake than either element on its own.
17. Stacked Corrugated Rings Under a Folded Paper Star
Corrugated edges are dust magnets — all those exposed flutes act like a comb. Run a soft brush attachment or a dry paintbrush across the layers every two weeks; a damp cloth will delaminate the paper almost instantly. Keep it well away from the lit candle you’re styling beside it, and if it sits anywhere near a radiator or heat vent, the layers will warp within a single season. Move it off the register and it holds shape for years.
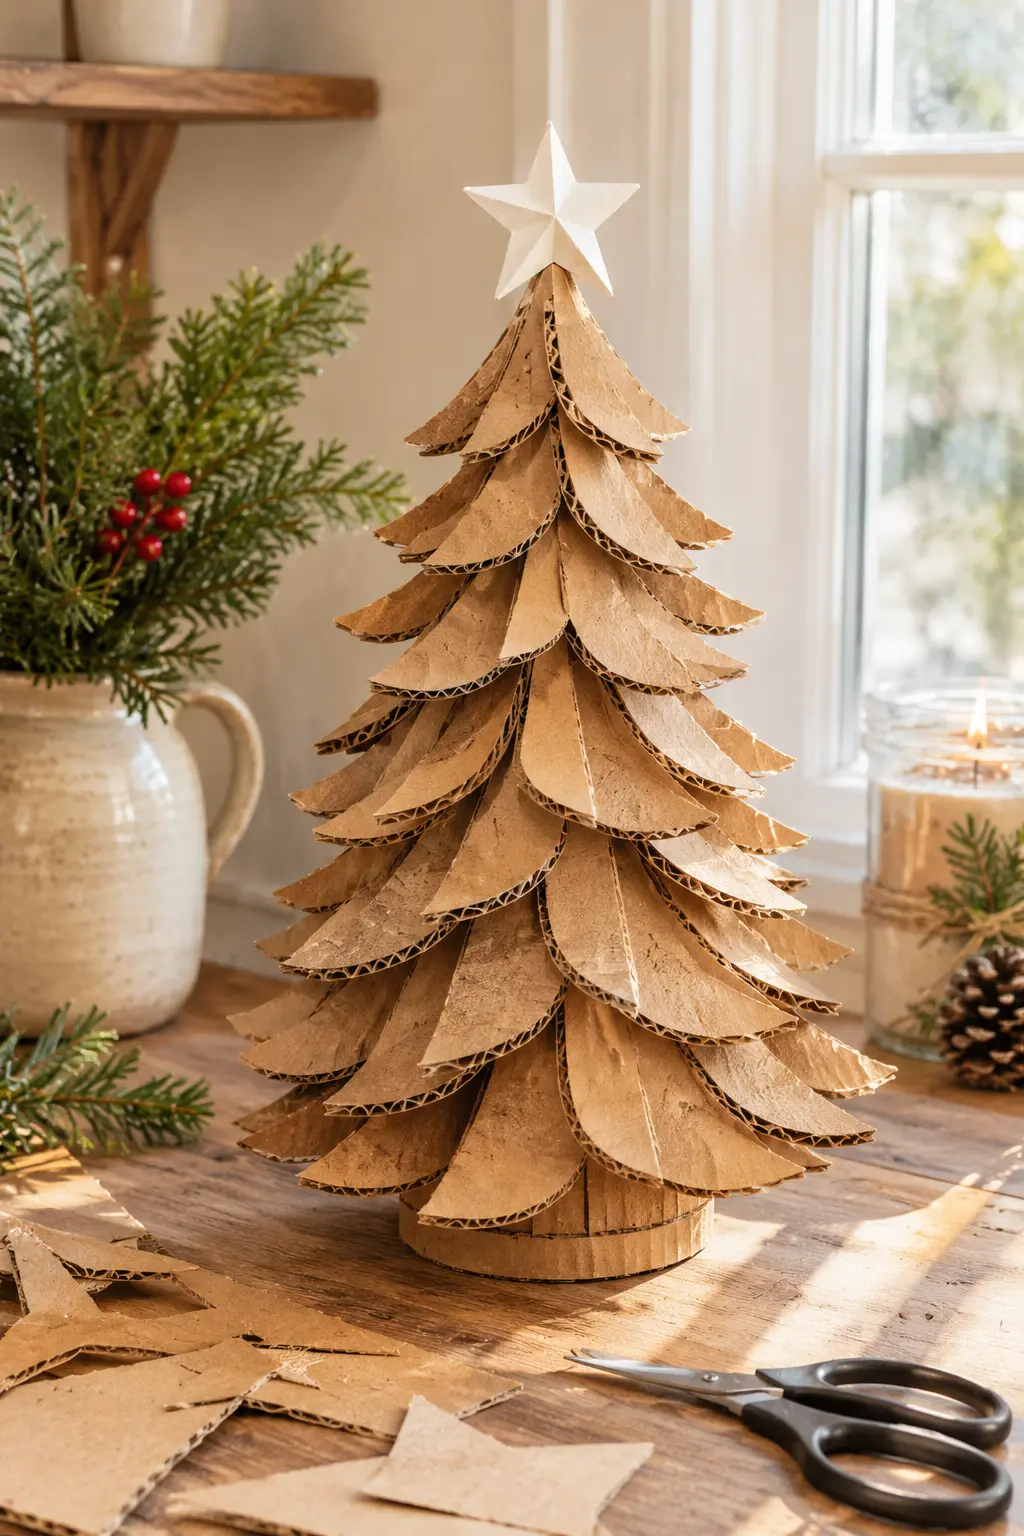
Every element here is either free or under $10. The cardboard comes from a shipping box. The white star is a sheet of cardstock scored and folded — about $0.50. Evergreen clippings are free from a tree lot’s discard pile in late November, a jar candle is $4 at a discount store, and pinecones are a walk in the park. Total styling cost: under $15 for a display that reads like a $200 boutique tabletop vignette.
18. Accordion Paper Trees Climbing a Wooden Staircase
Staircases are the most underused display surface in a house, and they only work for this idea if the treads are at least 10 inches deep. Trees under 10 inches tall fit on the landing; anything over 14 inches needs the floor or a console instead. In a narrow 36-inch stair hall, keep the trees along the outer edge so nobody kicks them at 7 a.m. on a Tuesday.
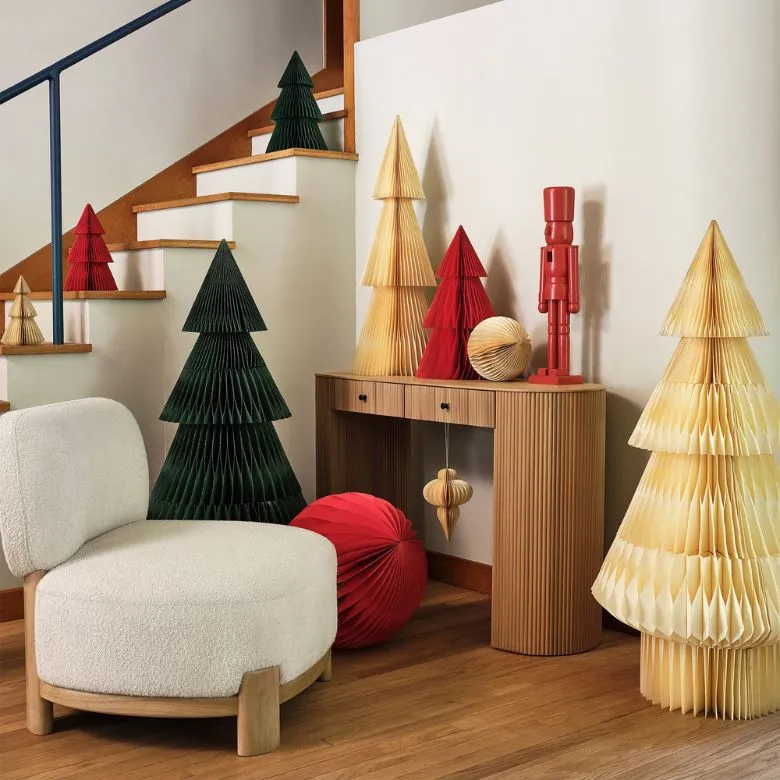
The placement does all the work. Instead of one big tree, you get a repeating shape at three different heights, which creates a rhythm the eye follows upward. The dark green, deep red, and pale yellow trio is deliberately unbalanced — two moody colors and one bright one — so it never reads as a matched set from a big-box store. That cream boucle chair in the corner softens the whole thing without adding another pattern to the mix.
19. A Green Egg Carton Tree Covered in Fan Ornaments
- Count your cartons before you paint. A 30-inch tree needs about 18 of them — start collecting in October.
- Choose a paint that flexes. Flat latex or craft acrylic, never enamel.
- Confirm you have somewhere to dry 40-plus panels — a garage floor or a tarp works fine.
- Decide on your light source first. These panels cast heavy texture shadows, so uplighting beats overhead.
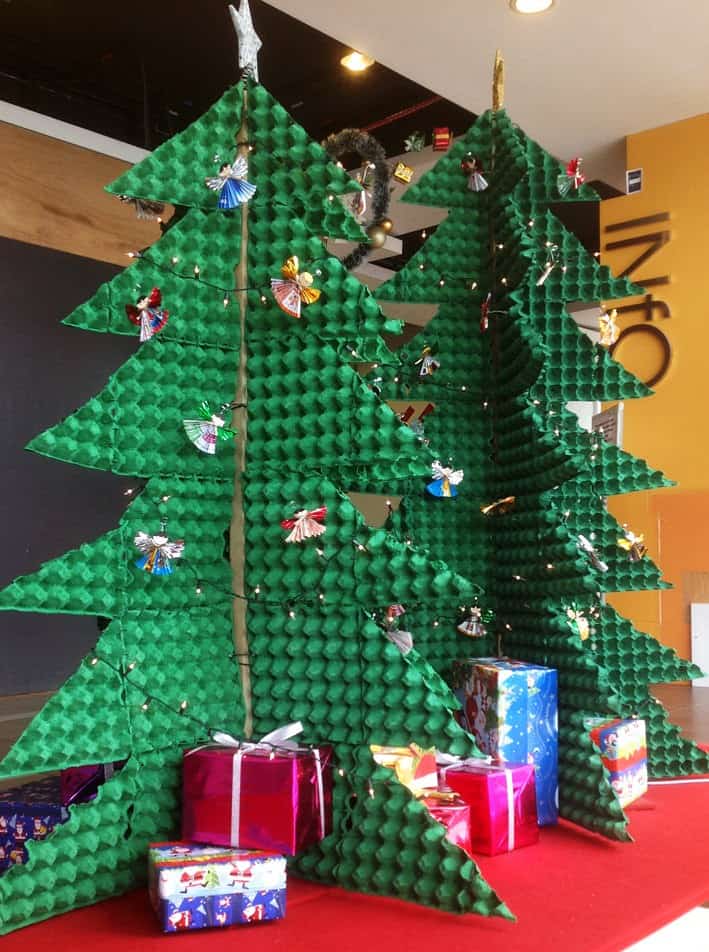
- Cut the egg carton lids and cups into roughly 3-inch panels with a craft knife.
- Paint each panel green and let dry a full 24 hours.
- Stack the panels in rows, widest at the base and narrowing toward the top, hot-gluing each row to a cardboard cone form.
- Weave the string lights through the gaps between rows, tucking wire behind the panels.
- Hang the fan ornaments on the outer layer with small wire hooks.
20. A Wall-Mounted Tree Rolled From Magazine Pages
The palette isn’t really a palette — it’s whatever print you feed it. Rolled magazine pages give you a hundred tiny variations of grey, cream, and ink, which is why this reads as texture instead of chaos. The working rule: 70% neutral paper, 20% warm color from the lights, 10% red on the star. If you use only glossy color pages, the whole thing turns muddy and busy at the same time. Sort for newsprint and text-heavy pages first.
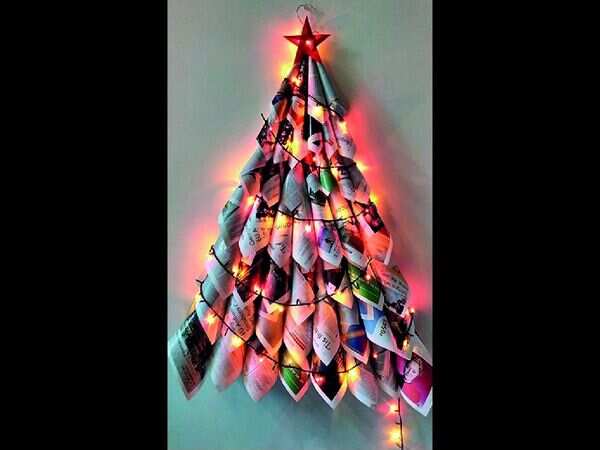
This is a fire-adjacent project and it deserves a real thought. Paper cones plus incandescent mini lights equals heat, so use LED only, no exceptions. Mount it on a wall away from curtains and keep at least 12 inches of clearance below. The rolled paper is also genuinely fragile — a bumped shoulder will flatten a row. Plan to refresh the outer layer each year, and accept that this is one of the more temporary ideas in the whole article.
21. A Tiered Cardboard Carousel With Painted Cutout Charms
- Cardboard, 5mm, four sheets: $16–$26
- Warm fairy lights on copper wire, two strands: $12–$18
- Acrylic craft paint in four colors: $8–$14
- Cutout templates for horses and apples: $0–$10
- Gift wrap and boxes for the base: $12–$20
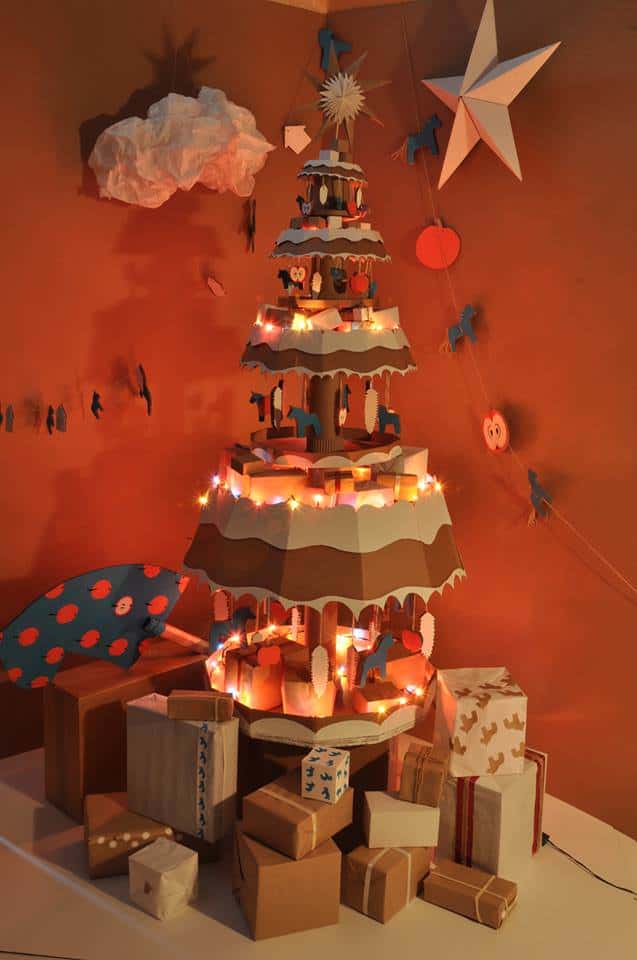
Total: $48–$88. A ready-made lit carousel runs $120 and up.
It’s also the dressed-up cousin of Idea #3 — same tiered silhouette, more whimsy, less restraint.
Paint the cutouts before you hang them, and paint the backs too. Unpainted back sides catch the light and read as raw cardboard from the side, which kills the illusion immediately. Use three thin coats of bright acrylic instead of one thick one, because thick paint curls cardstock. Place the lights first and the charms second, so you’re never working around a dangling paper horse while you’re trying to tape a wire.
22. Green Accordion Layers Crowned With an Origami Star
The origami star. It’s the only element here that isn’t a circle or a tier, and it introduces a second kind of geometry into an otherwise repetitive silhouette. Swap it for a plain five-point star and the tree still works — it just stops feeling considered. Notice too that the star is a lighter green than the tree itself, creating one soft tonal step at the top instead of a hard contrast. That’s a small move with a big payoff.
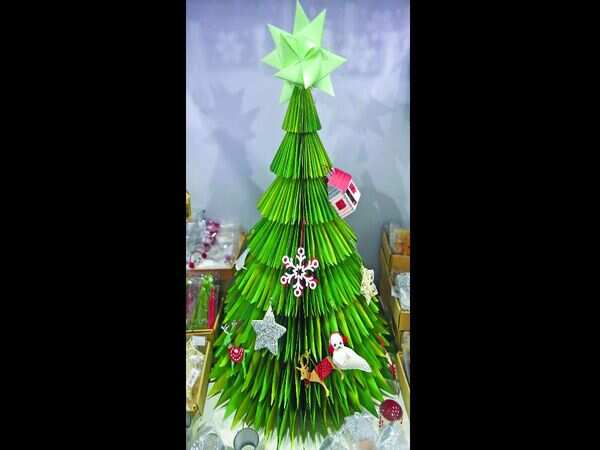
Accordion-fold construction is the most-saved cardboard technique of the 2025–2026 season, largely because it’s the one paper method that looks good from every angle without lighting tricks. It’s also the only one that folds flat for storage. Expect to see it migrate from trees into wreaths and garlands next year — the technique has more staying power as a trend than this specific tree shape does.
23. Star-Shaped Cardboard Layers With Red Ball Ornaments
- Cut seven star shapes from corrugated board, decreasing 3/4 inch in width each time.
- Cut a center slot in each star, slightly wider than the board thickness.
- Slide the layers onto a vertical cardboard spine, largest at the bottom.
- Hot-glue a white 6-inch wood disc to the base for stability.
- Dab small red ornaments onto the outer layer points with clear glue dots.
Time: about 90 minutes. Materials: roughly $11 plus a star topper.
Red baubles are the cheapest thing in the holiday aisle — a 60-count bag of mini spheres is about $6 after Thanksgiving. The white wood disc base runs $3 at a craft store, or use a sturdy cardboard circle you already have. Skip the hot glue and use clear removable glue dots instead, and you’ll be able to change the ornaments next year without tearing the board. Full build for under $20.
24. Neutral Pleated Cone Trees Against Fluted Paneling
These work at almost any scale because they’re pure shape. In a room under 100 square feet, stay between 6 and 12 inches so they read as a cluster rather than a crowd. In larger spaces, go up to 24 inches and group three different heights on a single tray. The fluted wall behind isn’t accidental — vertical texture behind vertical trees doubles the geometry. On a flat painted wall, you’ll want a taller tree to compensate.
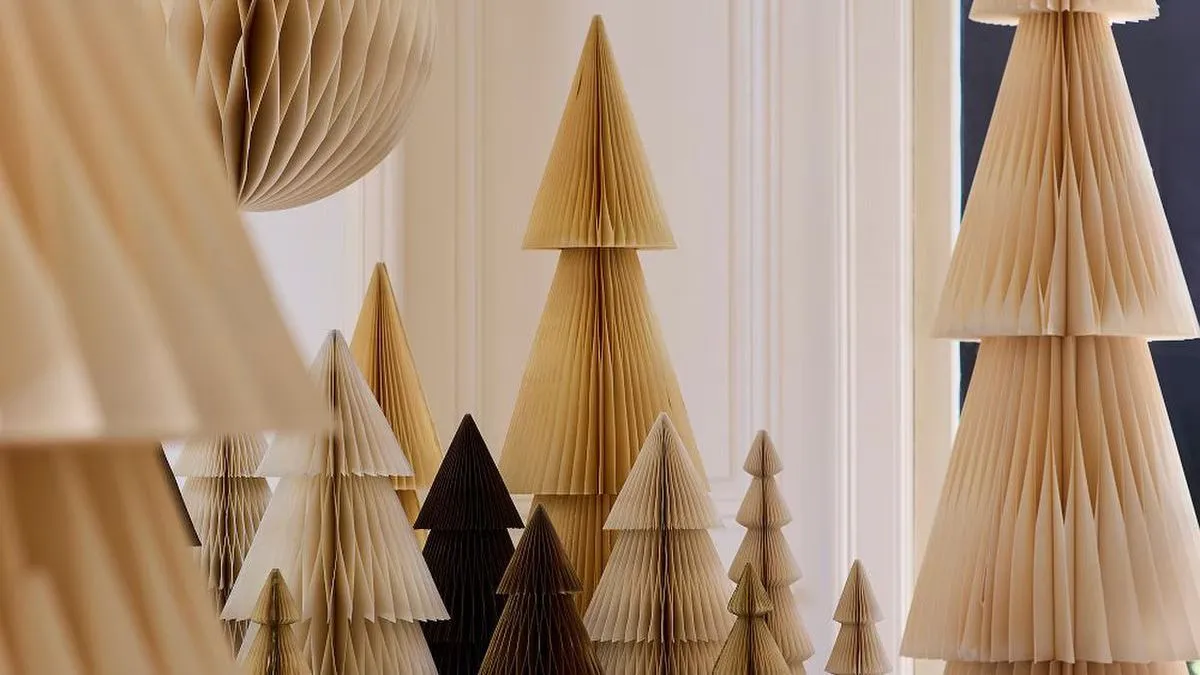
Cream, light tan, dark brown. Nothing else. That’s a monochrome palette in three values, and it’s why the display feels calm instead of empty.
- Cream pleated cone, 12 inches
- Light tan tiered cone, 9 inches
- Dark brown single cone, 6 inches
- Fluted or ribbed surface behind for texture echo
When you build a neutral arrangement, the only variable you control is value contrast, not hue. Swap cream for warm white, or tan for camel, and the formula survives. Introduce one red ornament and you’ve changed the entire proposition.
25. Layered Cardboard Trees With Deer Crossing the Base
The deer are what turn a flat backdrop into a scene. Two identical tree panels, one in front and one behind, create real depth, and the little herd at the base gives the eye a foreground, a middle, and a background — the same three-plane logic photographers use. The white fibrous material around their feet reads as snow without anyone having to say the word out loud. Remove the deer and it’s a shelf decoration again.
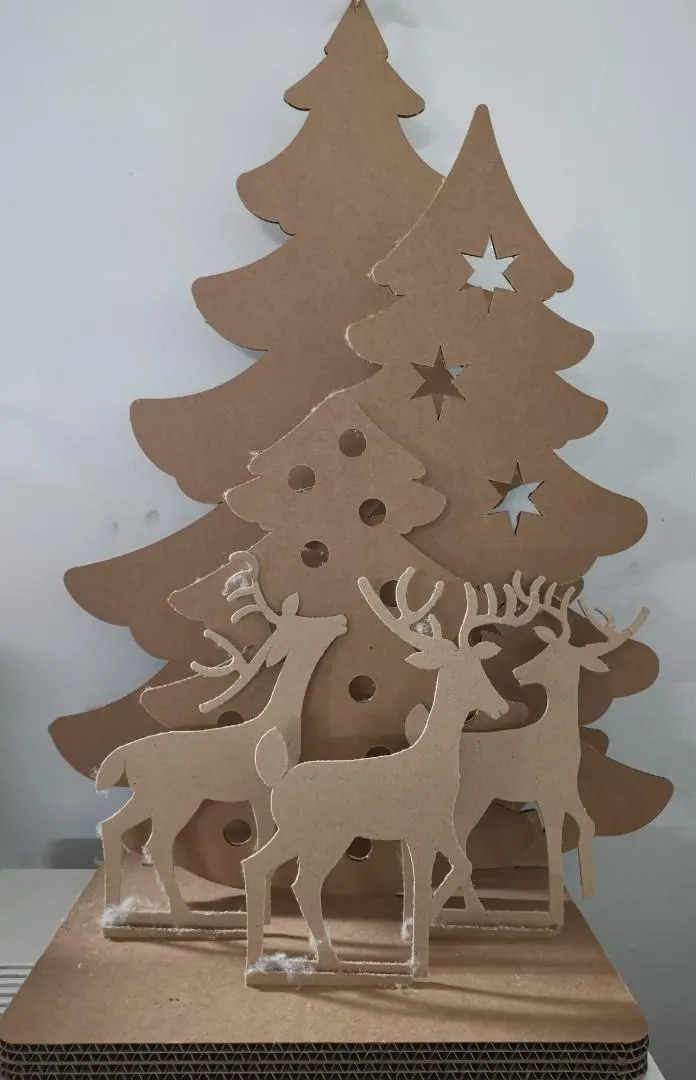
Cardboard deer will not survive a cat, a toddler, or a Roomba. They’re also light enough that a slammed door knocks them over, so weight the base with a hidden bag of rice or a couple of flat stones from the yard. And that snow is loose fiber, which means it travels — set the whole thing on a tray with a lip, or you’ll still be finding wisps of it in March.
26. An Unfinished Plywood Cutout, Straight From the Saw
- Sand both faces at 120 then 220 grit before you commit to any finish — you can’t undo a rough surface later.
- Decide now: paint it, stain it, or leave it raw. Raw plywood ambers over time.
- Check the weight. A 36-inch 3/4-inch plywood tree runs 8 to 12 pounds.
- Confirm how you’ll stand it up. A slot-and-foot base is simplest; lean it against a wall and it will slide.
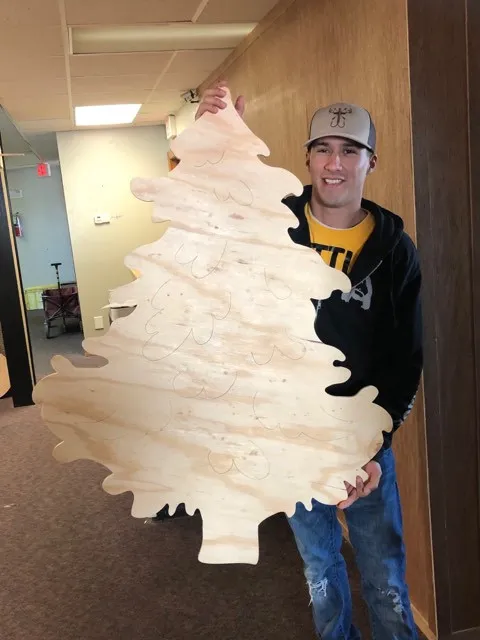
Plywood reads well at large scale because it’s structurally honest. A 30- to 42-inch cutout is the sweet spot for a room between 120 and 200 square feet; anything smaller looks like leftover scrap, and anything larger needs 4 feet of clear floor in front of it. Ceiling height isn’t the constraint — sightlines are. If a sofa blocks the lower third, go smaller. For a lighter footprint at the same scale, see the open-lattice version in Idea #9.
Raw plywood is low maintenance and high consequence. It doesn’t need dusting more than monthly and it won’t fade, but an unpainted edge will splinter and a splash of water leaves a permanent ring. If you want the raw look with protection, one coat of matte water-based polyurethane keeps the grain visible and adds maybe 20 minutes to the build. Reapply every three to four years.
27. A Slotted Pale Wood Tree Draped in Red Paper Balls
Hang ornaments on the outer slots only, and stop two-thirds of the way up. Red paper balls clustered low with bare pale wood above gives the tree a taper you simply can’t get from an even spread. On a 4-foot tree, that’s roughly 24 ornaments, not 60. Use thin twine loops instead of metal hooks — hooks leave visible scratches on soft wood after a single season, and you’ll be annoyed about it every December thereafter.
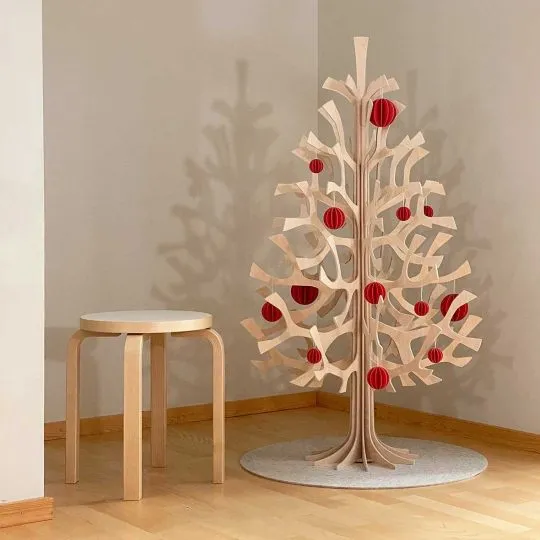
The little stool. It’s doing two jobs at once: giving the corner a second height and giving the tree somewhere to sit visually. Without it, the tree floats against a blank wall and the corner feels unfinished. With it, you get an L-shaped composition and a handy place to set a mug. The white top also quietly echoes the spacing of the ornaments above it.
28. A Backlit Triangle Strung With Red and Gold Minis
- Flat cardboard triangle panels, four sheets: $12–$20
- Warm white mini LED strand, 300 count: $16–$24
- Mini red and gold ornaments, 50 count: $10–$16
- Picture light or LED strip for behind: $14–$22
- Draped fabric and a tray for the base: $10–$18
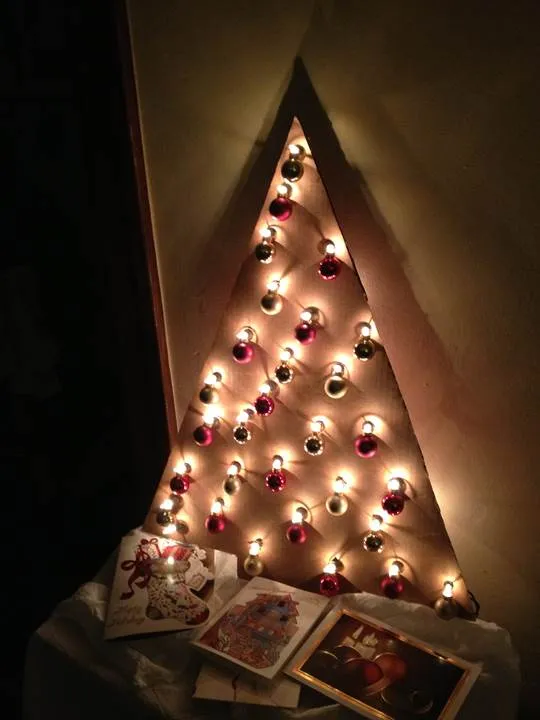
Total: $62–$100. Swap in a bag of mixed baubles from a discount store and you’re at $45.
A triangle this simple needs at least 5 feet of clear wall width to feel intentional — it’s a graphic element, not a corner filler. It works on a console, a mantel, or a low dresser, but it needs something at the base or it looks like it’s floating in the middle of nowhere. Christmas cards and a framed photo are doing that job here. In a small apartment, scale it down to 24 inches and lean it on a shelf instead of hanging it.
29. A Lit Cardboard Gingerbread House With Paper Chain Garland
- Cut the house panels — two gables, two side walls, one roof — from corrugated board.
- Cut a small door and window opening in one panel so light can escape.
- Assemble with hot glue, leaving the roof loose so you can reach inside.
- Puff-paint the icing details: roofline, window frames, and swirls on the gable.
- Set a battery puck light inside and lay the roof back on.
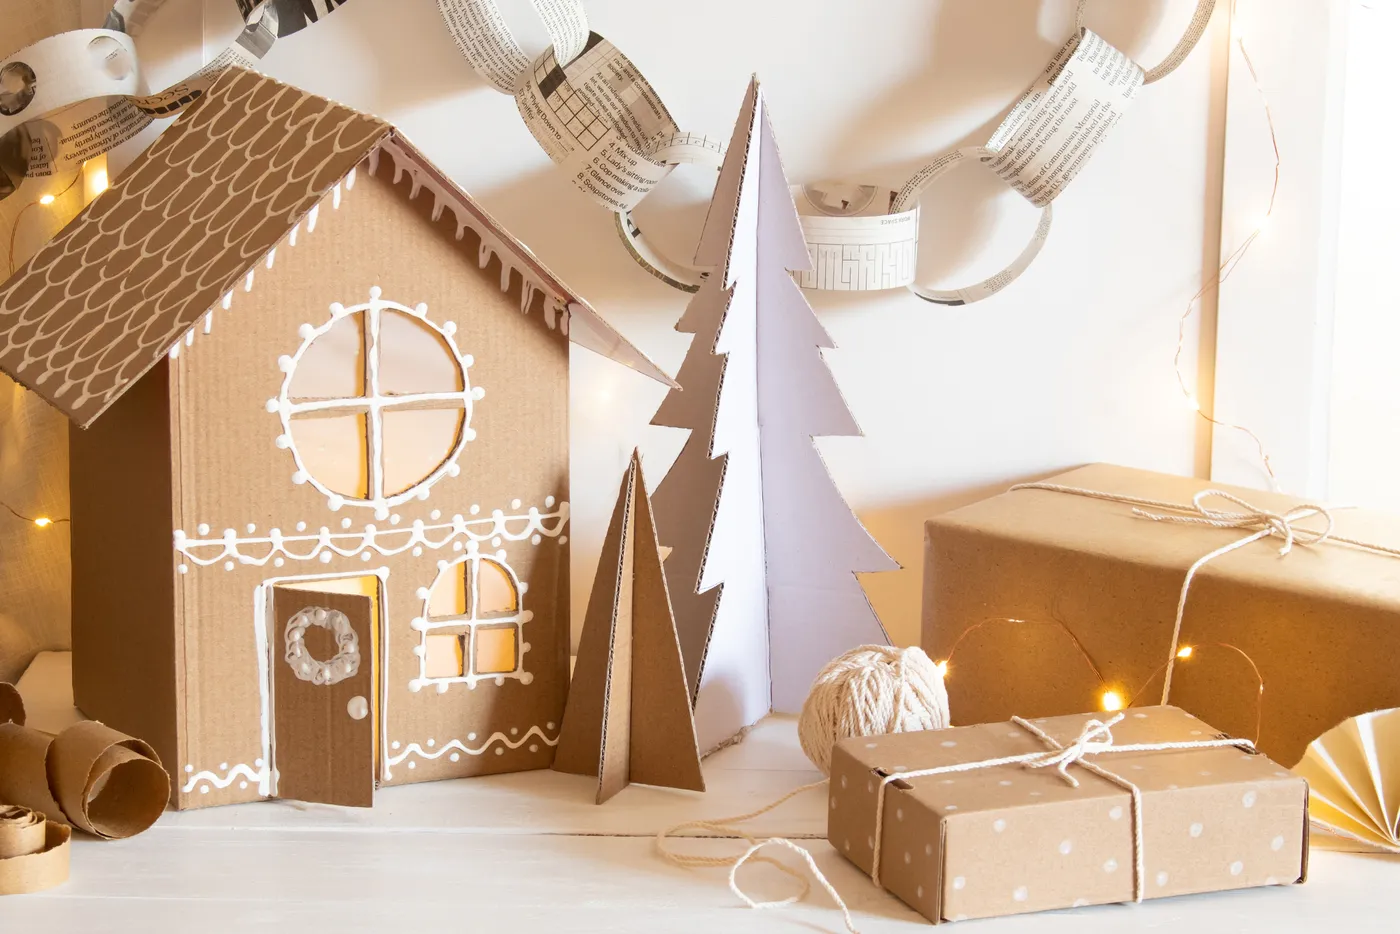
Time: about 3 hours including paint drying. Materials: roughly $20.
The lighting is doing the emotional work. A warm glow escaping through a window cutout makes the house feel inhabited, which is the difference between a scene and a craft. The newspaper paper chains, brown kraft gifts, and ball of off-white yarn all sit in the same tonal family — nothing shiny, nothing bright, nothing that catches a flash. That restraint is what lets one small warm light source feel like an entire room.
30. A Dark Pleated Tree Against a Warm Brown Wall
Deep brown is the surprise color of the 2026 holiday season. After years of white-and-silver minimalism, warm chocolate, taupe, and caramel are showing up in saved pins alongside brass and boucle. A dark pleated tree against a warm brown wall is the interior-design version of that shift — decor that looks like furniture rather than decor that looks like a party. Expect this palette to outlast the cardboard tree trend itself.
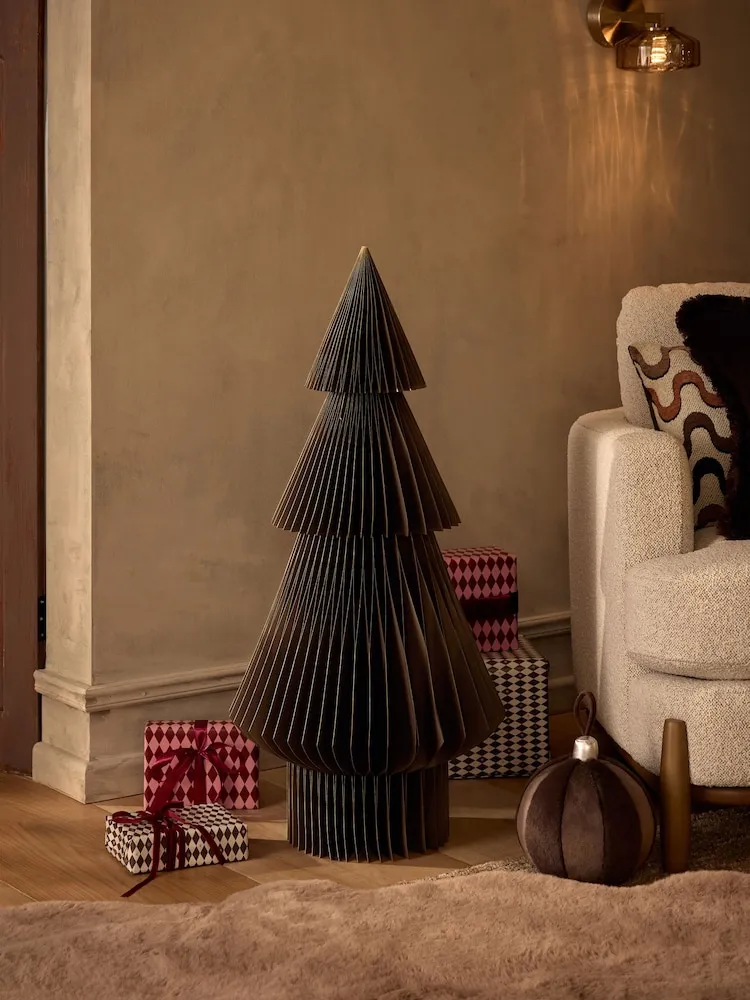
- Dark pleated paper tree, 18-inch: $18–$30
- Checkered wrapping paper, three rolls: $12–$18
- Brass wall sconce with ribbed glass: $45–$120
- Fluffy brown rug, 2×3: $35–$70
- Oversized fuzzy bauble: $8–$14
Total: $118–$252, with the sconce as the only real splurge. Thrift a brass sconce and the whole vignette drops under $80.
It’s about 80% warm brown, 15% cream, 5% brass, and that last 5% is non-negotiable — one brass sconce gives an otherwise monochrome corner a metallic anchor. Swap the brown for charcoal and the brass for black steel and the formula shifts from cozy to moody without changing the layout at all.
31. A Flat-Panel Tree Lit From the Inside Out
- Measure your wall first. A flat panel tree needs 20% of its own width in clear space on both sides.
- Test the lights before you mount anything — fresh batteries or a working outlet.
- Plan cord management. A 6-foot cord on a wall piece needs a clip or a paintable channel.
- Hold the panel against the wall at eye level to confirm it isn’t warped.
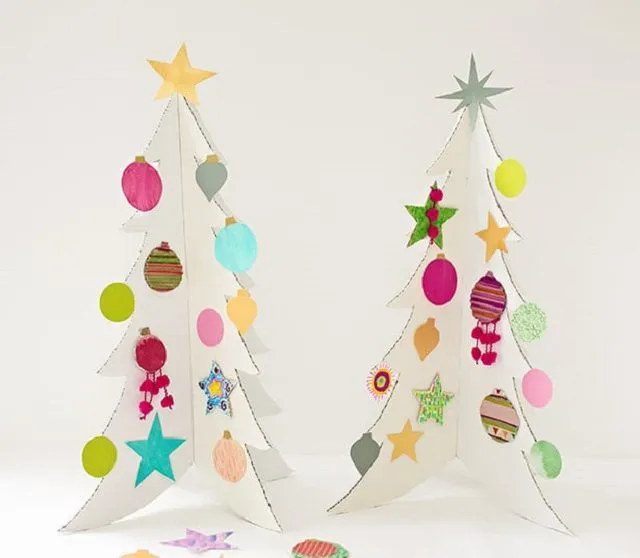
Flat-panel trees solve the one problem every floor tree has: depth. This takes up 2 inches of room instead of 30, which is why it works in hallways, above a desk, and in apartments where every square foot is a negotiation. The internal lighting is what keeps it from reading as a printed graphic — light bleeding through the cutouts gives the silhouette a soft, imperfect edge. Compare with the wall-mounted rolled-paper version in Idea #20: same footprint, completely different texture.
Bring On the Cardboard, Bring On the Glow
Here’s the thing about cardboard Christmas trees in 2026: they cost less than a nice dinner out, they fold flat when January arrives, and they look genuinely beautiful when the light hits them right. Pick one idea that matches your room’s scale — not the one with the most saves — and let it be the only thing in the corner doing any work.
📌 Pin your favorite build to your Holiday Decor board so you can find it again when the craft store aisles get crowded in November.