30 Jaw-Dropping Christmas Window Ideas That Will Make Your Home Sparkle This Holiday
You know that feeling when you finally find a Christmas window that looks exactly right — and then realize you have no idea how to make it happen on your own glass? Same. That’s why we spent a few evenings digging through Target, Etsy, Walmart, and IKEA (plus one very good neighborhood thrift store) to find 30 Christmas window ideas that actually translate to real panes, real sills, and real budgets — everything from about $3 decal sheets to $480 illuminated showpieces.
Inside you’ll find traditional red-and-green, quiet neutral paper stars, hand-painted whimsy, and a couple of neon-bright modern displays, with budget and luxury versions compared side by side where it matters. The 2026 version of the Christmas window is less about perfect symmetry and more about one confident gesture — a single oversized bow, one glowing silhouette, one wall of light. And stay until the end — we break down the most common mistakes that can ruin these looks.
📌 Save this to Pinterest for later — you’ll want to revisit these ideas.
1. Two Windows, Two Temperatures, One Dazzling Facade
The whole facade works because of one principle: color temperature contrast. The left display runs warm gold, the right runs icy blue, and the ornate dark frames between them act as a hard border so the two moods never muddy each other. Without that dark seam, the effect would just read as “a lot of lights.” It also lets you decorate a double window with two personalities — one nostalgic, one futuristic — and still have it look completely intentional.
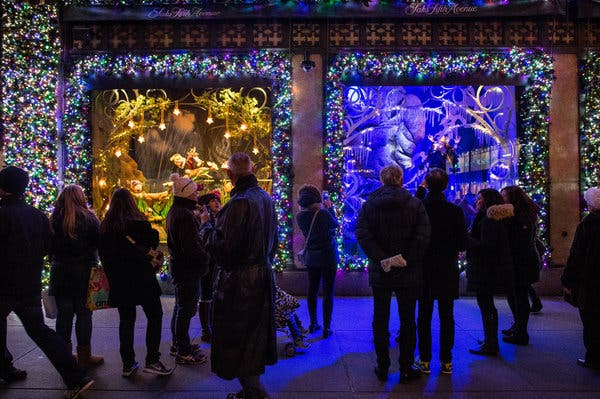
Keep the palettes from bleeding: put every warm bulb on one side of the mullion and every cool one on the other, and don’t let a green multicolor strand cross the middle. Hang the star lights at three staggered heights, roughly 18 to 24 inches apart, so the eye travels down the glass instead of landing on one tidy row.
2. Clear Snowflakes Glowing Above a Pinecone and White Linen
It’s the clear acrylic snowflake. Everything behind it — the tree, the gifts, the pinecone resting on that textured cream textile — is soft-focus and secondary. Because the snowflake is colorless, it picks up the warm LED glow and reads as ice rather than plastic, a trick a white-painted snowflake can never pull off. Remove it and the window becomes a nice but entirely ordinary view of a Christmas tree.
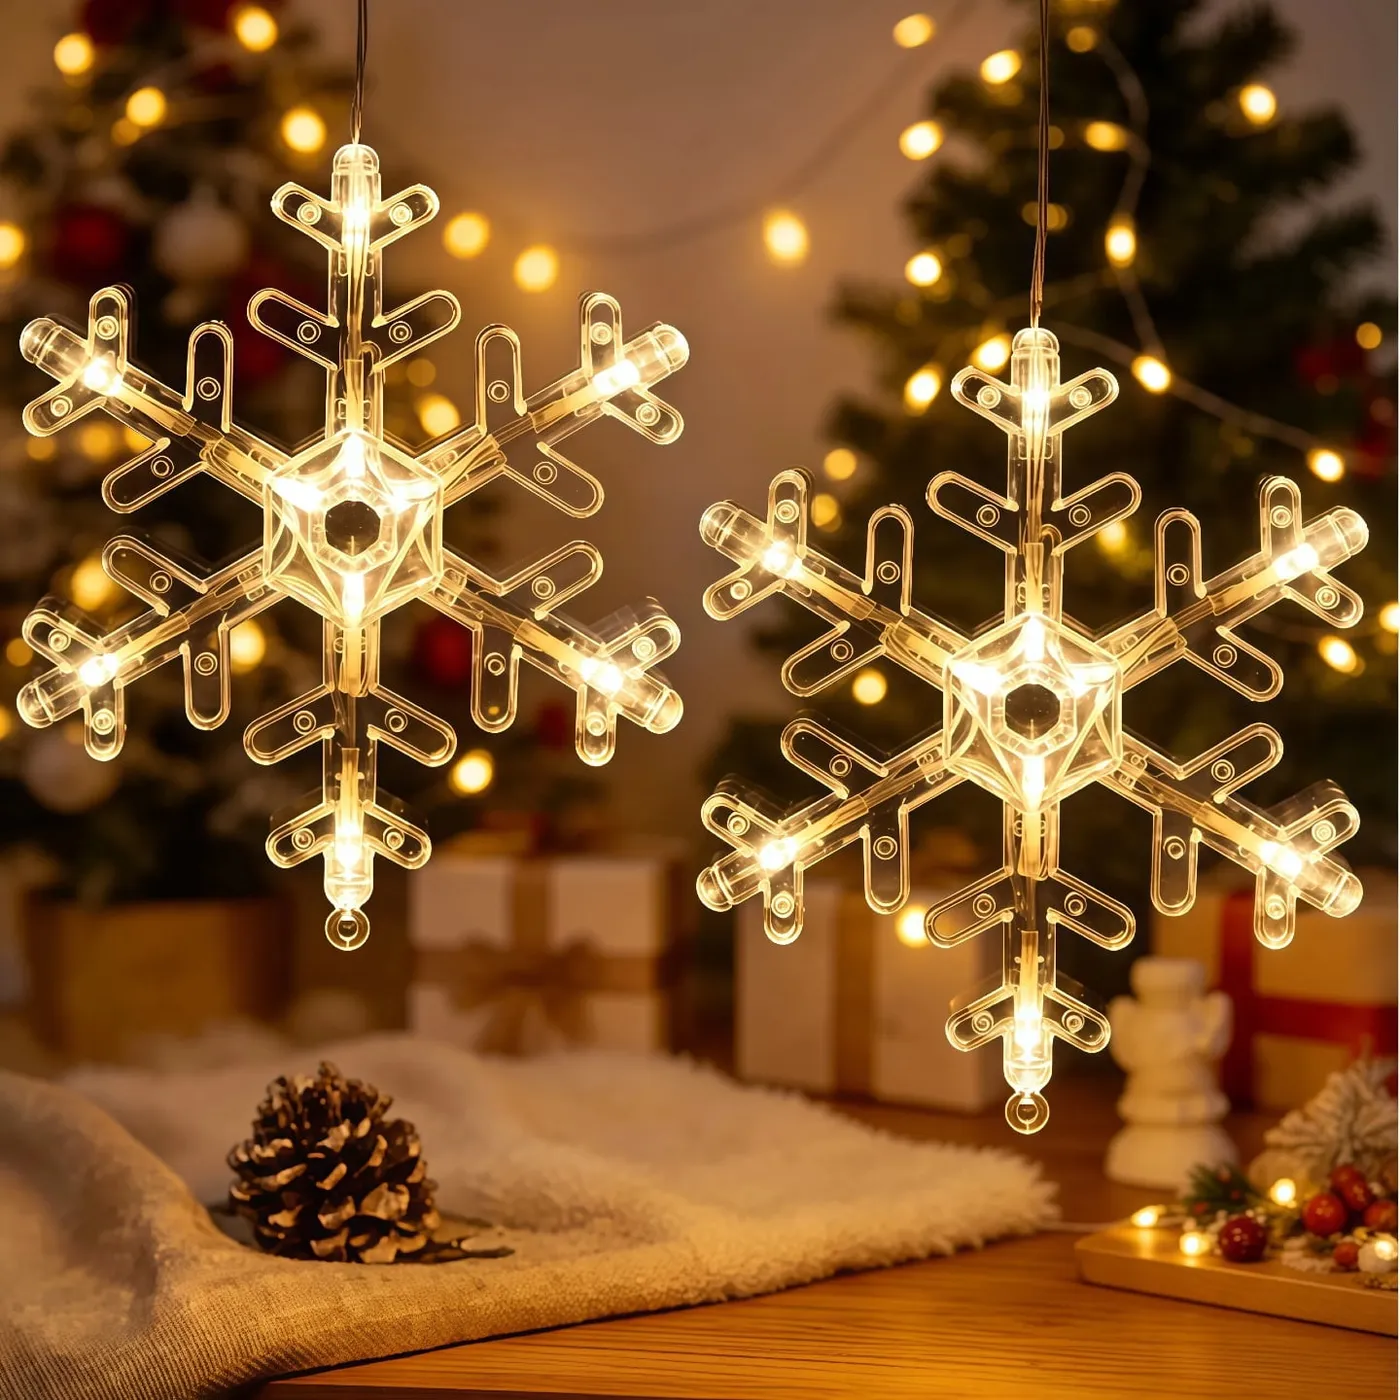
- Illuminated snowflake ornaments (2): $18–$45 each
- Warm white LED string lights: $12–$25
- Textured cream table runner: $15–$40
- Pinecones and small greenery: $6–$20
- Gift wrap and ribbon: $10–$25
Total: $79–$200, with the snowflakes doing most of the heavy lifting.
3. A Three-Pane Classic: Tree, Mantel, and a Tiny Brass Train
The formula here is roughly 60% deep green, 25% warm gold, 15% bright red, with blue lights used only on the tree as a cool accent. Swap the red for burgundy and the gold for aged brass and the whole display shifts from “childhood Christmas” to “grand hotel lobby” without changing a single prop. Proportions matter more than the pieces — keep the green in one dense mass on the left and let the smaller props fill the right two panes.
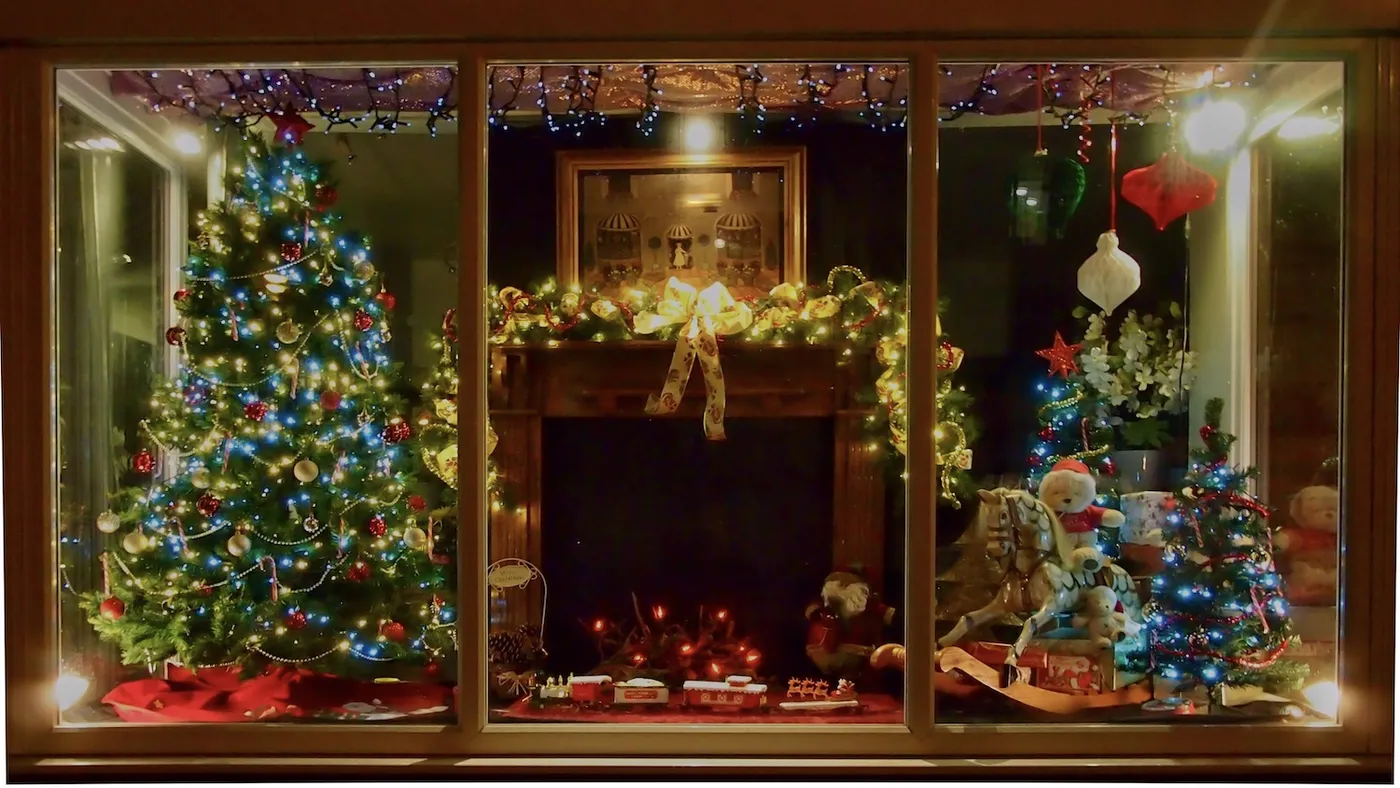
- Zip-tie a 9-foot faux pine garland to the mantel edge, then a second layer 4 inches above it for depth.
- Weave warm white battery lights through the top layer only.
- Wire in three clusters of ornaments in uneven sizes — left, center, right.
- Tie a 6-inch-wide cream velvet bow at center and let the tails fall past the mantel edge.
- Set the little train on a sanded board below so it doesn’t slide.
About 45 minutes and $60–$90 if you already own the garland.
4. A Pink Tree Behind Glass, a Sequin Santa Peeking In
Pink trees photograph like a dream and live a little differently. The flocked or dyed needles show every fingerprint and dusty ornament, and under warm white bulbs a soft pink can slide toward peach. Test your lights against the tree in a dark room before you commit, and keep a lint roller nearby if pets or kids are in the picture. The pink curtains in this display are doing half the work — they’re why the tree reads as a scene.
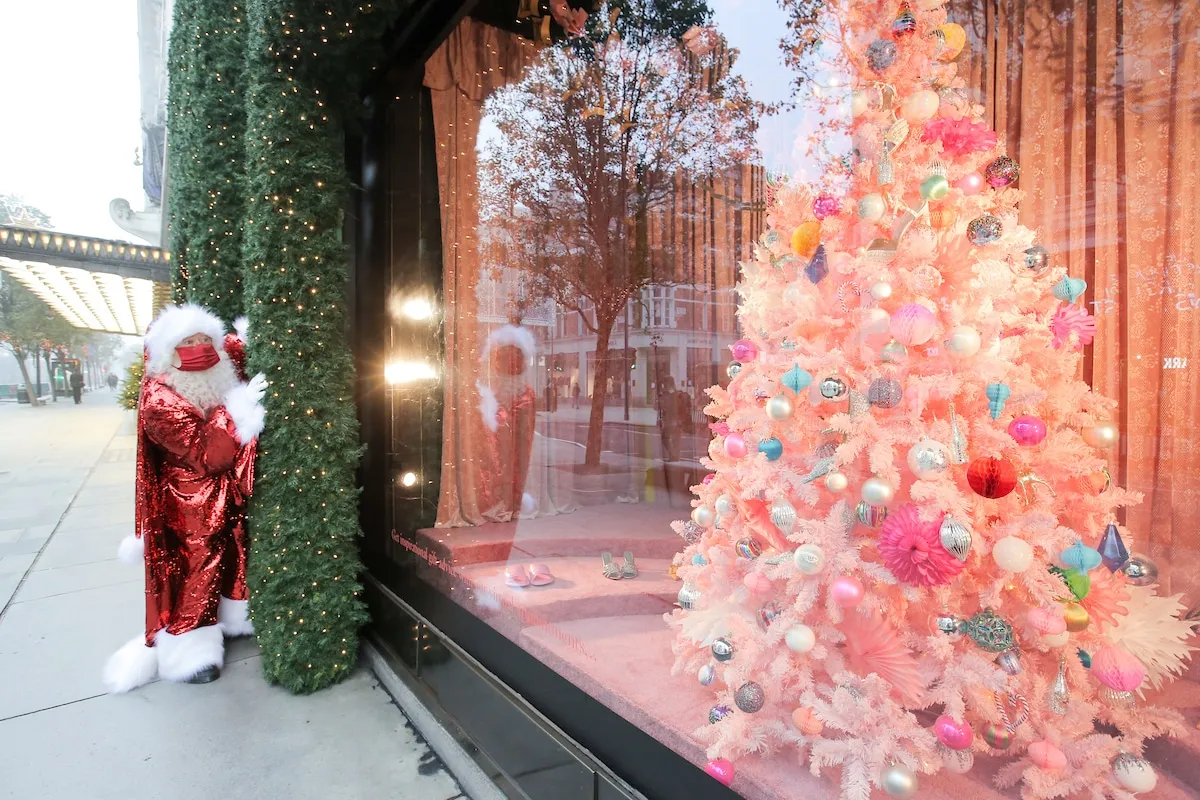
Skip the retail budget and build the same energy for under $120: a 6-foot pink tree from Walmart or Target runs $45–$70, pastel ornaments from the dollar store fill it out for $15, and a green garland with warm lights costs about $20. A red sequin jacket from a thrift store, hung on a dress form or a hook, stands in for Santa.
5. Snowflake Decals That Frame the Snow You Already Have
- Clean the glass with a 50/50 vinegar-and-water mix and dry it fully — decals grab dust, not glass.
- Start with the largest flake in a corner, not the center.
- Work outward with smaller sizes, keeping 3–4 inches between each one.
- Smooth from the middle out with a credit card to kill bubbles.
- Leave the middle third of the window clear so the snowy view still reads.
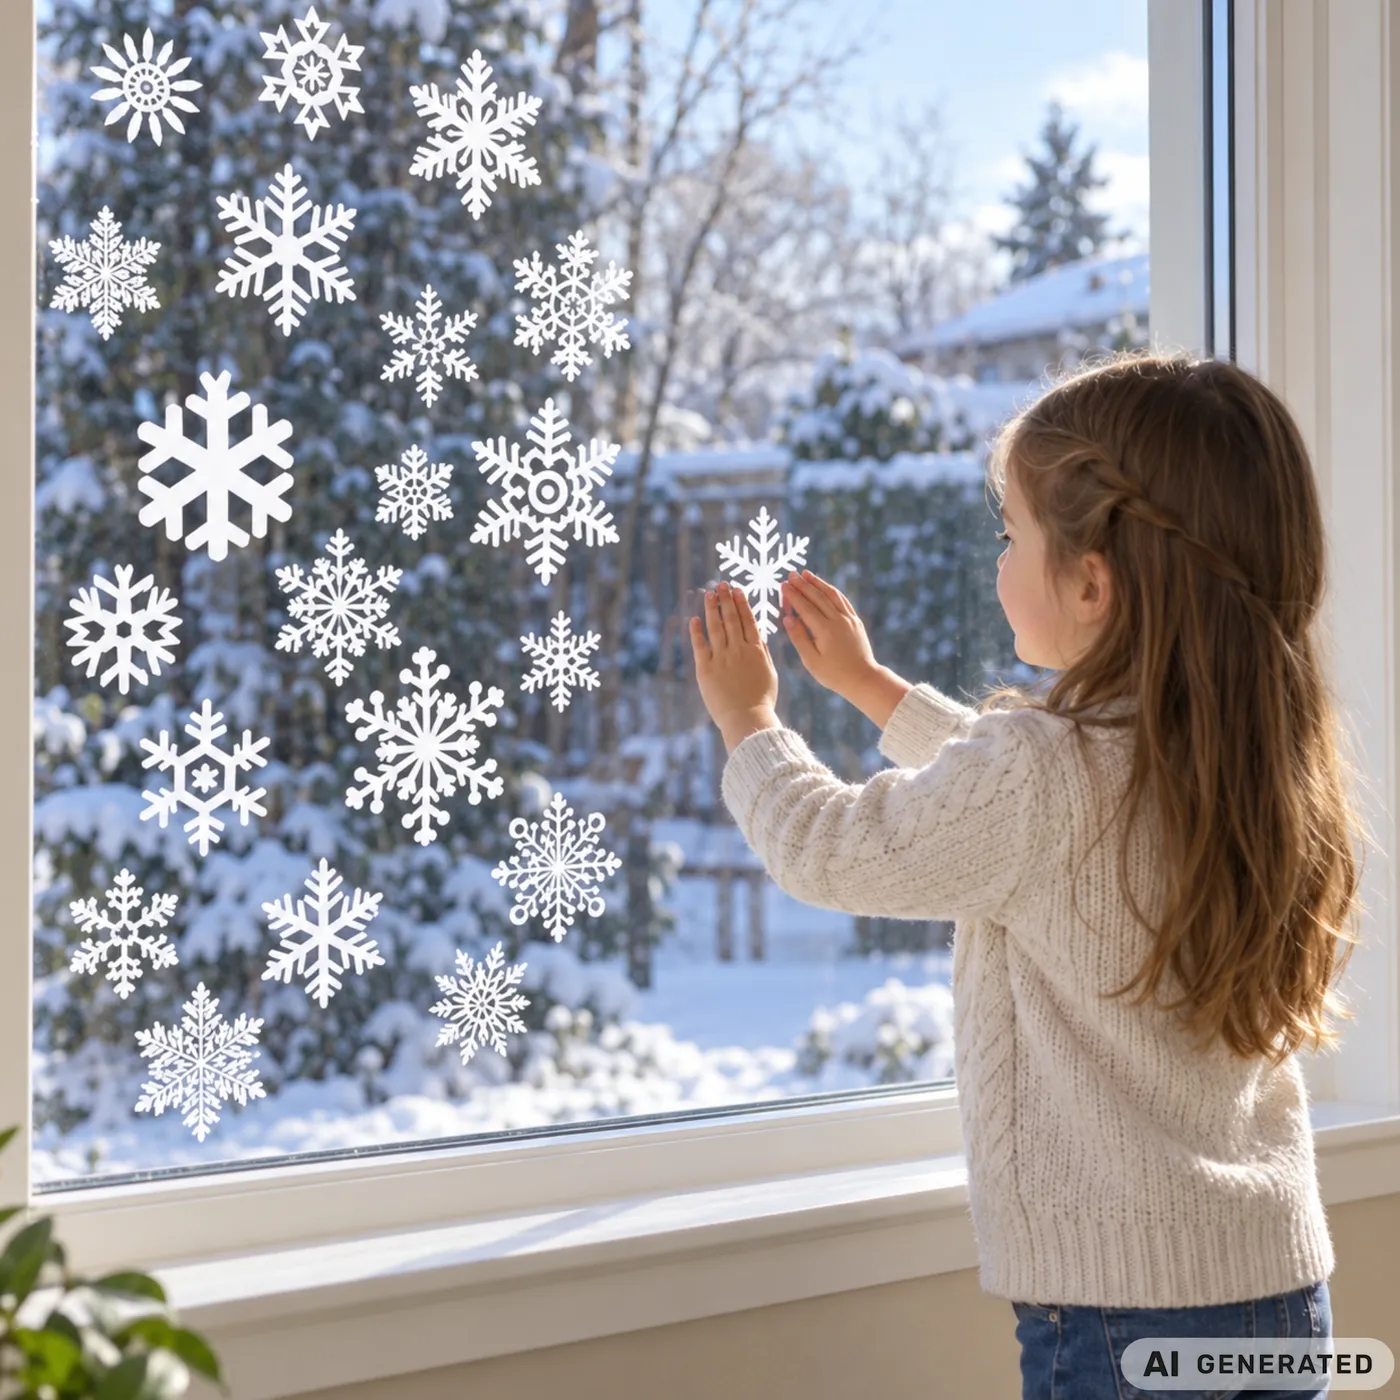
Twenty minutes, $8–$20, and zero damage to the glass.
- Measure the glass and count how many flakes you actually need — a sheet of 24 disappears fast.
- Check which side gets afternoon sun; decals on south-facing glass peel at the corners.
- Confirm they’re static-cling rather than adhesive if you rent.
- Decide now whether the view outside is worth preserving — it usually is.
6. Electric Blue Neon Outlines Against Dark Stone
Blue neon on dark stone is high contrast at its most literal: saturated cool light against a matte, near-black surface. The clock, lightbulb, and television outlines are simple, almost cartoon shapes, which keeps them readable from across a street. And that heavily textured, multi-colored garment on the mannequin gives the eye somewhere soft to land after all those hard glowing lines.
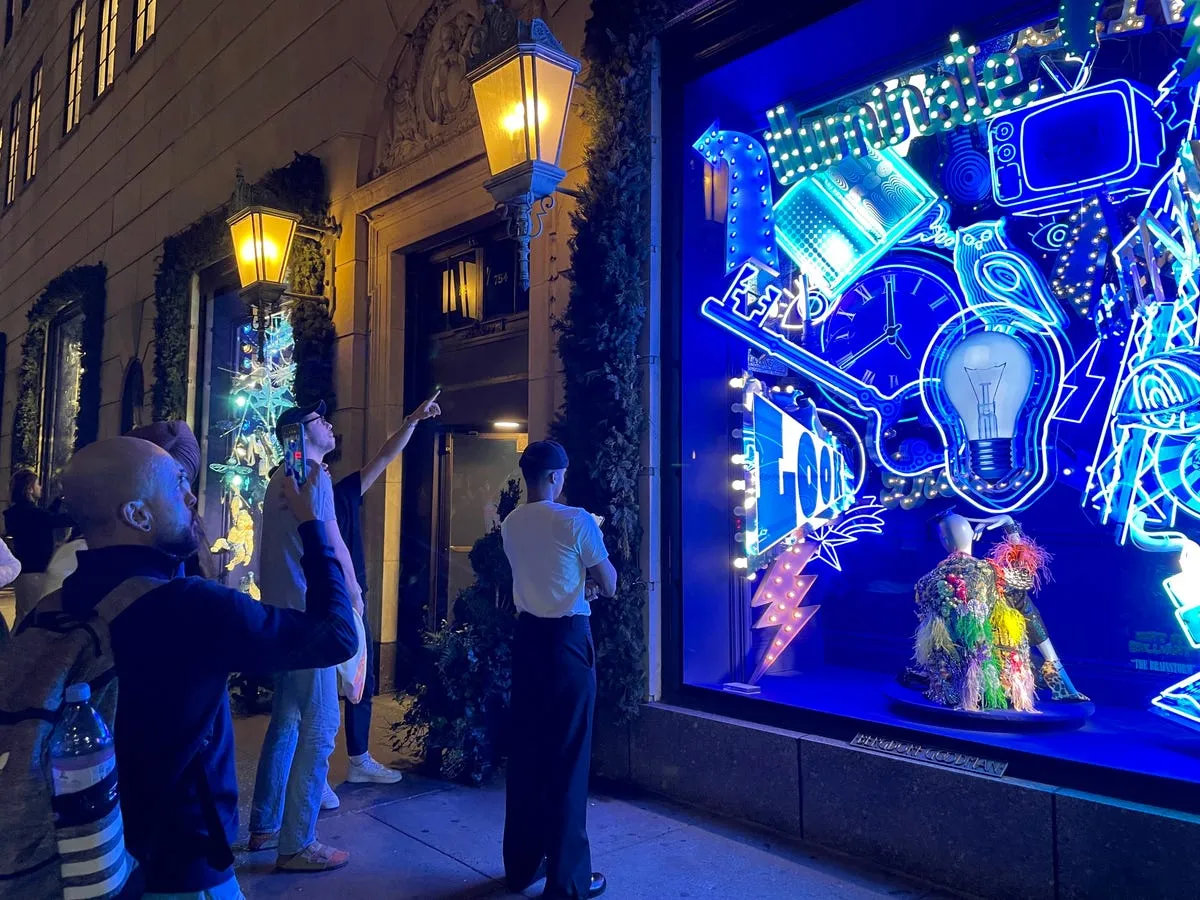
This is the 2026 version of holiday retail: less garland, more graphic. Stores have been borrowing from gallery lighting and neon art for a couple of seasons, and it’s showing up at home as single-color LED outline shapes instead of full rainbow strands. The look has legs because it’s essentially sculpture — change the shape and it works for any holiday.
7. Dark Wood, Red Berries, and One Wreath Doing All the Work
Hang the wreath so its bottom edge sits about a quarter of the way down the glass, not centered. Centered wreaths fight the window frame; lowered ones let the garland above breathe and make the whole arrangement feel deliberate. Use a bow with wired ribbon at least 2.5 inches wide — narrow ribbon vanishes against pine, and the red glitter snowflakes hanging above need something to answer to.
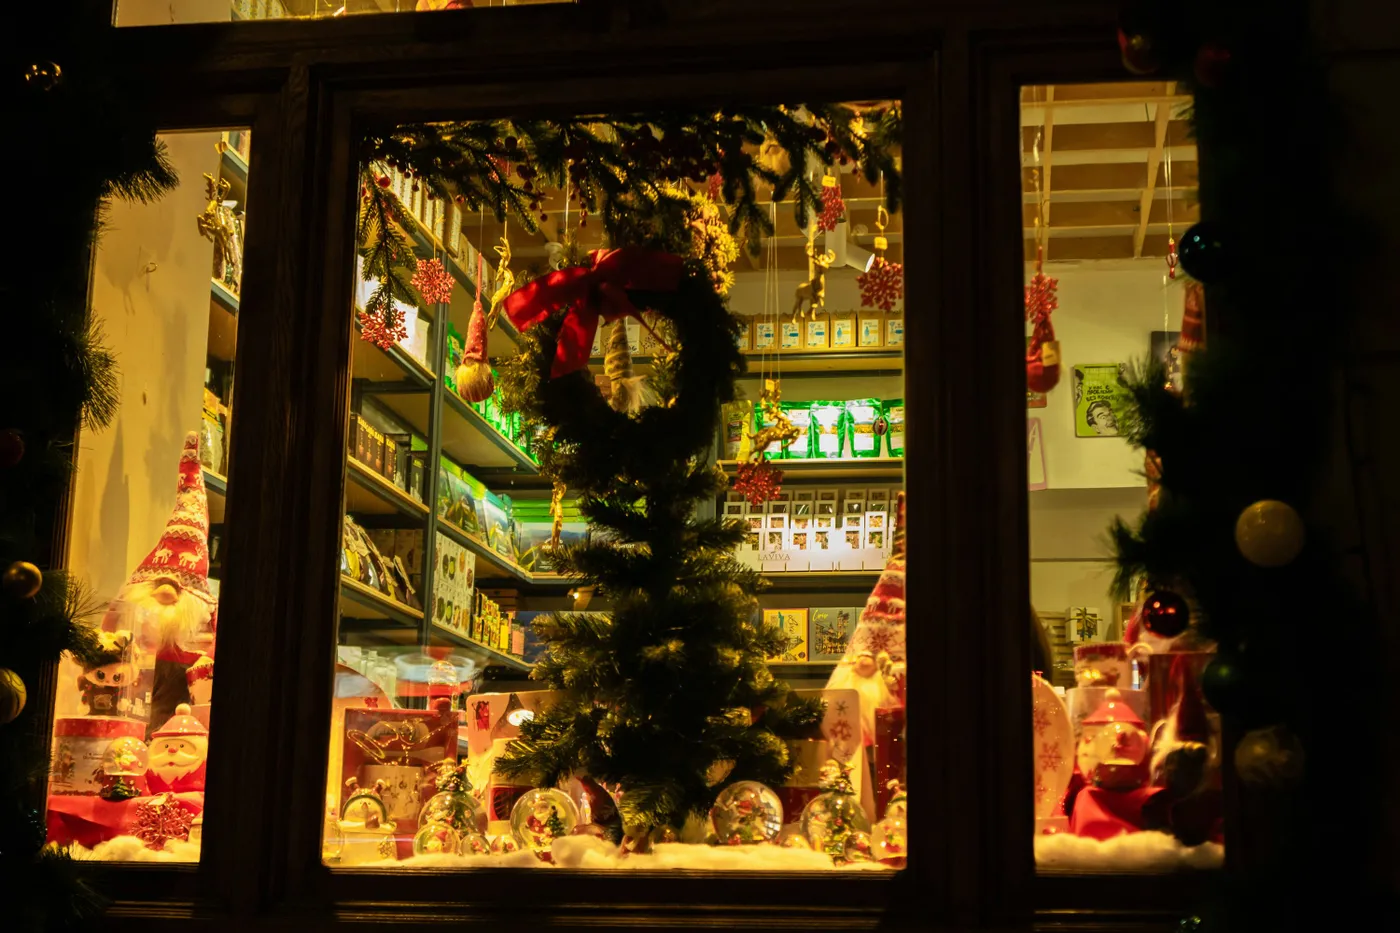
This layered look needs room to read. It works best on windows at least 36 inches wide and 48 inches tall; below that, cut to two layers — wreath plus sill display — or the glass turns into a jumble. Wide-but-short windows do better with the garland swagged across the top and the snow globes moved to a side table.
8. Paper Stars, White Ceramic Houses, and a Very Quiet Palette
Roughly 70% white and cream, 20% warm beige-gold, 10% forest green. That tiny green allowance is what keeps the whole thing from reading as bridal — one tree in the corner with paper and gold ornaments, a few real sprigs. Swap the beige for soft grey and the same formula turns cool and Scandinavian; swap it for blush and it goes soft and romantic.
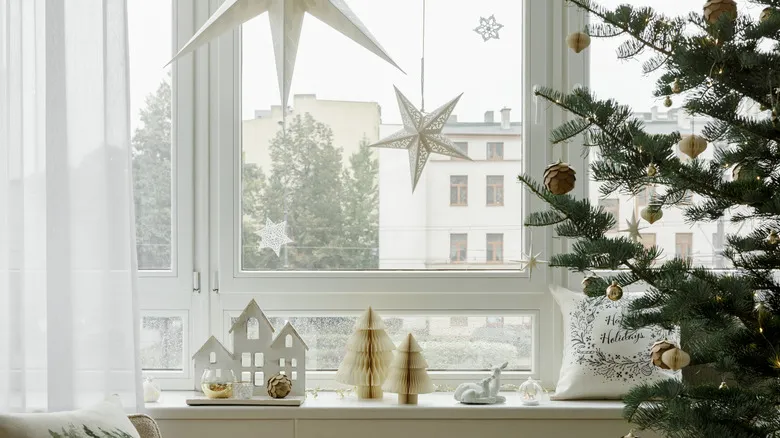
Paper stars and pleated trees are lighter than they look and they love to drift. Expect to re-hang a few after a windy week, and keep them out of direct sun or the white will yellow by February. Ceramic village houses wipe clean with a dry cloth; the paper ones don’t. If your window gets strong afternoon light, look for coated or vellum paper.
9. Star Lights on Strings Above a Candle and Pine
- Star-shaped LED string lights (set of 8–10): $15–$35
- Faux pine garland, 6 ft: $12–$30
- Red berry stems (3–5): $8–$18
- Pillar candle and holder: $10–$28
- Beige linen-look curtains, pair: $25–$70
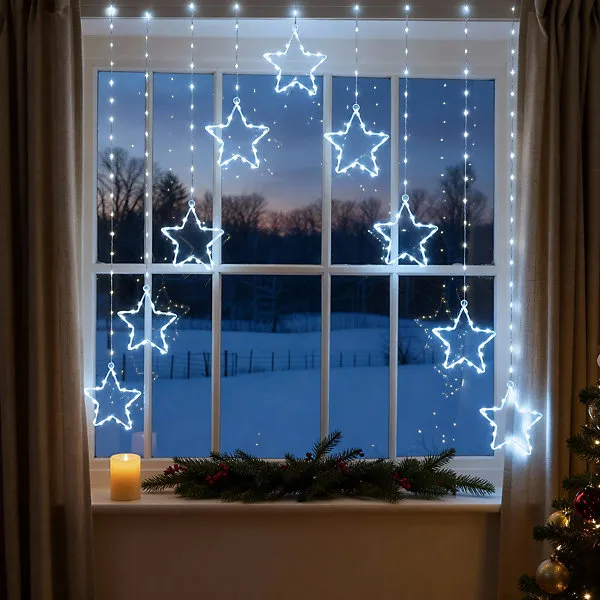
Total: $70–$181 — and the curtains do as much for the mood as the lights do.
The single lit pillar candle on the sill. It’s the only warm point of light below eye level, and it drags the whole composition down from “string lights hung in a window” into something that feels lived in. Take it away and you have a pretty but top-heavy display. Battery versions work fine — just find one with a convincing flame.
10. A Painted Village, Painted Snow, and One Delighted Snowman
- Sketch the snowman faintly with white chalk — it wipes off glass with a dry cloth.
- Block in the body with white acrylic craft paint, two coats, letting each dry.
- Add the black top hat and red scarf last, using a small flat brush for clean edges.
- Dot falling snow with a fingertip or the wrong end of a brush, varying the sizes.
- Seal nothing — acrylic lifts with warm water and a razor scraper in January.
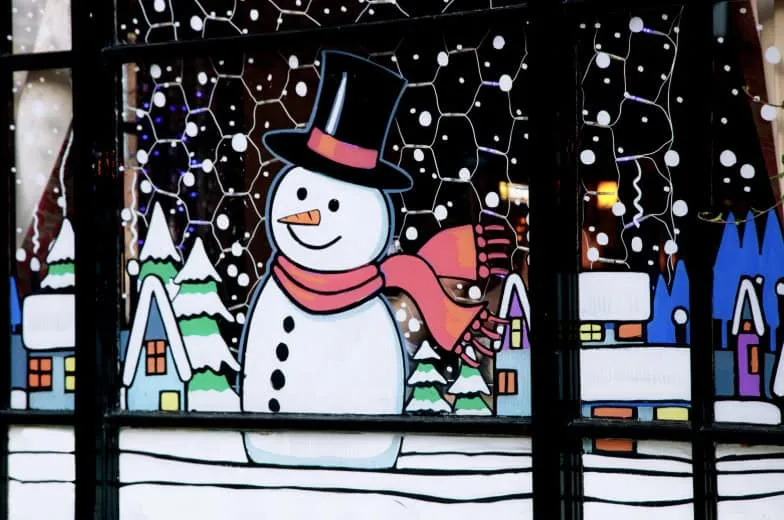
About two hours and $15 in paint.
The full painted scene costs less than a single store-bought light-up figure. Acrylic craft paint runs $2–$4 a bottle and you’ll use three; brushes, about $8 for a set. If painting feels like too much, printable village silhouettes on cardstock do a similar job, and white chalk markers give you the same look with far more forgiveness.
11. An Arch Window Tied With One Oversized Red Bow
On an arch, the bow belongs at the keystone — the very top center — and the garland should follow the curve rather than cutting straight across it. Twist two garlands together so it reads thick from the street, and wire the bow on separately so it isn’t held up by pine alone. A 10-inch bow on a 4-foot arch is the right ratio; anything smaller gets swallowed.
Big bows and heavy garlands are heavier than they look, and suction cups will not hold them. Plan on adhesive-backed hooks rated for at least 5 pounds, or tie into the window frame itself. Also worth knowing: red glitter ornaments shed. If the sill below is painted white, you’ll be wiping it down weekly through December.
12. Poinsettia Stained Glass, Lit From the Inside
Backlighting is doing everything here. The black leading separates each red poinsettia and green holly leaf so the design stays crisp instead of bleeding into a blur, and the warm lamp and candle lantern inside give the panel depth. From outside, a backlit window reads as an invitation; the same panel unlit would just look like a dark rectangle with colored glass in it.
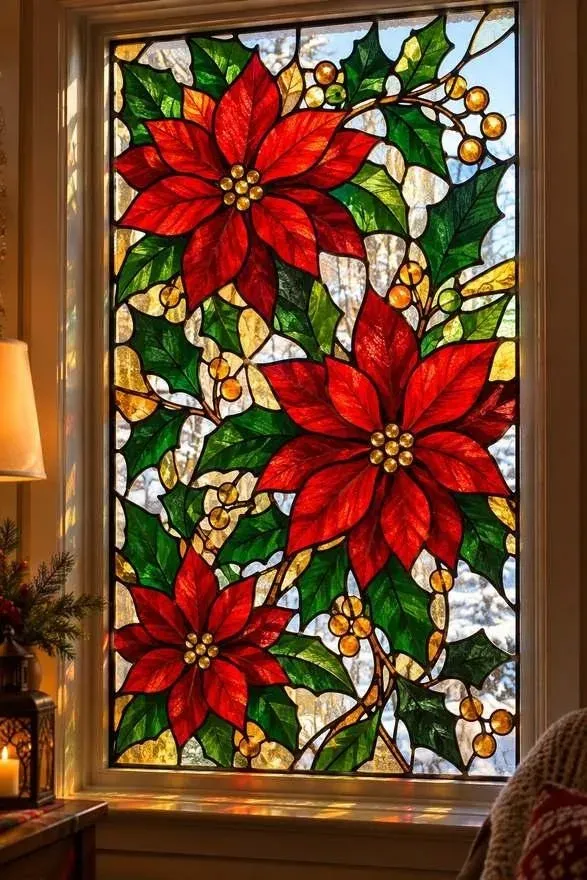
Real stained glass wants an annual clean with distilled water and a soft cloth — never vinegar, which etches the leading over time. If yours is a film or decal version, expect the edges to lift in a heated room; a little warm air and pressure fixes it. Either way keep that candle at least 12 inches from the glass so soot doesn’t dull it.
13. Three Snowmen, Three Top Hats, and a Shower of Gold Bells
This is one of the cheapest looks in the whole roundup. Static window clings run $6–$12 for a sheet of snowmen and flakes, and a small set of gold bell and angel ornaments is about $10 at Walmart or Target. Hang them from clear fishing line taped to the frame — no hooks, no hardware, no damage to the trim. Total for a full storefront-style window: under $30.
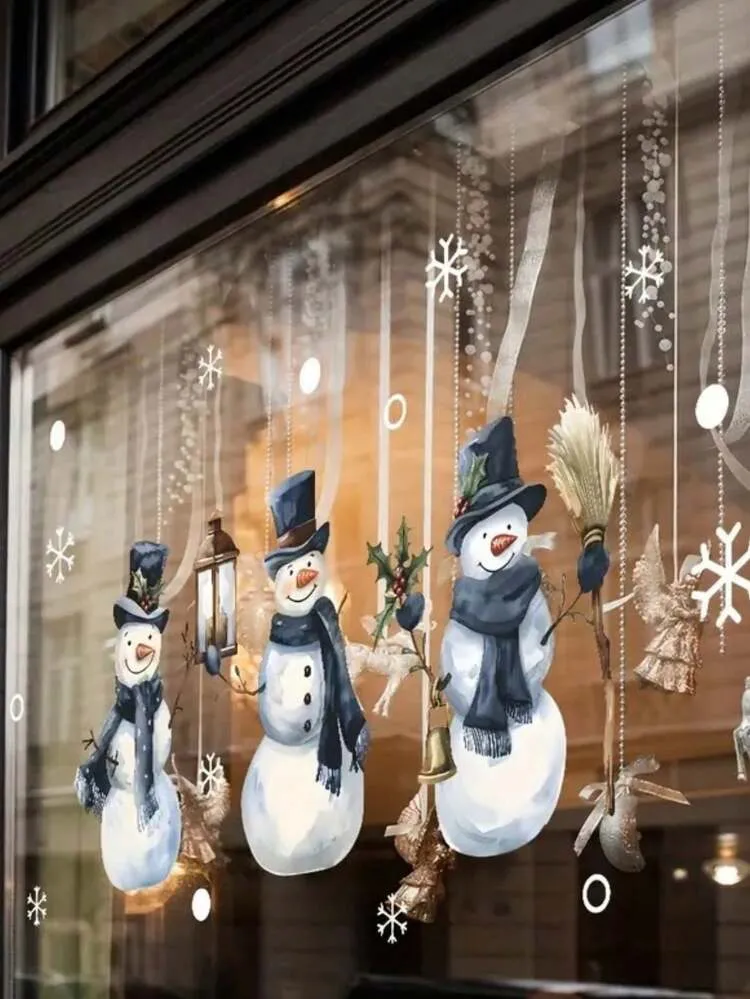
Three snowmen need a wide canvas — 60 inches or more. On a standard 30-inch bedroom or bathroom window, drop to one snowman and let the snowflake decals carry the rest. Tall narrow windows look better with two stacked vertically than three in a row, and the ornaments should hang at least 6 inches apart so they don’t tangle. For a richer version, see Idea #18.
14. A Gingerbread Man in the Tall Pane
- Tape off each pane with blue painter’s tape so the frames stay clean.
- Paint the snow base first, roughly 4 inches deep, with a slightly uneven top edge.
- Block in the two trees, then the gingerbread man in the widest pane.
- Flick white paint for snowflakes instead of drawing each one — faster and more natural.
- Paint the light string last, one continuous wavy line with alternating color dots.
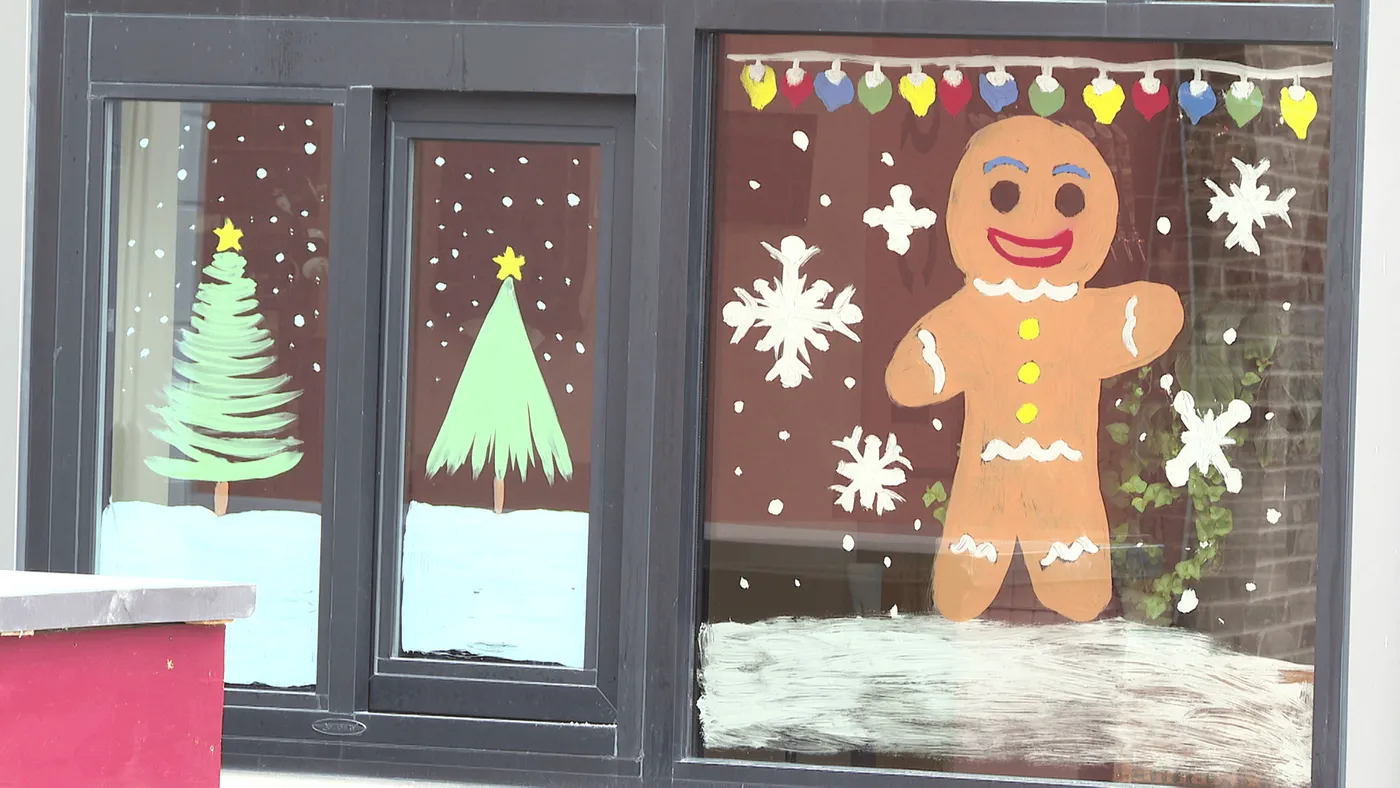
Roughly 90 minutes and $12–$20.
Work in the widest pane first, then the narrow ones. On multi-pane windows the eye lands on the biggest opening, and if you paint a small pane first you’ll scale everything else too timidly. Keep the tallest figure at about 60% of the pane height — bigger reads as a mural, smaller disappears from the sidewalk.
15. One White Spiral Tree Filled With Doodles
The spiral. A straight-edged tree outline on glass looks like clip art; a hand-drawn spiral immediately reads as decorative, and it gives you a natural place to stash all those doodles. Every snowflake, candy cane, and star lives inside the coil, along with that hand-lettered “Noël.” Lose the spiral and you have a scattering of small drawings with nothing holding them together.
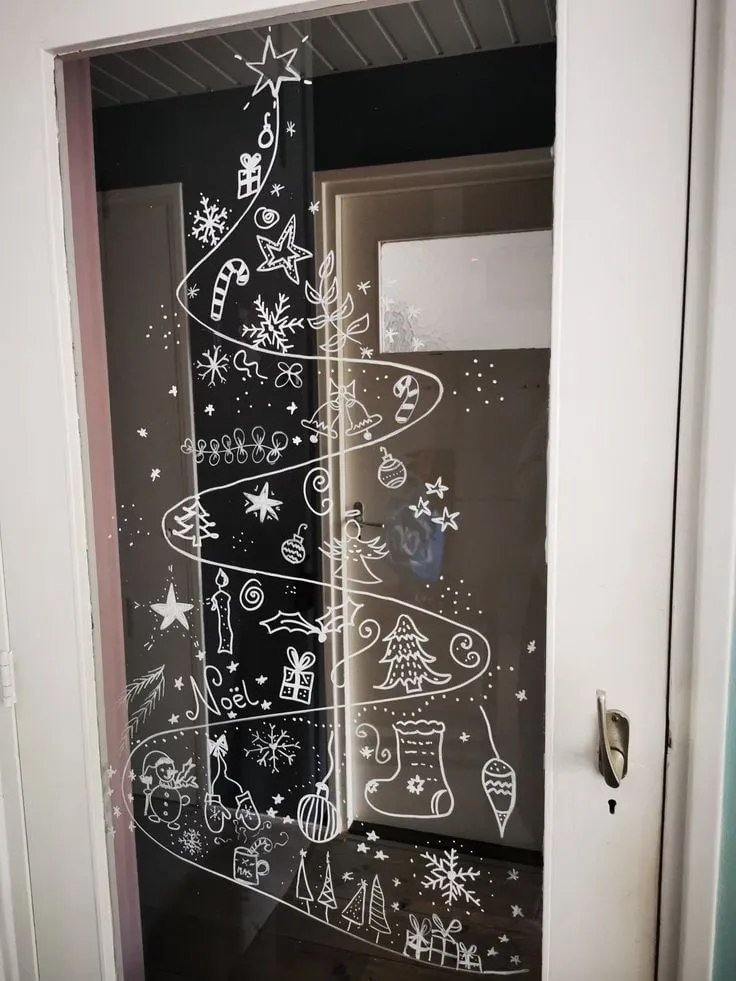
100% white, which is less boring than it sounds. The variety comes from line weight instead of color — thick outlines for the spiral, thin strokes for the doodles, dots as filler. Swap white for a soft metallic silver pen and it turns glam; go with a cream paint pen and it warms up against a white door frame.
16. Painter’s Tape Still On: Storefront Trees in Progress
Hand-painting a storefront is slower and messier than the tutorials suggest. Acrylic needs glass that’s been degreased or it beads, and each tree takes 20–40 minutes depending on detail. Do the taping a day ahead so you’re not fighting edges and paint at the same time, and budget one full evening for glass this size. The painted string lights along the top edges are the last thing you do, not the first.
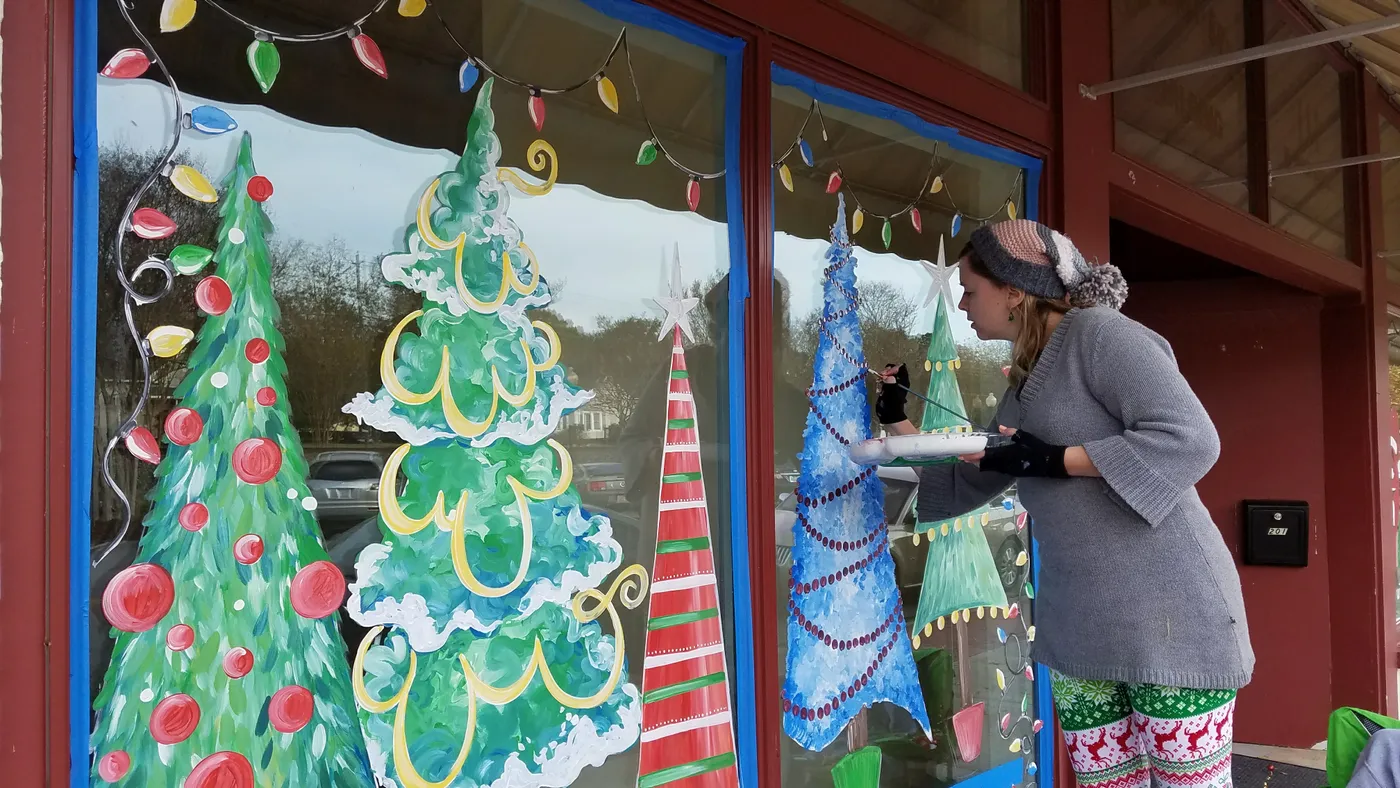
- Acrylic craft paint, 6 colors: $18–$36
- Assorted flat and round brushes: $12–$30
- Blue painter’s tape, 2 rolls: $8–$14
- Glass cleaner and lint-free cloths: $8–$15
- Razor scraper for removal: $6–$12
Total: $52–$107 — and you’ll reuse everything but the paint next year.
17. White Vinyl Forest With a Herd of Deer
Vinyl silhouettes scale beautifully because they’re flat — this look works anywhere from a 24-inch kitchen window to a 10-foot storefront. As a rule, the tallest deer should be about half the window height. On very large glass, repeat the same three tree shapes at different sizes instead of buying more designs; repetition reads as pattern. If you’re working at architectural scale, look at Idea #28.
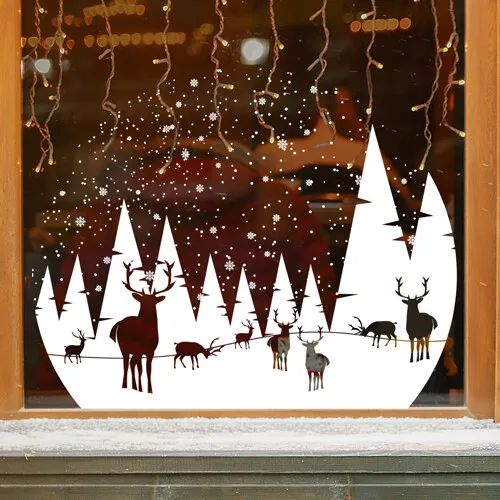
Flat white silhouettes work because the eye fills in the details. The deer have no faces, the pines have no needles, and that’s exactly why the scene reads as winter rather than as stickers. The warm string lights along the top also cast a slight cream tone onto the white at night — the difference between “craft project” and “window display.”
18. Cartoon Clings Meet a Fully Loaded Windowsill
- Clear the sill first — you need to see what will actually fit.
- Measure the visible glass; clings crowd fast once you add “Merry Christmas” text.
- Check that the character clings are reusable if you plan to reposition them.
- Confirm the sill can take weight — ceramic figurines add up.
- Plan where the lantern’s cord goes if it’s plug-in rather than battery.
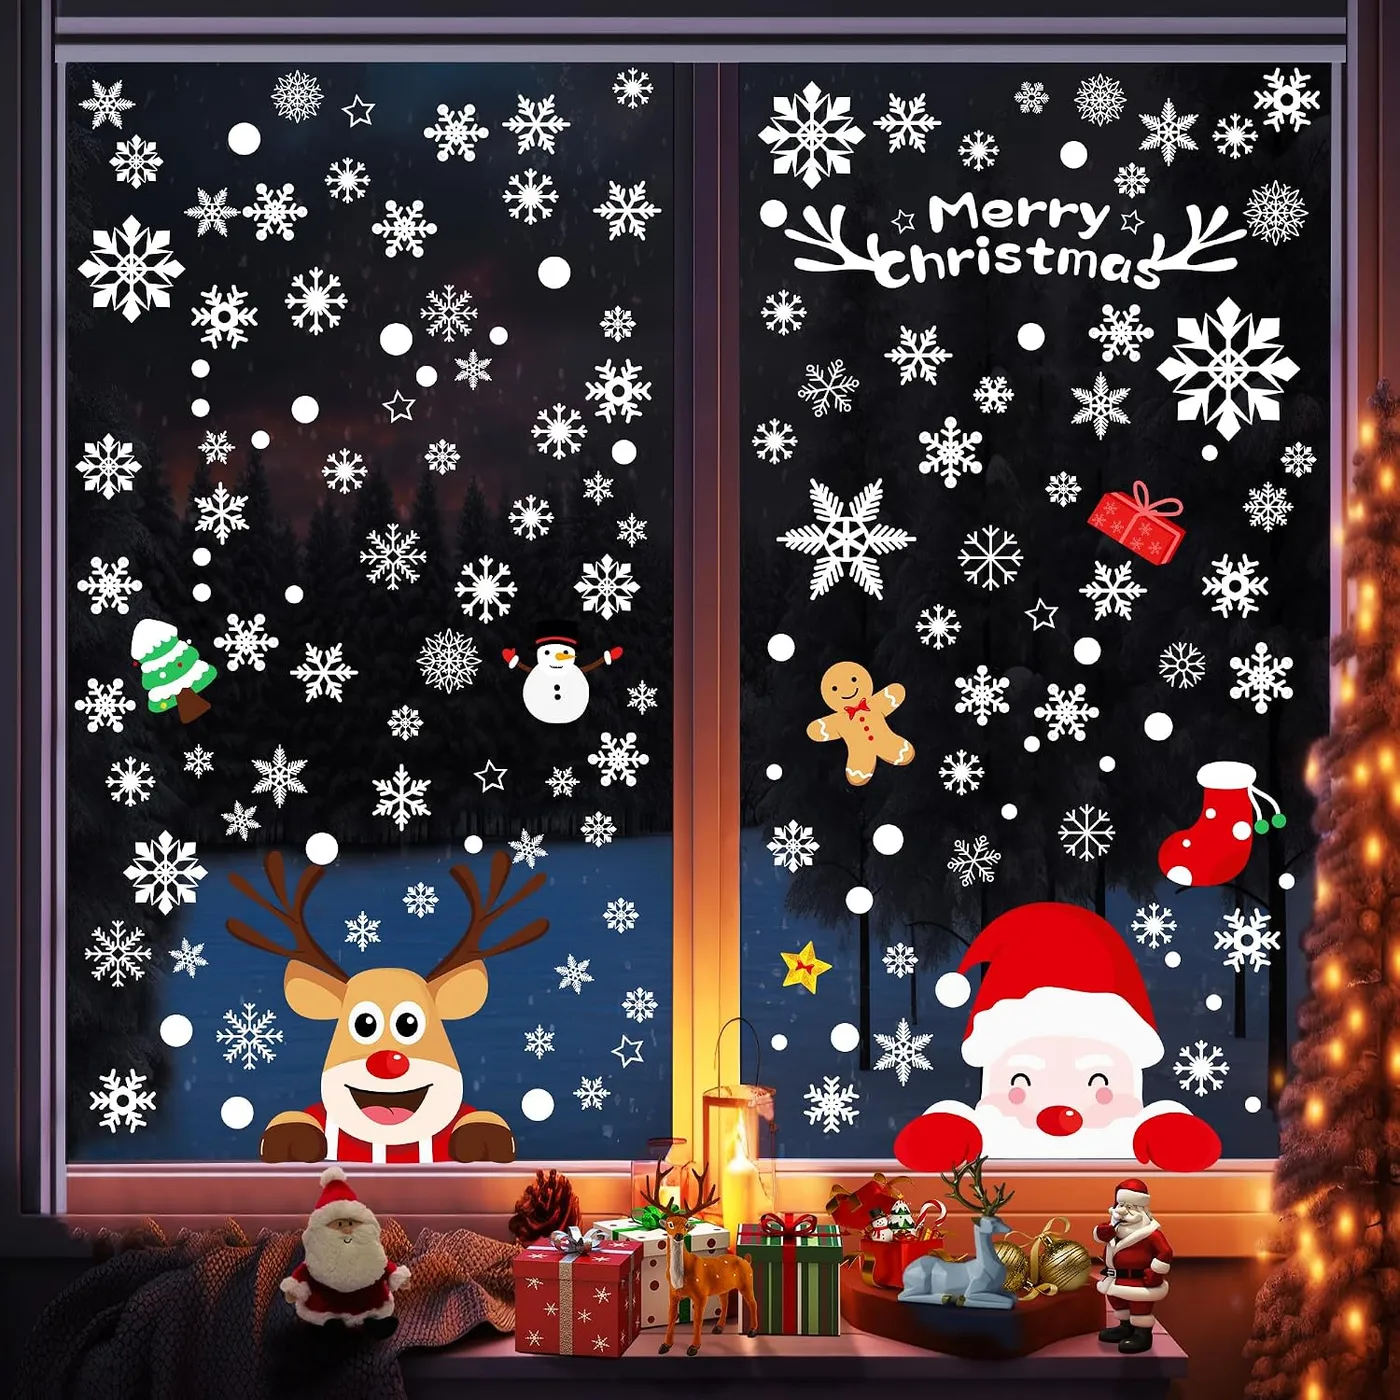
This is dollar-store territory in the best way. Cling sets run $3–$8, character decals $5–$10, and a battery candle lantern is about $12 at Target. The gifts on the sill can be empty boxes wrapped in paper you already own — nobody sees inside. Total for the full window: comfortably under $40, and most of it packs into a shoebox in January.
19. A Brown Reindeer in a Santa Hat, Painted by Hand
Paint in this order: hat, then head, then antlers, then snowflakes. The hat anchors the composition and gives you a fixed point for the head’s angle. Use a flat brush for the body and a round detail brush for the trim — and leave that white trim slightly uneven, because perfectly crisp edges are what make hand-painted characters look like decals instead of drawings.
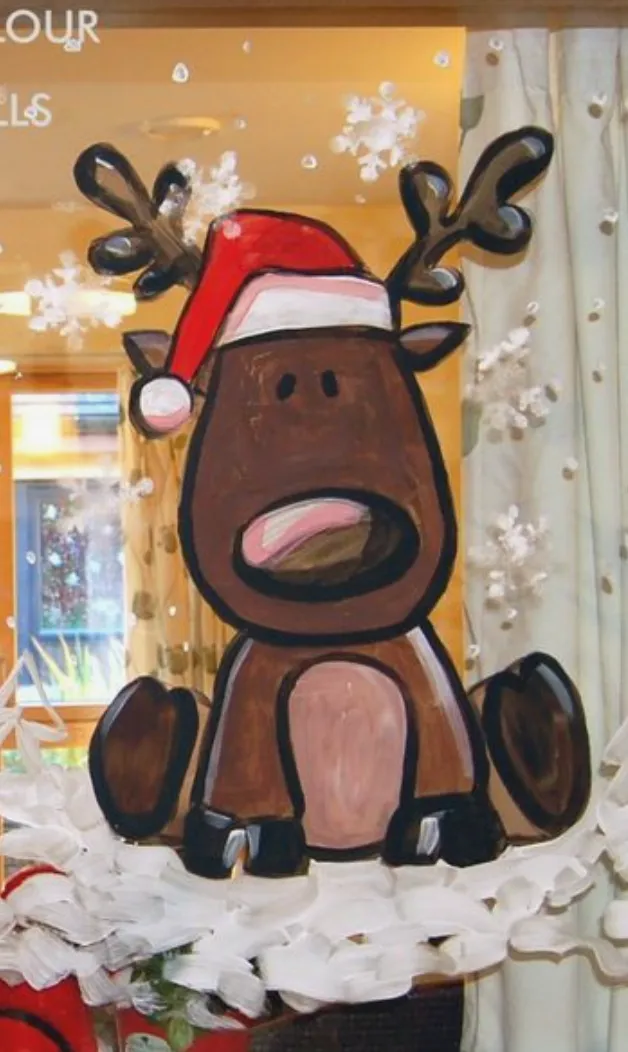
- Chalk the outline on clean glass and step back to check the proportions.
- Fill the body with two coats of medium brown acrylic.
- Add the red hat, then the white trim and pom last.
- Paint snowflakes around the head, not behind it.
- Build a textured snow base by dabbing white paint with a sponge.
- Let it cure 24 hours before anyone touches the glass.
About an hour and a half, $15 in supplies.
20. Frosted Panes, Village Silhouettes, and a Snow-Dusted Garland
Frosted film and frost spray both attract fingerprints, and film edges lift in humid rooms. Wipe with a damp cloth only — solvents cloud the frost permanently. The pine garland will drop needles for the first week, so shake it out before it goes up. If dust bothers you, swap the real garland for a faux one you can rinse and re-fluff each season.
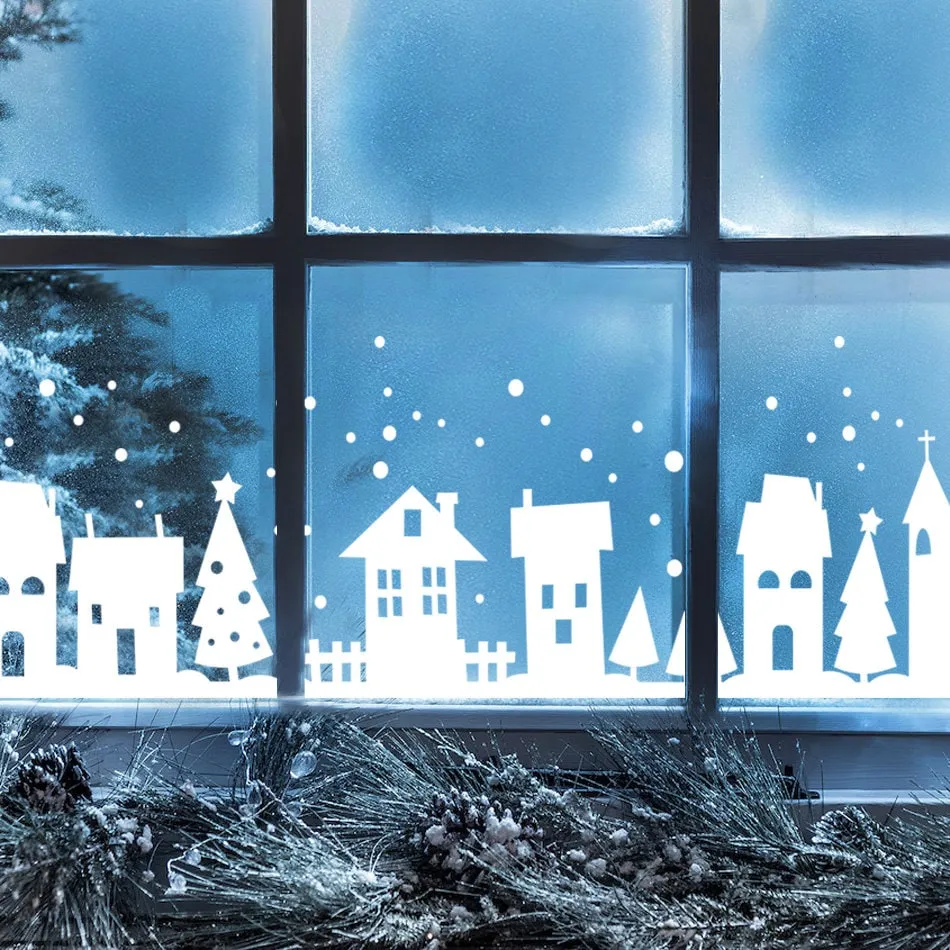
Roughly 50% icy blue, 30% white, 20% dark green and brown. The blue is what makes this feel cold and quiet, so it lives on the upper panes while the white and green stay low. Swap that icy blue for warm amber light behind the frost and the exact same decals read as cozy cabin instead of arctic.
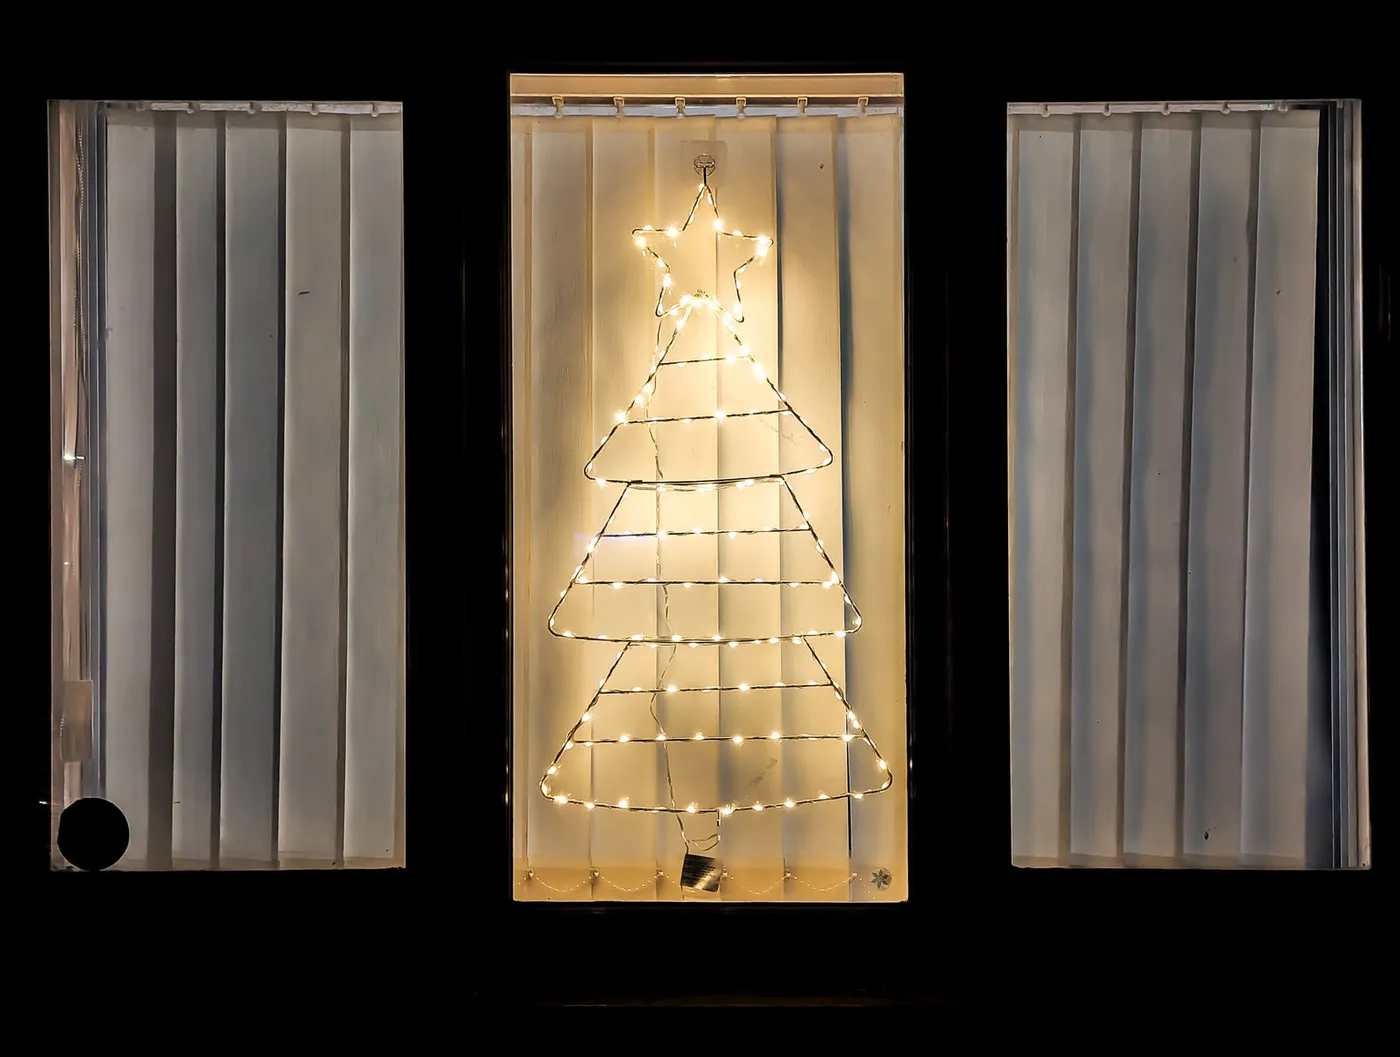
21. An Illuminated Tree Outline Beside a Glowing Santa
Outline lights have taken over from icicle strands in the last two seasons — partly because LED rope light got cheap, and partly because a single glowing shape photographs better than a hundred tangled bulbs. It’s a trend with real staying power: the shapes change, the format doesn’t. Expect more outlines built around one strong silhouette in 2026, and fewer windows filled edge to edge.
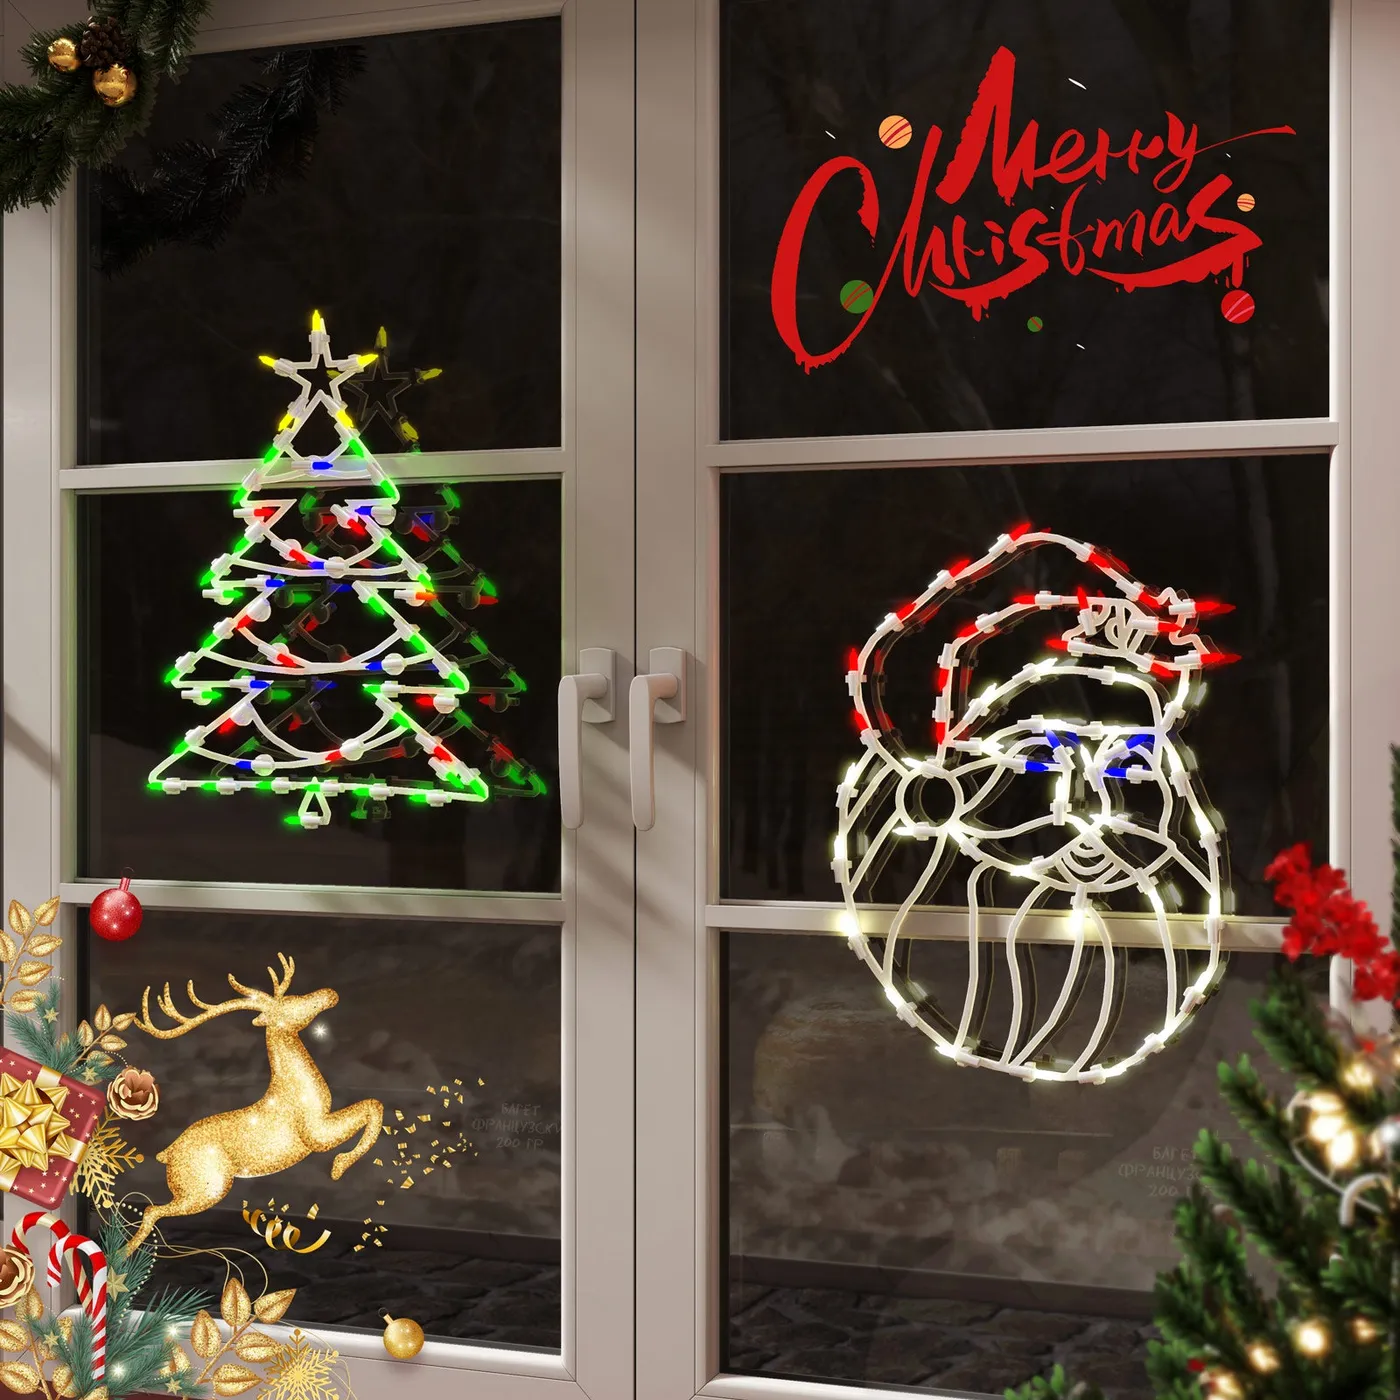
- LED tree outline light, 4 ft: $25–$60
- Santa head outline or window light: $18–$45
- Red “Merry Christmas” decal: $6–$15
- Pine garland with gold ornaments: $20–$45
- Suction cups and clips: $5–$10
Total: $74–$175 — and the outlines store flat, which matters in a small house.
22. Snowflakes on the Glass, a Frosted Tree on the Sill
The frosted miniature tree. Snowflake decals on a window are everywhere; a small flocked tree with pinecones and red berries sitting on the sill behind them is what makes this window feel styled rather than decorated. It also solves the depth problem — decals alone are flat, and one three-dimensional object behind the glass gives the whole composition layers.
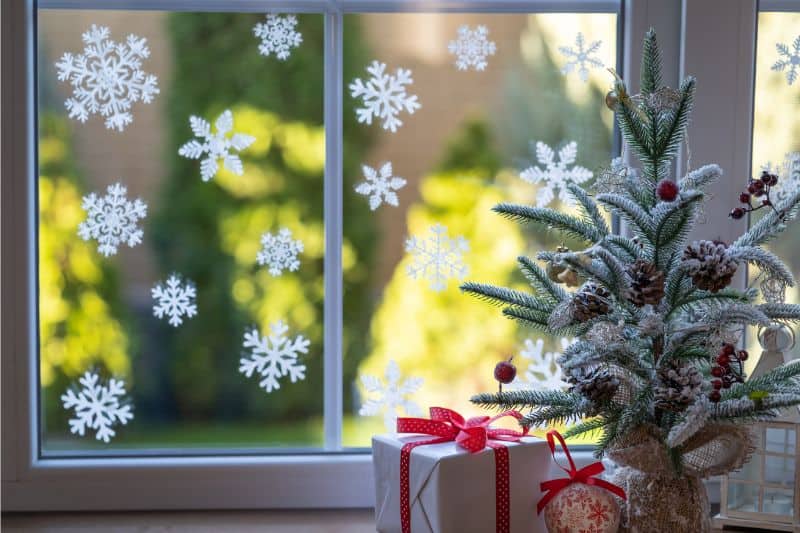
This one is built for standard windows, 30 to 48 inches wide, any height. It’s the friendliest idea here for apartments and rentals because nothing is permanent. If your sill is shallow — under 6 inches deep — use a narrow tabletop tree or a cluster of small ones; compare with Idea #9, which puts the entire display on the sill without needing depth at all.
23. Spray-Painted Winter Scenes With Paddington in the Middle
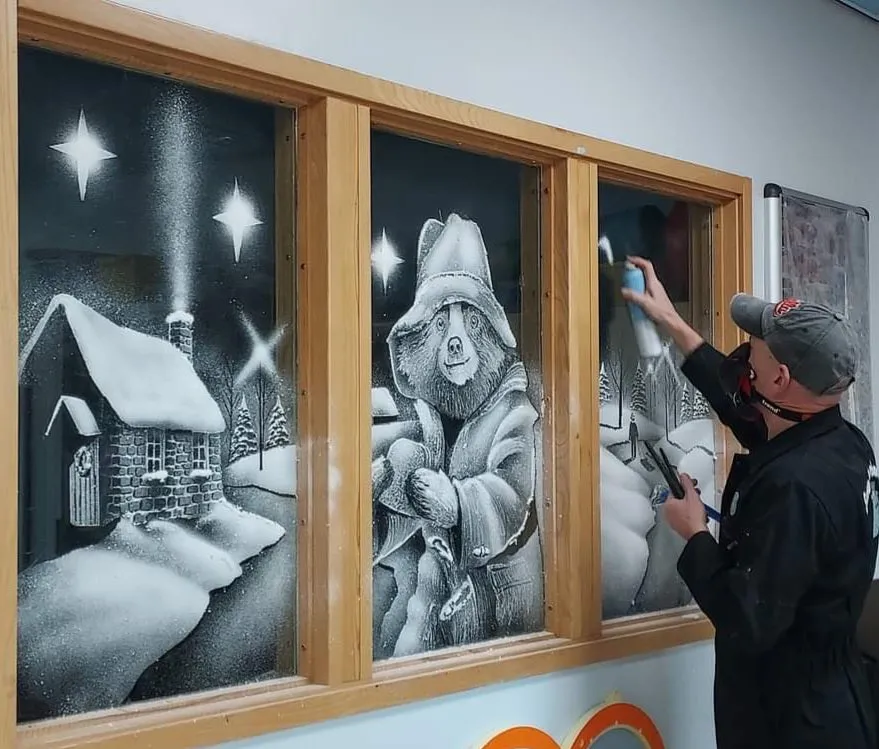
White spray paint on dark glass gives you something paint pens can’t: softness. The edges feather, so the snow-covered cottage and the smoke curling from its chimney look atmospheric rather than drawn. Paddington in the center pane ties three separate scenes into one story, and the natural wood frames do the rest by keeping everything warm and unfussy.
Spray paint on glass is a commitment. Overspray drifts, so mask the frame and the floor thoroughly, and ventilate the room properly — this is not an 11 p.m. project in a closed bedroom. Removal means razor scraping and solvent, which takes an evening. If you rent, do the cottage scene in white window markers instead.
24. A Curved Window That Paints the Sidewalk in Color
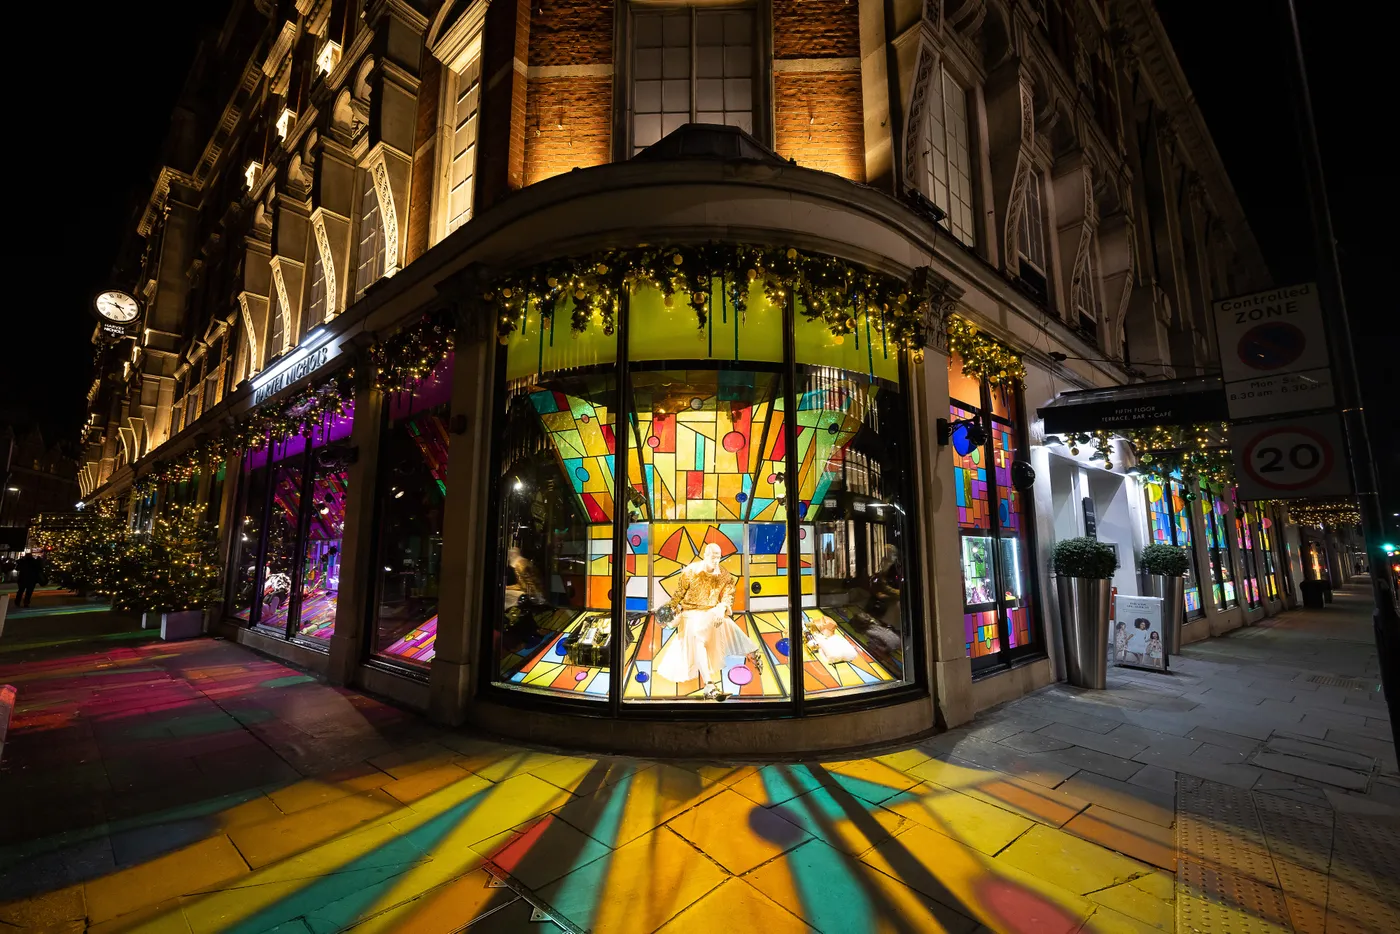
With colored window film or panels, the money is in the gaps. Leaving 1 to 2 inches of clear glass between colors lets light pass and throws those colored patterns onto the floor and sidewalk — which is the entire point of a curved facade. Butt the pieces tight together and you get a flat, static panel with no projection at all.
Color projection has been creeping up since people started filming their holiday windows for short-form video. A window that throws light onto the pavement is shareable in a way a static display isn’t. Stained-glass film and colored gels are finally affordable too, so what used to require a department-store budget is now a weekend project.
25. Two Cartoon Trees With Striped Ornaments
Two painted trees, three paint colors, a set of brushes. Green, white, red, plus a yellow accent for the stars and ornament stripes runs about $14 in craft paint, and the snowdrift below needs nothing but white and a swipe of light blue. Compare with Idea #14 — same technique, more figures, roughly the same cost.
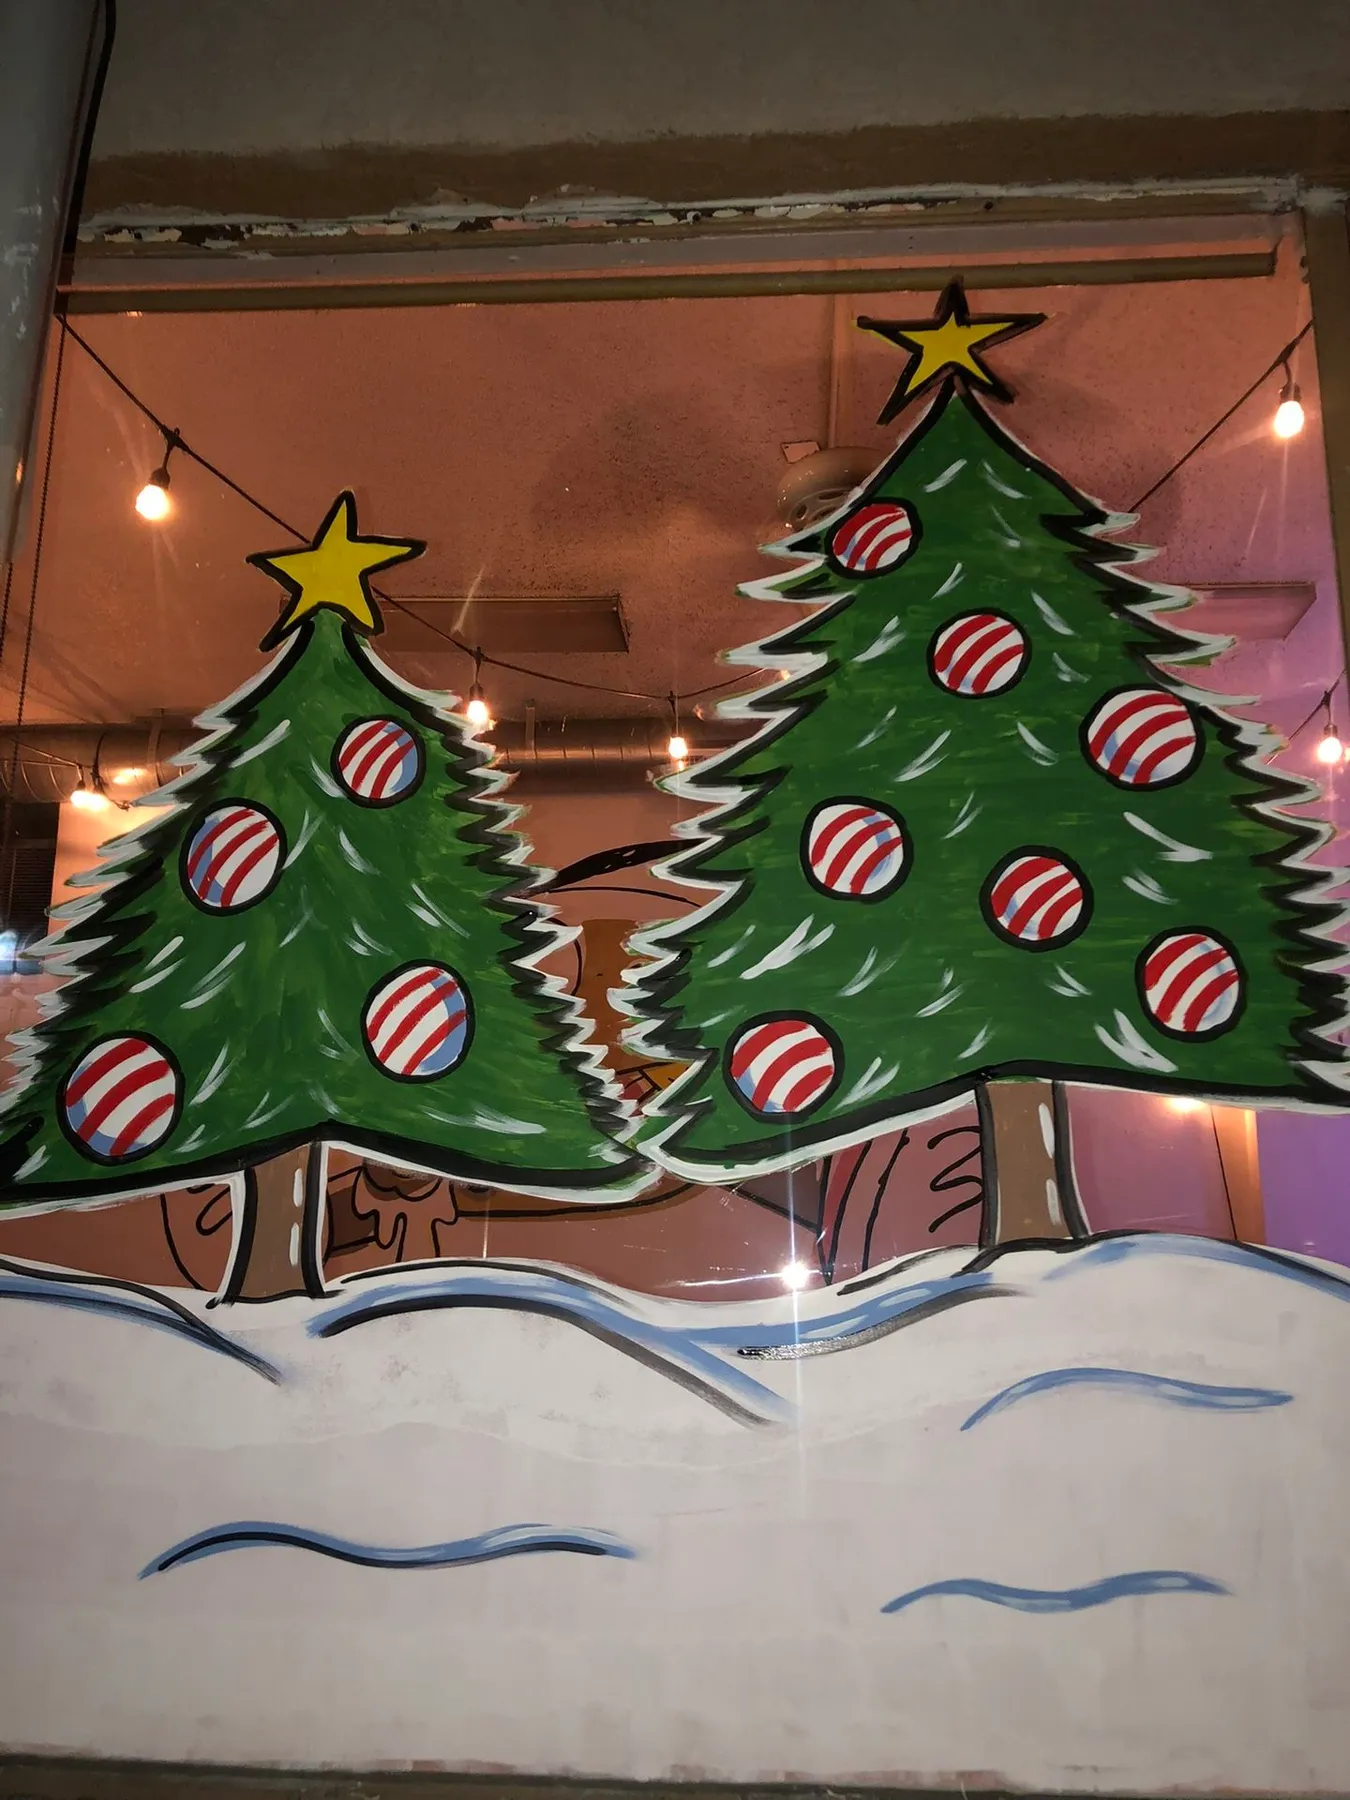
- Paint both snowdrifts first so the trees sit on something.
- Outline each tree in green, then fill with two coats.
- Add striped ornaments by painting a white circle, letting it dry, then striping red.
- Top each tree with a five-point star in yellow.
- Finish with light blue swooshes at the base for shadow.
Forty-five minutes and under $15.
26. Backlit Silhouettes That Glow From Inside
Silhouette cutouts are forgiving across sizes, but backlighting needs at least 24 inches of glass per cutout or the light spills and the shapes lose their edges. Multi-pane windows do the framing for you — each figure gets its own little stage. Combine with Idea #20 if your glass is small; frosted panes and silhouettes solve the same problem in different ways.
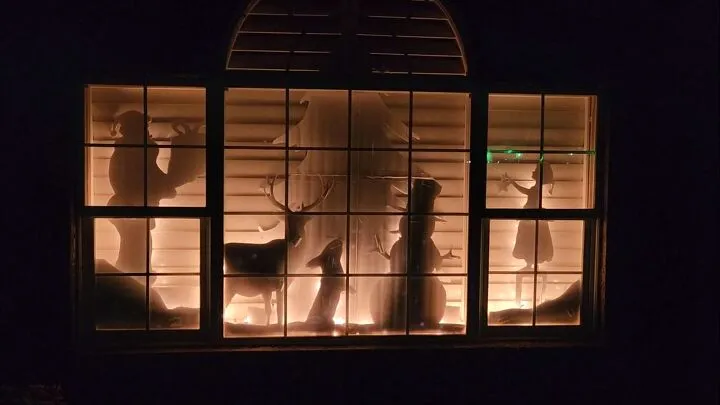
The backlight. White cutouts taped to glass in daylight are just paper; put a warm lamp behind them and they become a scene. The blinds behind this display are doing quiet work too — they diffuse the light so Santa and the reindeer read as solid shapes instead of blown-out glow. Remove the source and everything collapses back into craft paper.
27. Nutcrackers, Hot Air Balloons, and a Very Full Storefront
- Warm LED string lights, 2–3 strands: $24–$60
- Nutcracker figures (2–3): $30–$90
- Painted hot air balloon backdrop or patterned fabric: $20–$55
- Miniature teddy bears and toy vehicles: $15–$40
- Pre-lit garland with ornaments: $25–$55
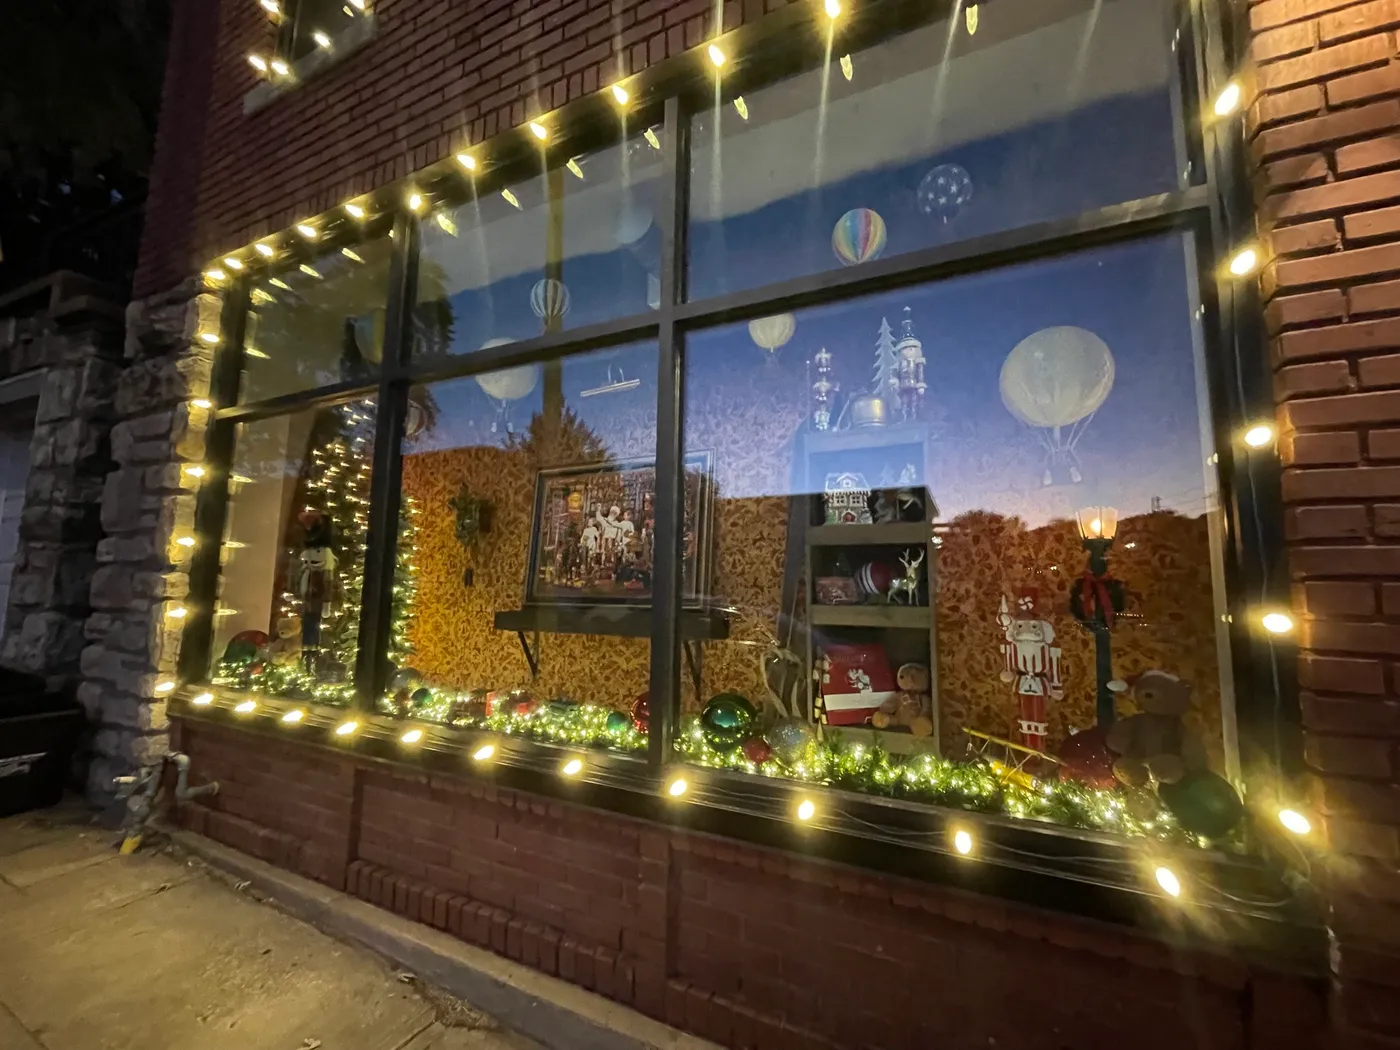
Total: $114–$300, or considerably less if you raid the toy bin.
Depth is the whole trick here — the painted sky, the mid-layer toys, and the lighted garland at the front each sit at a different distance from the glass. That’s what makes a storefront window feel like a scene instead of a shelf. The blue backdrop also does something practical: it makes every warm bulb in front of it look warmer by comparison.
28. Giant Light-Filled Ornaments on a Glass Facade
Big spheres look effortless online and are genuinely fiddly in person. Frames that size need proper anchoring, and anything hanging at height needs a wind plan. If you’re scaling this down for a tall interior window or a porch, keep the spheres at least 18 inches across — smaller and they read as baubles, not architecture. Ladder safety is not optional.
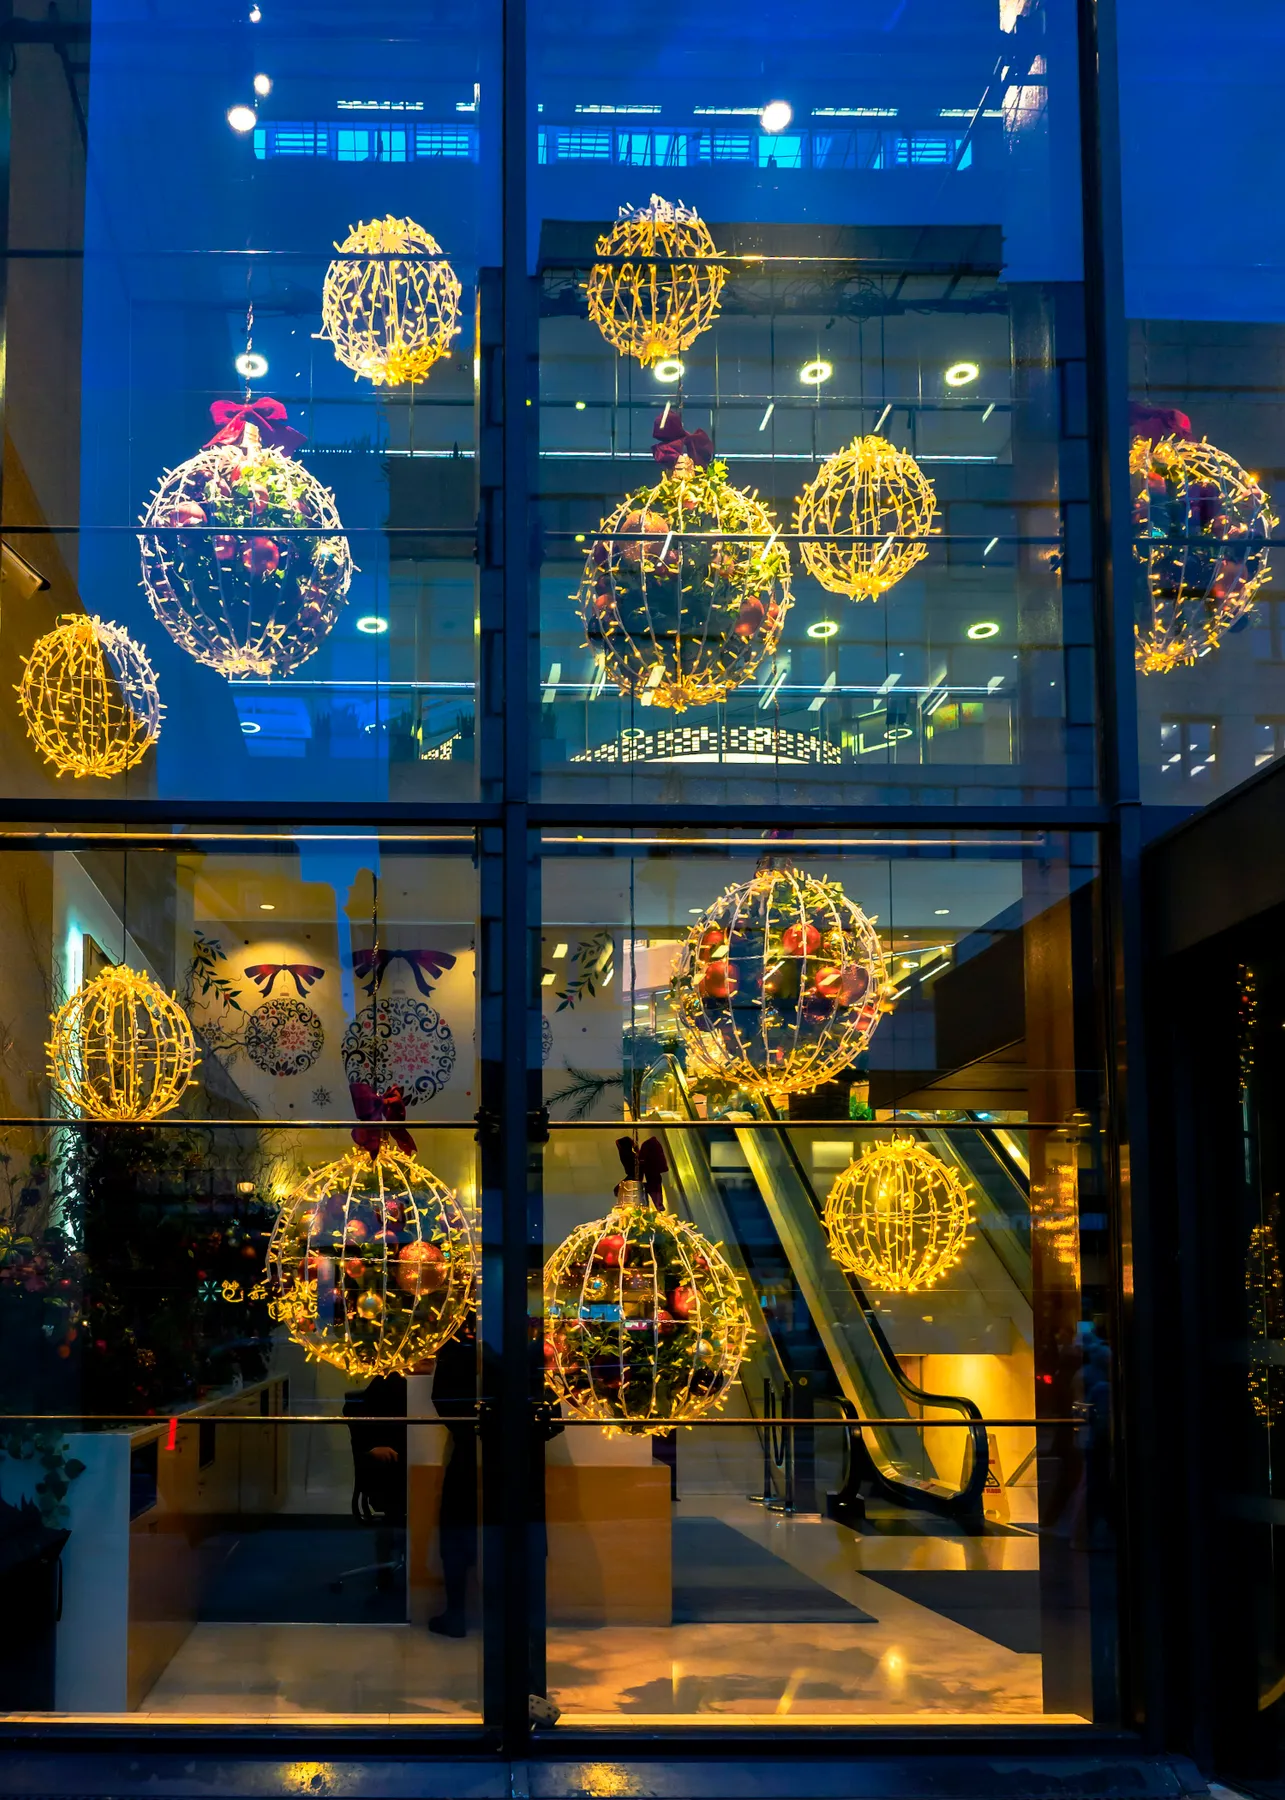
Fill the spheres asymmetrically. A handful of foliage and red berries pushed to one side, a big red bow at the top-left, and empty space for the light to travel through reads far better than a densely packed ball. Use warm white only — mixing daylight LEDs into a gold frame kills the glow that makes this look expensive.
29. Village Silhouettes, Two Mugs, and a Wool Blanket
- Decide the sightline — where do you actually sit when you look at this window?
- Check that the decals won’t be backlit by a lamp you use every evening.
- Pick mugs that contrast the blanket, not match it.
- Keep enough sill clear to actually set a mug down.
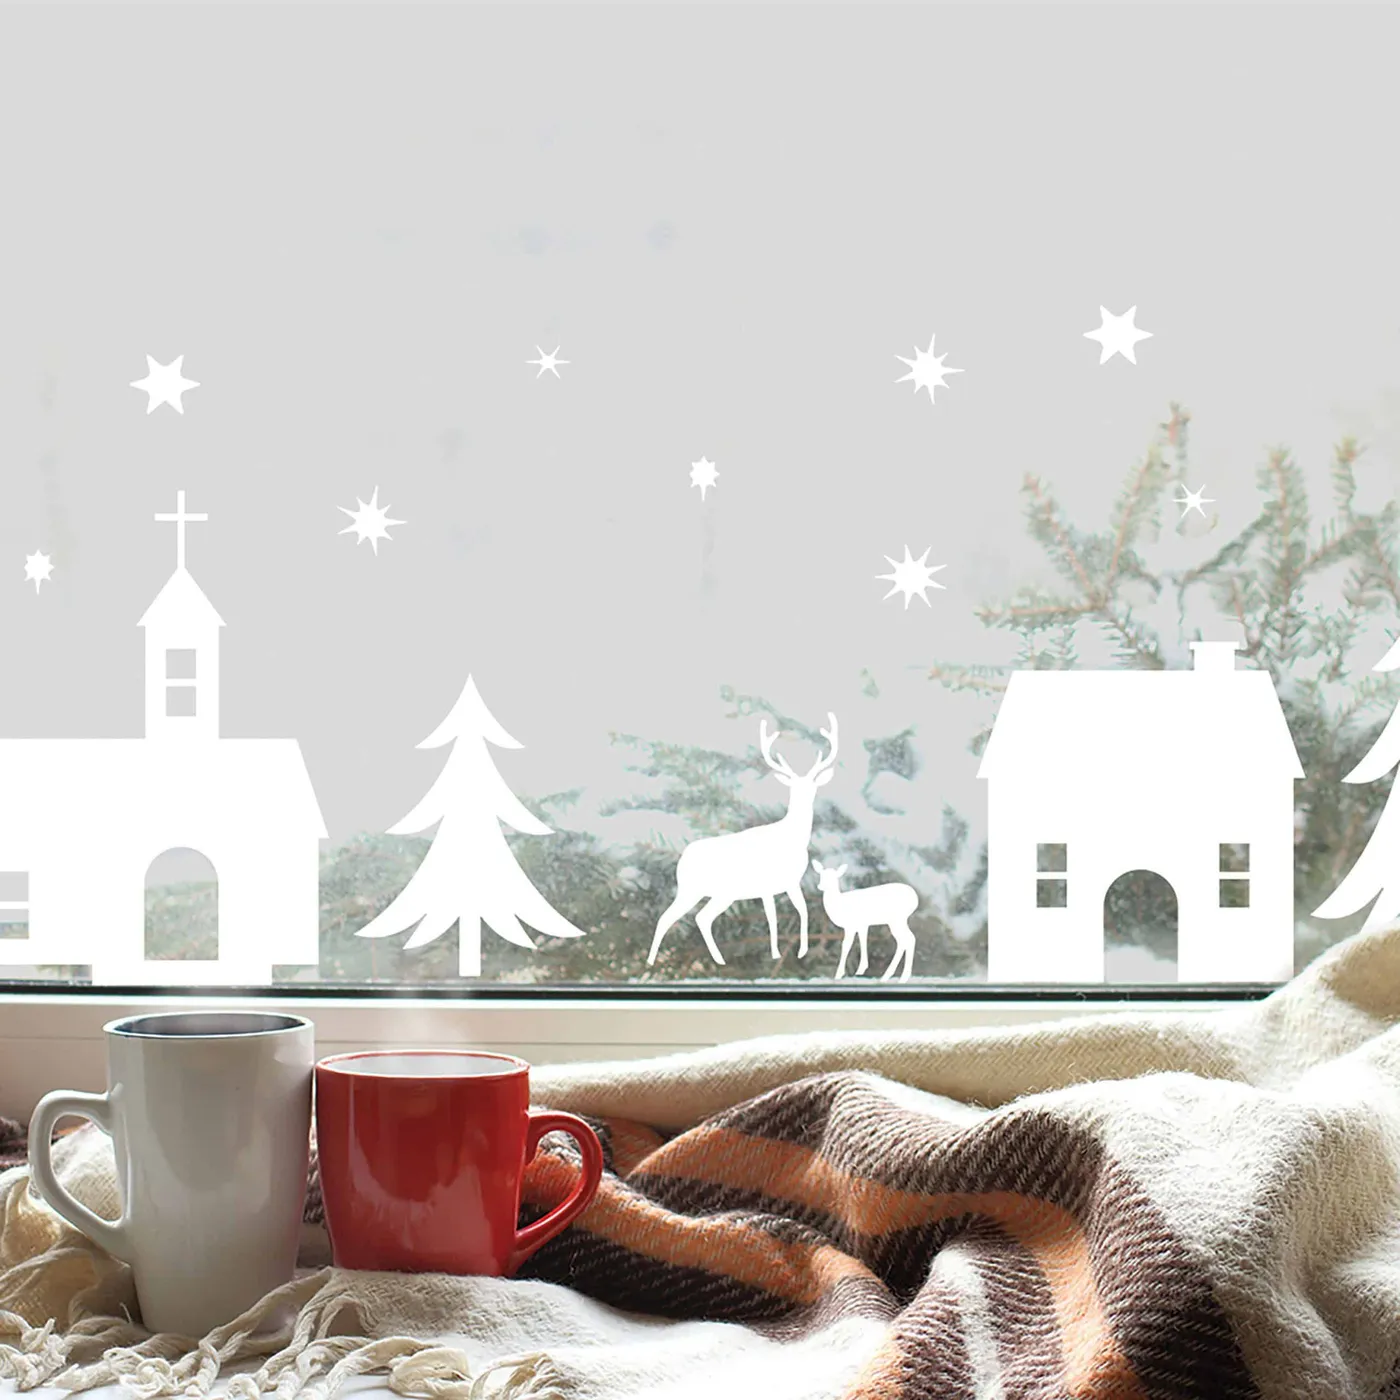
Roughly 60% white and cream, 30% warm brown and orange, 10% red. That red is carried entirely by one mug, which is enough — two red mugs would tip the whole thing into a color scheme rather than an accent. Swap the plaid wool for a grey herringbone and the window goes quiet and cool; keep the red mug either way.
30. A Light-Up Snowman Holding His Own Tiny Tree
Suction-cup decorations need re-pressing every week or so, especially on cold glass where the cup stiffens. Warm the cup in your hand before sticking it, and clean that spot on the glass first — that’s the whole difference between a decoration that holds through December and one that drops on day three. Battery life on light-up figures runs 20–30 hours; use rechargeables.
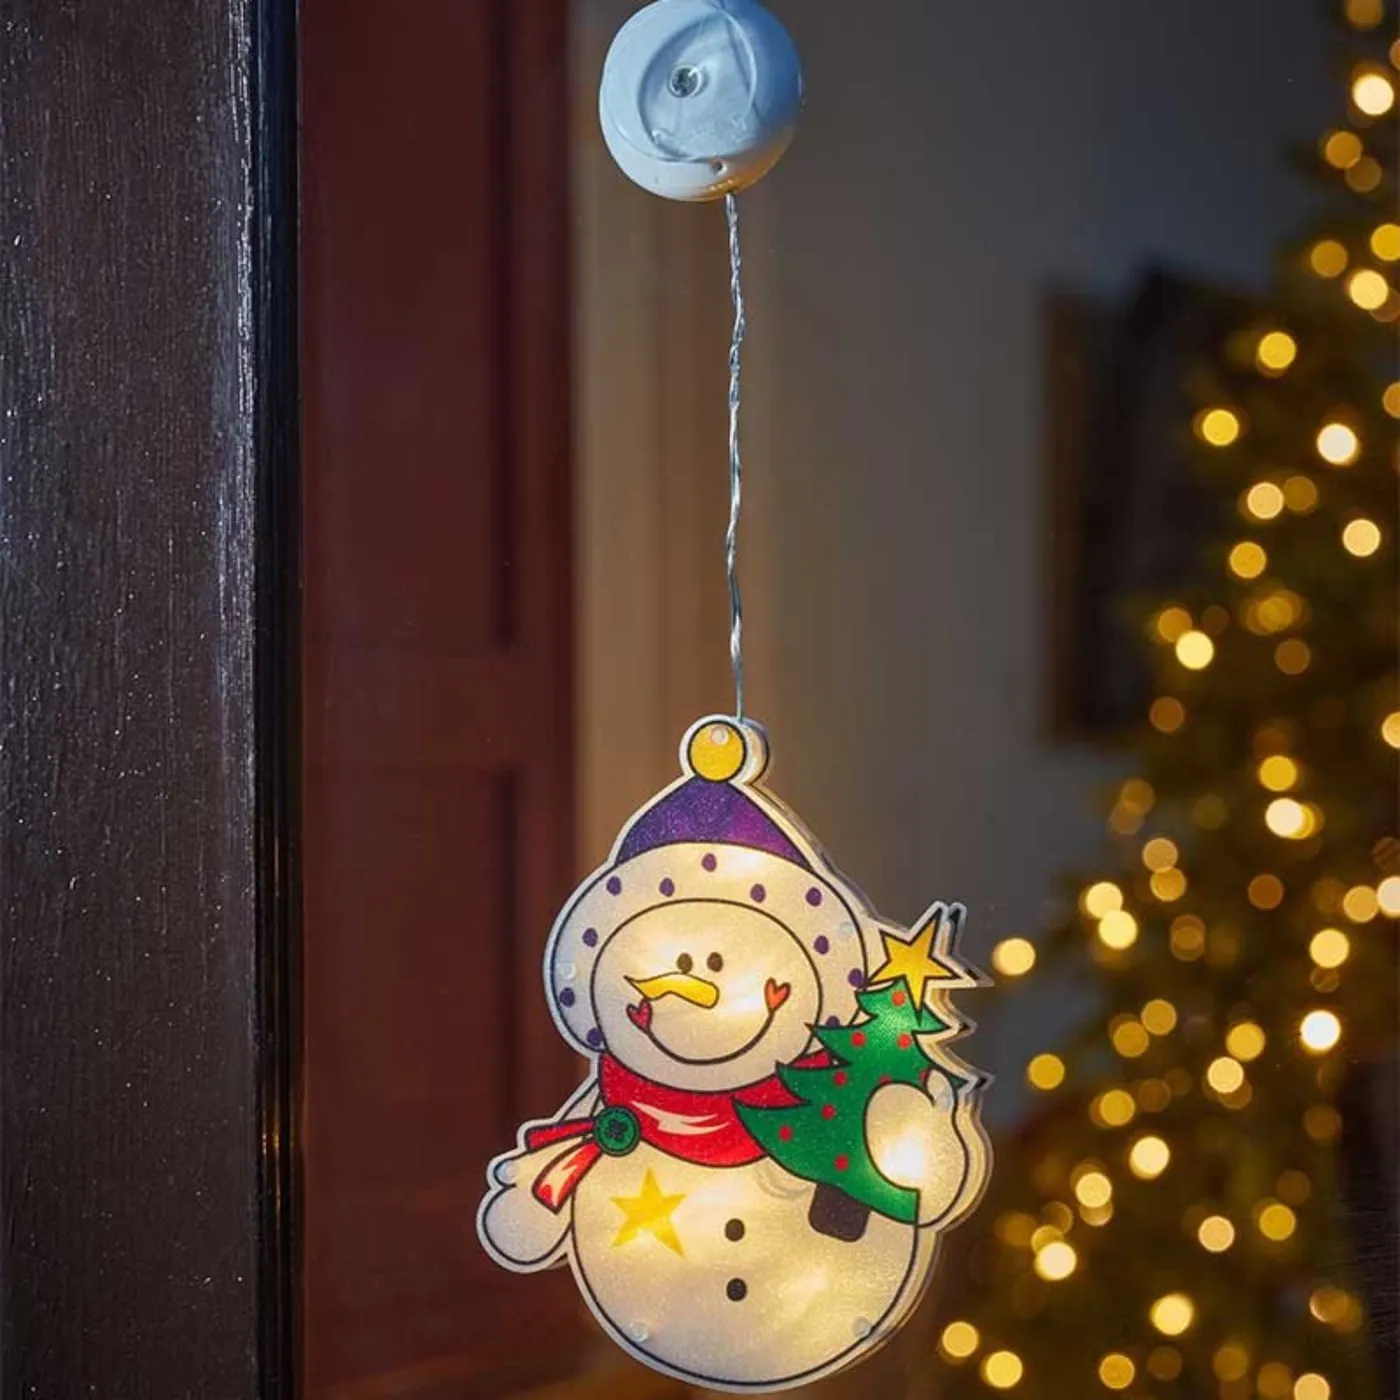
Light-up window figures run $20–$40 at Target and Walmart, and the effect is nearly identical to the $90 boutique versions. If you want to spend even less, a plain plush snowman hung on clear line with a battery fairy-light strand tucked behind it costs about $12 and glows just as warmly. Compare with Idea #2 for the more polished take.
Your Window Has a Whole Winter to Shine
Pick one idea, one gesture, and one weekend — that’s genuinely all a great Christmas window needs. Whether it’s a single oversized bow or a spiral of white doodles, the windows people remember are the ones that did one thing with confidence instead of five things in a hurry.
📌 Save this to Pinterest now so next December doesn’t start from a blank browser tab.