21+ Jaw-Dropping Grinch Classroom Door Ideas That Will Inspire Your 2026 Holiday Spirit
You know that feeling when you walk past a classroom door that makes you stop dead in the hallway — and suddenly your own door looks tragically plain? That’s the Grinch door effect, and it is everywhere this December.
We spent serious time digging through Michaels, Etsy, Amazon, and Hobby Lobby to bring you only what’s worth your attention this year, from $8 paper cutouts to $180 layered wood signs — and yes, budget and luxe versions are compared side by side. After filtering hundreds of options, we narrowed it down to 21 ideas that actually hold up under fluorescent hallway lighting. Inside you’ll find hand-drawn Whoville scenes, oversized character faces, plush wreaths, and full cutout villages, all built around storybook nostalgia, paper-craft maximalism, and that very specific lime green.
Grinch decor is peaking in 2026 because teachers traded generic snowflakes for characters kids can name — and Pinterest saves prove it. And stay until the end — we break down the most common mistakes that can ruin these looks.
📌 Save this to Pinterest for later — you’ll want to revisit these ideas.
1. Hand-Drawn Whoville Wall With A Candy Cane Signpost
Three things are doing the heavy lifting on this wall. First the value split — white on the bottom third, blue on the top — gives the whole scene a horizon line, so the Who characters have somewhere to stand. Second, the paper snowflakes repeat at irregular intervals, which keeps your eye moving sideways instead of stopping dead. Third, everything is hand-drawn, and the slightly wobbly outlines are the entire charm. Trace it perfectly with a projector and you lose the personality that makes kids stop and point.
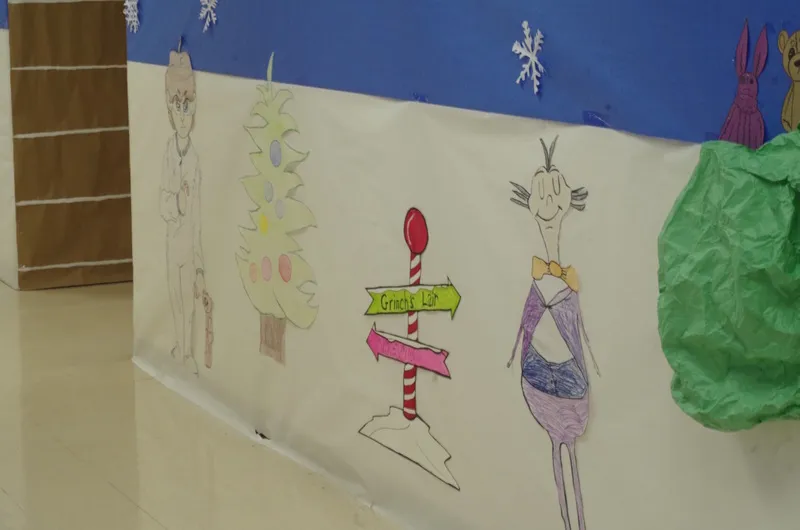
Before you tape anything up, run a strip of painter’s tape across the wall at 40 inches from the floor — that’s seated eye level for most elementary kids — and keep every character’s feet within two inches of that line. Then back each cutout with a scrap of foam core or a double stack of mounting squares. A quarter inch of lift casts a real shadow, and shadows are what stop a flat paper display from looking like a bulletin board from 1998.
2. Oversized Grinch Face With A Fluffy Santa Collar
It’s the collar. That red band with the fluffy white trim running along the bottom of the door does two jobs at once: it finishes the character, and it disguises the single most awkward element on any classroom door — the handle. Pull the collar off and you’re left with a floating green face and a brass knob sticking out of somebody’s chin. Everything else here is negotiable. The collar isn’t.
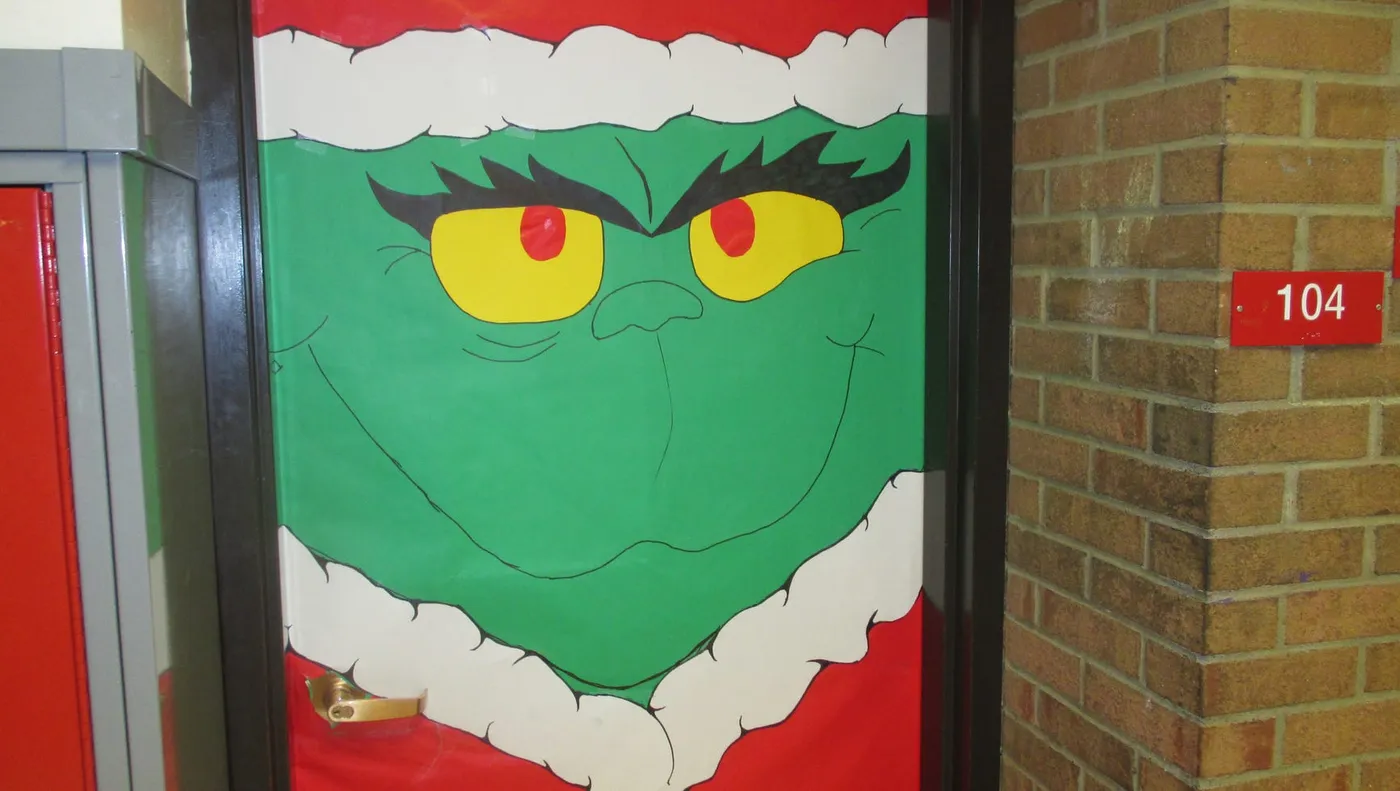
The door still has to open, close, and pass a fire marshal. Keep every layer at least two inches clear of the hinge side, and never wrap paper around the latch edge — that’s how doors stop latching by February. Test your adhesive on the door’s finish first, too. Laminated doors and old varnish will happily surrender a chunk of themselves to a strip of double-sided tape in June.
3. Lime Green Bulletin Board With A Paper Chain Heartbeat
The formula runs roughly 60% lime green base, 25% two-tone green paper chain, and 15% pale hearts in pink, cream, and forest green — then a whisper of warm light on top. Lime is a loud color, so the two darker greens in the chain do the quiet work of keeping it from vibrating. Swap the palette by keeping the percentages: navy base, sky-and-slate chain, blush hearts. Same structure, completely different mood.
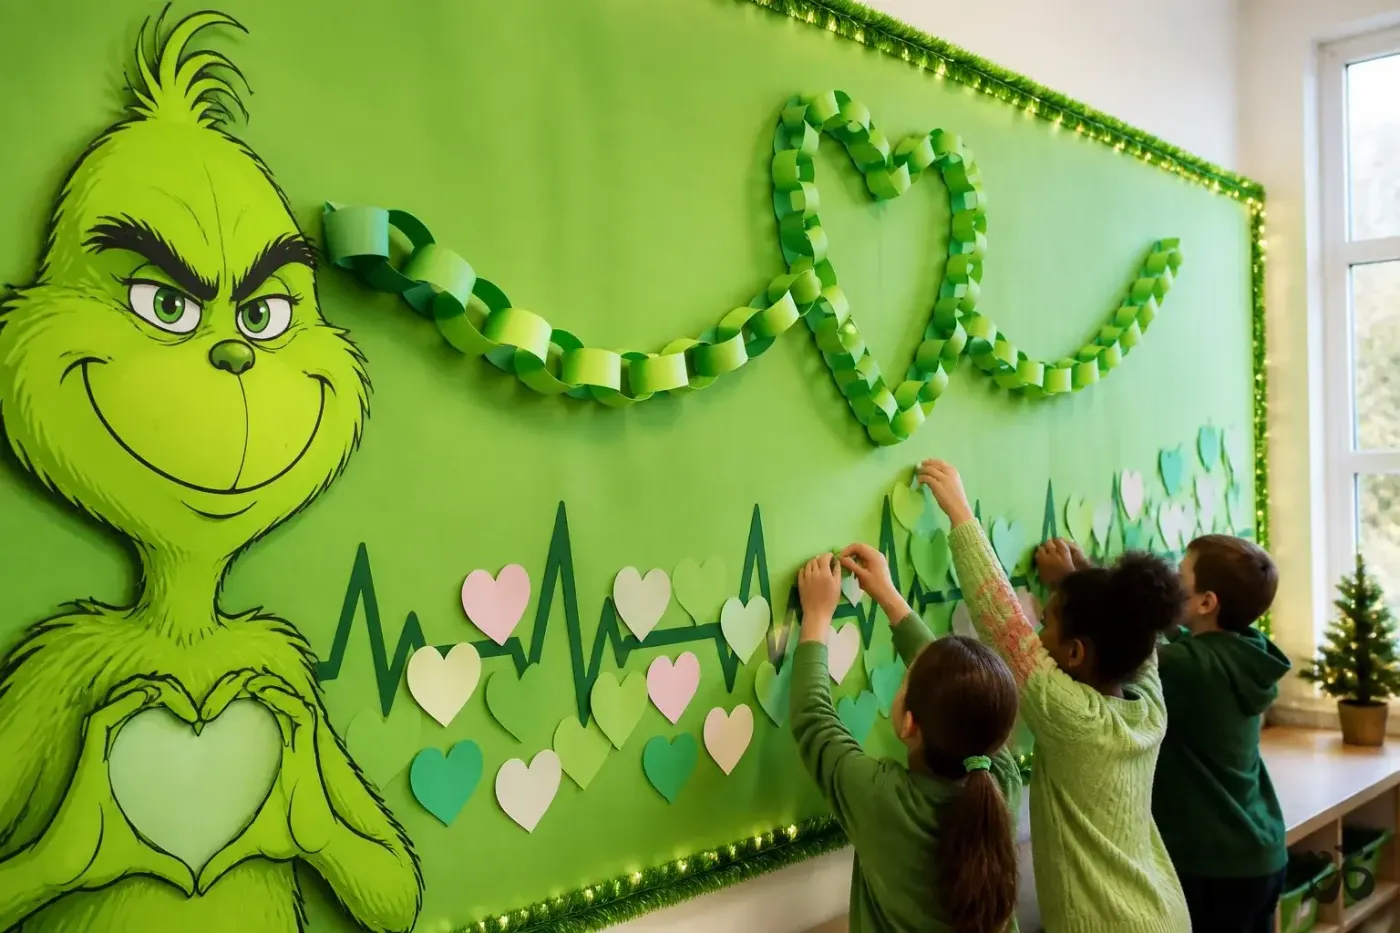
Use a battery micro-strand — 20 to 30 warm white LEDs is plenty for a board this size — and tape the pack to the back of the frame instead of the wall, so you’re not fishing for a switch every morning. Set the built-in timer for 7 a.m. to 4 p.m. and you’ll never think about it again. Skip cool white lights here; they read blue against lime green and make the whole thing look like a cafeteria.
4. Height Chart Door With A Textured Grinch And Newspaper Wall
This works on a standard 36-by-80-inch door, and it’s the rare idea that doesn’t need much hallway width — you’re decorating a single plane. The height chart eats the full door height, so make sure your top number clears the frame by a few inches. If your door has a narrow vision panel, drop the chart to the lower half and let the Grinch’s hat carry the upper half, the way Idea #9 handles it.
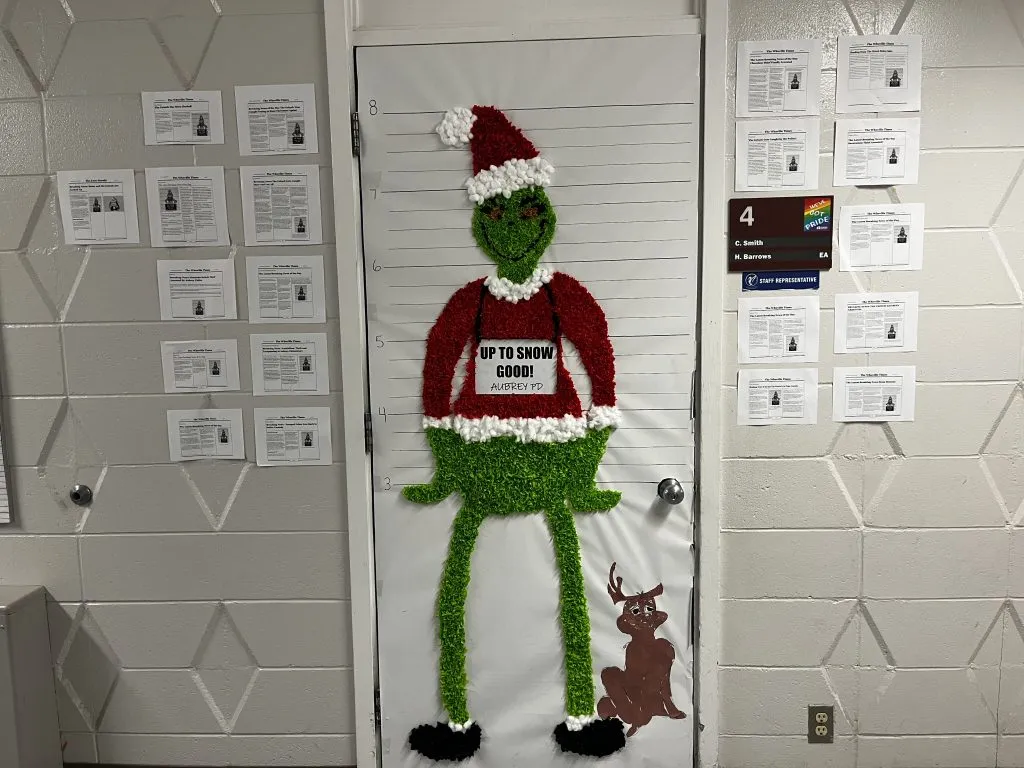
Making the height chart:
- Measure the door height and divide it into 6-inch increments.
- Cut 1-inch white paper strips for the horizontal lines.
- Print the numbers about 3 inches tall — bigger than feels right.
- Lay everything out flat on the floor before you peel a single backing.
- Work bottom to top so you’re not leaning over wet adhesive.
Roughly 45 minutes and under $10 in paper.
5. Red Front Door With A Grinch-And-Tree Decal And Garland
Recreating this entry:
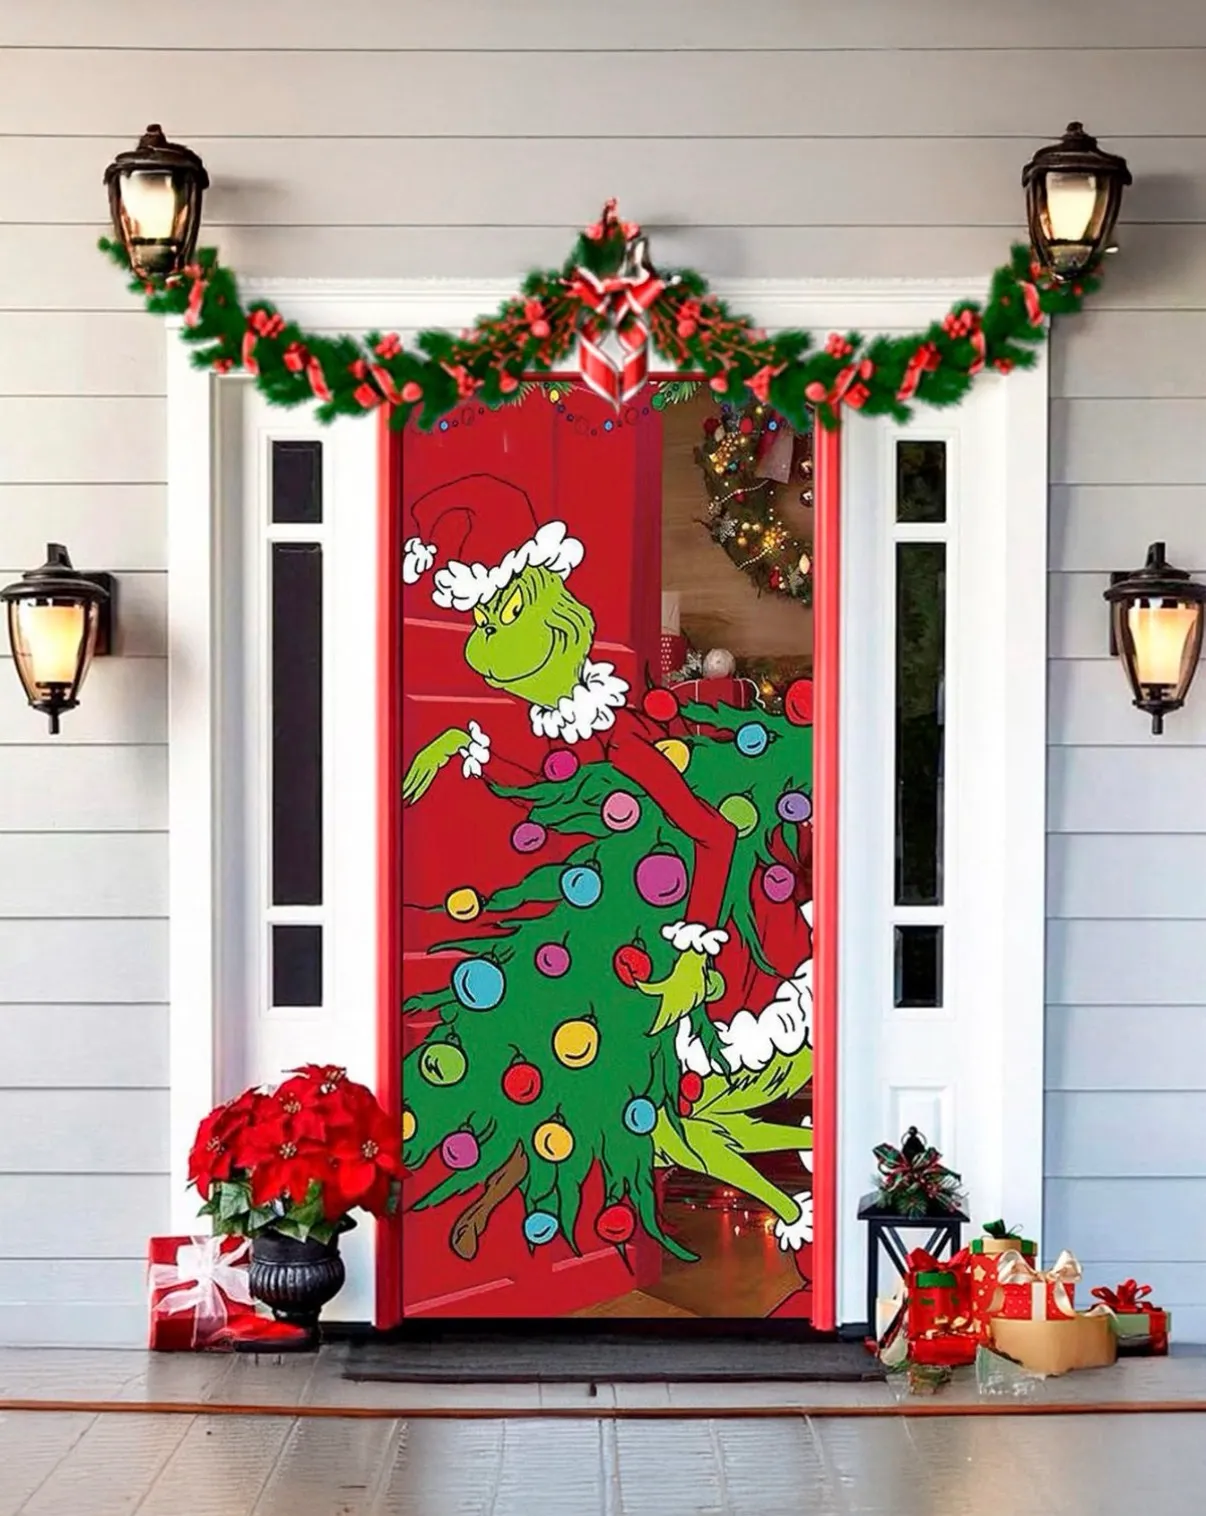
- Grinch-and-tree door decal: $15–$40
- Green garland with red bows and berries: $25–$70
- Two wall-mounted lanterns: $30–$90
- Potted poinsettias: $12–$30 each
- Wrapped boxes and ribbon: $20–$50
- Outdoor-rated tape and hooks: $10
Total: $112 to $290. Budget alternative: skip the lanterns and poinsettias, use a $10 garland and thrifted boxes wrapped in brown kraft paper — about $55 gets you halfway to the same first impression.
Door-scaping has quietly replaced the porch tree as the thing people photograph. Pinterest behavior tells the story: saves for character-specific door decor keep climbing, because a recognizable face reads instantly in a thumbnail where a tasteful wreath does not. The Grinch is unusually durable because that story is about a person changing, not a decoration matching a color scheme.
6. Ornament Garland Frame Around A Plush Grinch Wreath
Two warnings. An ornament garland is heavy — a full 9-foot strand can run six or seven pounds, so hang it from the frame and wall, not the door itself, or your hinges will complain by New Year’s. And artificial snow plus foot traffic is a rough combination. If this is a school entrance rather than a porch, bank the snow against a baseboard instead of spreading it across the walking path.
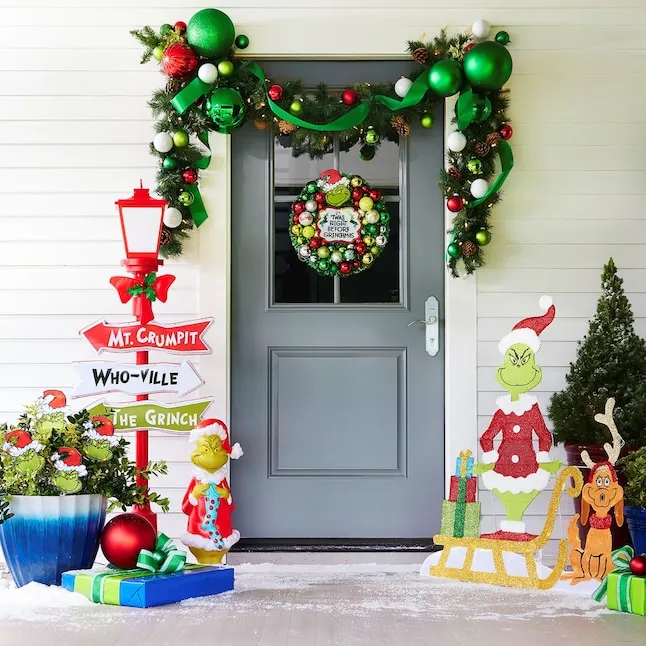
The whole look is buildable for under $60. Buy two dollar-store tubs of shatterproof ornaments and wire them onto a thrifted grapevine form with floral wire — about $18 total. The character cutouts? Print a free coloring page onto cardstock, color it with markers, and back it with foam board for $8 instead of $40. Check Facebook Marketplace in early November; teachers unload entire themed sets. Compare with Idea #12 for the bigger-budget version of the same story.
7. Blue Sky Backdrop With Hand-Holding Whos And Draped Garlands
The figures hold hands across the entire width, so your eye never exits the scene — it just keeps traveling. That’s repetition doing structural work. The yellow vertical strips break the blue field into bays the way columns break up a long wall, which makes a wide, awkward hallway feel intentional instead of empty. And the palette stays disciplined: blue, white, green, red, yellow. Five colors, no exceptions. Add a sixth and the whole thing goes muddy.
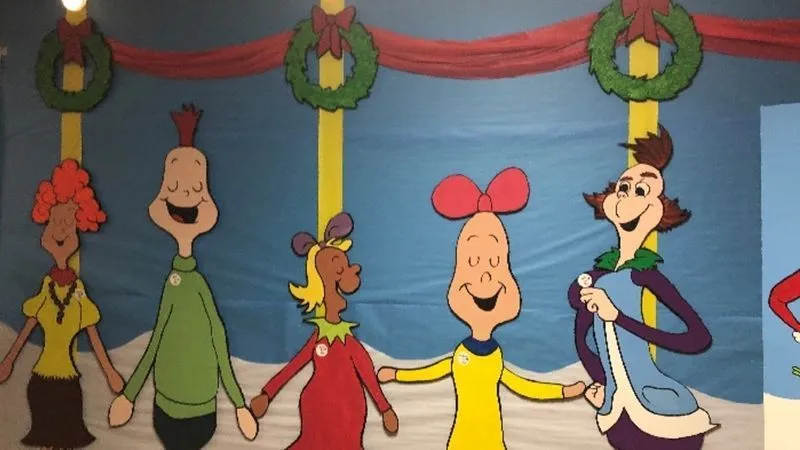
For the fabric swags, buy 60-inch-wide fabric, not 44 — you get fuller folds for the same money. Staple at three points only: the two ends and the middle. Let each swag droop about a third of its total width; a 4-foot span sags around 16 inches. Fewer staple points means the fabric hangs on its own natural curve, which always beats a curve you forced. Test the drape on the floor first.
8. Glittery Grinch Hand Spilling Over The Door Frame
The overlap. The green hand and the glitter ornament cross onto the door frame instead of stopping politely at the edge, and that one decision makes flat paper read as something three-dimensional. It also solves a scale problem — a small decoration centered on a big flat surface looks lost, but one that spills over a corner has a reason to be that size. Remove the overlap and it’s a sticker. Keep it and it’s a scene.
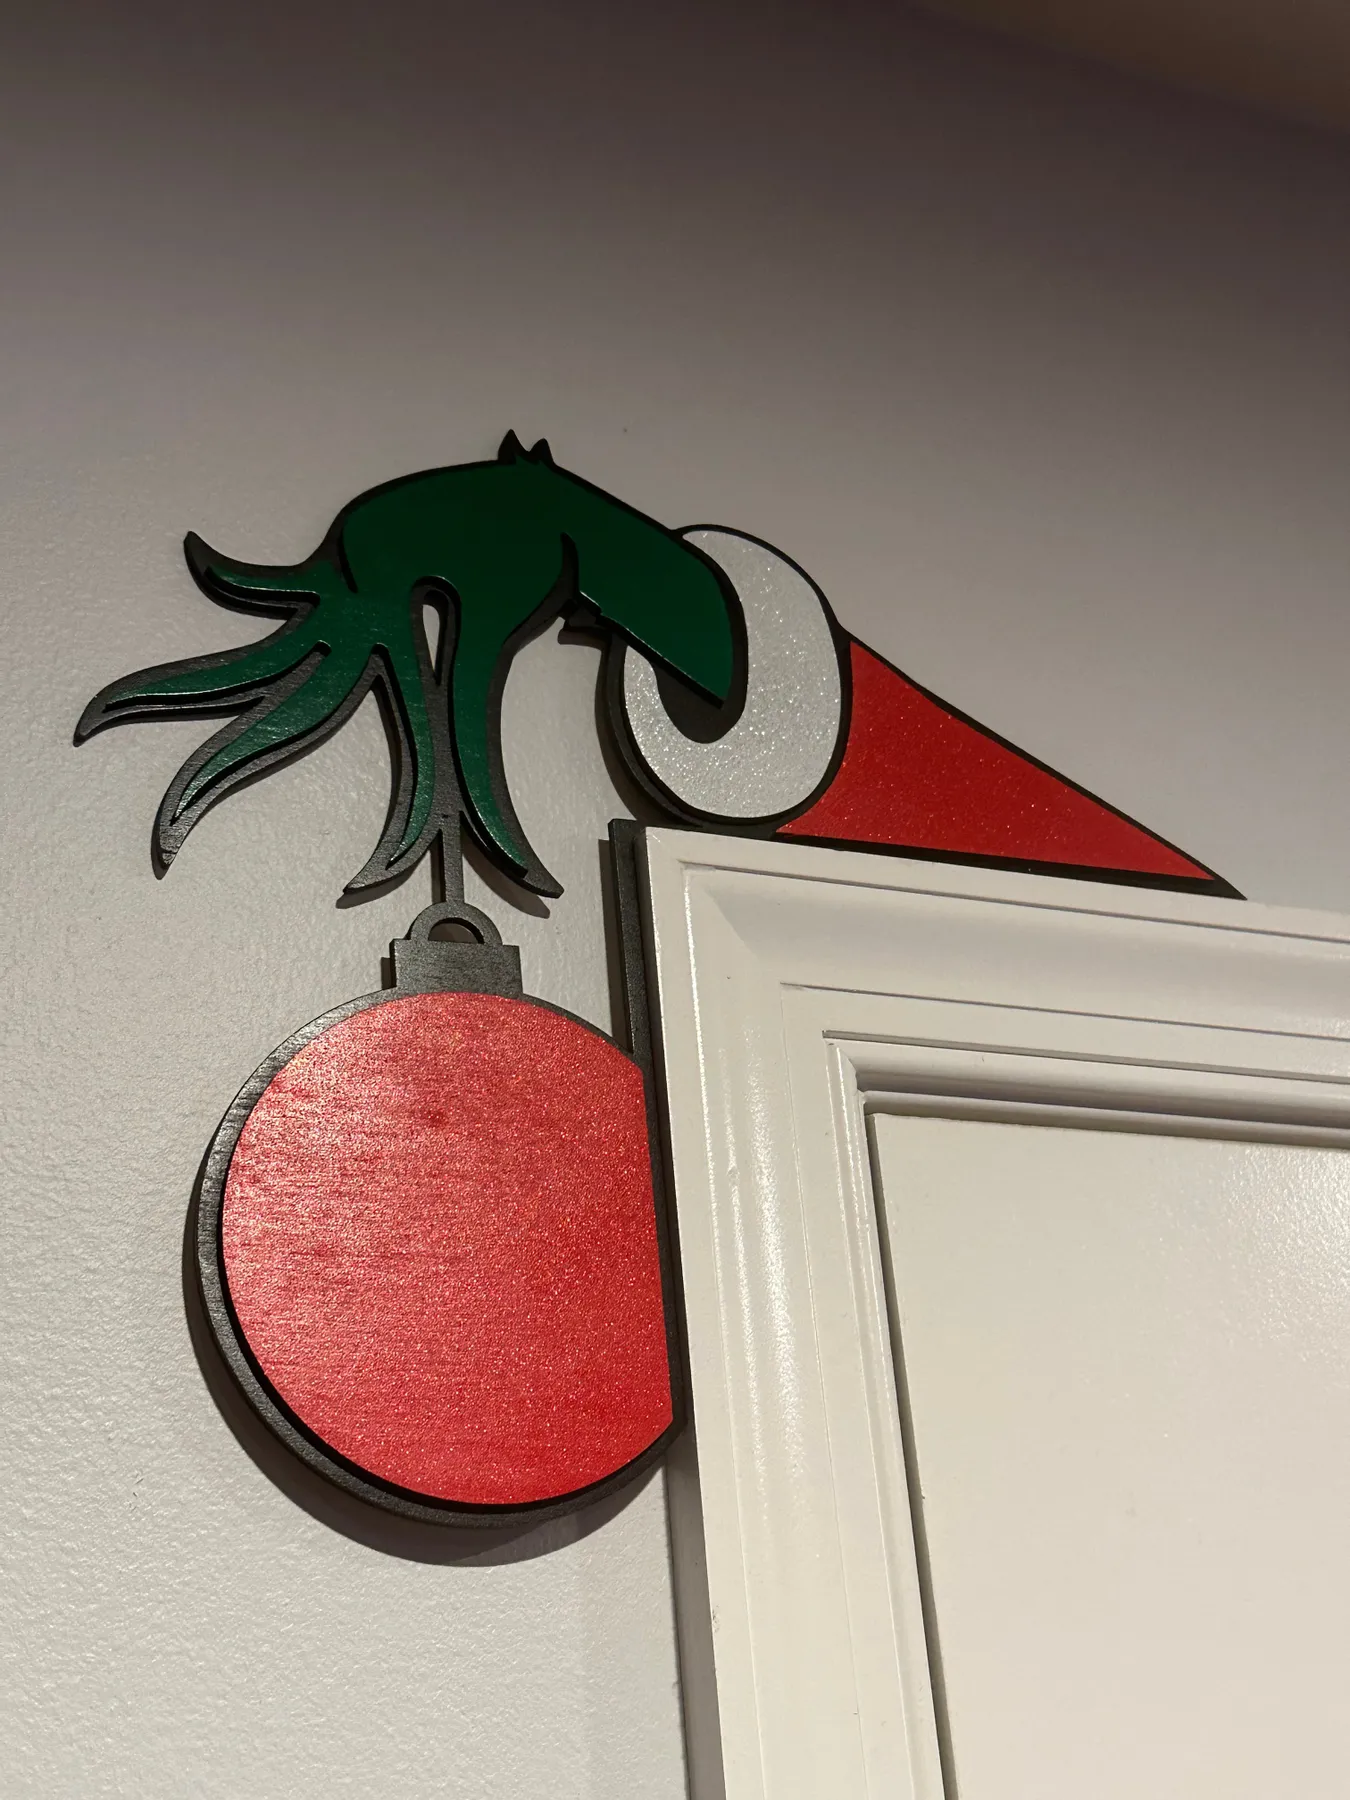
This one is made for awkward spots: narrow doors, the half-wall between classrooms, the sliver of wall beside a storage closet. Minimum useful size is about 14 inches tall — smaller than that and the glitter reads as a smudge from three feet away. On a standard 36-inch door, keep the cluster in the upper half so nobody’s shoulder wipes it off. For the full-door version of the same character, see Idea #13.
9. Grinch Face With A Hat That Clears The Door Frame
The hat only works if it truly clears the top of the frame. Cut it as a separate piece, mount it on foam board, and attach it to the wall with removable strips — never to the door — so the door swings free underneath. Leave a half-inch gap between the door’s top edge and the hat’s lower edge; any tighter and the paper catches, tears, and takes paint with it. Measured once, this takes ten minutes.
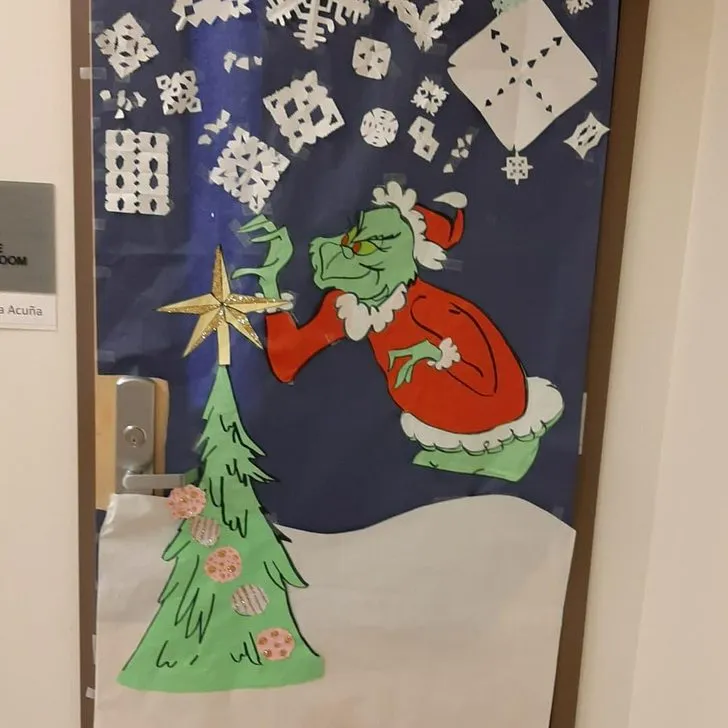
Paper fades. A south-facing hallway will bleach a bright green face to mint by mid-December, and there’s no fixing it — only replacing it. Buy a spare print now while the design is still available. Also budget ten minutes at takedown: warm the adhesive with a hairdryer on low for 20 seconds and the strips release without lifting paint. Cold paper tears. Warm paper peels.
10. Hand-Colored Grinch Door With Snowflake Yellow Panels
Scaling a hand-colored door drawing:
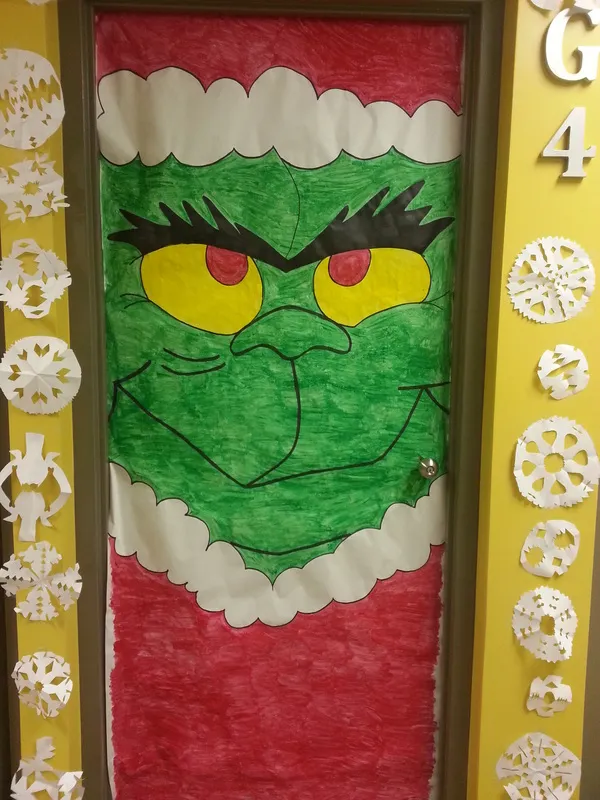
- Project the outline onto paper taped to the door, or grid it up from a printed image in 6-inch squares.
- Pencil first — markers bleed through and there is no undo.
- Block in flat color, then let it dry completely before adding black outlines.
- Color in one direction only; cross-hatching goes muddy at this scale.
- Seal with matte clear spray outdoors, 12 inches away, in two light passes.
About three hours, under $15 in paper and markers.
The color logic here is temperature, not quantity: 55% cool green character, 25% warm yellow wall, 15% soft white snowflakes, 5% red accents. The yellow panels are what keep the green looking alive instead of sickly — put the same drawing on a white wall and it goes flat. Translate it anywhere by pairing one warm field with one cool field at roughly a 1:2 ratio, then letting a small hot accent break the tie.
11. Plush Grinch Head Wreath With Layered Patterned Ribbons
Wreath maximalism is real — the plain grapevine years are fading, and people want a wreath that functions as wall sculpture. Plush character heads are the 2026 version of the vintage ornament wreath: same density, more personality, and easier to hang because the plush does the volume work for you. Etsy makers have pushed this hard, which is why the ribbon layering looks so specific. Staying power? The plush head dates fast. The ribbon recipe doesn’t.
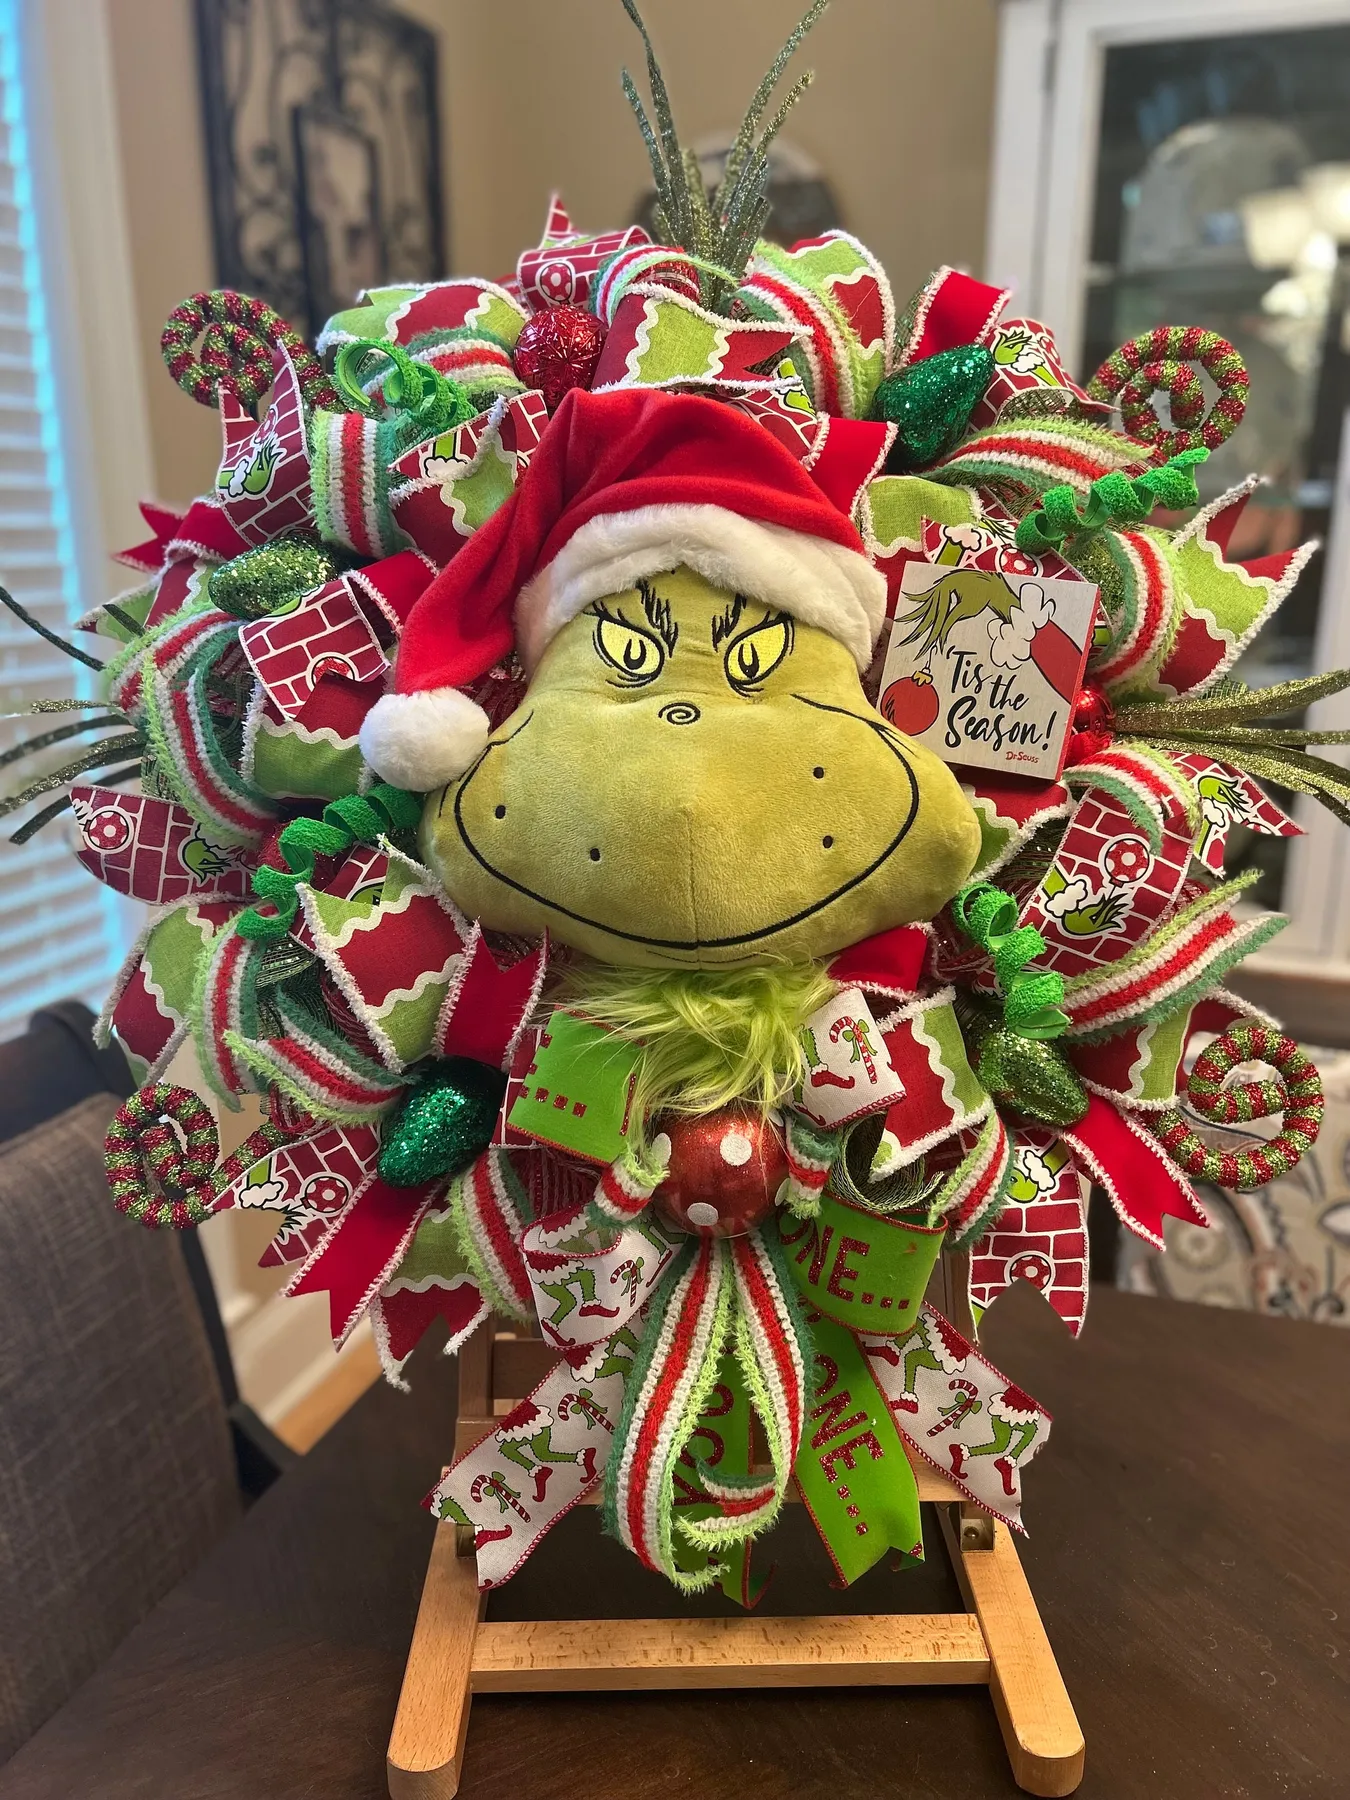
Ribbon math sneaks up on you. A wreath this dense swallows 8 to 12 yards, and at $6 to $12 a roll that’s the whole budget before you’ve bought a single ornament. Buy three rolls in three widths — 2.5 inch, 1.5 inch, and 7/8 inch — and layer by width instead of buying eight patterns. Weigh it, too: mesh plus plush can hit five pounds, which needs a proper over-the-door hanger, not a suction cup.
12. Multi-Panel Whoville Street Scene With A Candy Cane Arch
The candy cane arch. Without it you have a row of flat buildings and a character floating somewhere in the middle. That striped arch gives the eye a frame, establishes depth, and — most usefully — tells you exactly where the main character belongs. It’s doing the job a doorway does in a stage set. Everything else in this display could be swapped for a cheaper version and survive. The arch is the load-bearing idea.
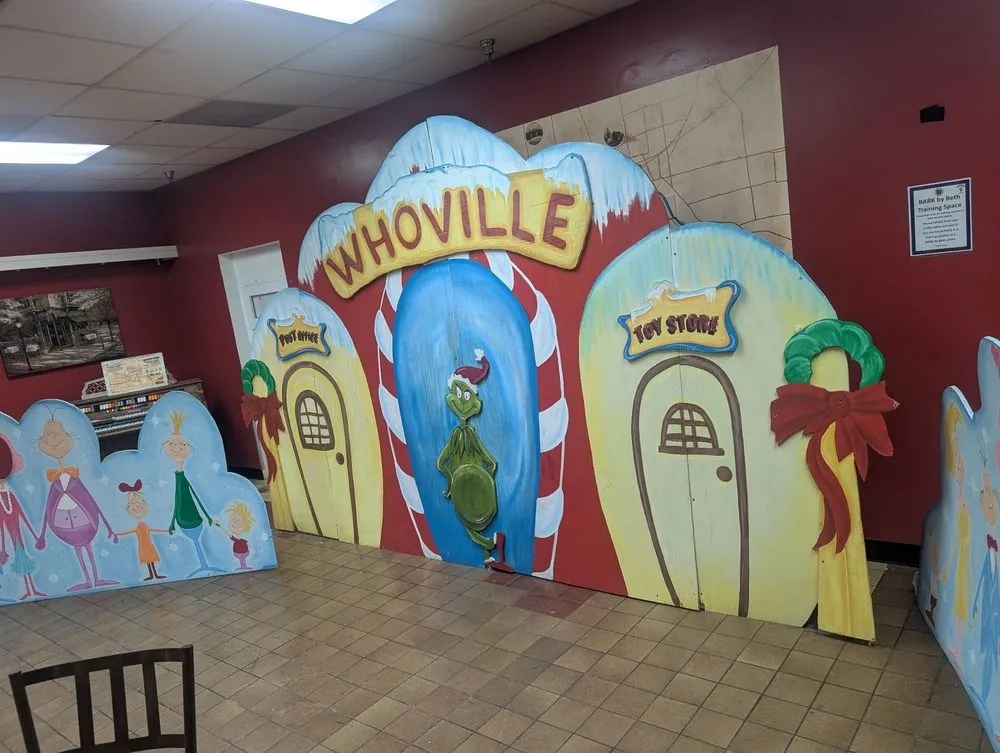
Cardboard is your friend. Two appliance boxes from a furniture store — free if you ask nicely — become the Post Office and the Toy Store. Paint them with $1 acrylics, add white paper scallops for snow, and cut the candy cane stripes from a roll of red-and-white striped wrapping paper instead of buying a printed arch. Total spend lands around $35 versus $200 for a kit. Then scale the same trick up following Idea #20.
13. Green Paper Grinch Head With One Tiny Red Heart
A standard 36-inch door fits this face perfectly if you respect three numbers: eyes about 7 inches wide, spaced one eye-width apart, with the eyeline at 60% of the door height. Nail those and the proportions read as the character from forty feet down the hall. Miss them and it reads as a green blob with issues. Ceiling height is irrelevant here, since you’re working on a single plane — even a low hallway works.
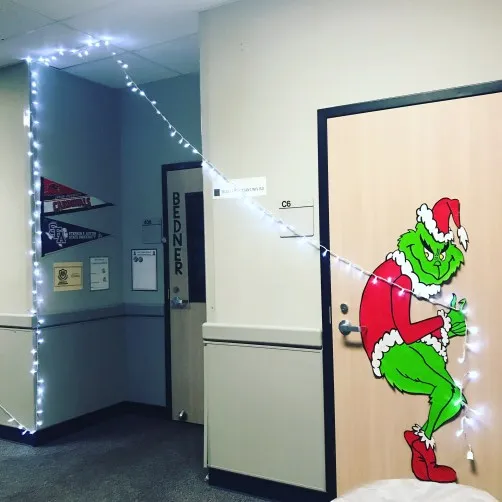
That tiny red heart is the entire emotional payoff, so don’t let it get lost. Place it just below the eyeline and slightly off-center; dead center reads as a target. Cut it from a scrap of red cardstock rather than paper, because cardstock holds its shape when the door slams. About the size of a quarter is right on a standard door. Any bigger and it starts competing with the eyes.
14. Merry Grinchmas Door With Cloud Trim And Buffalo Check
Signage is doing the storytelling. Whoville, Mount Crumpit, Grinch’s Lair — each small sign adds a location, and locations imply a world, which is why the door feels bigger than 36 inches. The white cloud trim is the second trick: it softens a hard rectangular edge, and hard rectangular edges are exactly what make school displays look institutional. Soften the frame and the scene inside instantly reads as illustration instead of decoration.

Making the cloud trim:
- Cut 9-inch circles from white cardstock — about 14 for a standard door width.
- Overlap them by a third and tape from behind into one continuous strip.
- Attach the strip to the top of the frame first, then out to the wall.
- Add a second staggered row if the trim looks thin from five feet away.
- Curl the bottom edges around a pencil for a softer silhouette.
Twenty minutes, about $6.
15. GRIN 6 Football Jersey Grinch With Scattered Puzzle Pieces
Dark paper is unforgiving. Every fingerprint, every chalk smudge from a kid pointing at that orange jersey, shows up by week two. Wipe with a dry microfiber cloth — never a wet wipe, which streaks matte paper permanently. If the door gets heavy traffic, laminate the jersey and the cutouts; it kills the paper texture slightly but buys you a full season. Store the pieces flat, not rolled, and they’ll survive three Decembers.
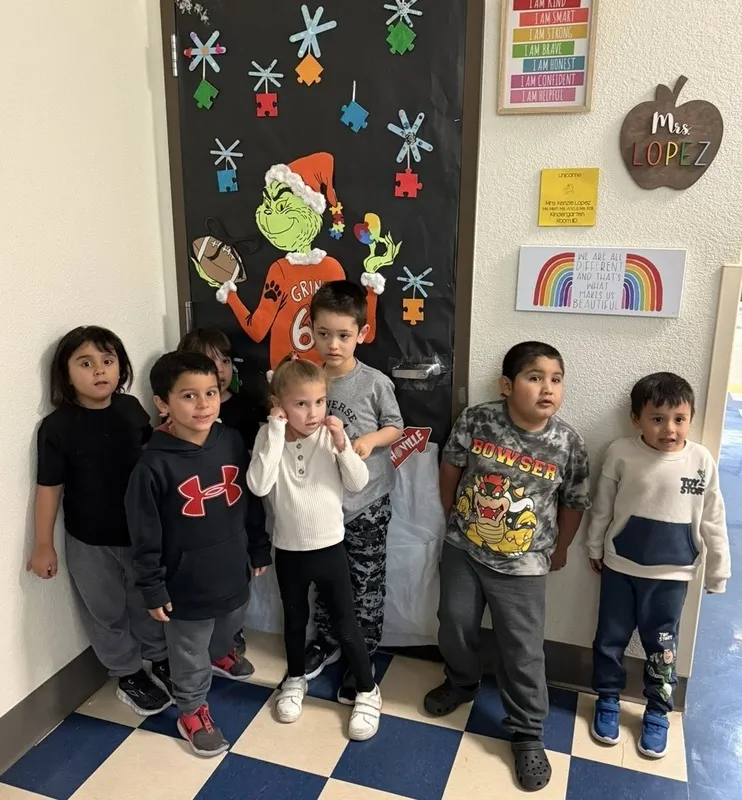
Check your door’s vision panel before you plan anything. A window right where you want the jersey means either shifting the whole character up or leaving that zone uncovered — and a half-covered window looks like a mistake, not a choice. Be honest about density, too: snowflakes, puzzle pieces, and a jersey is three focal points competing. Pick two. The third is what makes it read as cluttered instead of clever.
16. Light Blue Hallway Sky With Cutout Whoville Rooftops
Measure your hallway run before you buy paper. A typical corridor segment between doors is 8 to 12 feet, which is the sweet spot: three buildings, one gap, one snowy roofline. Under 6 feet and the scene crowds; over 16 and you need a fourth building or it looks unfinished. Keep the roofline between 60 and 72 inches so kids can see the snowcaps without craning. See how Idea #21 handles the same wall.
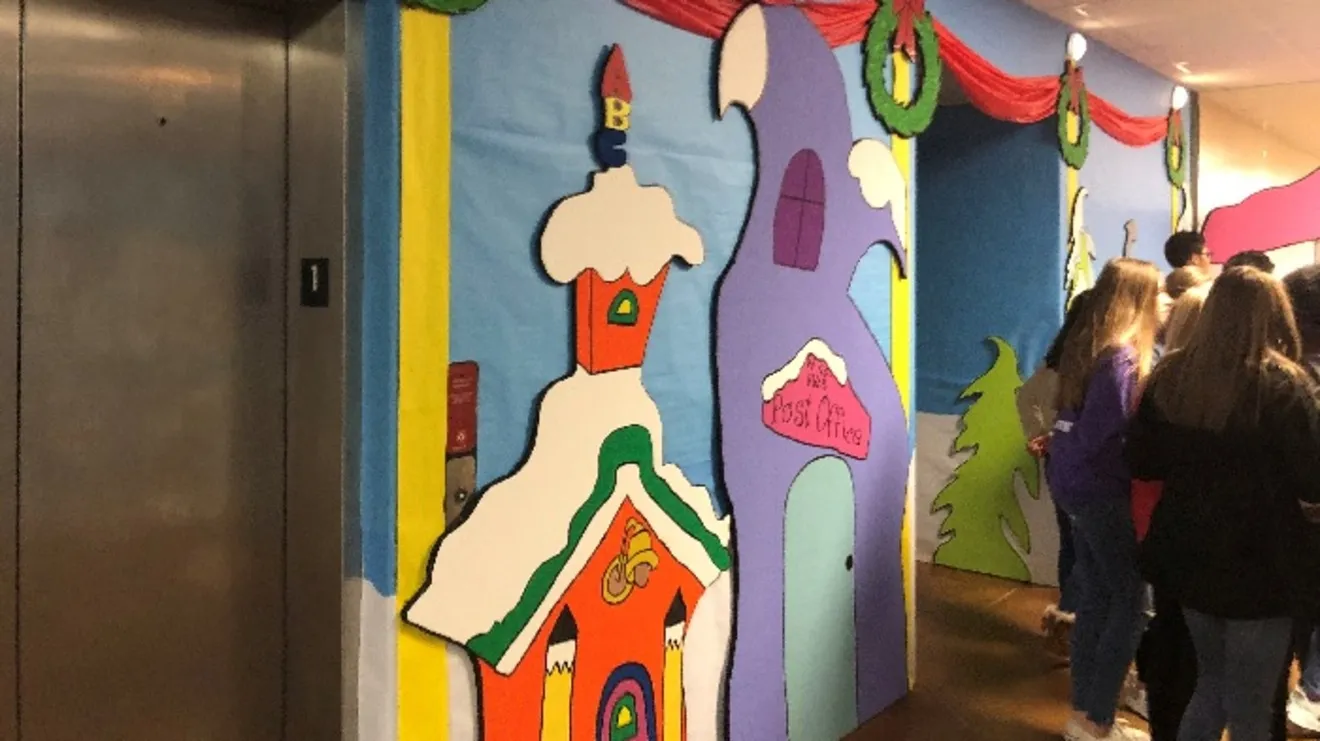
Think of it as sky first, buildings second: 50% light blue, 20% white snow, 25% building color split across orange and purple, 5% yellow and red accents. The trick is that the snow isn’t decoration — it’s the transition layer that lets orange and purple sit side by side without fighting. Swap in a mint sky with teal and rust buildings using the same ratios and the scene still holds together.
17. Royal Blue Door With An Abstract Yellow Window Shape
Abstract shapes live or die on proportion. Keep the yellow form’s widest point at about 60% of the door width and its total height under 30 inches — past that it stops reading as a shape and starts reading as damage. Sketch it on newspaper first, tape it up, and step back ten feet. Whatever looks wrong from ten feet is wrong. And the tiny black dot matters more than you’d think; it gives the eye a full stop.
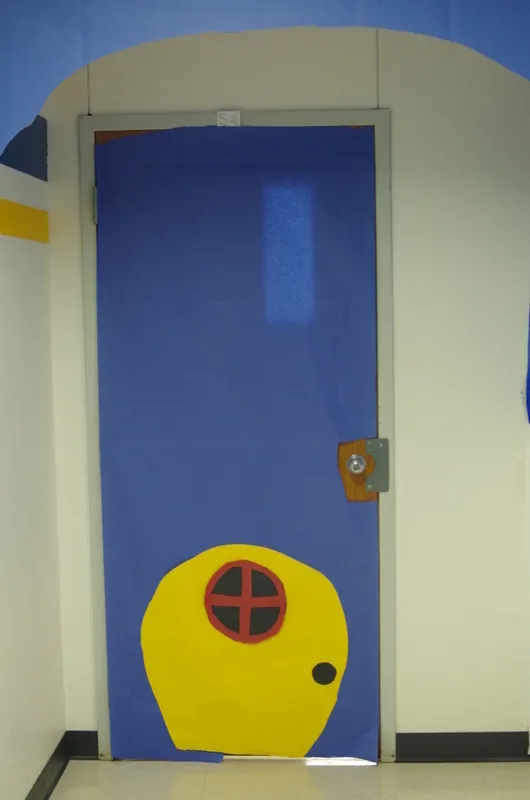
Two rolls of bulletin paper and a pack of construction paper will cover this entire door for about $14. The royal blue is the one thing you can’t substitute — a lighter blue loses the night-sky weight — so spend there and go cheap everywhere else. Cut the circular window from a paper plate, outline it in red marker, and draw the cross-bars with a Sharpie. Same layered-cutout logic as Idea #8, minus the glitter.
18. Black Door, Pink-Pajama Grinch, And A Student Art Wall
Building the student gallery wall:
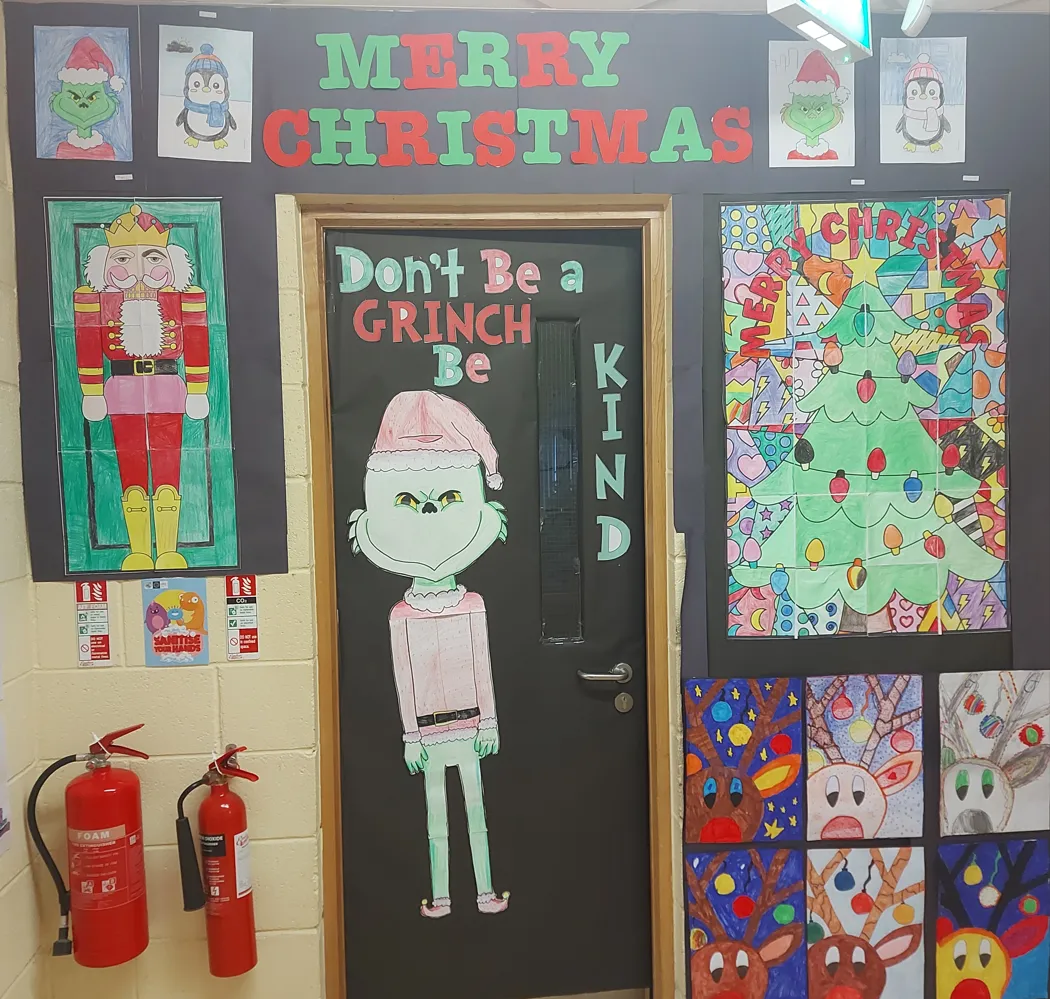
- Have every student work on the same 9-by-12 paper — uniformity is what makes the chaos work.
- Mark a grid with 2-inch gaps using a pencil and a level.
- Place the biggest pieces first, like the Nutcracker and the abstract tree, as anchors.
- Fill around them, alternating portrait and landscape orientation.
- Mount each piece with a tape loop per corner so nothing curls.
About an hour for 24 pieces.
The black door is the reason this works. Black recedes, so the pink pajamas and every marker color on the surrounding wall jump forward. On a white door the same cutout would compete with twenty drawings. The message does the rest — a character famous for being unkind, wearing soft pink, beside a wall of kids’ art, teaches more than any poster. Note the letters above stay red and green.
19. Cotton Fluff Snow On A Cutout Orange Whoville House
Before you commit to cotton snow:
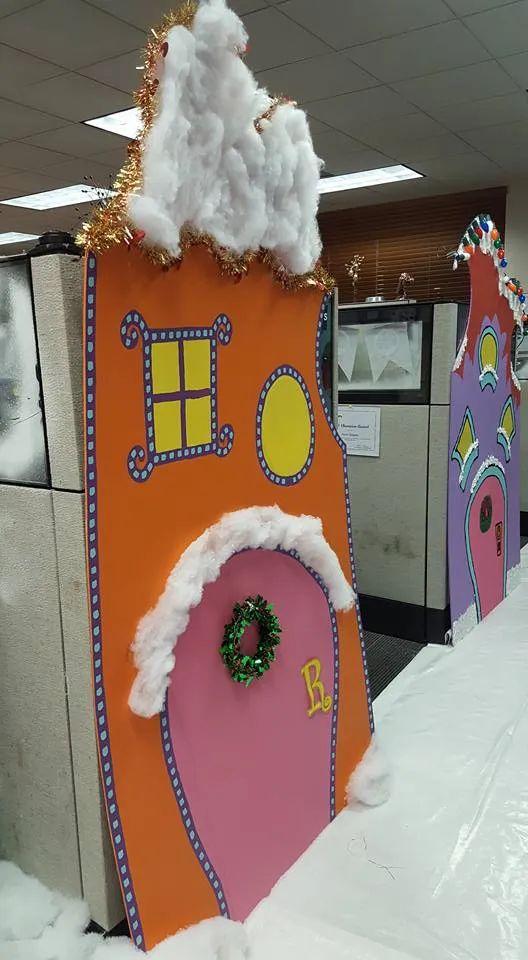
- Confirm the surface is vertical and out of any doorway’s swing path.
- Check whether the building allows loose fluff — many schools don’t, because of HVAC vents.
- Have a lint roller and a trash bag ready for takedown day.
- Measure your wall depth; the cotton needs about 6 inches of spread to look like snow.
- Buy twice the batting you think you need.
Cotton batting is priced like precious metal. A $4 bag of polyester pillow stuffing from any big-box store looks identical once it’s fluffed, and you’ll need roughly one bag per linear foot of roofline. Dollar-store gold tinsel is thinner than craft-store tinsel but reads the same at three feet. Total for this little house, snow and tinsel included: about $16.
20. Stacked Gift Box Whoville Village On A Black Backdrop
The black backdrop. It costs about $8 in roll paper and it’s the difference between a display and a pile of presents. Black absorbs the seams, the tape lines, and the shadow of the shelf behind it — and it pushes every bright color in front to full saturation. Remove it and the same stacked boxes sit in a beige room looking like leftovers. If you change one thing from this setup, change it to a dark background.
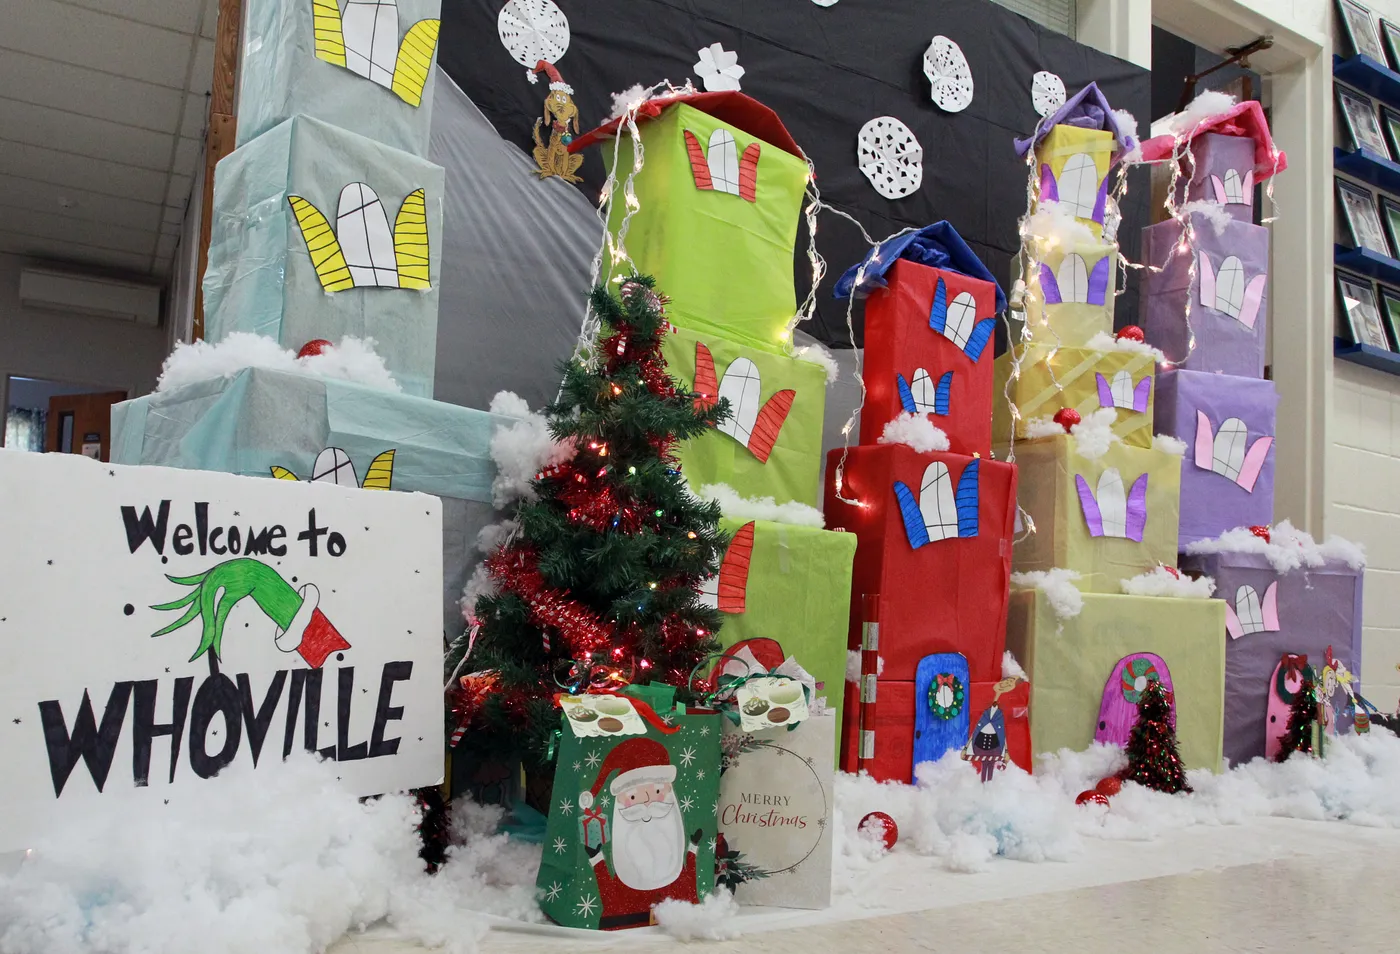
Stacked boxes tip. Tape each layer to the one below with double-sided tape on all four corners, and keep towers under about 30 inches unless they’re braced against a wall. Respect the walking path, too — a display that eats 4 feet of floor in a hallway is a trip hazard by the second week, and every teacher who’s tried it has the story to prove it. Bank it against a wall and skip the middle.
21. Draped Red Fabric And Wreaths Over A Sky Blue Hallway
For a 10-foot hallway run:
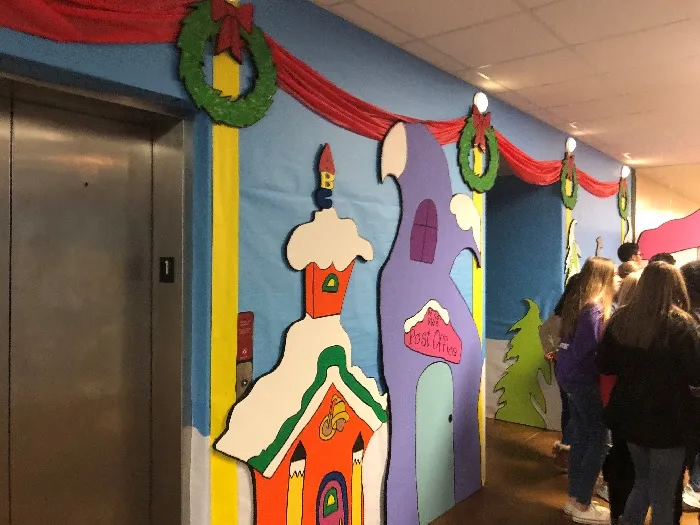
- Light blue roll paper, two rolls: $20–$35
- Yellow border strips: $8–$15
- Red drape fabric, 60-inch wide, 4 yards: $24–$60
- Four green wreaths with bows: $40–$120
- Cardstock and acrylic paint for buildings: $18–$40
- Removable hooks and tape: $12
Total: $122 to $282. Budget alternative: thrifted wreaths plus a red bedsheet instead of new fabric cuts that total by roughly 55%.
The fabric sets your required height. A 4-yard drape needs at least 84 inches of wall above the buildings, so a 9-foot ceiling is the practical minimum — below that, shorten the swags rather than lowering the wreaths. Long hallways want the drape repeated every 6 feet. Short ones need a single centered swag and nothing above it.
Go Hang A Little Whoville In Your Hallway
Start with one plane — a door, a bulletin board, a bare stretch of wall — and let the character do the talking. The best Grinch doors in this list aren’t the most expensive ones; they’re the ones where somebody picked a single good idea and followed through with a marker and a roll of paper.
📌 Pin your favorite version now so you can find it again in November when the hallway is bare and the clock is ticking.